Contents
The Radiator’s Role
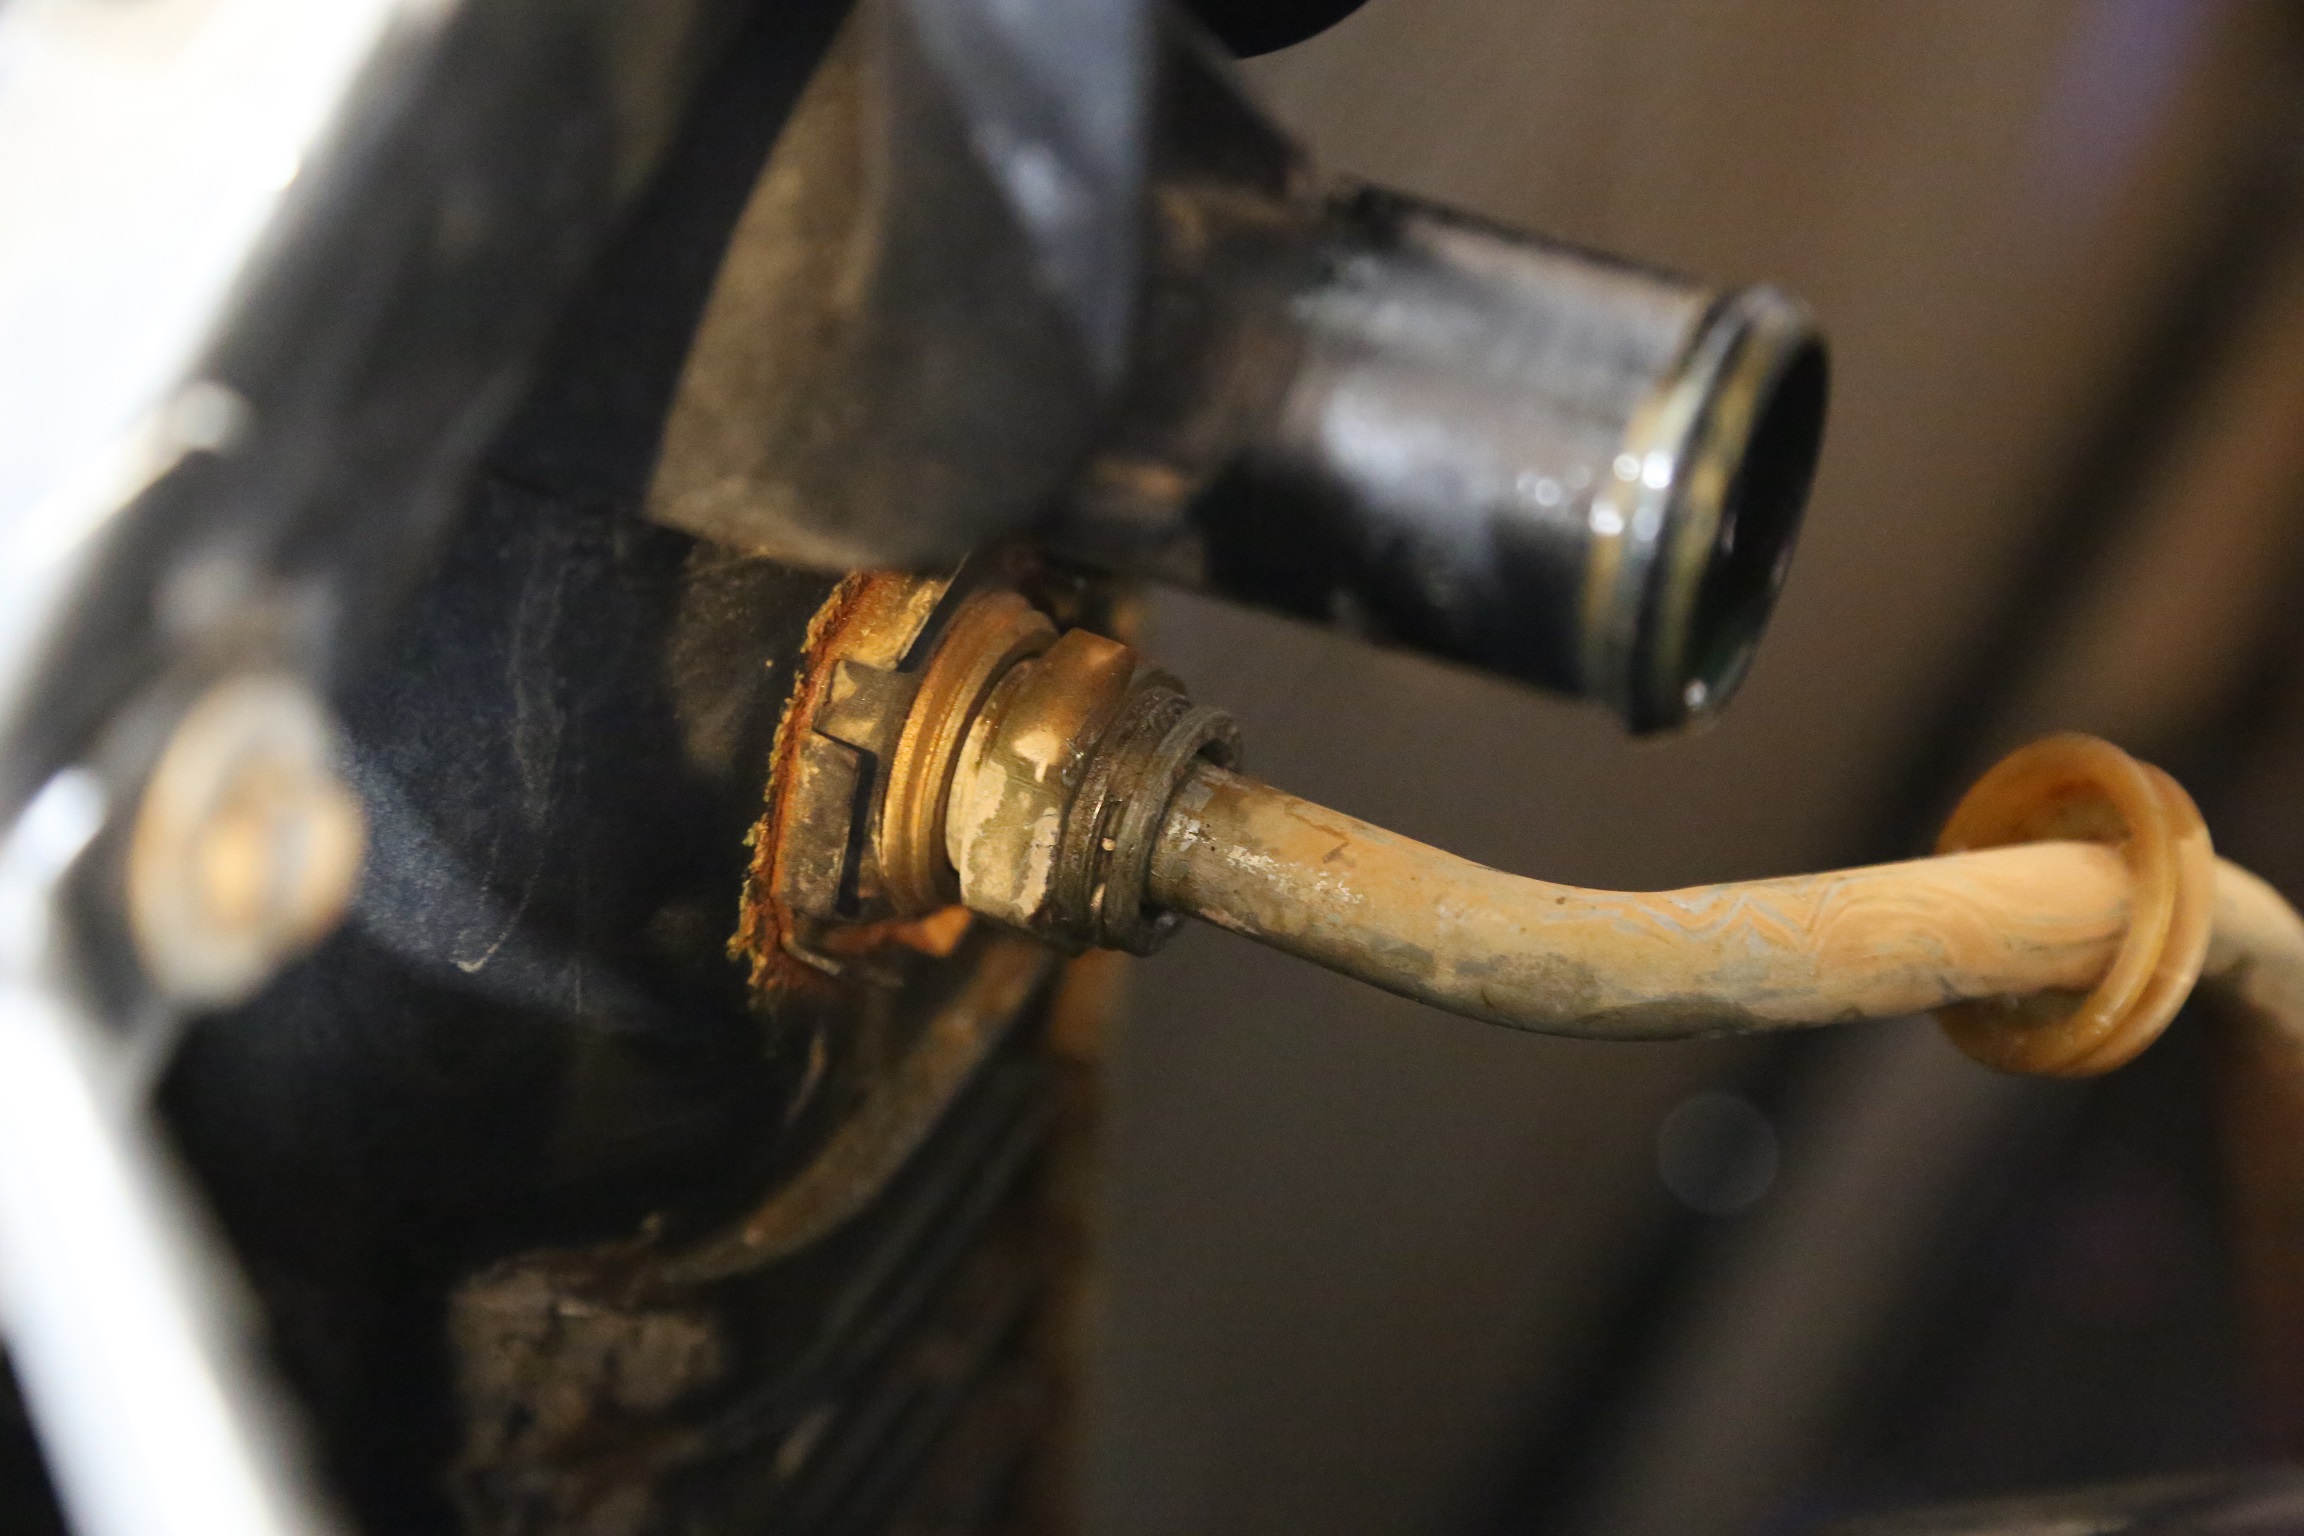
The white/yellow crust around this fitting indicates the fitting is leaking. In fact, this plastic tank is cracked and needs replacement.
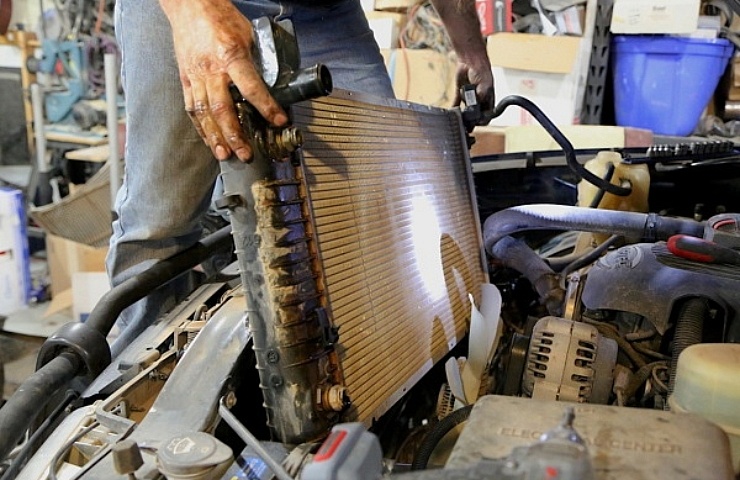
A radiator is a heat exchanger. Most vehicles use a liquid-to-air radiator, in which hot coolant flows through the engine into the input radiator tank, across the core via a series of tubes lined with thin fins, and into the outlet tank, where it can flow back into the engine.

Inside a radiator is the core. Notice the yellowish sludge. This is from not being flushed regularly, allowing dirt and wear materials to build up. This core is aluminum.
As the cooler outside air blows through the radiator, the fins are cooled, pulling the heat out of the coolant and cooling the engine. This is a continual process. It starts when the engine thermostat opens to let coolant flow and ends when the engine is shut off.
Symptoms of a Radiator Leak
There are a few telltale signs of a leaking car radiator. Catching a leak in the early stages helps to minimize the damage since a small leak can lead to catastrophic engine failure if left unattended.
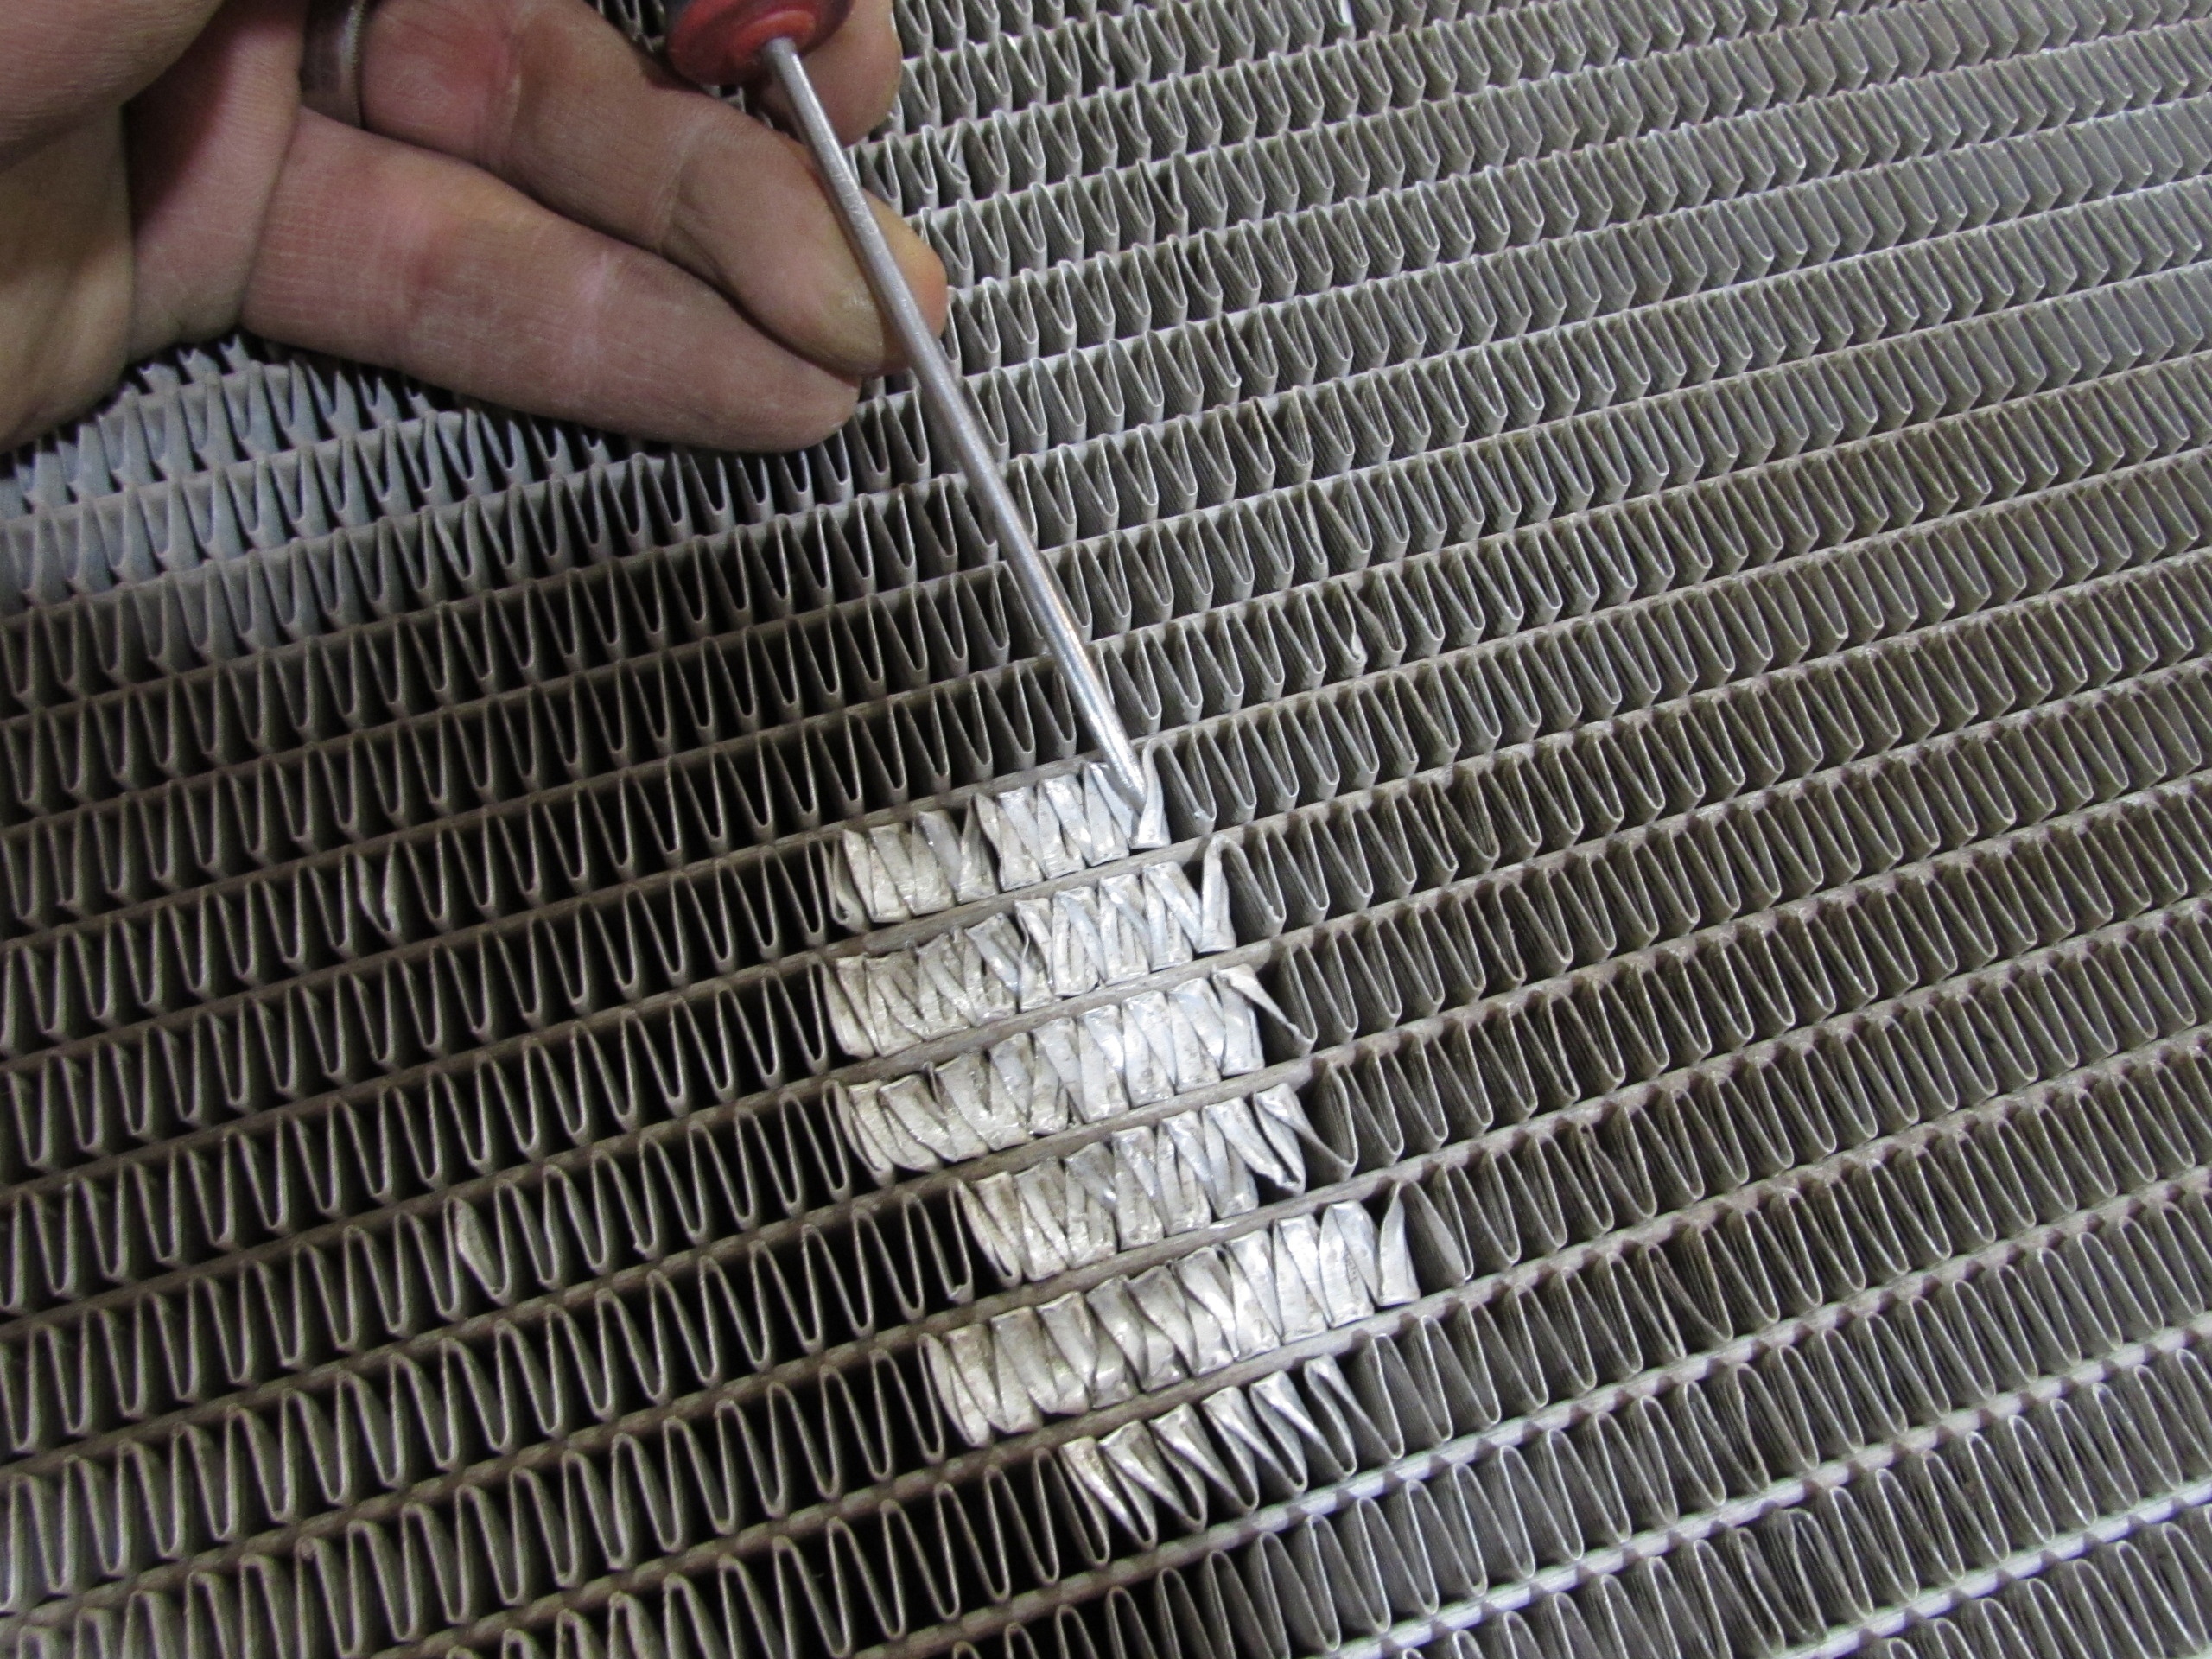
Smashed fins are a problem for radiators. You can fix this, but it takes patience. This area currently has no flow and is not cooling.
Whiff of antifreeze – Antifreeze—especially hot antifreeze—has a mild, sickly-sweet smell. If you smell this, check the cooling system, including the heater core, for a leak.
White powder on the radiator – You might find a powdery white crust around fittings, hoses, and the radiator core. This is left behind when antifreeze dries and can be very helpful for finding the source of a leak.
The petcock is at the bottom of the radiator. The V knob is the valve handle.
Coolant puddle – Once a leak is bad enough, you may notice a small pool of antifreeze under the vehicle or around the radiator. Coolant can also pool on crossmembers, brackets, and inside bodywork, so look for the highest area of wetness. Coolant doesn’t travel upward unless the fans blow it.
Low coolant light – The check engine light (CEL) may illuminate if your coolant level gets low enough. An OBDII scanner should reveal a code for low coolant. If you frequently have low coolant warnings, you likely have a leak. Coolant levels do fall as water evaporates, but this should not occur often.
Overheating – The final straw is overheating. Your engine can overheat for multiple reasons, but low coolant can kill your engine without you realizing it. If the coolant level falls below the level of the temperature sensor, your engine control module (ECM) may not even show the engine it is too hot, but it is.
Shop now for radiatorsRepair or Replace a Car Radiator?
If your car radiator is aluminum, replacement is the best option. Copper-brass radiators can be repaired, but only a few shops do this anymore. If your radiator is original and the vehicle’s value depends on originality, repair is a good plan. But replacement is usually the most cost-effective solution.
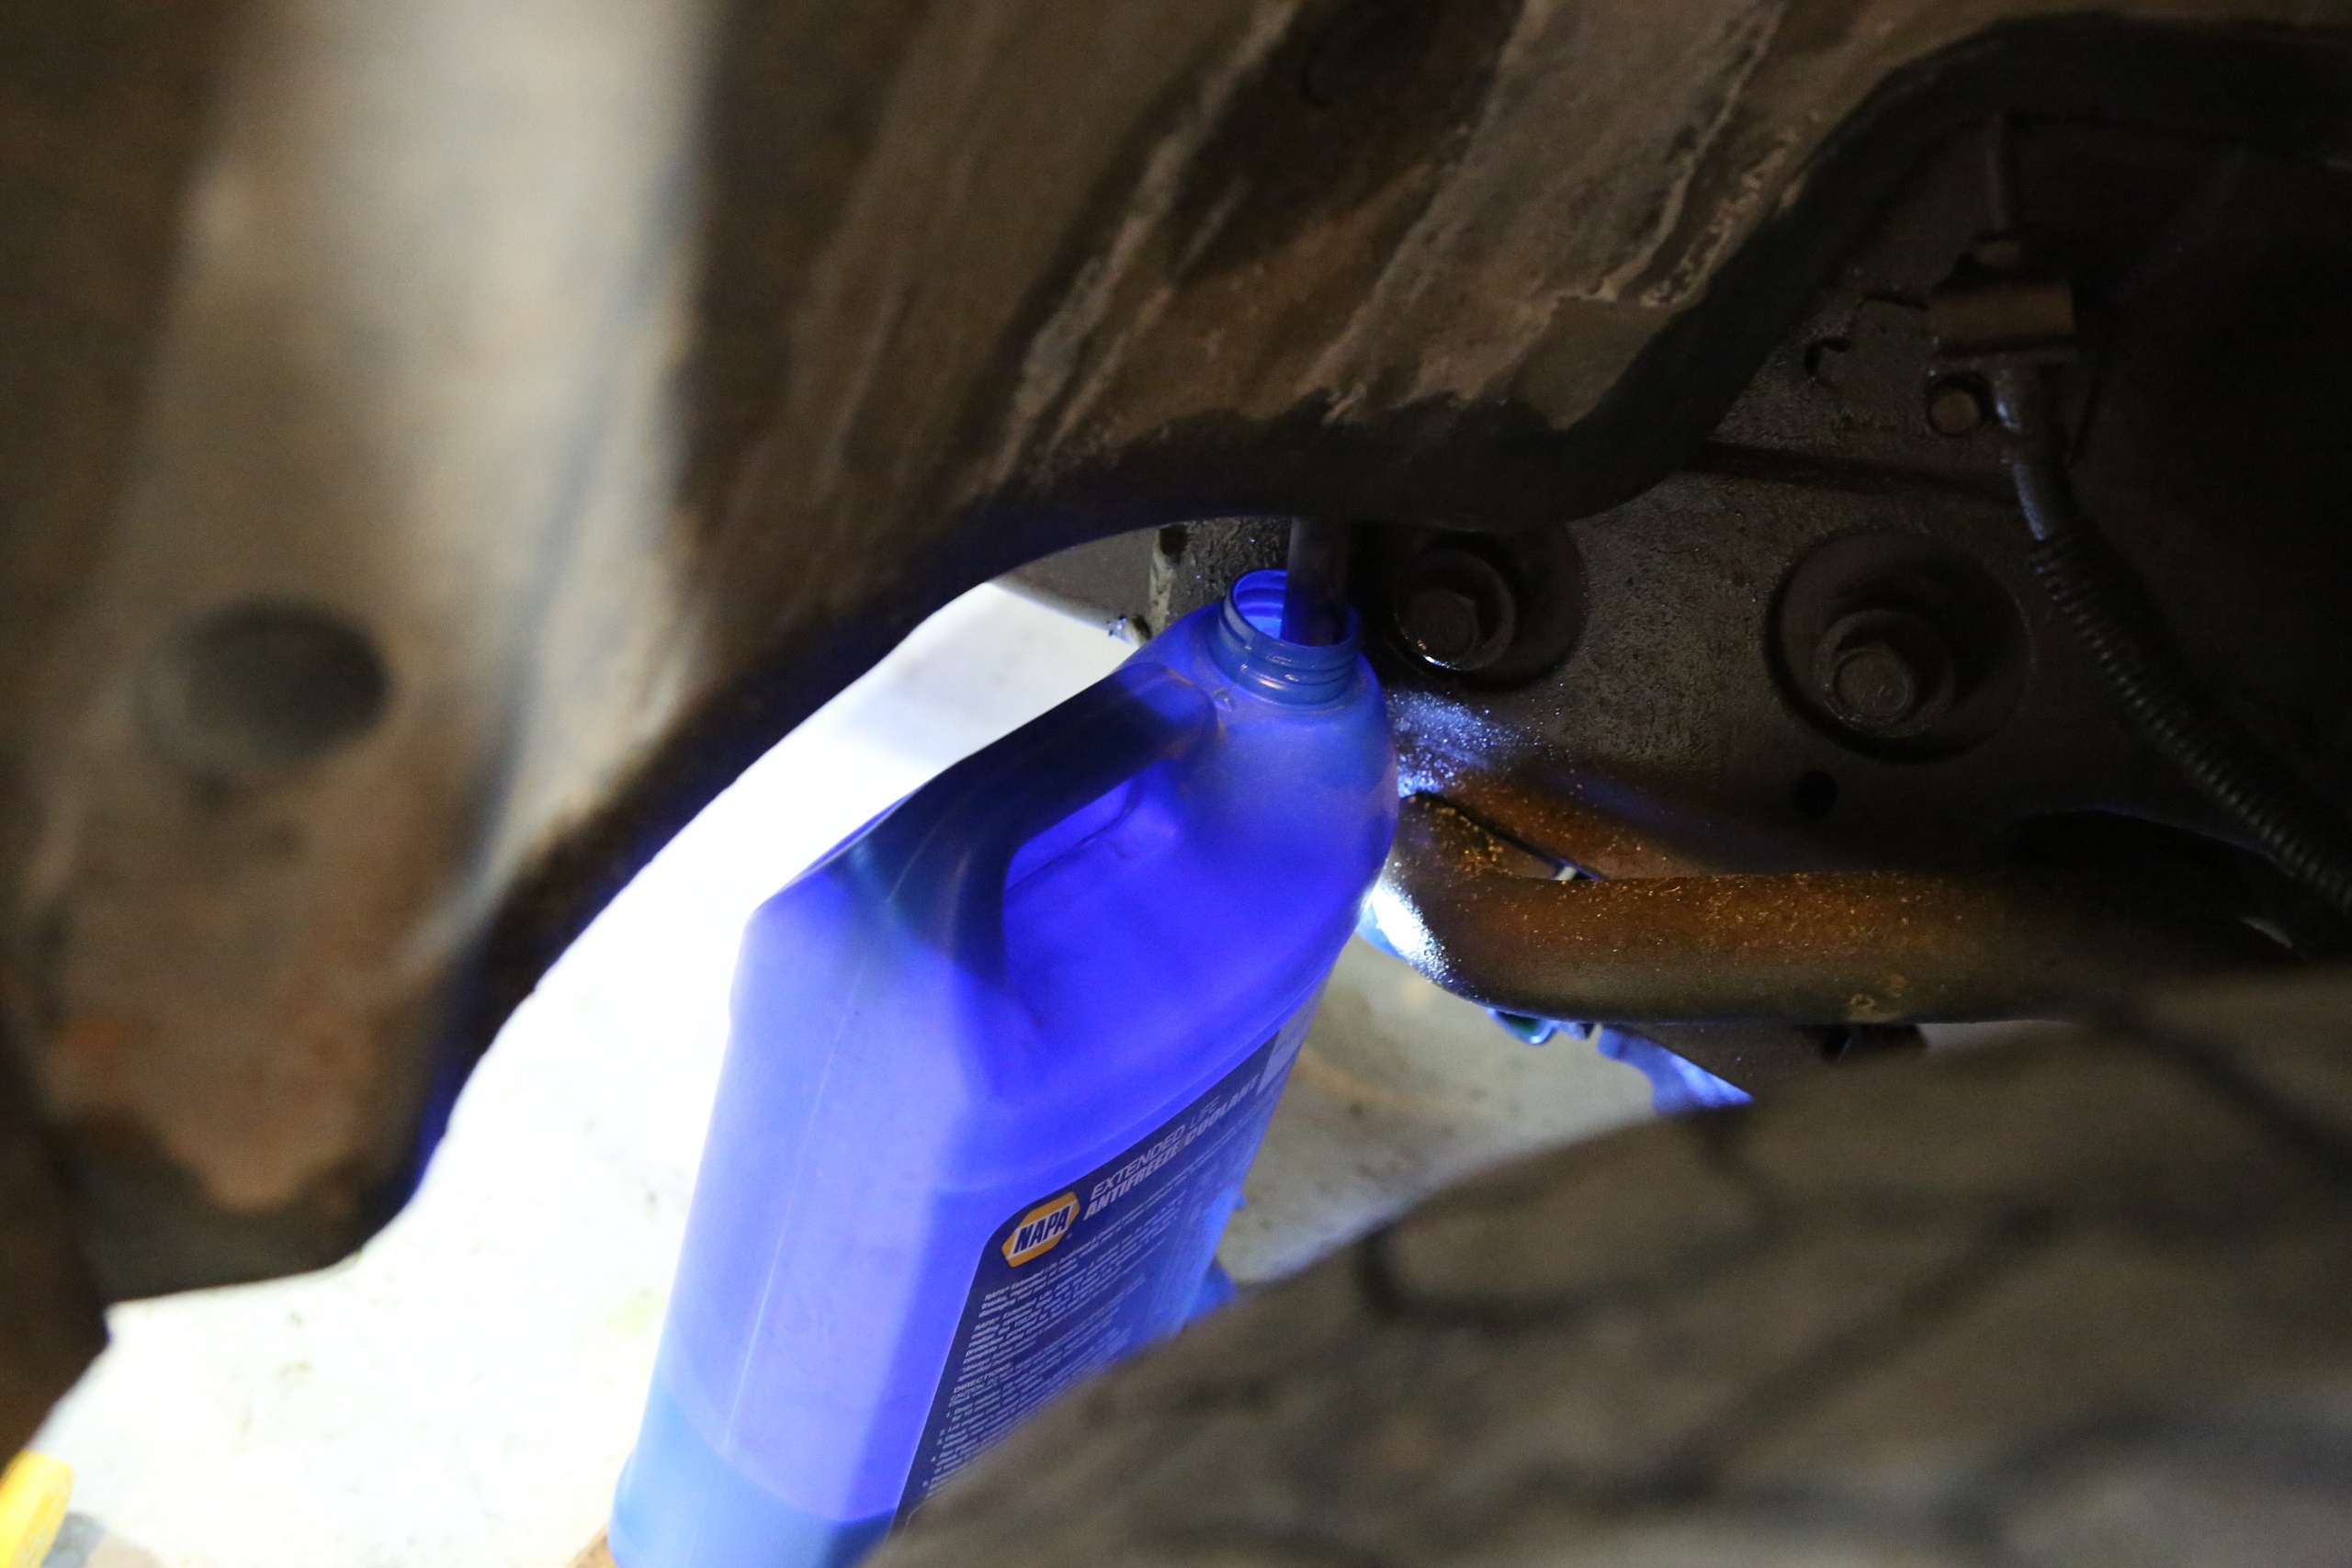
When draining a radiator, using a hose to funnel the coolant to a jug or drain pain is a good idea.
Quick roadside repairs can be an effective short-term solution. Many people have run them for years. Liquid sealants that use powdered metal and binders work together to seal holes in radiators. These materials flow through the system freely without causing clogs in the cores, but when they encounter air, they fill the hole and harden to seal the leak and get you home.
Waterproof high-temperature epoxies are a great choice for tank repairs. They work on both plastic and metal, making them perfect for fixing cracked or pinhole leaks.
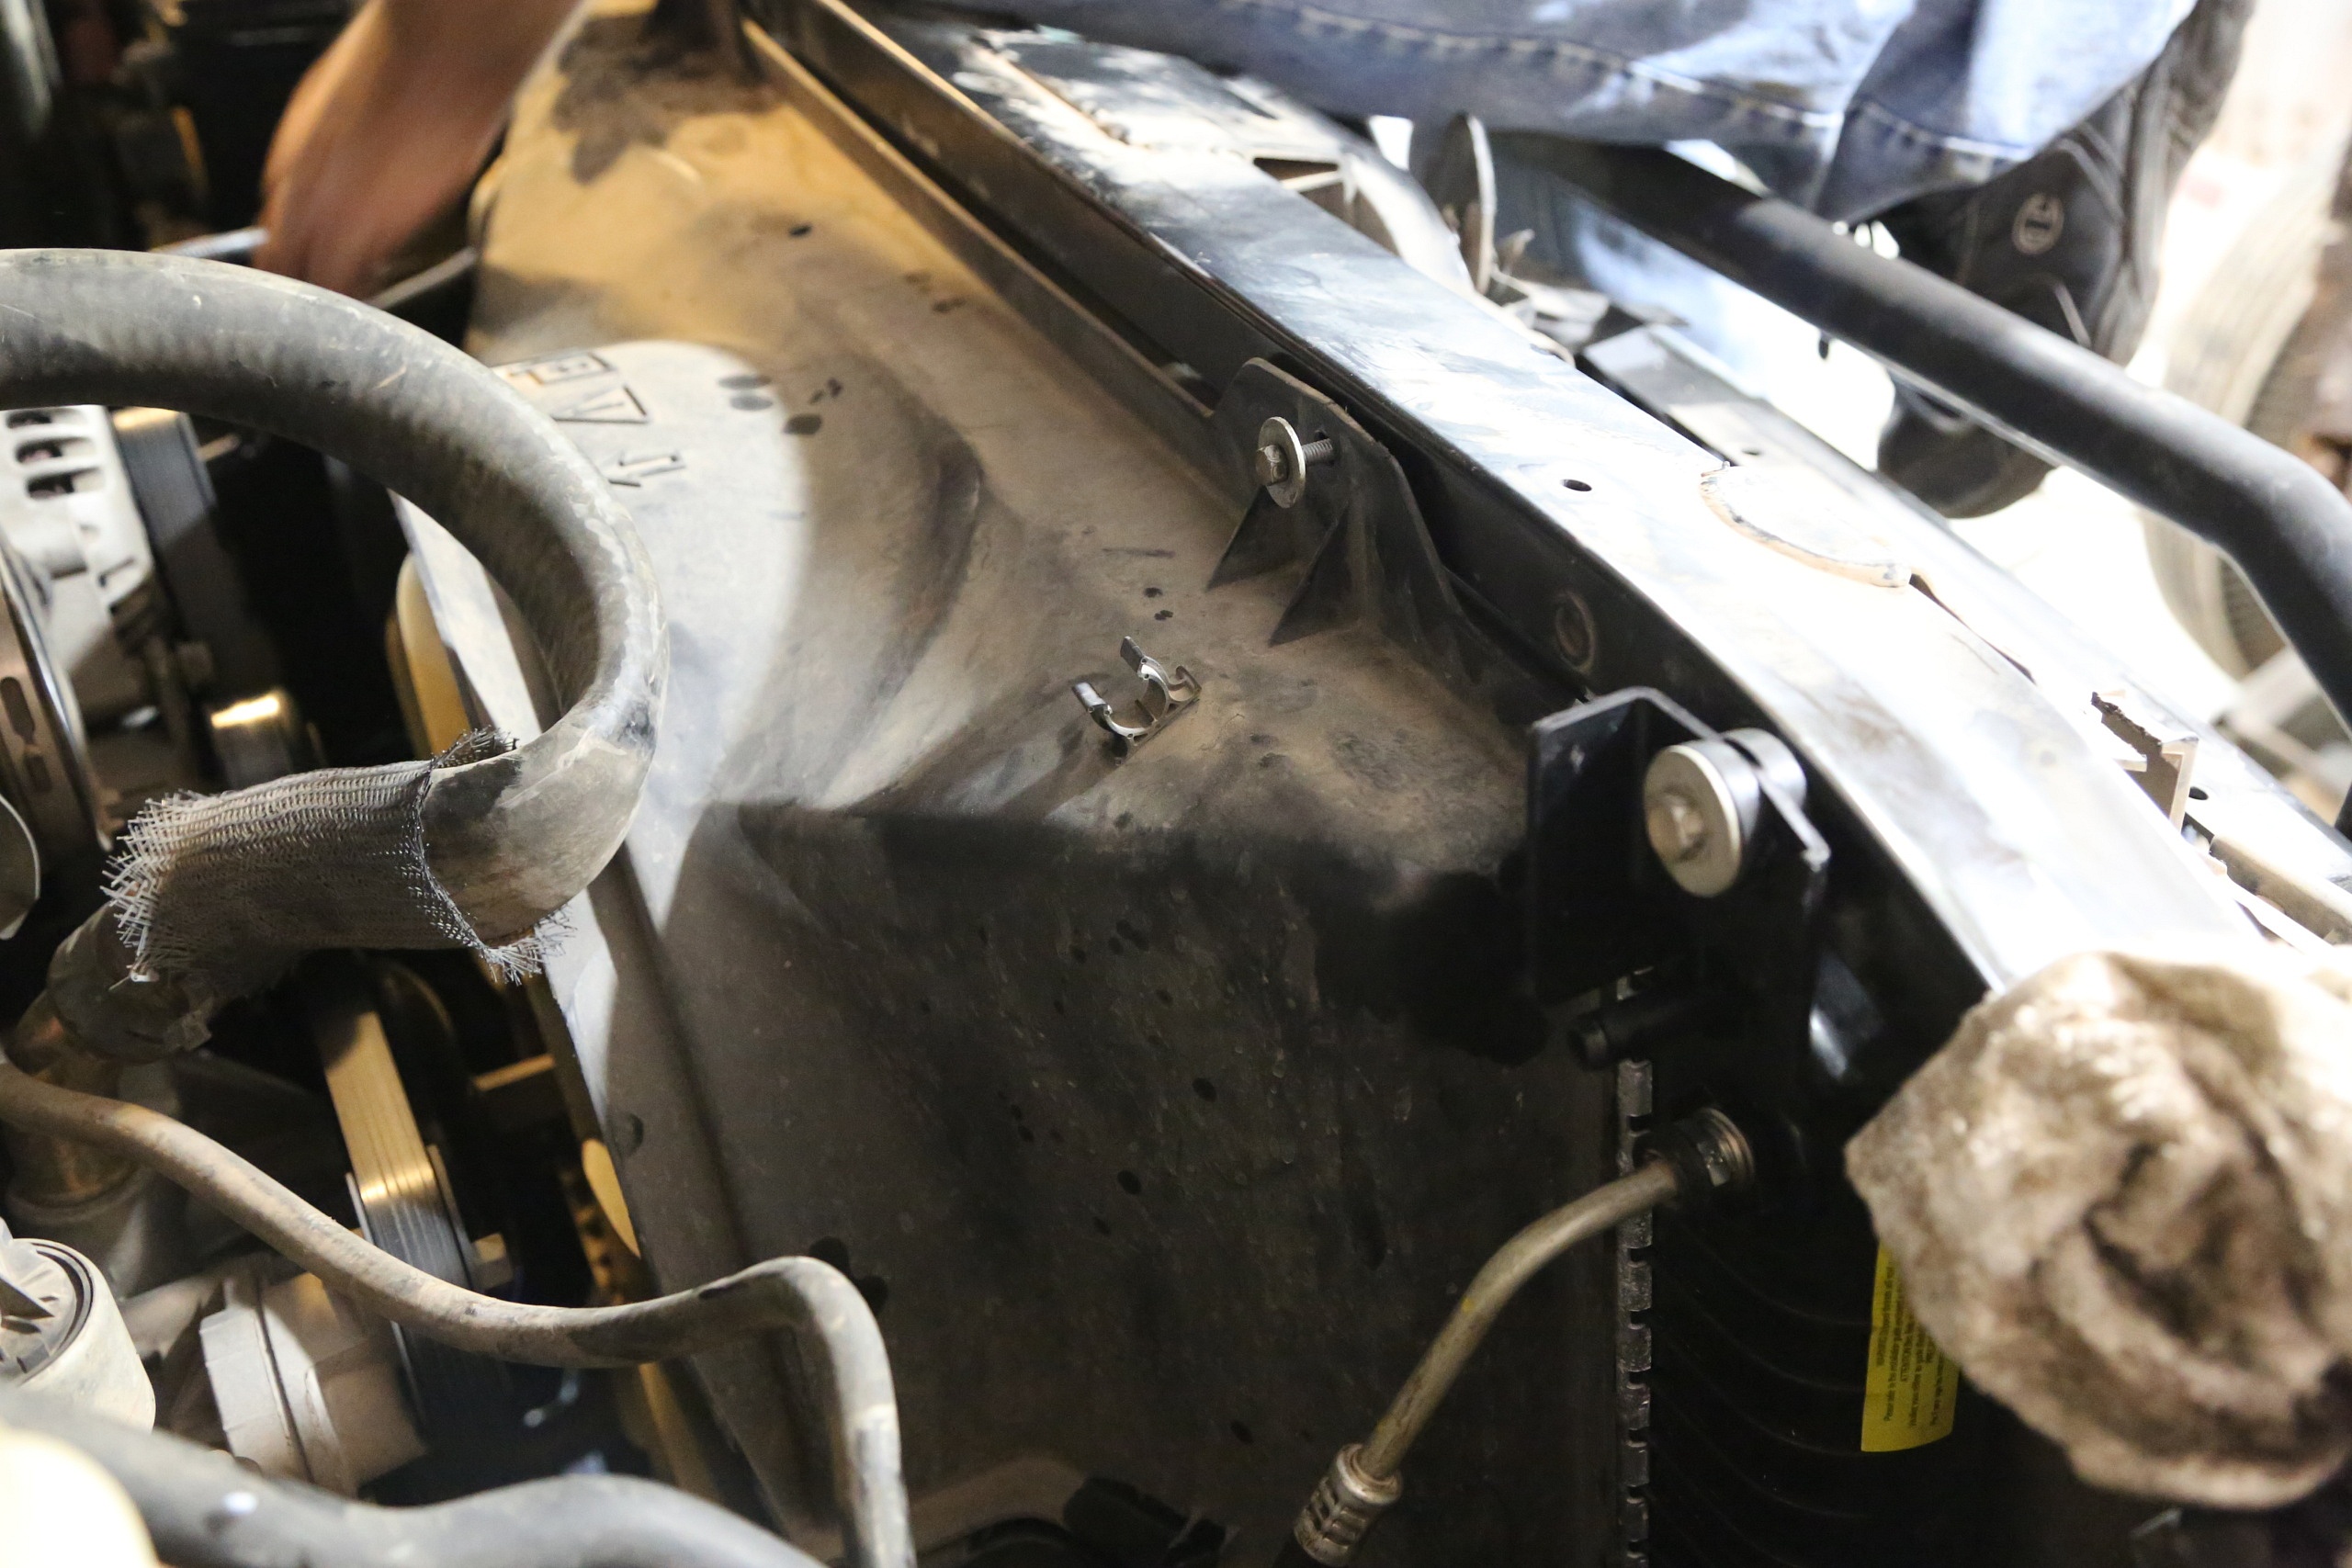
Most vehicles have a fan shroud that must be removed to get the radiator out.
Remember that these are all technically temporary repairs, so use them at your own risk.
Shop now for radiatorsHow to Replace the Radiator
This is a general guide to replacing a typical front-mounted radiator in a car or truck. Some vehicles will require more disassembly and other steps.

The main hoses are retained by worm or spring clamps. Springs clamps are removed by squeezing the ends together and sliding them back.
- Disconnect the battery negative terminal.
- Locate the drain petcock for the radiator. This should be at the bottom of one tank.
- Place a bucket or drain pan under the petcock outlet. Some have a small hose attached for clean draining, while most are just open. Pay attention to the drain placement, as you will likely have to push the pan farther away than you think to catch the flow.
- Open the petcock. Once the flow is being caught, remove the radiator cap and open the overflow bottle. Without a petcock, you must drain the system by removing the lower hose.
- Once the system is drained, disconnect the radiator hoses. This is a great time to replace the hoses too.
- Remove the transmission cooler lines if equipped. Using line wrenches for hard lines will save your fittings from being rounded off. If hose clamps secure the lines, simply loosen and remove them. Remove any other lines connected to the radiator.
- If the fan shroud and electric fans are attached, remove them. First, disconnect the electric fan harness, unbolt the shroud, and carefully remove it from the vehicle. If the engine has a mechanical fan, disconnect the fan shroud and slide it back toward the engine. It should be clear of the radiator itself.
- Loosen radiator mounts. Some radiators bolt in, while others are held in place by a bracket and rubber bushings. Inspect the bushings for tears and splits. Replace if worn or damaged.
- Lift the radiator out of the vehicle.
- Unpack the new radiator and carefully lower it into place. The fins can be bent over easily, so take care when installing the new unit.
- Finish the installation in reverse of removal. Threaded fittings need thread tape or thread sealant to avoid leaks.
- Fill the cooling system with a 50/50 antifreeze mix. You can also use pure antifreeze or distilled water, but never tap water. Tap water contains minerals that will damage your cooling system over time.
- Run the engine with the cap off and refill until the system is full. Turn the heater on to full hot while filling so that the heater core is filled. This will help avoid air pockets. Check the coolant level after the engine has cooled and top off again.
Car radiator leaks are a troublesome issue for many vehicle owners. If left unchecked, a leak can severely damage your engine and leave you on the side of the road. Regularly examining the cooling system will help you avoid these costly problems and ensure you get where you need to go.
Shop now for radiators