
Contents
What the Coolant Temperature Sensor Does
Heat is a byproduct of internal combustion. While most of it goes out the exhaust, the engine soaks up much of that heat. The engine’s cooling system takes care of the rest by flowing coolant through the engine and out to the radiator, which transfers the heat to the outside air.
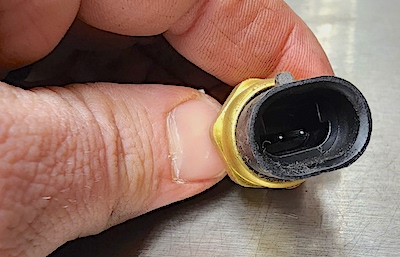
Some engine coolant temperature sensors are two-pin, and some are three. This one is a two-pin. You can test it by testing the resistance across the two pins.
Many drivers don’t realize that your engine needs to operate a specific temperature for efficient combustion. With today’s EPA standards, that temperature range has tightened and becomes even more critical.
The only way your engine control module (ECM) knows the engine temperature is through the engine coolant temperature (ECT) sensor. The ECT sends an electric signal to the ECM and other modules so that they can monitor and adjust all relevant systems to be the most efficient.
Signs of a Failing Coolant Temperature Sensor

Here are a few sure signs that your ECT is failing:
Overheating – If your vehicle has a temperature gauge, it should be steady and stable. There should not be any big swings; it should stay at relatively the same temp, whether idling or in motion. If it jumps, drops drastically, or bounces from temp to temp, it’s probably a failing sensor.
Poor fuel economy – When your ECM gets the wrong information, it doesn’t know what to do. It may waste fuel or go into limp mode. If the ECM thinks the engine is cold, it will go into an open-loop mode, which means it’s running on a set of programmed instructions rather than current readings.
Black smoke – Black smoke from the tailpipe means the engine is dumping extra fuel into the system. It will also smell rich with fuel, even to the point of burning your eyes. This is a sign that the ECM is getting the wrong signal and, for safety reasons, has added fuel to compensate. More fuel means less heat, less chance of detonation, and less chance of engine damage.
 Check engine light – If a sensor sends signals outside the normal range, it will set a code and illuminate the check engine light on the dash. You can use an OBDII code scanner to determine the source of the problem.
Where Is the ECT Located?
Depending on the vehicle, the ECT sensor is located somewhere in the engine coolant path, often at the front of the engine near the water pump. Some are easily accessible, and some are buried deep behind the accessory drive or secondary covers.

Placement on the engine varies. This GM Gen V LT-series engine locates the temperature sensor in the water pump housing.
Most vehicles use a negative temperature coefficient resistance-type sensor. In this type, the resistance decreases as the temp rises. Some older vehicles use a positive coefficient, where the resistance rises with the increase in temperature.
Regardless of the coefficient, the sensor uses a five-volt reference signal that the ECM matches against the resistance to ground. The varying resistance correlates to the temperature of the engine. Some are two-wire (five-volt and signal), and some are three-wire, which adds a known ground path.
Testing an ECT Sensor
There is a relatively simple test that you can do with a digital multimeter (DMM) and an infrared thermometer. You can also use a high-featured scanner diagnostic tool. It should be done on a cool engine.
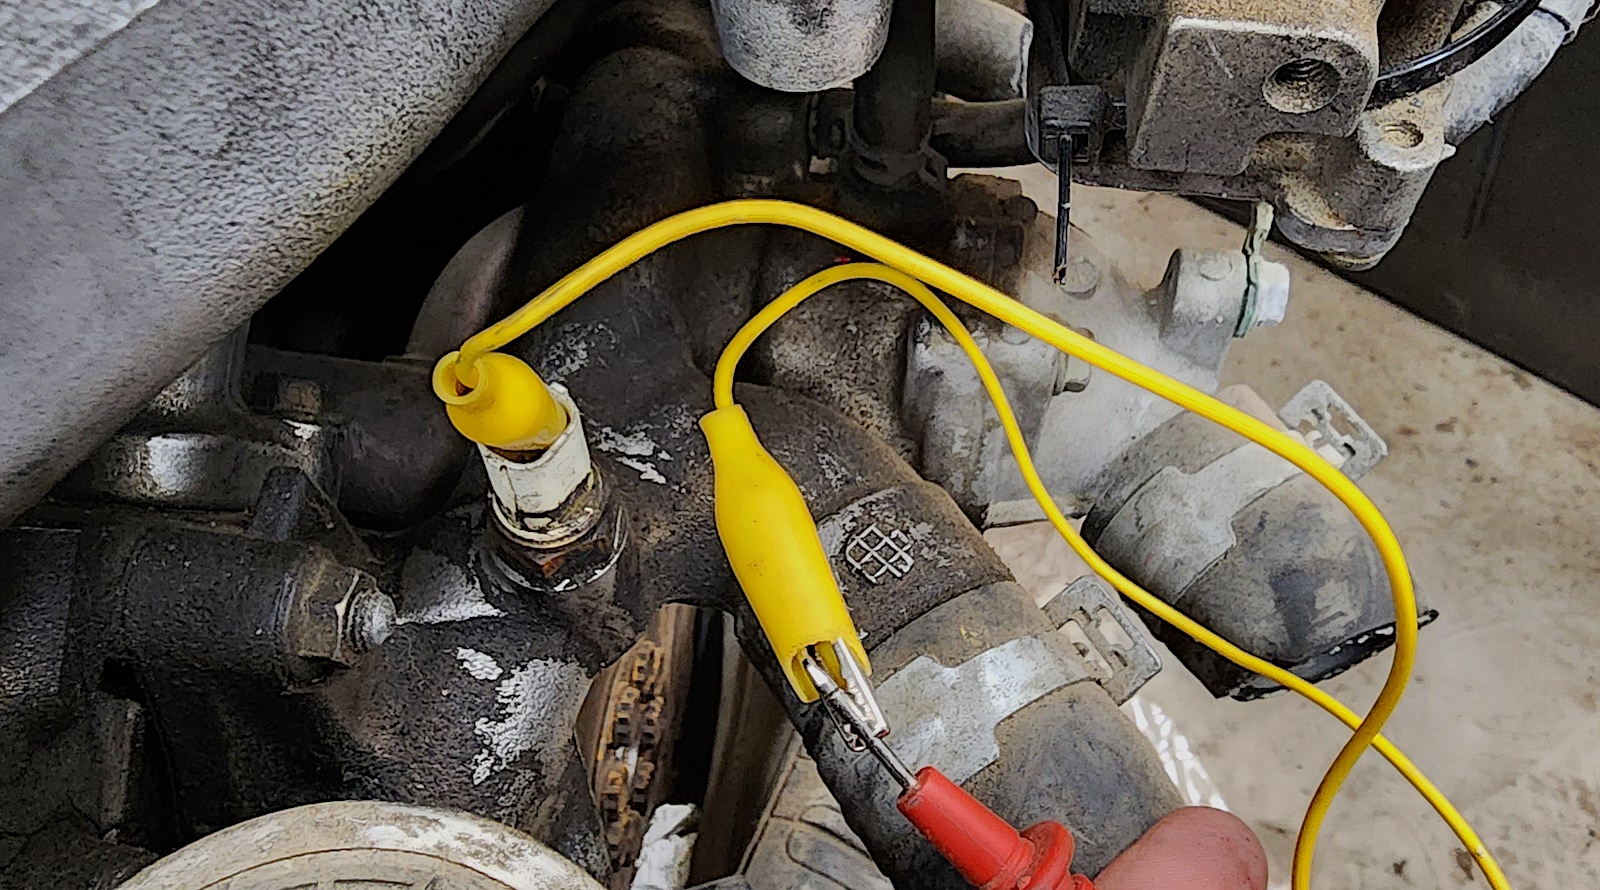
Using an alligator clip lead makes testing easier than holding the DMM probes onto the terminal pins..
- Locate the sensor and disconnect the plug.
- Set your DMM to ohms in the 10,000 range or auto-ranging.
- Check the temperature of the surface where the sensor is mounted. This is a critical step—you need to know what the temperature of the sensor is. Note this and check your vehicle’s repair manual for the resistance guide of the temperature sensor for your car. This varies by make and model.
- Determine which pins are ground, signal, and reference. This should be detailed in your repair manual, or you can use the DMM to determine the pins. The signal pin is the one you need for this test.
- Connect the ground probe of the meter to the battery ground or a good chassis ground.
- Touch the signal pin with the positive probe. Verify the readings with the repair manual.
- Start the engine. Continue probing the sensor and watch the readings change. Use the infrared thermometer to verify the actual temperature.
If the resistance readings are different than they should be for that temperature, the sensor is faulty and must be replaced.
How to Change a Coolant Temperature Sensor
This is usually a quick project as the sensor is typically easy to access. Important reminder: Never do this project on a hot engine!

Only use sensor-safe high-temperature thread sealant for sealing sensors and their adapters to the engine.
- Locate the coolant temperature sensor.
- Disconnect the vehicle’s negative battery terminal.
- With your new sensor in hand, determine what size wrench or socket you need. Place a towel under and around the old sensor location to capture any coolant that spills. (If you are due for a coolant flush, this is a great time to do it.) If the sensor is located below the water neck, a lot of coolant will come out.
- Disconnect the old sensor plug and set it aside.
- Remove the old sensor with the wrench or socket.
- Wipe a little high-temp thread sealant on the threads if they are not coated. The thread sealant must be suitable for sensors. Many thread sealants will interrupt the ground connection and cause erratic readings.
- Install the new sensor and torque to spec, typically 15 to 20 pound-feet.
- Connect the harness plug to the sensor.
- Reconnect the battery negative terminal.
- Start the engine and check for leaks.
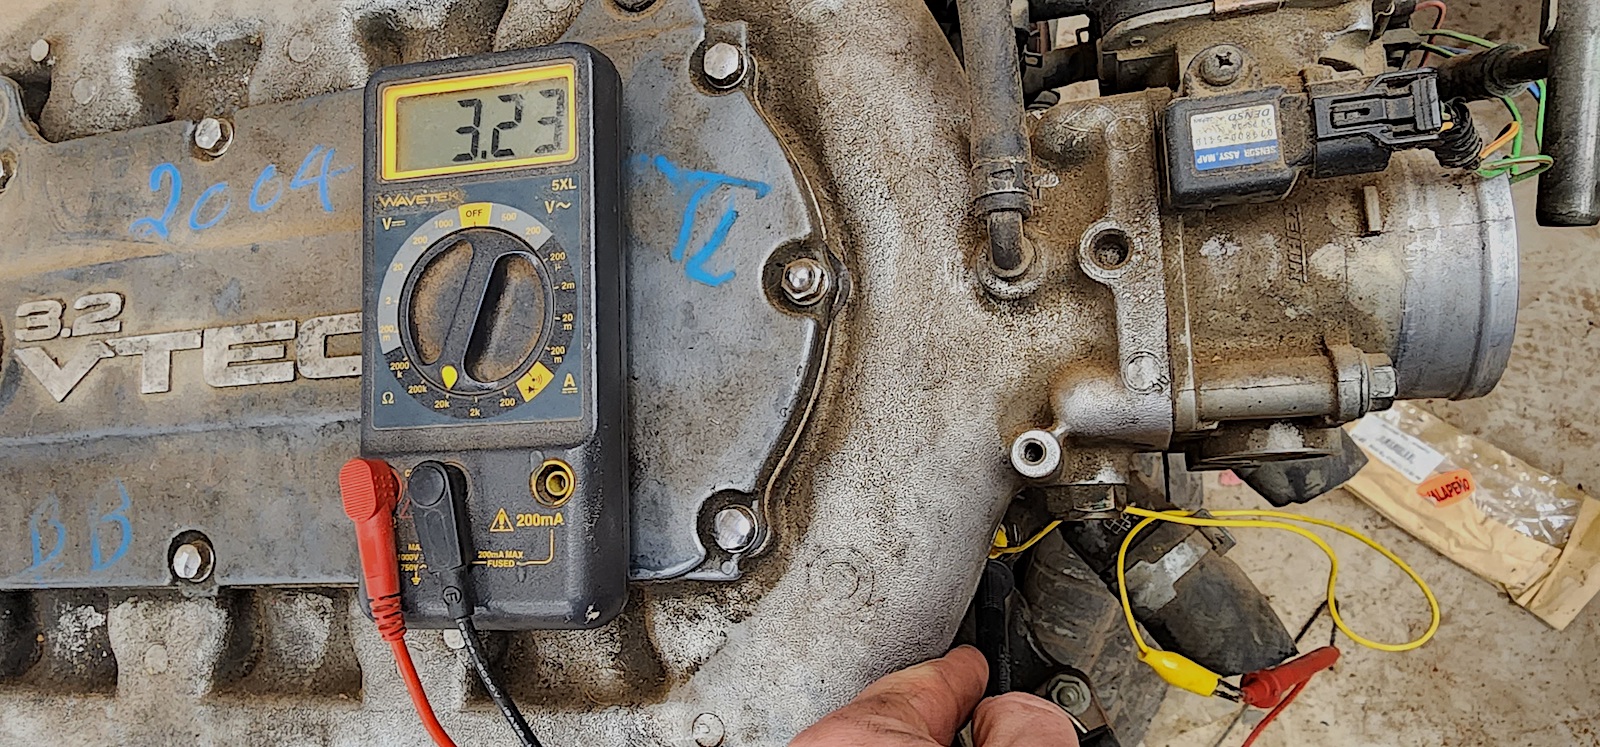
This Acura V-6 ECT sensor tested out to 3.23 kiloohms when cold, which is within spec. It needs to be warmed up to check the output at a couple of different temps to be sure it is good.
If your ECM doesn’t read the engine temperature, it cannot correctly control the timing and fuel sequences efficiently. Even if the engine is not overheating, the coolant temperature sensor readings are critical for efficient engine operation. When a sensor starts reading erratically, it will soon fail. Make sure it is working correctly so you don’t get stranded on the side of the road.
Shop now for coolant temperature sensors