Contents
What Is a Brake Controller?
A trailer brake controller alters driver inputs for braking. It activates when you push the brake pedal in the towing vehicle.
Federal law states that commercial vehicles must have a brake controller when the trailer has a loaded weight exceeding 3,000 pounds.
The typical brake controller has an adjustable voltage output. With this feature, the trailer’s weight and type, and the weather conditions, determine the braking force and gain amount. For example, an empty trailer needs low braking force to avoid locking the brakes up and damaging the tires. On the other hand, trailers filled to capacity need higher braking force to reduce stopping distances.
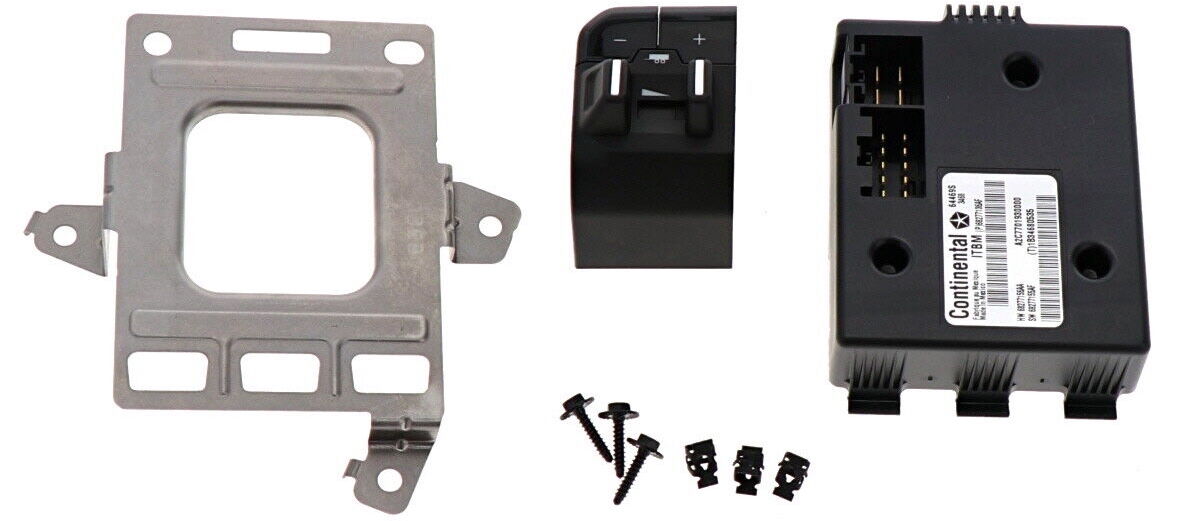
Continental Mopar brake controller
There’s usually another way to manually activate the brakes as well. This alternative function helps to reduce trailer sway or maintain control when driving on slippery surfaces.
Different Types of Brake Controllers
Brake controllers come in different designs. The two most popular are time-delayed and proportional brake controllers.
Time-Delayed Brake Controller
The time-delayed brake controller uses a predetermined capacity set by the user based on the trailer and cargo weight. A manual “sync” switch on the controller adjusts braking force and timing. When you push the brake pedal, a braking amount set by the driver is applied. If it is set too low, your tow vehicle does more braking than it needs to, so the trailer slows down. If it is set too high, the trailer applies more braking power than necessary.
While this system provides a low-cost way to tow safely, it’s usually not the pick for frequent towing. Instead, it’s best suited to drivers who tow only occasionally.
Proportional Brake Controller
The proportional brake controller activates the trailer brakes at the same intensity and time as the tow vehicle. With this system, there’s less wear to the brakes on the vehicle and trailer. It’s also faster and more responsive but does come at a cost.
Time-Delayed vs. Proportional Brake Controllers
These two brake controller systems have several things in common
- Wiring is performed the same way.
- The braking signal can be manually overridden when needed.
- Maximum braking power can be adjusted based on load weight.
Yet, some differences must be considered.
| Difference | Time-Delayed | Proportional |
| Cost | Inexpensive option | More costly |
| Braking power | Preset amount of force | Smoother, more controlled |
| Response time | Variable | Responsive |
| Usage | Occasional towing | Heavy trailer usage |
| Mounting | Installation anywhere | Must be mounted in a particular orientation |
| Size | Smaller, compact | Larger than proportional |
When Do You Need a Brake Controller?

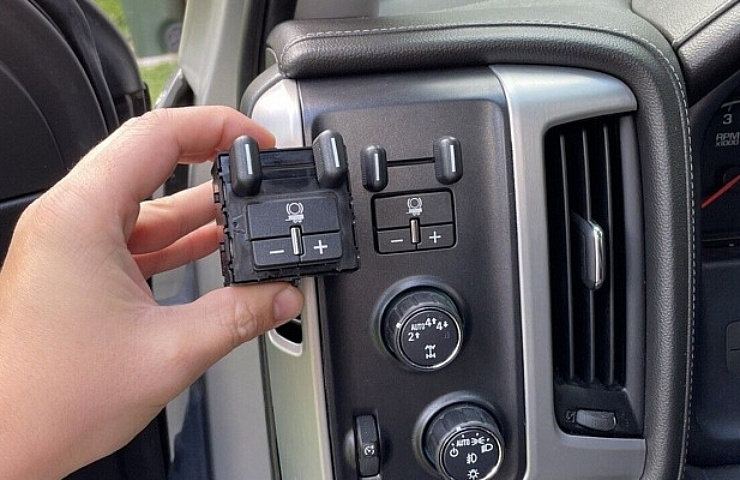
OEM Ford Super Duty in-dash trailer brake controller module
It’s important to check local laws regarding towing. You don’t want to be pulled over, ticketed, or found responsible for an accident because you failed to follow local regulations.
Use a brake controller when towing a trailer with electric or electro-hydraulic brakes. The trailer brakes won’t properly establish when to activate without the brake controller.
How to Install a Brake Controller
With plug-and-play technology, installing a new brake controller is straightforward.
- Disconnect the negative battery cable. This step helps to prevent personal injury and damage to the vehicle’s electronics.
- Find a mounting location for your brake controller. Many people mount it on the side of the steering wheel or slightly below it. While it’s still visible in this location, it stays out of the way. You could also mount it above your dashboard.
- Using the mounting bracket as your template, drill the holes needed to position the brake controller. Be careful where you drill and adjust the location if the spot is compromised. We recommend removing the panel first to see what’s behind it.
- Position the brake controller bracket to the holes and secure it with the included fasteners. Don’t over-tighten the screws, or you could strip the holes.
- Secure the brake controller on the bracket.
- With your vehicle-specific harness, plug the controller into your vehicle. One end connects to the factory harness under the dashboard, while the other goes to the brake controller.
Your vehicle’s wiring harness location depends on the model. You can look at the service manual to find the location or check these common spots.
- Under the dashboard, to the left of the steering column, close to the emergency brake
- Under the dashboard, inside the junction box near the steering column
- Behind the center access panel under the dashboard on the passenger side
- Under the dashboard, near the center console
- Under the dashboard, close to the brake pedal
- Behind a storage pocket found near the center of the dashboard
How to Splice in a Brake Controller
If you can’t get a plug-and-play connection for your vehicle, you have to splice in the wiring. Here are the steps.
- Disconnect the negative battery cable to prevent personal injury and damage to the car’s electronics.
- Find the brake controller wiring bundle. It’s typically under the dashboard.
- Separate the bundle of wires carefully. Remove any tape that holds the wires together.
- Strip the wires and separate them for splicing into the brake controller harness.
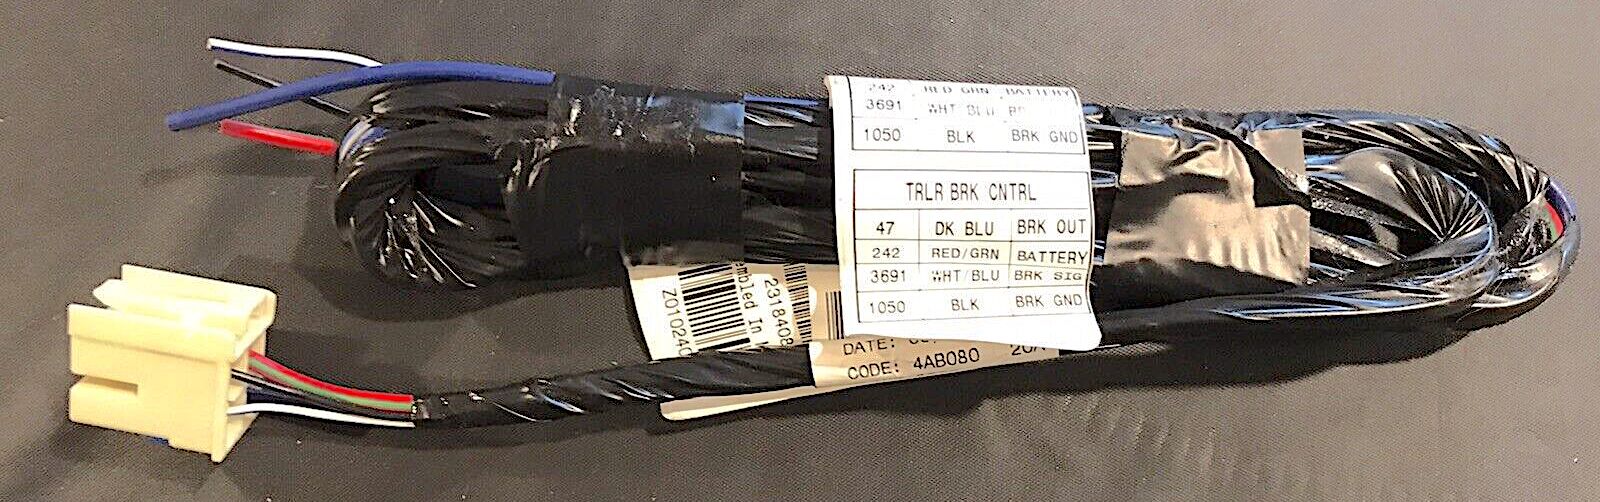
OEM GM trailer brake control wire harness
Here is the typical color-coding information for splicing.
- Blue: Brake output to the trailer connects to the blue brake controller wire
- White: Ground wire connects to white brake controller wire
- White with a blue stripe: Brake lights connect to red brake controller wire
- Red: 12+ volt connects to black brake controller wire
All this information should be available with the brake controller. If the manufacturer has a different color-coding system, follow what’s outlined in the manual.
Once the splicing is done, follow these remaining steps.
- Determine the best mounting location for your brake controller. It could be mounted on the side of the steering wheel or slightly below it. While it’s still visible in this location, it stays out of the way. You could also mount it above your dashboard.
- Using the mounting bracket as your template, drill the holes needed to position the brake controller. Be careful where you drill and adjust the location if the spot is compromised. Remove the panel first to see what’s behind it.
- Position the brake controller bracket to the holes and secure it with the included fasteners. Don’t over-tighten the screws, or you could strip the holes.
- Secure the brake controller on the bracket.
- Plug the brake controller harness into the unit.
- Attach the brake controller power wire to the battery. Use the factory power feed wire that’s already installed in the vehicle. It should be under the hood, close to the fuse box.
- Reconnect the negative battery cable.
With the new brake controller installed, it’s best to test drive the towed trailer in an empty parking lot to get a feel for the brakes. If adjustments need to be made, do that before hitting the road.
Shop now for brake controllers


