Contents
What the Alternator Belt Does
Most cars still run on fossil fuels, but a surprising amount of electricity is needed to start the engine. Headlights, tail lamps, heat and air conditioning, and even simple things like the radio all need power. The battery stores some juice, but the alternator, which is driven by the engine, keeps the battery fully charged.
Ensuring the alternator V-belt is in good condition enables the alternator to charge the battery properly. A broken alternator belt could lead to your headlights failing or the inability to start your engine.
Symptoms of a Bad Alternator Belt
The V-belts used in most vehicles are made from various natural and synthetic rubbers molded around fiber materials. The design keeps the belts strong and flexible. But with time and use, the belts can wear, leading to stretching, fraying, and even chunks of rubber going missing.
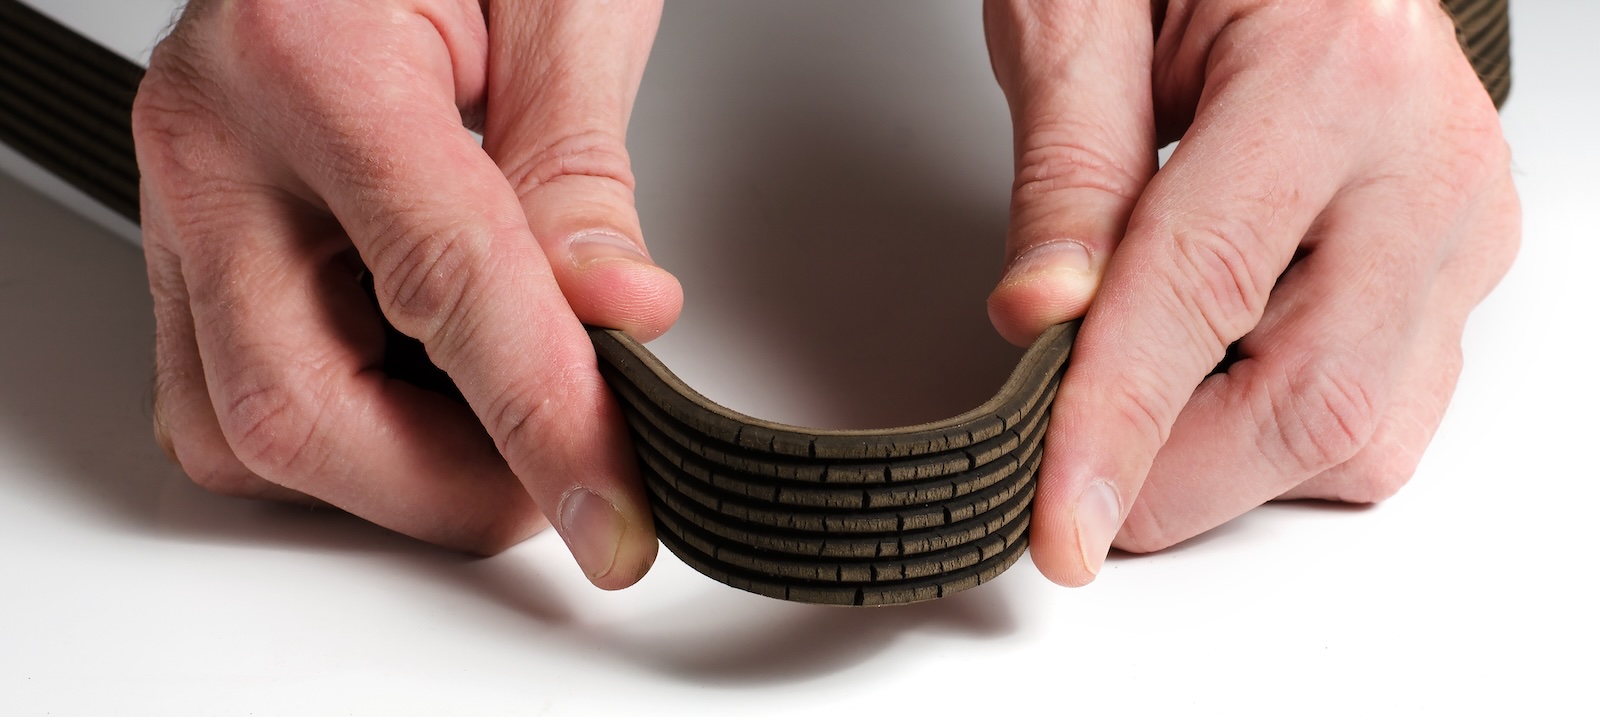
Rubber tends to become brittle over time, so inspect your belt regularly, especially before long drives. Look closely to see if the rubber looks dry, cracked, or scaly. These are signs that it might be time to replace the alternator belt.
Shop now for alternator beltsHow to Replace an Alternator Belt
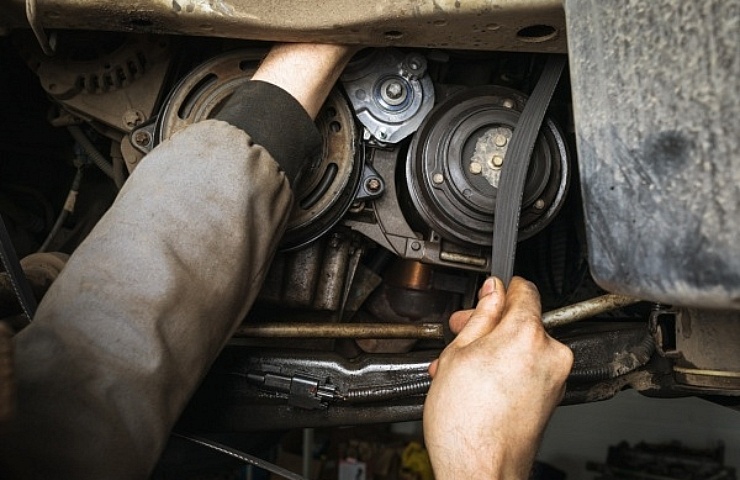
Fortunately, alternator belt replacement is usually a simple job, although it’s sometimes complicated by other engine components being very close. You often work very close to the engine fan, which can start up at any time, even if the engine isn’t running. It’s critical to disconnect the battery to ensure you don’t get injured.
Gather the tools and supplies to complete the job:
 As always, refer to the manufacturer’s shop manual for proper torque values, tensions, and the procedure to access the V-belt. You may need to remove the engine fan or a second accessory belt to access and replace the alternator belt.
- Open the hood and disconnect the negative terminal on the battery.
- Locate the bolts holding the alternator in place and loosen them. Do not remove the bolts. Just loosen them enough to be able to pivot the alternator.
- Pivot the alternator so the old belt slackens enough for removal.
- Remove the old belt and route the new belt over the pulleys.
- Tighten the alternator belts, ensuring the belt is set to the proper tension (see below).
- Replace any other parts you removed: accessory belt, engine fan, etc.
- Reconnect the negative battery terminal.
Start the car, and ensure the alternator is properly charging the battery. Now go for a drive.
Related: The Alternator Is Your Car’s Little Electric Power Station
Belt Tension Is Critical
One thing to be especially aware of is belt tension. While modern serpentine belts typically have spring-loaded or hydraulic tensioners that automatically adjust how tightly the belt winds around the pulleys, a V-belt relies on the alternator to create the proper tension.
If the belt is too loose, it will slip on the pulleys and won’t turn the alternator at the proper speed. You might not get the full charging performance out of the alternator.
Conversely, if the V-belt is too tight, it could lead to severe stress on the bearings within the alternator. This, in turn, could lead to premature failure of the alternator. The extra stress on the belt could cause it to fail early, too.
While every automaker has a specific tension requirement listed in their shop manual for the car, there are two typical rules of thumb for setting the correct tension:
- With the alternator tightened in place, find the longest distance between two pulleys and push down on the belt. The belt should not deflect more than half of an inch. If it deflects more, it’s too loose. If it doesn’t move even half an inch, the belt is too tight.
- With the alternator tightened in place, again find the longest distance between two pulleys and try to twist the belt from side to side. If the belt can twist about 90 degrees (a quarter turn), the tension is set correctly. If it won’t turn that far, it’s too tight. If it turns more, it’s too loose.
Either way, loosen the bolts holding the alternator pivot in place and adjust the tension as necessary. Repeat until the tension is correct.
Shop now for alternator belts