Contents
What the Camshaft Position Sensor Does
Your engine has a crankshaft and at least one camshaft. On modern engines with electronic ignition controls, each has a position sensor.
- The crank position sensor is located in the lower timing cover or on the side of the block. It detects the real position of the crankshaft.
- The cam position sensors detect the real position of the cams.
The engine control module (ECM) uses this information to determine the ignition and fuel timing to keep the engine in proper working order. The crankshaft spins twice as fast as the cams, so the ECM must always know the exact position of the camshaft. Without this precise data, the engine will run terribly, if at all, and you could have interference issues between the pistons and the valves, which will destroy your engine immediately.
The crank and cam position sensors operate the same way: the sensor reads the position via a wheel or tab on the cam or crank. Most use magnetic fields to determine proximity to the sensor. These sensors are very effective and long-lived, but they can fail over time.
Read: The Difference Between Camshafts and Crankshafts
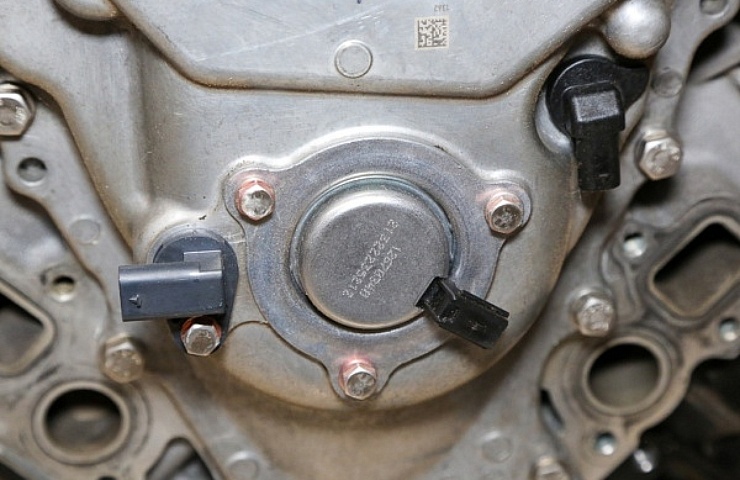
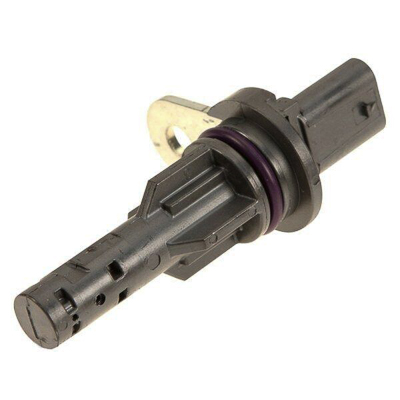
A cam position sensor in the timing cover of a Chrysler Gen III hemi V-8
Signs of a Failing Cam Sensor
Cam sensors can die without much warning. If you get a notification, your vehicle’s check engine light will light up, and you’ll need a code reader to determine the issue.
Read: What Does the Check Engine Light Mean?
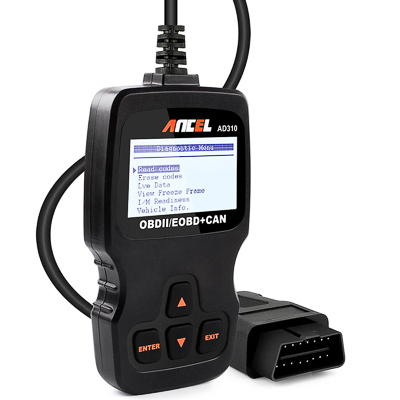
A code reader can help diagnose car problems.
For most vehicles, cam sensor codes include P0335-339, P0340-349, or P0011-19. If your ECM sets a P1136 code, then it is possible the cam or crank sensor is not calibrated. Sometimes, you can relearn the sensor and get by for a while, but most likely, the sensor is dying and needs to be replaced.
There are a few other telltale signs that your cam sensor is failing:
Rough idle, engine surging while driving – As the cam sensor loses the ability to read the cam, the timing and fuel release are interrupted. This leads to the engine not running correctly, misfiring, or dying.
Poor fuel economy – This can be a dying sensor with bad readings, causing the ECM to go into limp mode.
Hesitation during acceleration – If the vehicle hesitates, backfires, stutters, and pops, then your cam sensor could be sending the wrong readings.
No start – When the sensor is dead, your vehicle will not start at all.
The symptoms of a failing cam sensor can look like many other issues. The codes will help you determine the root cause. Cam timing is directly related to the timing belt, so you could replace a belt or sensor while the issue was with the other part. You need to look at the system as a whole to determine the real culprit, so check the timing belt or chain for tension, chewed ribs, and breakage.
Shop now for auto diagnostic toolsCost of Replacing a Cam Sensor
Replacement cost varies wildly by the vehicle and depends on the job’s complexity. On average, expect to spend $200 to $400 to replace the cam sensor on most front-wheel-drive vehicles, as the sensors are much harder to reach on these engines. The sensor itself typically costs between $25 and $125.
You can replace the cam sensor on most vehicles yourself. It is often time-consuming because the sensor is usually located directly in front of the cam itself.
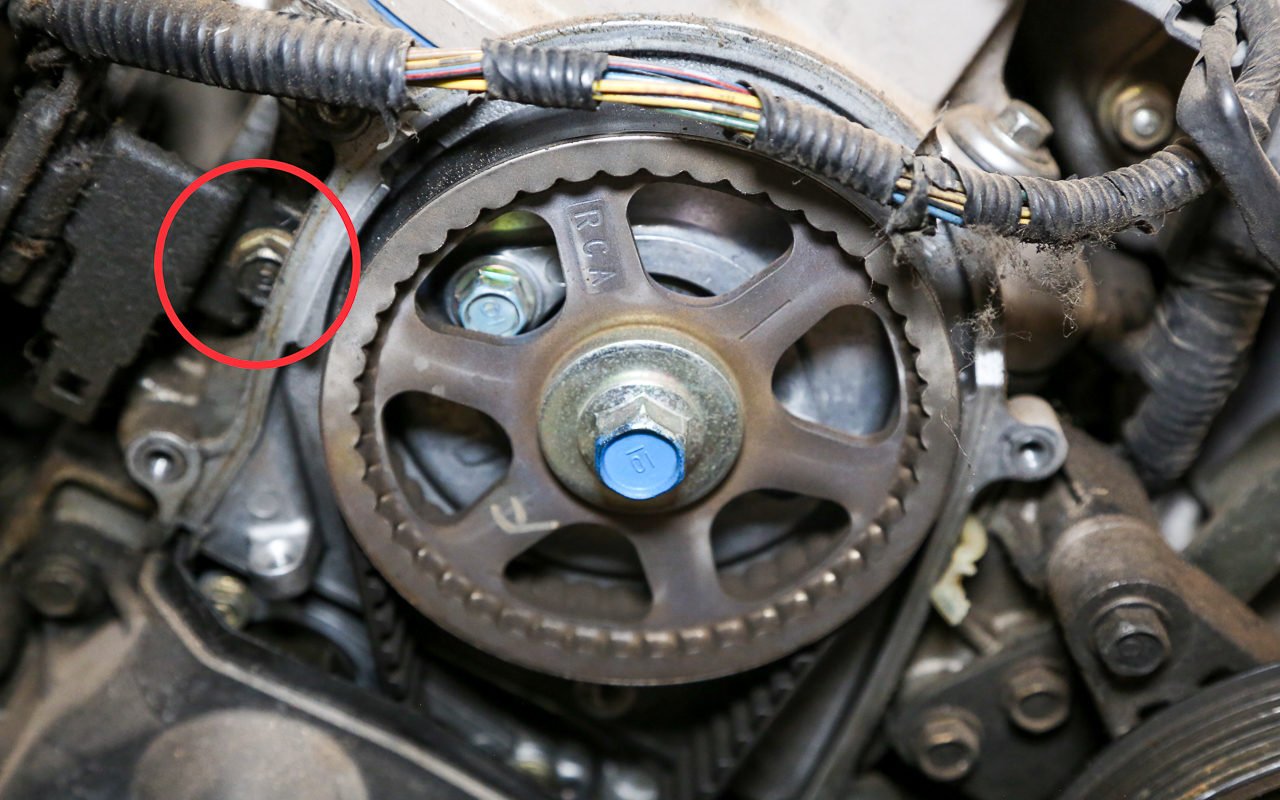
The cam is in the center of the block above the crankshaft in V-6 and V-8 pushrod engines, so the entire front drive of the engine has to be removed to get to it. If you have overhead cams, the sensors will be in front of the cylinder head, behind the timing covers. This may or may not be easily accessible.
Shop now for car and truck engine sensorsHow to Replace Cam Sensors
Once you locate the sensors and access them, the replacement process is straightforward.
- Disconnect the terminal plug from the sensor.
- Remove the fasteners securing the sensor, usually one to three bolts, typically 8mm or 10mm for most modern engines.
- Most cam sensors have an O-ring seal. Carefully pull the sensor out of the housing; a slight twist usually helps.
- Inspect the sensor and housing for damage like cracks or chips. Also, look at the cam wheel for damage.
- With a new sensor in hand, lubricate the O-ring with a dab of engine oil. Never install an O-ring dry—they will grab and tear.
- Install the sensor into the housing, replace the bolt(s), and torque to spec.
- Reconnect the wiring plug and ensure that it is locked in place.
- Replace any covers, accessories, and brackets that were removed to gain access to the sensor.
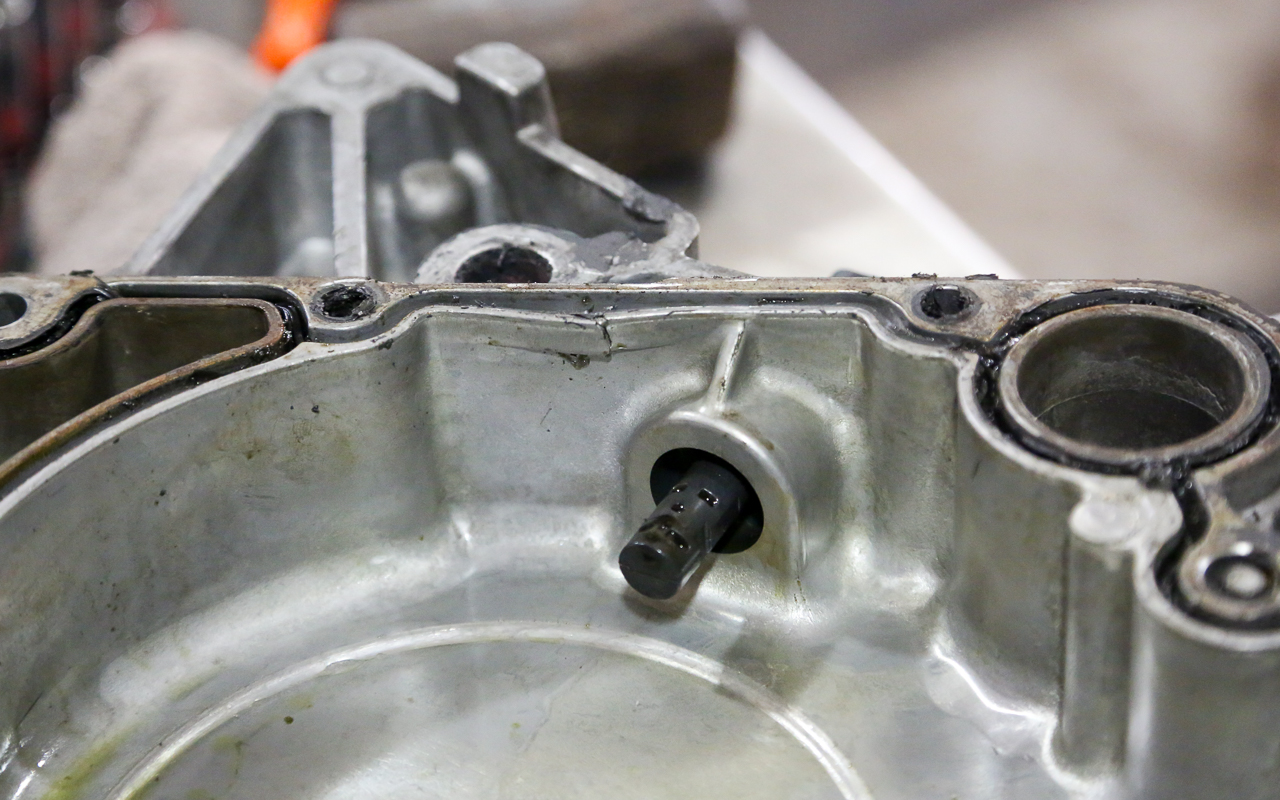
A Chrysler Gen III hemi V-8 cam sensor out of the timing cover
Some engines require a reset or sensor learning procedure, which varies by manufacturer. A quick relearn requires the battery to be disconnected for 15 to 30 minutes. Verify the process for your specific application. Some vehicles need an advanced scan tool to relearn sensors. It just depends on the manufacturer.
Your engine needs the cam sensor to be properly working to control the engine’s operation. If it is failing, you will have drivability issues. It can fail while the engine is running, leaving you broken down on the side of the road. Always heed the warning of your check engine light and check the codes. Catching a sensor issue early can help save your engine.
Shop now for complete car and truck engines