Contents
- A timing belt is different from a timing chain, which is similar to a bicycle chain that uses toothed gears.
- Timing belts are made from EPDM rubber and uses cog-style teeth to mesh with the engine’s cogged gears.
Because a timing belt uses rubber, it wears out faster than a metal chain, so replacing it at periodic intervals is critical. If you skip the replacement, you could end up with a dead engine.
The Timing Belt’s Role
The belt transfers the rotation of the crankshaft via the crank timing gear to the camshaft gears. Most engines that use timing belts have overhead cams. As the crankshaft spins, the belt spins the cams at a 2:1 speed, meaning there’s one cam rotation for every two crank rotations. The belt ensures the cams stay in time with the crankshaft. If the camshaft timing is adjustable, it’s done through the cam gears.
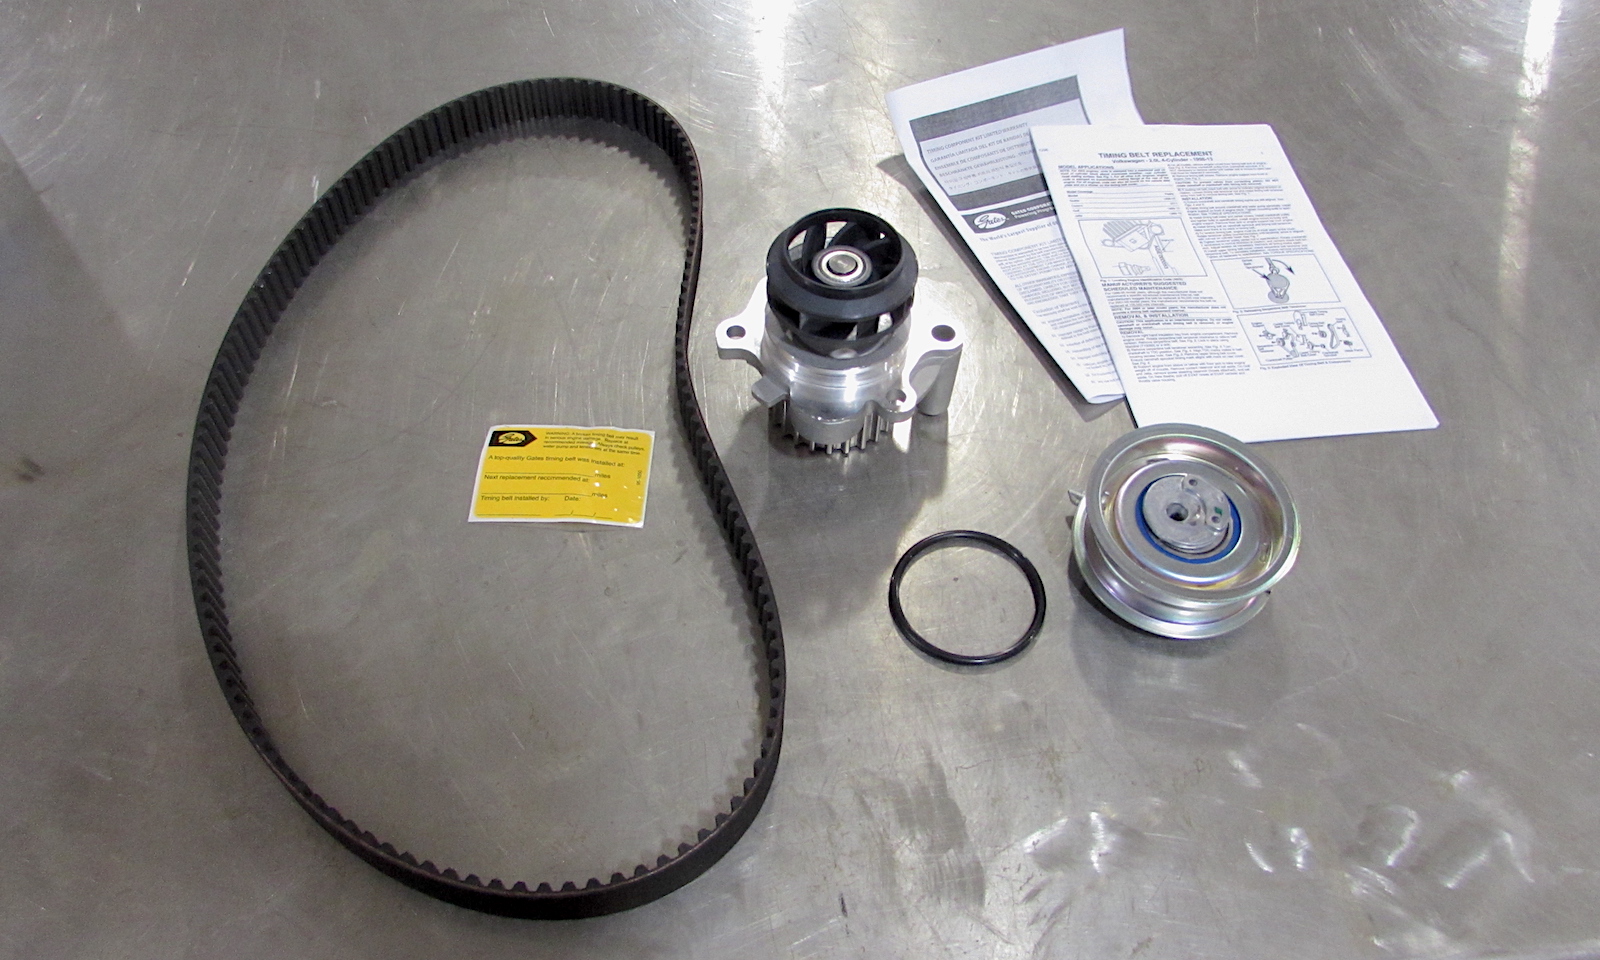
This is a timing belt kit for a Honda engine. It comes with a new belt, water pump, tensioner, and an O-ring gasket for the water pump.
There are two kinds of engines: interference and non-interference. In an interference engine, when the valves are open, the piston can touch the valve at top dead center (TDC). A non-interference engine is one where the valves can be fully open when the piston is at TDC.
Why does that matter? If the timing belt stretches, breaks, or jumps a cog in an interference engine, the piston will most likely hit valves, which will bend or break the valve head and can break the piston. This almost always results in a destroyed engine that requires a total rebuild or replacement. Non-interference engines do not damage themselves when the belt fails. Check your specific engine by make, model, and year, as most manufacturers use both engine styles.
How Often to Replace the Timing Belt
Most timing belts should be replaced every 60,000 to 100,000 miles. Check your owner’s manual to find the recommended change interval.
When changing the timing belt, most manufacturers recommend replacing the water pump simultaneously. Many timing belt kits come with a new water pump as well.
While most belts will last beyond the recommended replacement interval, they will show signs of aging. Look for cracking, frayed edges, and missing or damaged cogs. It can be difficult to get to the timing belt to look for signs, as some engines have it buried under the front covers, accessory drive, and valve covers. Other engines have removable access covers that pop off easily to check the belt.
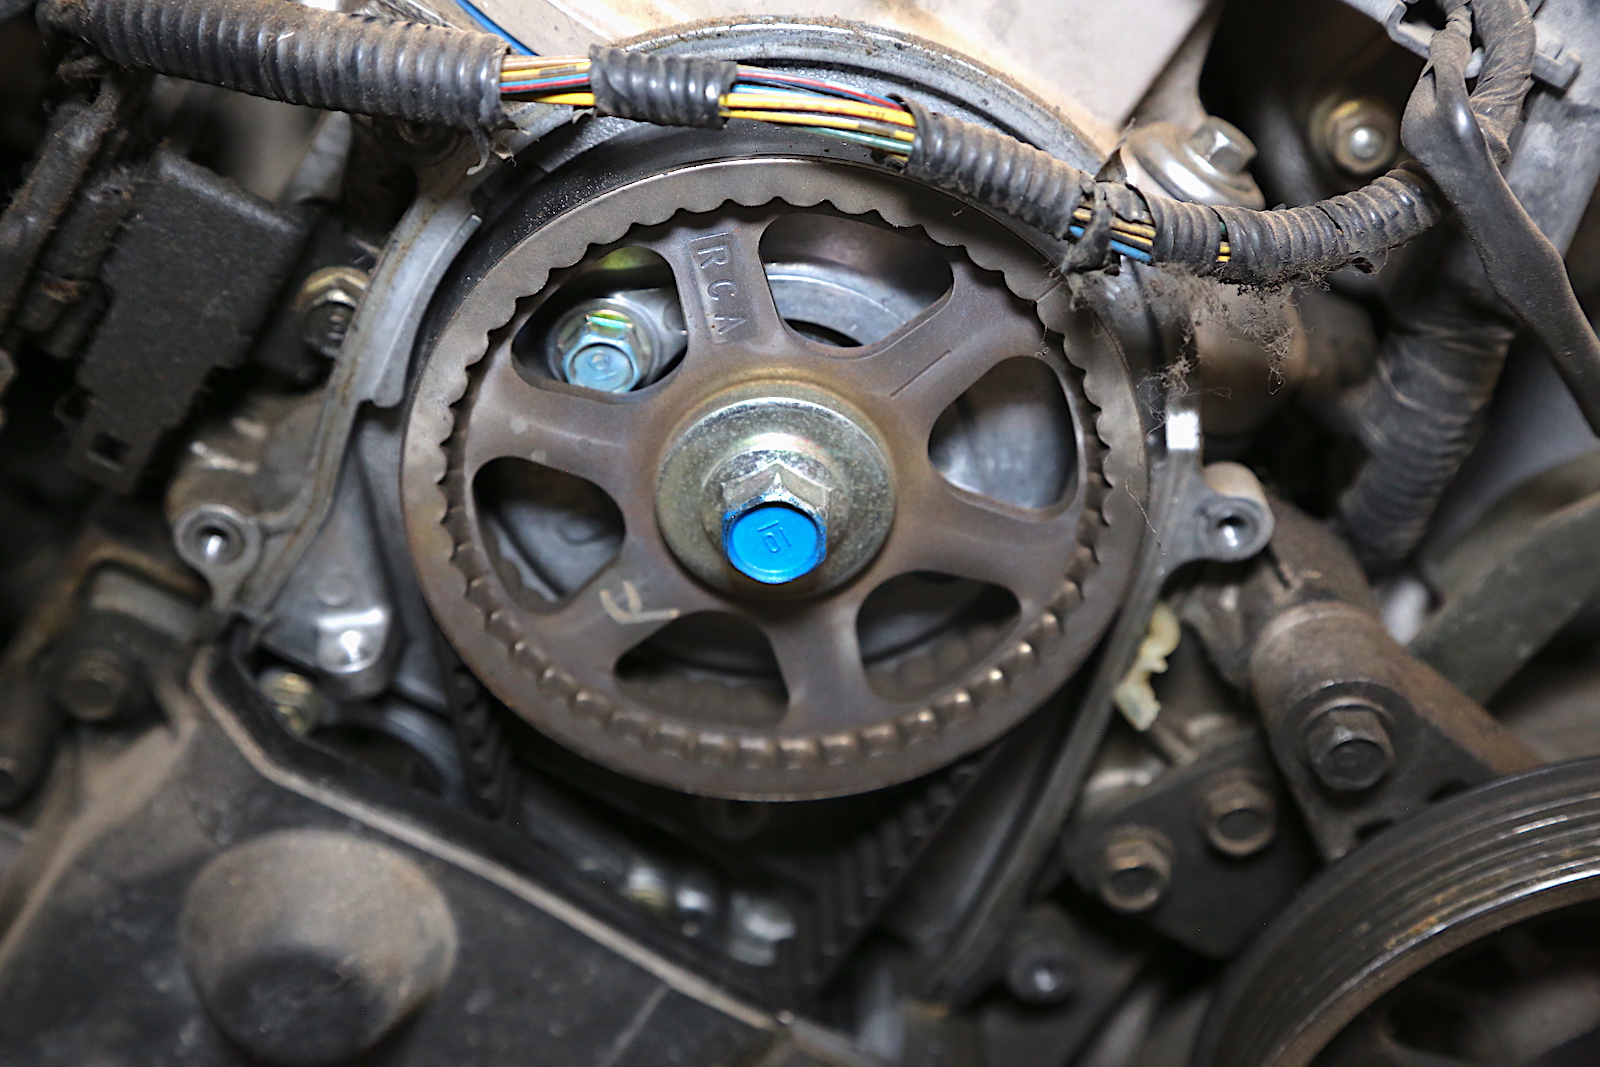
This Acura 3.2 V-6 timing gear has a hash mark (shown at 1 o’clock) that marks the TDC point. This is critical for a correct belt change. The mark IS NOT lined up with the mark on the head in this picture.
But a timing belt can always fail without any outward signs, making preventative maintenance the key to a long-lived engine. Changing the belt when you are at or near the recommended interval is the best bet.
Shop now for timing belt kitsOutside of physical signs on the belt, you may have some issues with the engine, such as misfiring, black smoke from the exhaust, difficult starts, and an illuminated check engine light.
Cost to Replace a Timing Belt
For most vehicles, replacement can cost $500 to $1,100 at a shop. If it’s difficult to access the engine or the belt, the service can run more than $2,000.
Timing belts are not expensive. For most applications, you can get a complete kit with a water pump, gaskets, tensioner, and belt for less than $200—or the belt alone for less than $100.
How to Replace a Timing Belt
Replacing a timing belt is a moderate-level repair job. The basic replacement is not difficult, just time-consuming. But the peril is high, as you can easily get the timing of the cams wrong if you do not start with the engine in the correct position or if you move the cams during the process.
The belt itself has cogs like these. If the cogs are missing, chunked out, or the belt has cracks or frayed edges, it needs to be replaced immediately.
Every engine is different, but there are usually marks on the cam gears for the TDC position. These marks are either noted to point to a specific mark on the cylinder head(s) or to a certain clocking (12 o’clock, 3 o’clock, etc.). If you just pull the covers, remove the belt, and put the new one on without checking the timing, you can cause significant damage.
When changing a timing belt, you should have all the required parts gathered and ready to install.
- Disconnect the battery negative terminal and locate the timing belt covers.
- Remove the serpentine accessory drive belt and any components to access the belt. Reference the repair manual for your vehicle to do the job correctly.
- Remove the timing cover(s), which may be in one piece or multiple pieces.
- Rotate the engine until the crankshaft and timing gears are at the correct TDC point as referenced in your repair manual. This is a critical step. If possible, lock the timing gears so that they cannot move.
- Remove the tensioner(s), then remove the belt.
- Replace the belt immediately, ensuring the gears and crank do not move even a little.
- Install new tensioners to tighten the belt.
- Reinstall the covers, accessories, and serpentine belt. If the kit came with a water pump, replace it as well.
- Connect the battery negative terminal.
These are the basic steps to replacing a timing belt. Your engine may require additional steps or parts. When you follow the guidelines and pay attention to the details, you should be able to change your timing belt in an afternoon.
Be sure to note the mileage on the vehicle when you replace the belt to know when you need to change it the next time.
Shop now for timing belts