Replacing a car windshield can cost $500 or more. Or, you can stop a little chip from becoming a big crack. Paying for a chip repair at a shop could be more than $100, but you can do it yourself for less than $30.
Most windshield repair kits provide what you need to repair up to four chips, depending on their size. Of course, small chips are easier to repair than larger ones. Most kits work for chips smaller than 1.25 inches in diameter. Kits claiming to repair six-inch cracks might not be as effective.
We recommend doing this job in a garage or carport. It’s okay to do this repair in the sun. But delay the project if rain is in the forecast. You don’t want to ruin the effort by getting the repair wet too soon.
Tips and Tricks
- The repair process is for small chips—not for large cracks. Don’t try to repair damage in the driver’s line of sight. The chip, even when repaired, might be slightly visible.
- Repairing a windshield chip requires a wait time of 30 minutes to one hour for the fix to cure.
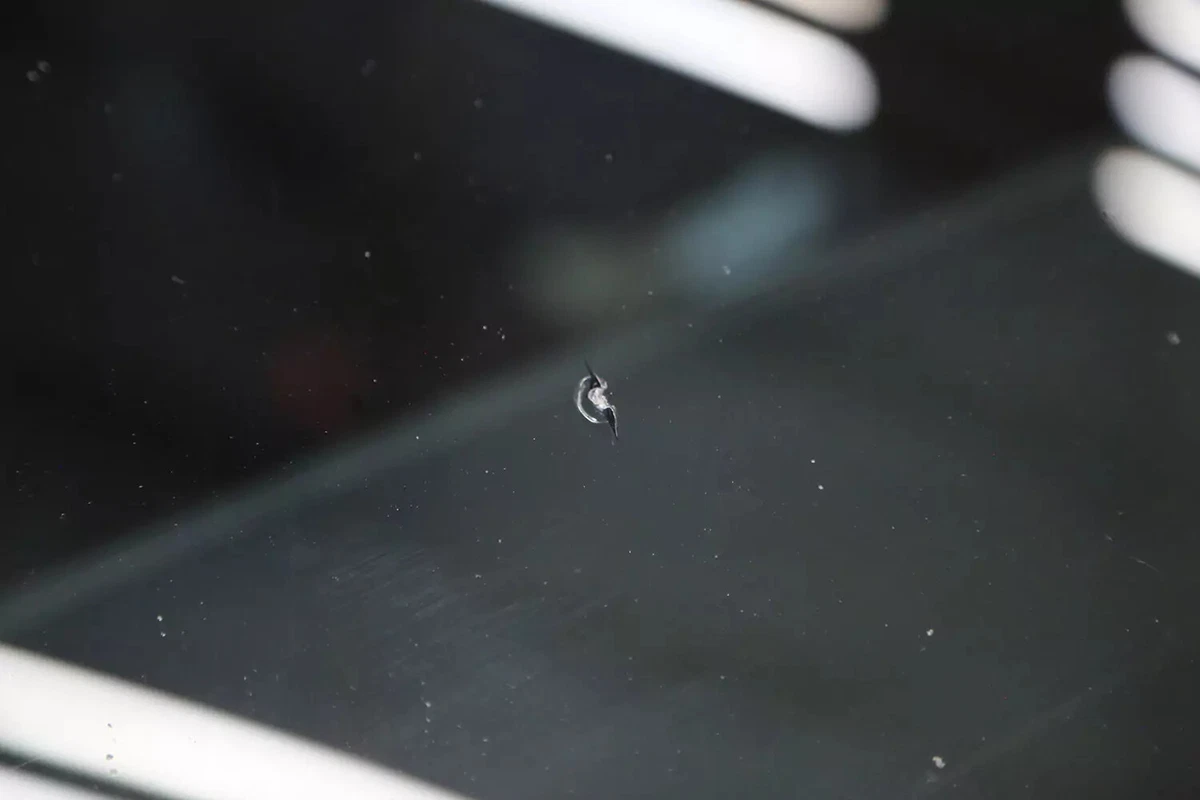
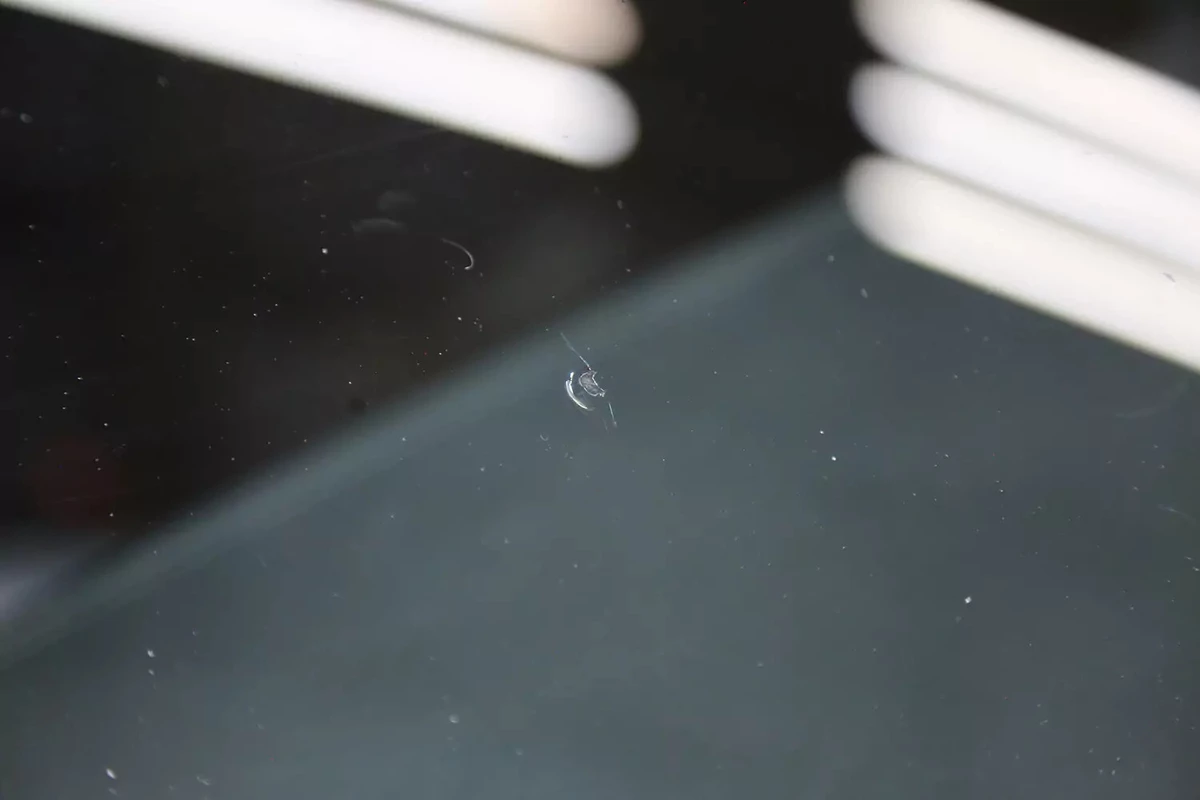
Locate the windshield chip. Most chips smaller than a dime are easily fixed in one or two applications. Large breaks may require more effort.

Use rubbing alcohol and a clean towel to clean the glass around the chip.
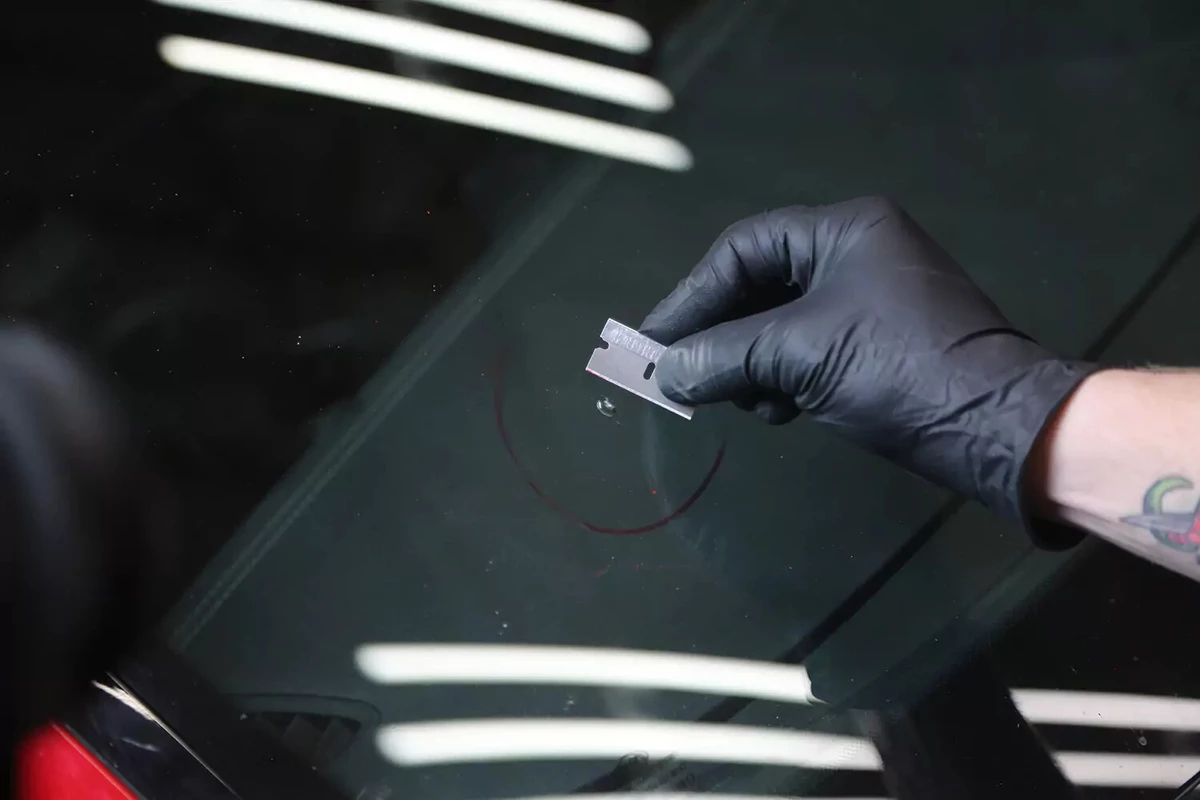
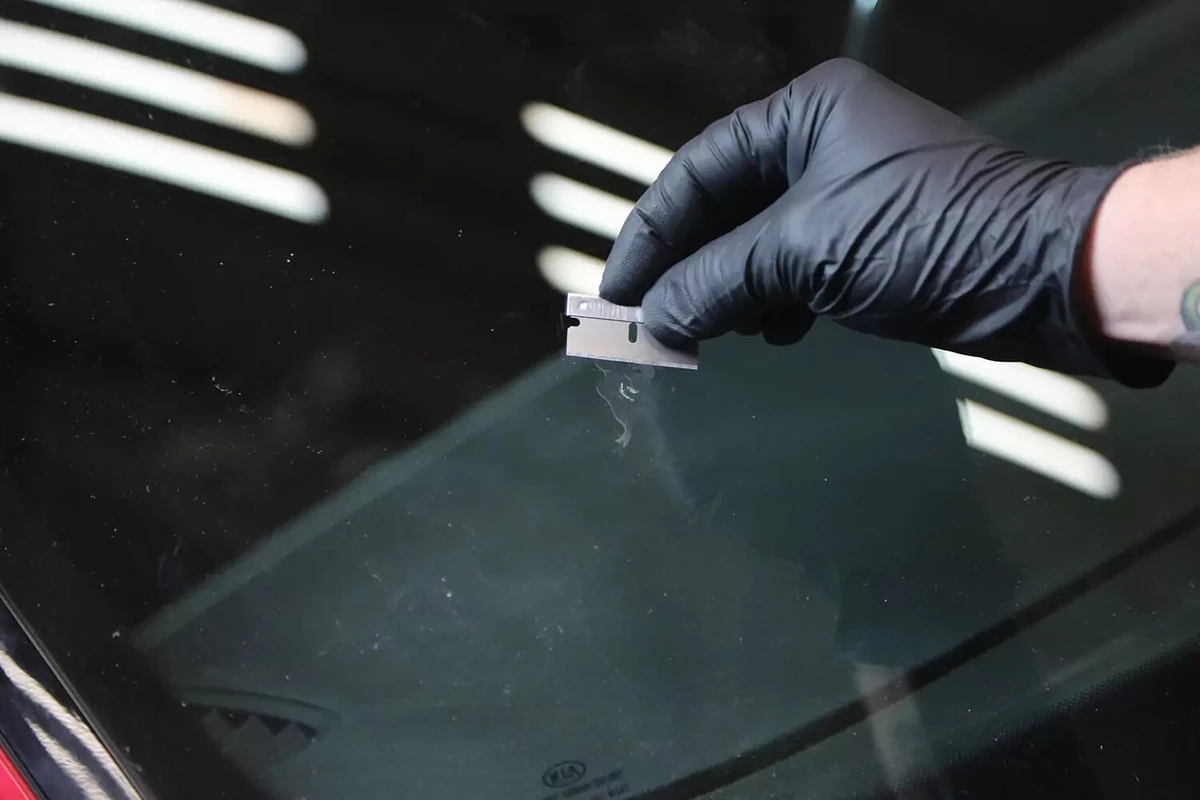
Using the supplied razor blade, scrape the glass to remove any debris or grime. The blade should glide over the chip. If it gets hung up, there are loose pieces of glass that must be removed.
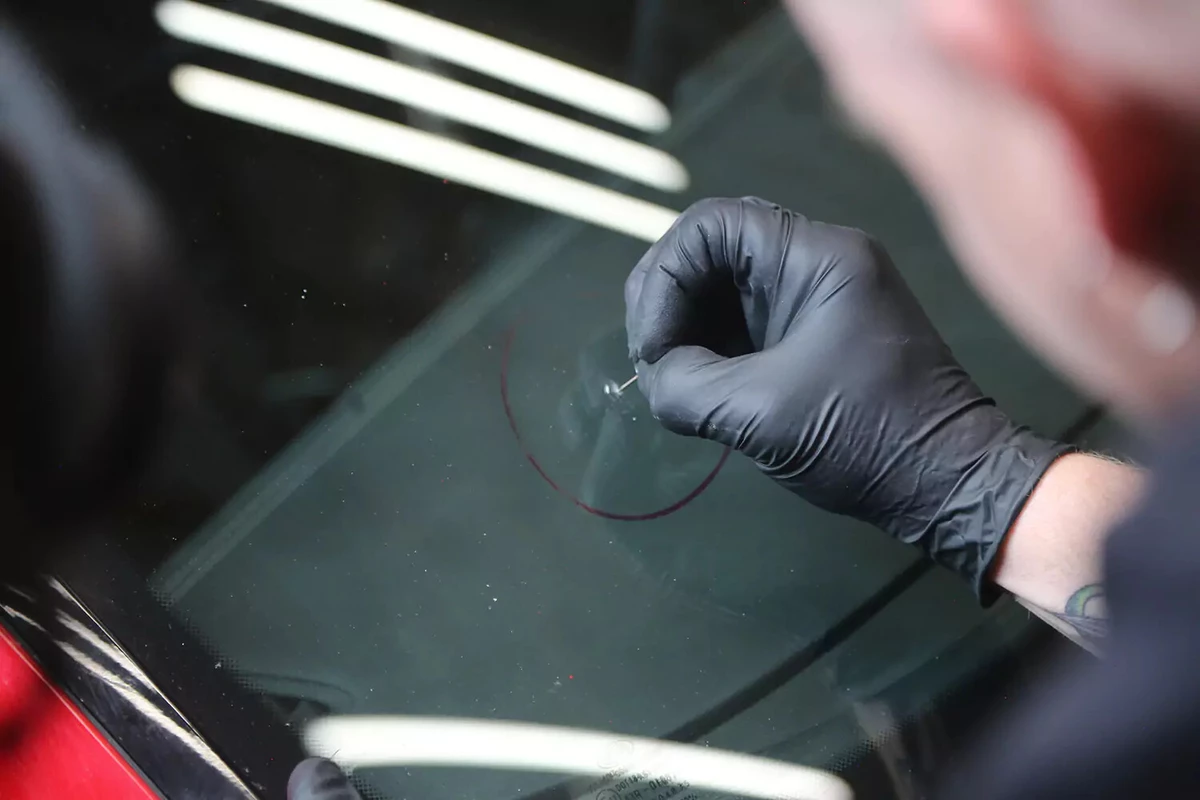
The kit should come with a push-pin tack (like what you use on a corkboard). This is used to clean out the interior of the chip. Remove bits of glass dust. Carefully dig in and around the chip to clean it.
Wipe away any glass dust from the surrounding area.
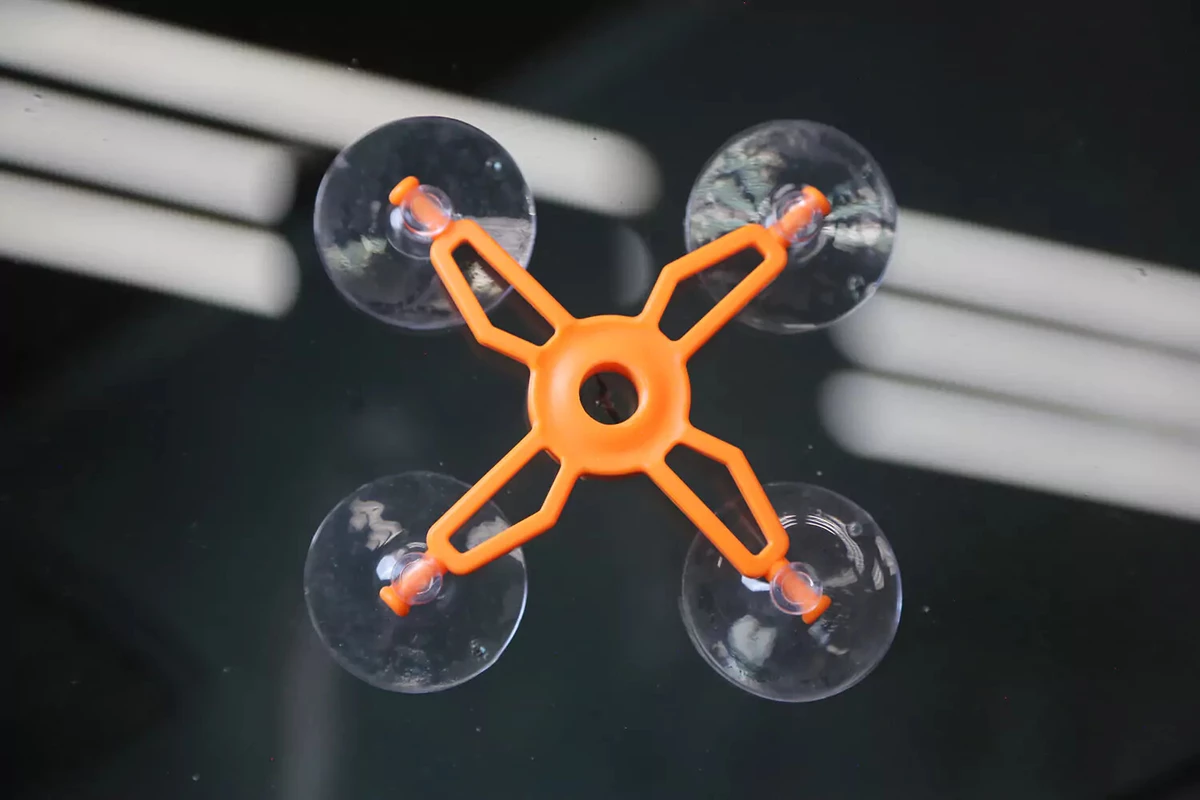
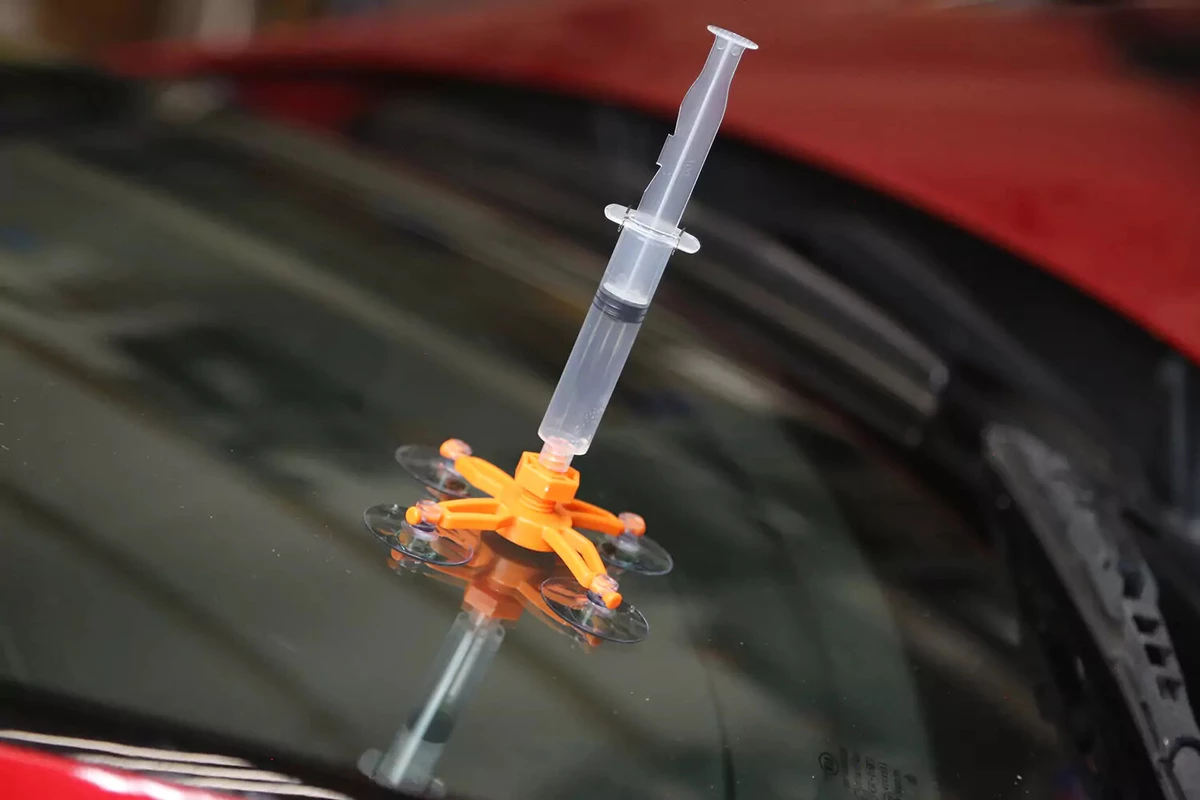
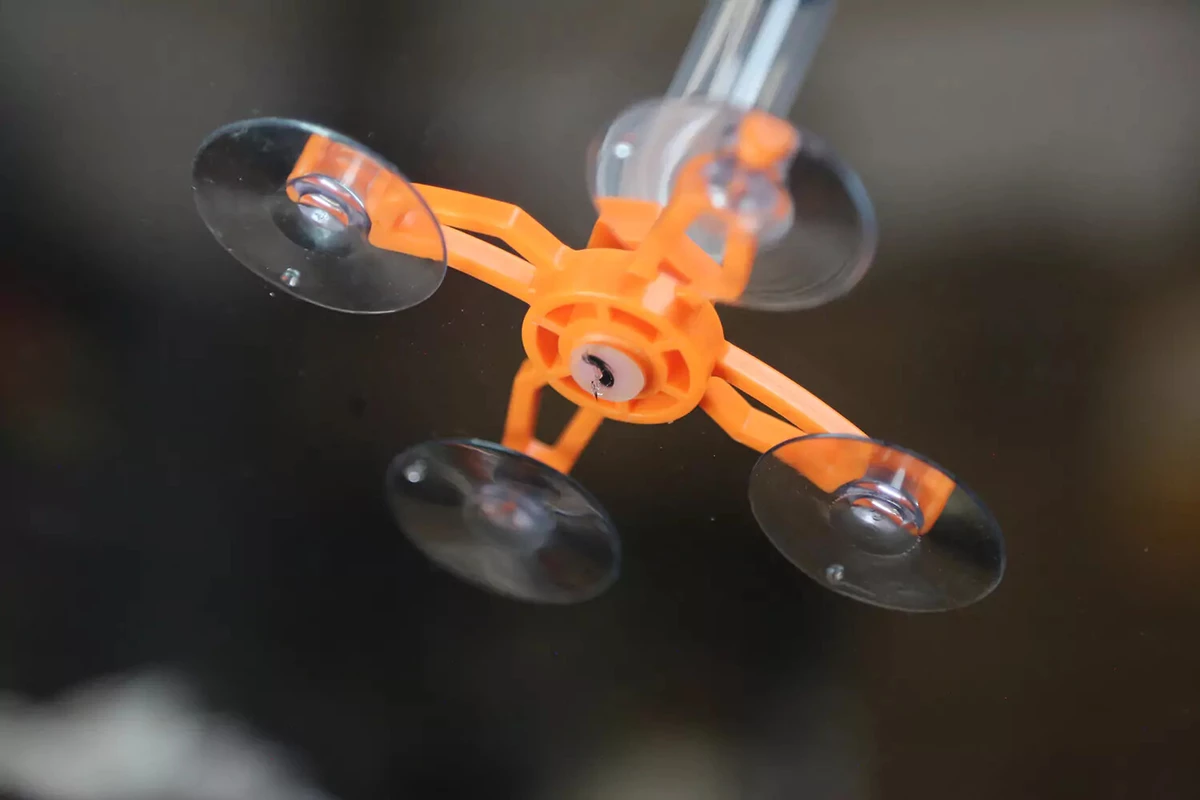
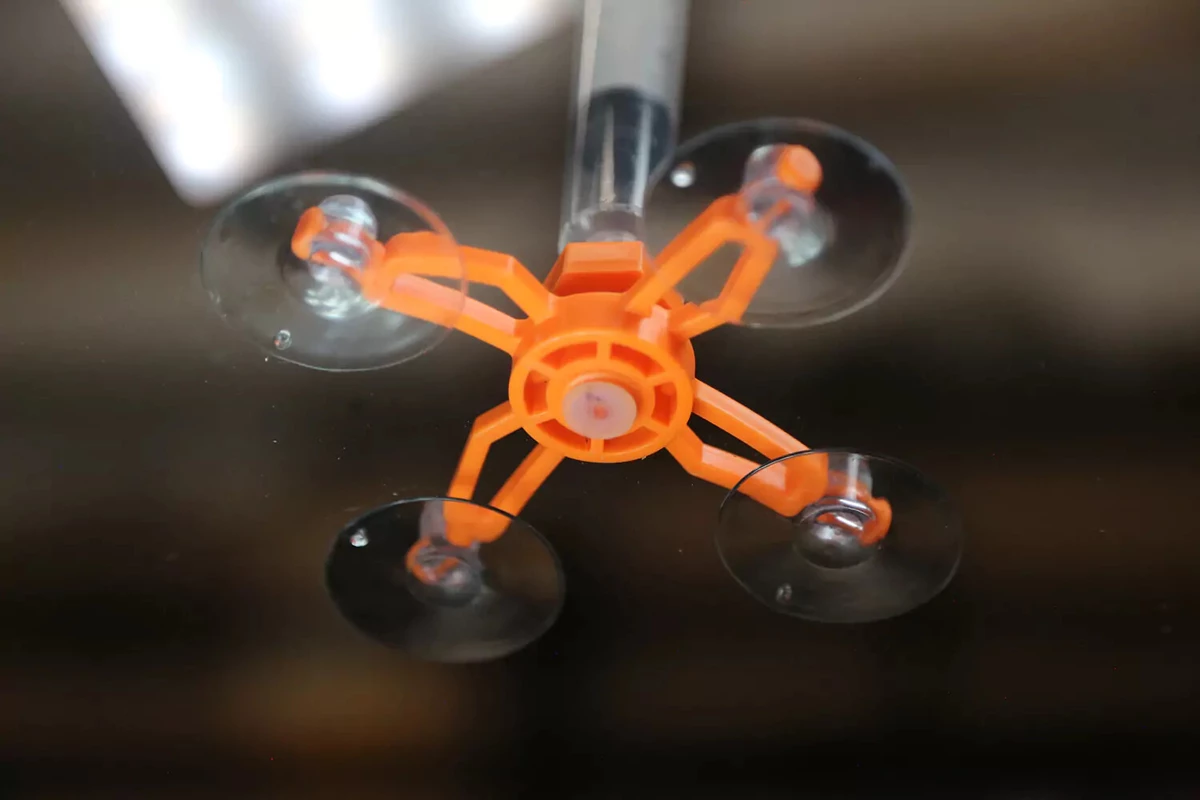
Place the repair jig over the chip’s center. You might need to wet the suction cups to get a good seal.
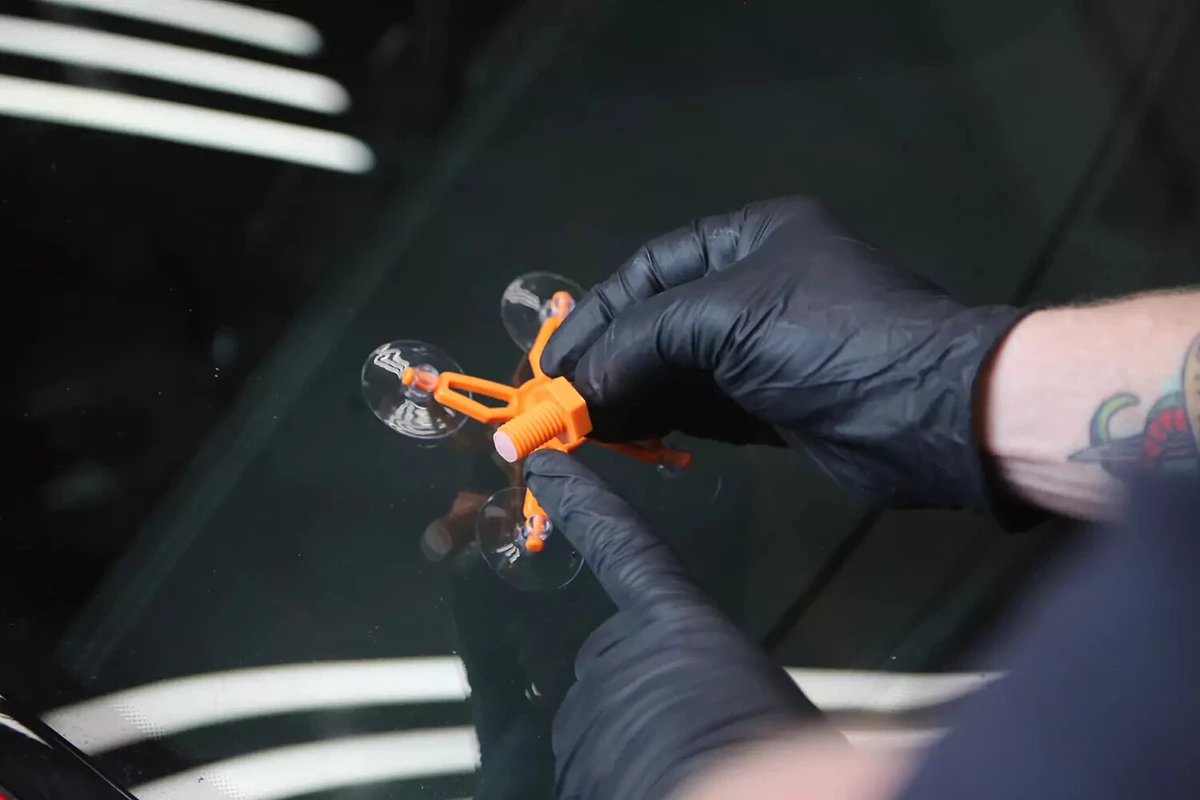
Most kits come with a thread-in repair head. Position the soft tip of the repair tool against the glass to create a seal.
Attach the fully closed syringe into the repair jig.
This stage is to pull any moisture out of the chip.
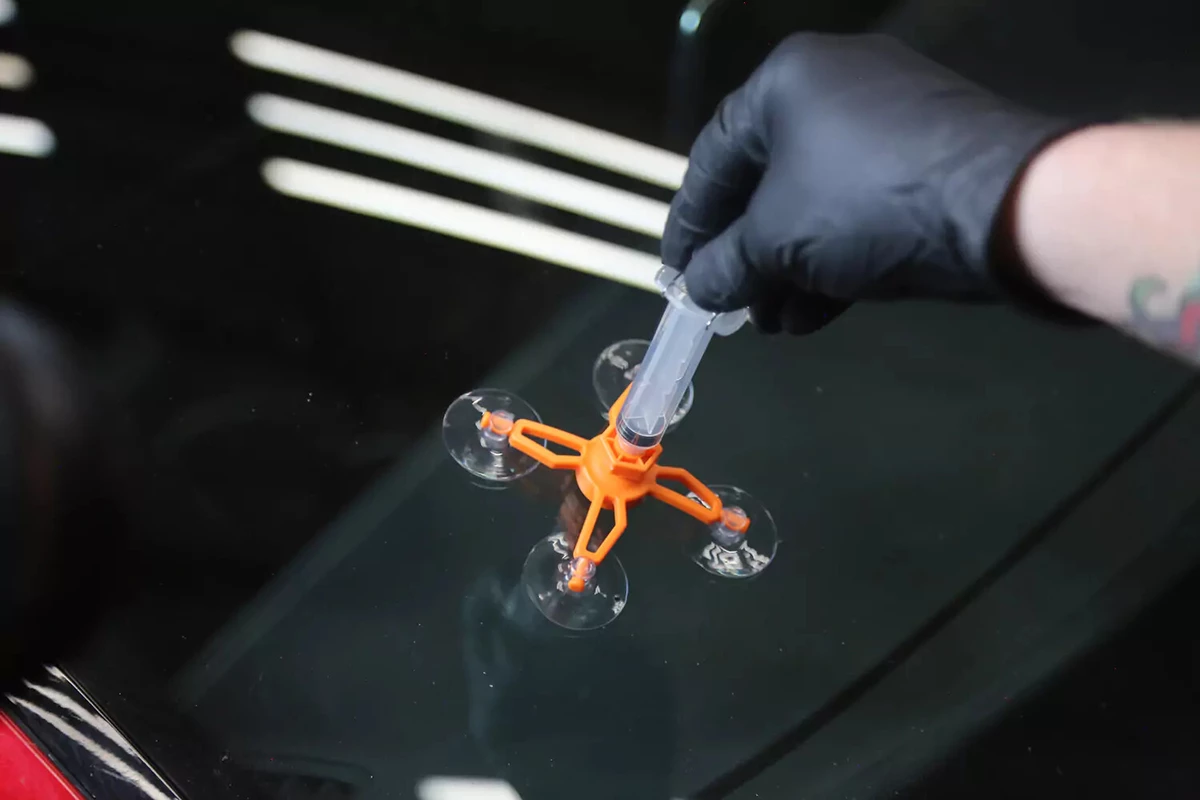
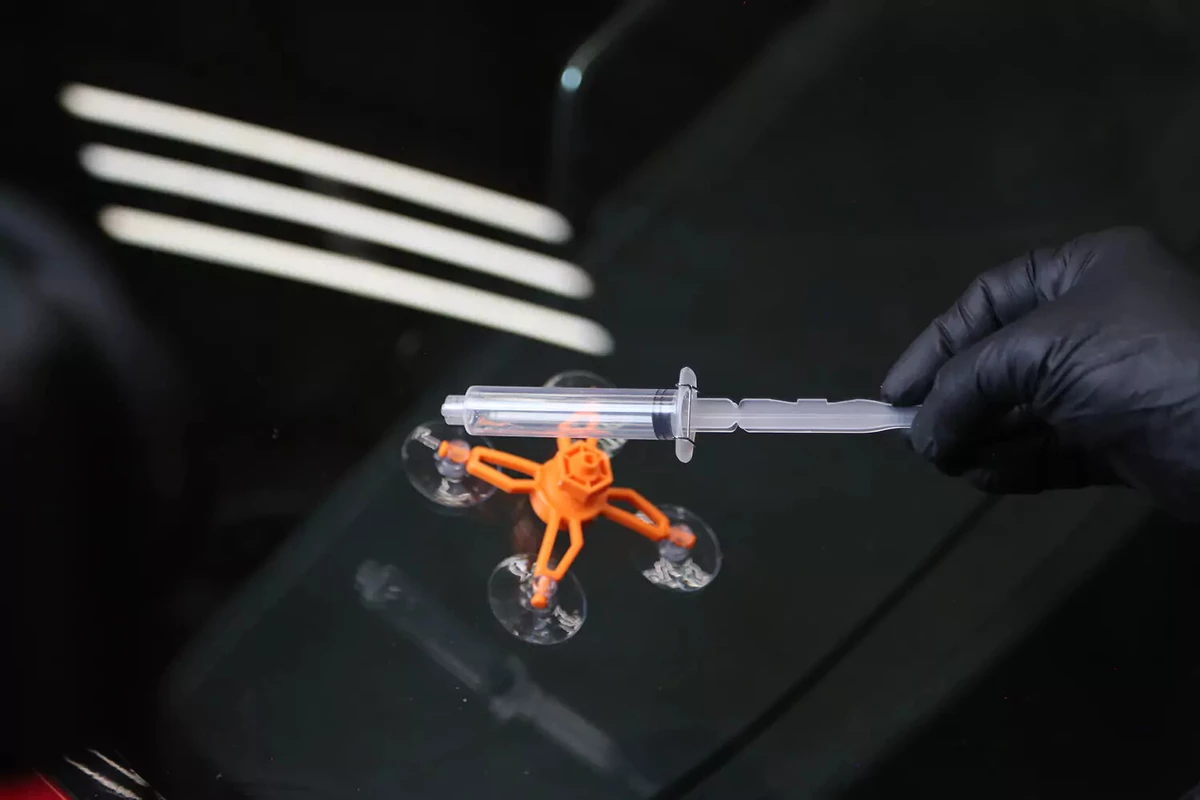
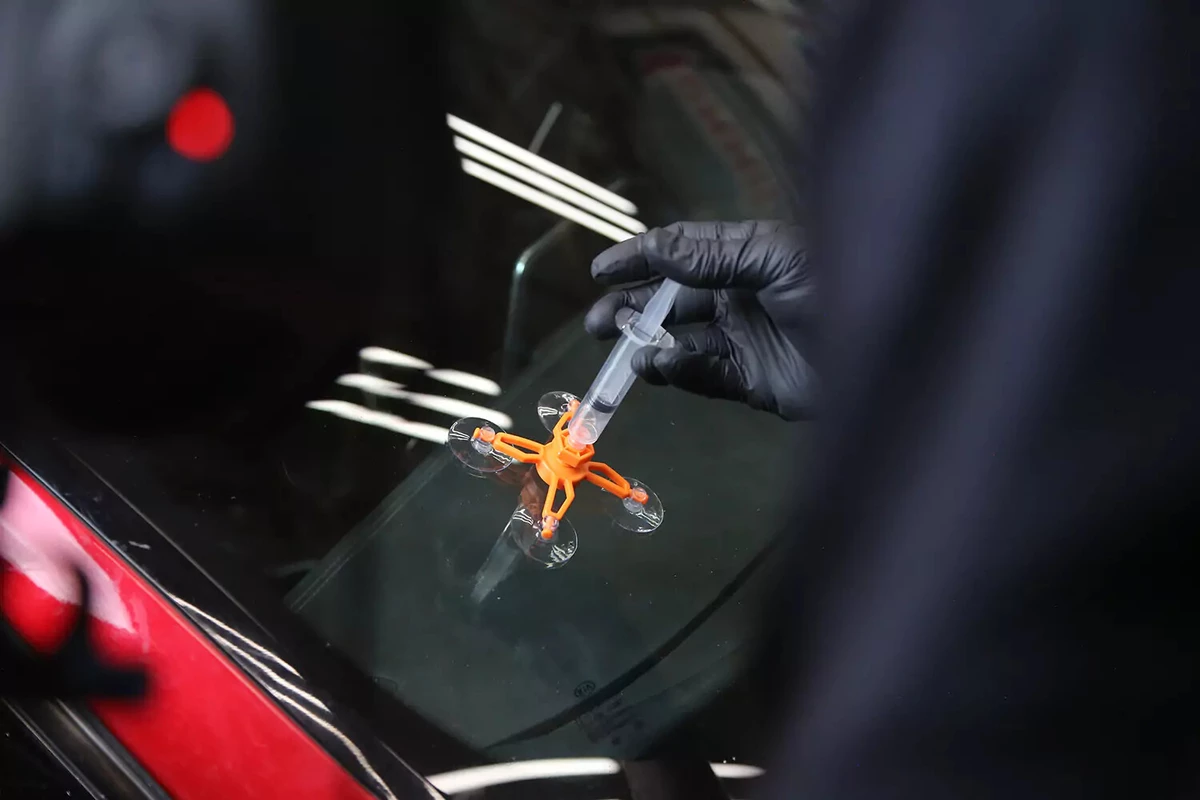
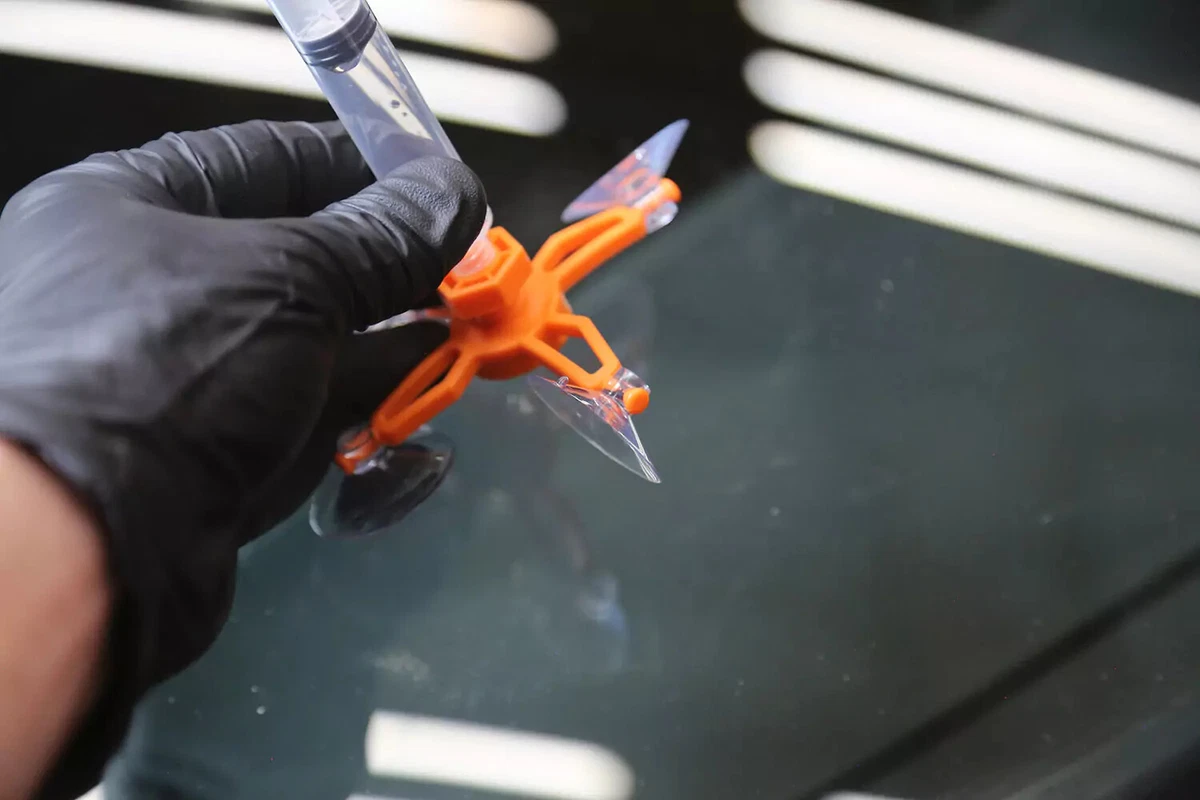
Pull the syringe plunger all the way back and lock it in place with an attached spring clip. You might need to rotate the plunger to align the notches in the stem.
You should feel the plunger fight when pulling it back. That means the jig is sealed. If the plug slides back easily and stays in place when you release it, you don’t have a good seal. Try again.
Allow the plunger to hold the vacuum for about 10 minutes.
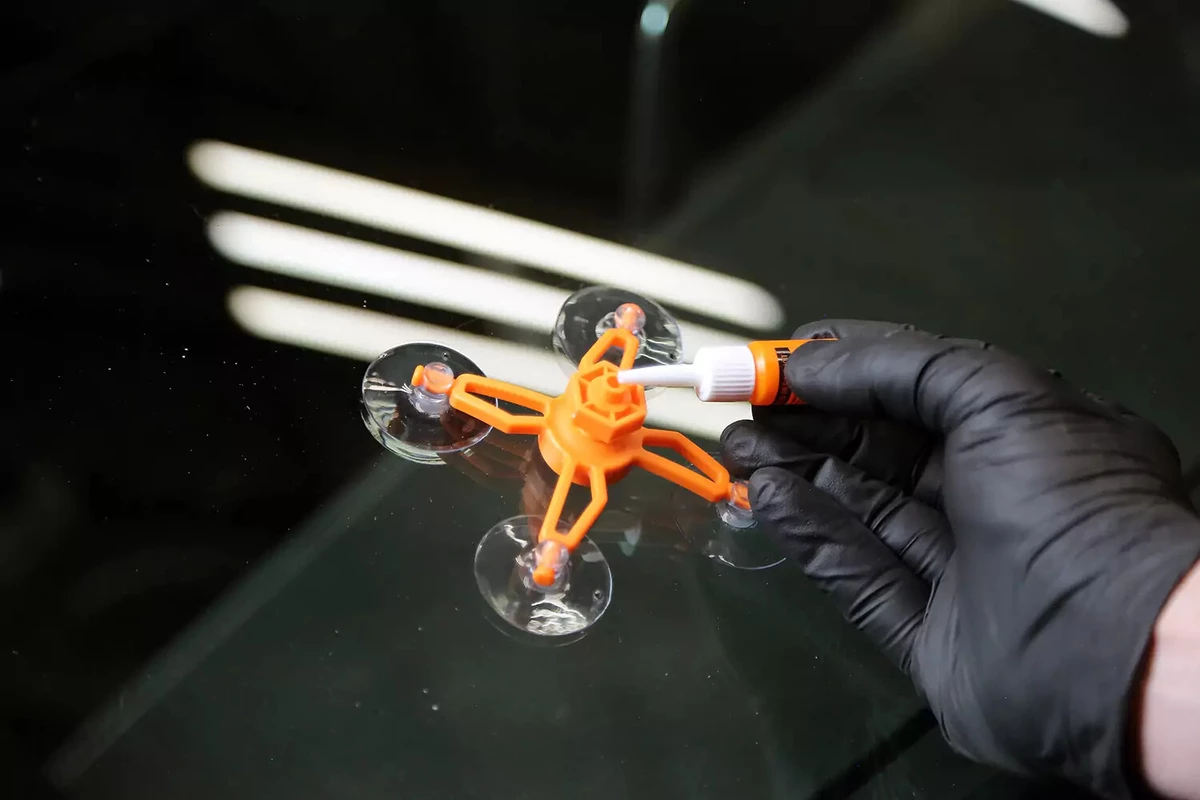
After the vacuum time has elapsed, remove the syringe and add a few drops of the liquid. The exact amount depends on the chip’s size and the kit. We used four drops in total for the repair on our demo vehicle.
With the repair liquid in the jig, reattach the syringe (with the plunger pushed in all the way).
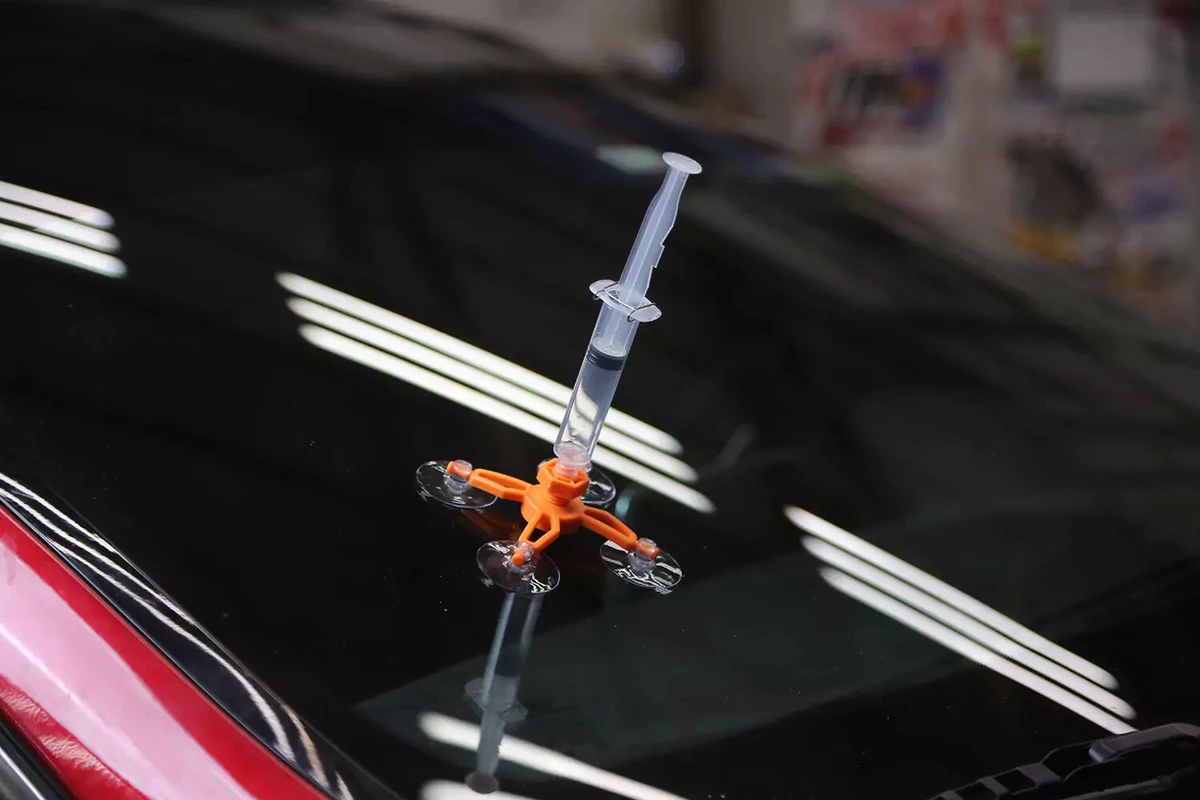
Pull the plunger up to the top notch and leave it there for three to five minutes.
While the vacuum is pulling air out of the chip, look at the repair from inside the vehicle. You should not see any bubbles inside the chipped area.
If you see bubbles, tighten the jig repair head.
Wait for three minutes. Then, release the vacuum and remove the syringe. Pull the plunger all the way to the top without removing it from the base.
Place the syringe back into the jig and press the plunger down to the very last notch on the plunger stem. Lock the plunger in this position to pressurize the resin into the chip.
Set a timer for three to five minutes.
Look at the repair from the inside. Notice that the chip is nearly invisible? That means the liquid has been pushed into all of the areas of the chip. That’s good.
After the timer goes off, remove the repair jig.
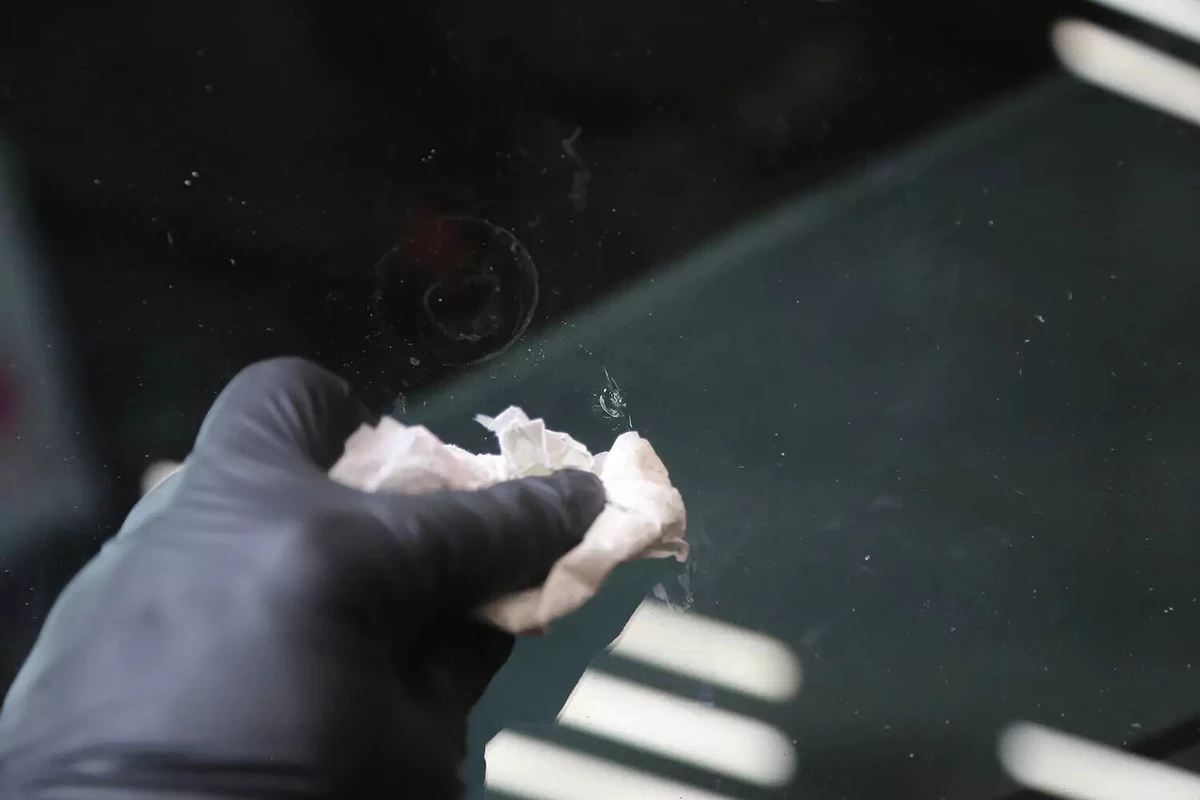
The repair liquid has not set yet. Some excess liquid may run down the glass. Wipe it away with a clean towel.

A protective cover slip is supplied with most kits. Hold it in one hand, and with the other hand add one drop of liquid to the top of the repair.

After applying the drop to the top, quickly place the protective slipcover on the repaired area.
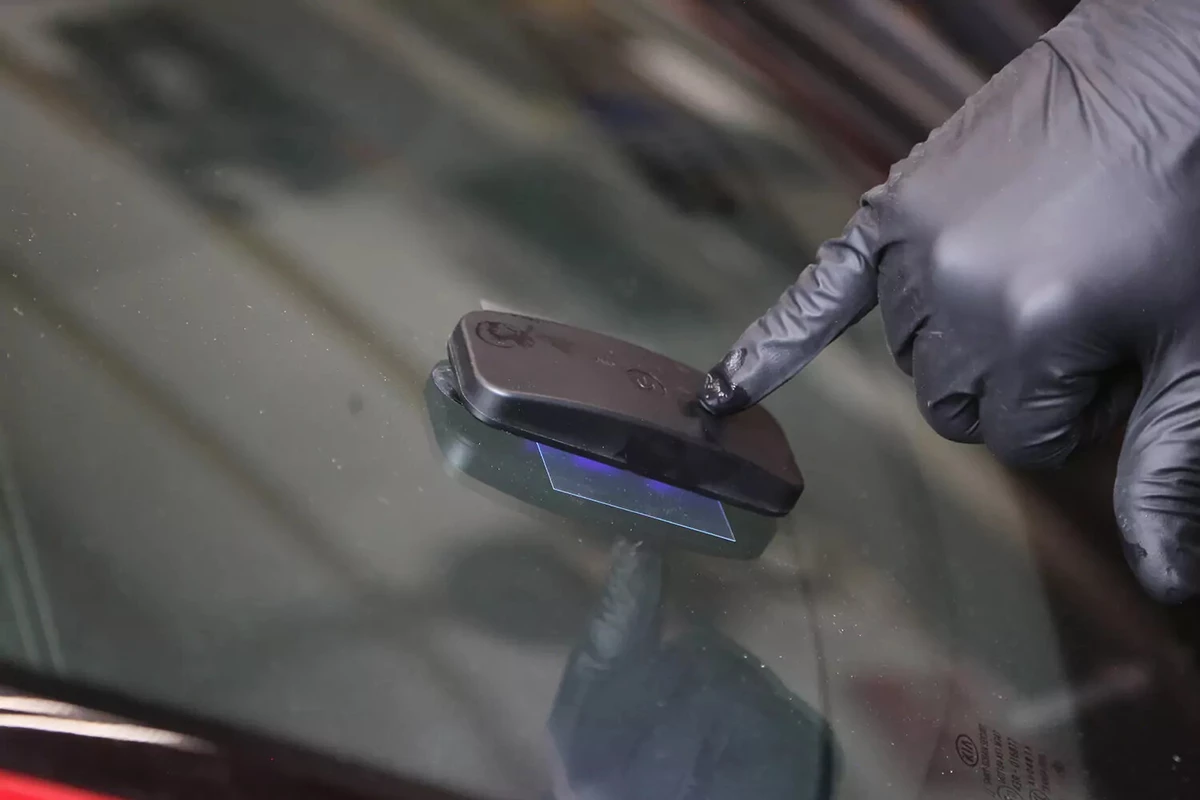
If your kit came with a UV curing light, attach it to the windshield over the repair. Turn it on. Let the light sit over the repair for at least five minutes. Verify the recommended curing time suggested with the kit instructions.
UV lights that come with these kits usually have two- and four-minute settings and automatically turn off. Check the repair after the light turns off.
If you don’t have UV lights, move the car into the sunlight. The time needed to cure depends on the specific resin. It could be as quick as 15 minutes or might take an hour.
Lift the cover slip. If the repair is not solid, put the cover back down and use the UV light or sunshine again until it hardens.
Do not look directly at the UV lights, which can damage your eyes.
The repair will have excess material on the surrounding glass. Use the supplied razor blade to carefully scrape the excess off. It should peel off like a thin film. You might need to apply pressure. Be careful as you glide the blade over the chip.
If you gouge the repair, don’t worry. Go back to Step 17 and repeat. A second application should improve most visible repairs.
The final step is to clean the glass again. The repair is now finished.
You may see a slight flaw in the glass, but the chip and related cracks should be sealed. The cracks should no longer creep over time.
Our camera picks up more of the chip that you can see in person. From inside the vehicle, you can’t see the repair at all.
About the author

Share your feedback
This article is meant to provide general guidance only. Automotive maintenance, repair, upgrade, and installation may depend on vehicle-specifics such as make and model. Always consult your owner's manual, repair guide for specific information for your particular vehicle and consider a licensed auto-care professional's help as well, particularly for advance repairs.
Recommended for you
Find answers and inspiration
Buying the Right Windshield Washer Fluid
6 min read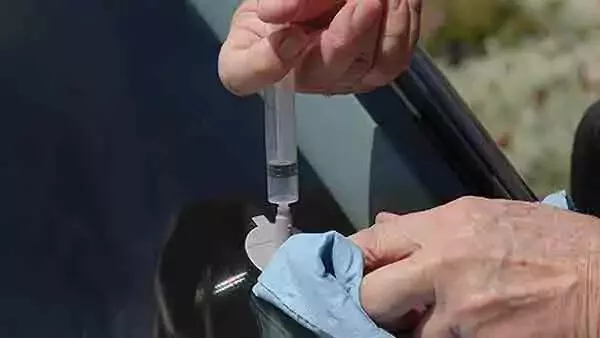
How to Buy the Best Windshield Chip Repair Kit
5 min read
How to Change Windshield Wipers
3 min read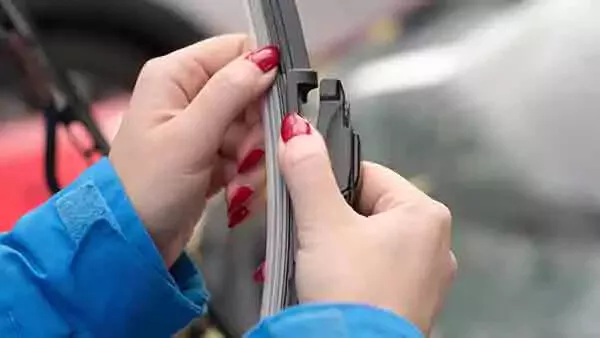
What You Should Know About Windshield Wipers
4 min read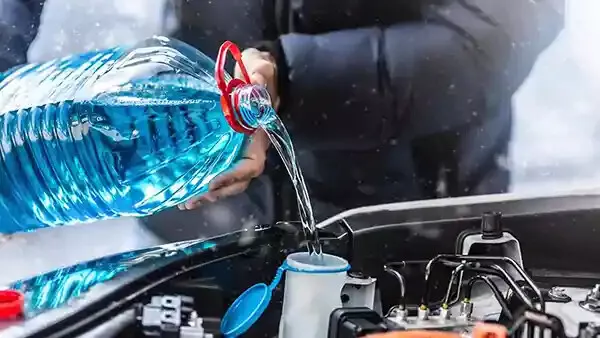
Essential Info About Windshield Washer Fluid
6 min read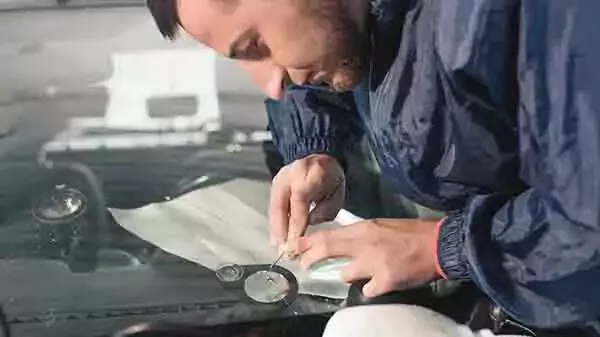
An Introduction to Fixing a Chipped Windshield
4 min read
How to Refill Windshield Washer Fluid
4 min read
Explore more projects

How to Replace Brake Fluid
1 to 2 hours
Beginner
10 min read

How to Replace an Ignition Coil
Less than 30 minutes
Beginner
6 min read

How to Replace a Radiator Hose
Less than 30 minutes
Beginner
5 min read

How to Replace Brake Rotors
1 to 2 hours
Beginner
7 min read

How to Replace a Serpentine Belt Tensioner
Less than 30 minutes
Beginner
4 min read

How to Replace a Drive Belt
Less than 30 minutes
Beginner
5 min read

How to Rotate Your Tires
30 to 60 minutes
Beginner
5 min read
How to Refill Windshield Washer Fluid
Less than 30 minutes
Beginner
4 min read

How to Replace an Oxygen Sensor
30 to 60 minutes
Beginner
5 min read

How To Replace Differential Fluid
Less than 30 minutes
Beginner
8 min read

How to Replace Sway Bar End Links and Bushings
30 to 60 minutes
Beginner
6 min read

How to Replace Transmission Fluid and Filter
1 to 2 hours
Beginner
11 min read

How to Replace a Cabin Air Filter
Less than 30 minutes
Beginner
5 min read

How to Change Disc Brake Pads
30 to 60 minutes
Beginner
8 min read

How to Replace a Valve Cover Gasket
Less than 30 minutes
Beginner
7 min read
How to Change Windshield Wipers
Less than 30 minutes
Beginner
3 min read

How to Replace an Engine Air Filter
Less than 30 minutes
Beginner
5 min read

How to Clean Fuel Injectors
1 to 2 hours
Beginner
8 min read

How to Replace Shock Absorbers
30 to 60 minutes
Beginner
8 min read

How to Change a Car Battery
Less than 30 minutes
Beginner
6 min read
Automation How to Change a Car Battery
Less than 30 minutes
Beginner
6 min read

How to Replace a Mass Air Flow (MAF) Sensor
Less than 30 minutes
Beginner
7 min read

How to Replace a Clutch Master Cylinder
1 to 2 hours
Beginner
11 min read

How to Flush and Change Engine Coolant
30 to 60 minutes
Beginner
6 min read

How to Replace a Distributor Cap and Rotor
30 to 60 minutes
Beginner
5 min read

How to Check Tire Pressure and Change a Tire
Less than 30 minutes
Beginner
9 min read

How to Replace a Fuel Filter
30 to 60 minutes
Beginner
7 min read

How to Replace a PCV Valve
30 to 60 minutes
Beginner
6 min read

How to Replace a Brake Caliper
1 to 2 hours
Beginner
7 min read

How to Replace an Idler Pulley
30 to 60 minutes
Beginner
4 min read

How to Change a Headlight Bulb
Less than 30 minutes
Beginner
6 min read

How to Replace an Exhaust Gasket
1 to 2 hours
Beginner
9 min read

How to Replace a Throttle Body
30 to 60 minutes
Beginner
6 min read

How to Change Oil in a Car
Less than 30 minutes
Beginner
8 min read

How to Replace an Alternator
1 to 2 hours
Beginner
11 min read

How to Replace an EGR Valve
30 to 60 minutes
Beginner
5 min read

How to Jump Start a Car
Less than 30 minutes
Beginner
9 min read