Your vehicle’s front suspension is connected to the wheel hub assembly via a ball joint. This joint controls the suspension’s movement and assists with smooth steering. Most ball joints last 70,000 to 150,000 miles with proper maintenance, which includes regular greasing and inspection for damaged boots. Without that maintenance, they can fail much sooner.
If a ball joint completely fails, your car could be undrivable. Fortunately, they don’t typically fail overnight. There is usually a long lead-up.
Symptoms of a bad ball joint include loose steering, uneven tire wear, vibrations, and popping or knocking sounds—especially when turning. Take these symptoms seriously and respond before a failing ball joint separates.
Is it hard to replace ball joints?
Replacing ball joints is considered an advanced do-it-yourself mechanic job that usually takes two to five hours. It can be challenging to remove the old ball joints. Take your time, and pay attention to safety.
Front-end alignment is required whenever you remove or replace a steering or major suspension component. This procedure can only be done at an alignment shop. After completing this job, don’t drive the vehicle until you align the front end and steering. It’s safe to drive short distances to the alignment shop.
Tips and tricks for DIY ball joint replacement
- You do not have to replace all the ball joints at once. However, if one fails, the others are likely to follow.
- Many modern vehicles use non-replaceable ball joints. In that case, you replace the entire control arm, including the ball joint. This guide focuses on replaceable joints.
- This project can be done in your garage with the right tools, but it is more dangerous on vehicles with open-coil springs. Cars and trucks with torsion-bar or MacPherson strut suspensions do not spring apart when the ball joints are separated from the spindle/steering knuckle. Open-coil springs can dramatically spring apart.
- For open coils, you can use three methods to release the tension on the spring: an internal spring compressor, an external compressor, or the floor-jack method.
- Internal/external compressors can be used to bind the coil spring in its collapsed state to facilitate removal. We advise against using the floor-jack method, which allows the spring to shoot out. A compressor is safer.
- Depending on the age and make of your vehicle, the ball joints may be bolt-in, press-in, or riveted in place. Our demo vehicle has press-in lowers and riveted uppers. Grind or chisel the heads off the rivets, then drill and punch out the remainder with a hammer and punch. The replacements bolt in.
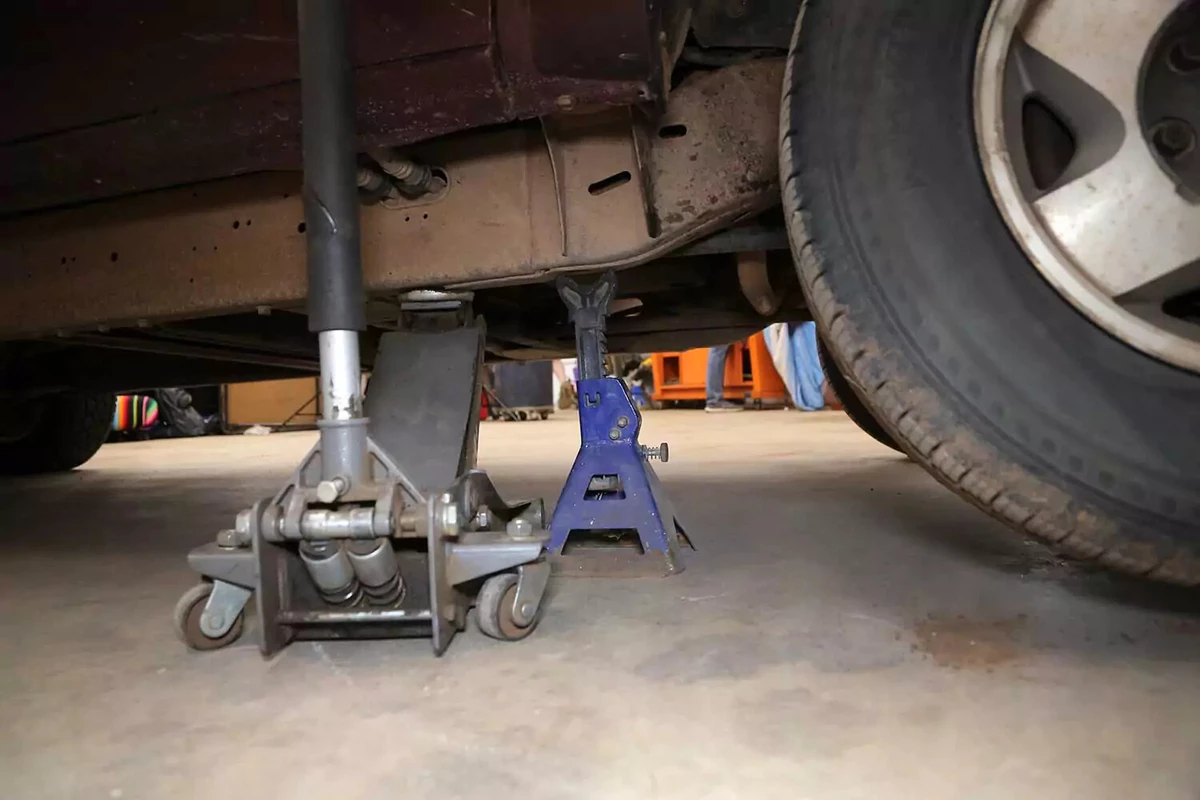
This project requires working safely under the vehicle. You will need a floor jack, and jack stands, ramps, or wheel cribs to support the vehicle.
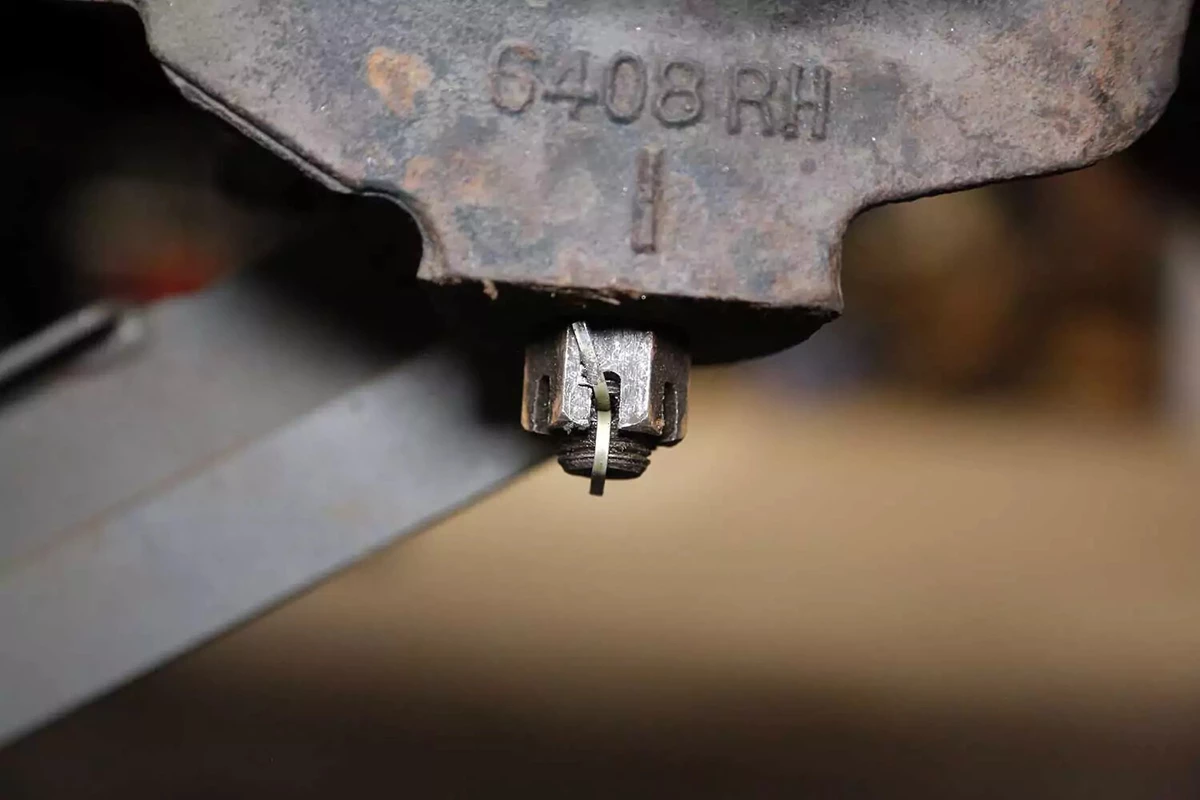
Locate the factory jacking points just behind the front wheels or just in front of the rear wheels. The jacking point is a metal section with two V notches about two inches apart. Check your owner’s manual to confirm the lift location.
Never use jack stands on dirt, gravel, or asphalt. If you do not have access to a concrete work surface, use wheel cribs, solid-base ramps, or wide-base wood supports to support the vehicle. Never use cinder blocks or bricks as supports.
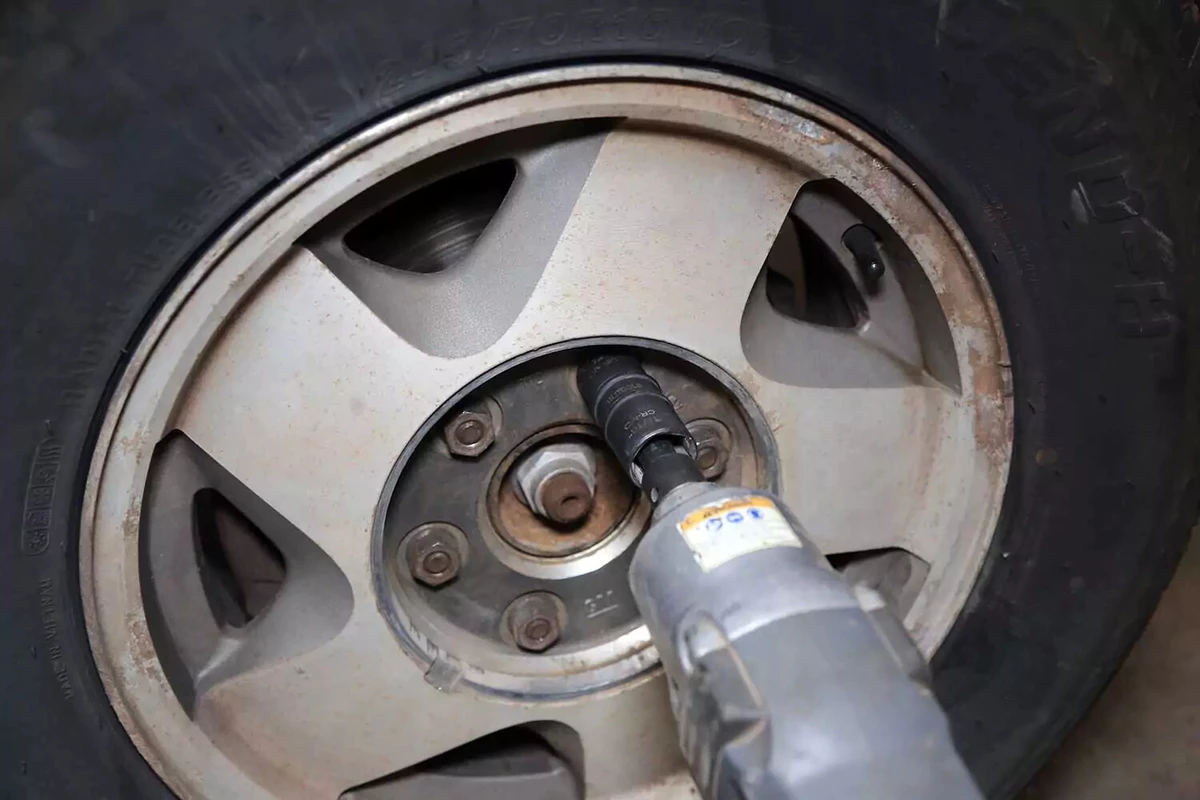
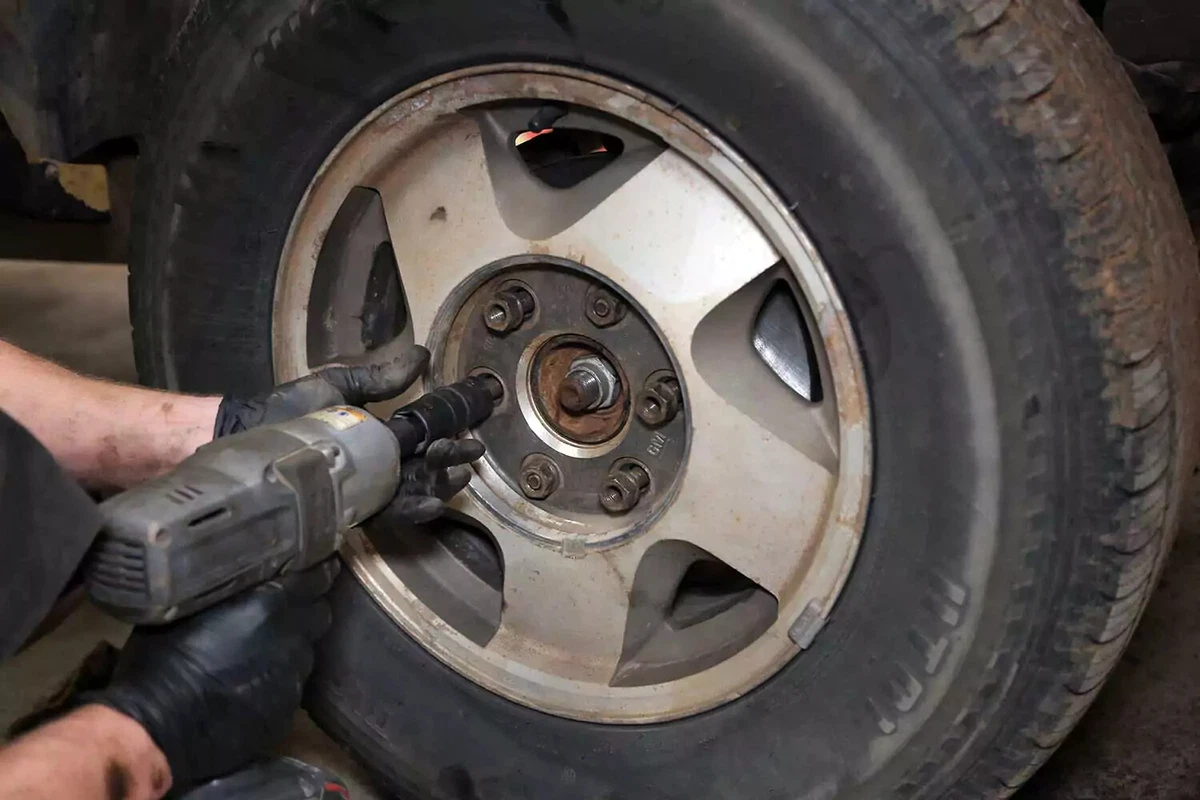
Use an impact wrench to remove the lug nuts from the wheel. Alternatively, you can use a tire iron, socket, or wrench.
If you don’t have a pneumatic or electric impact wrench, crack the lug nuts loose while the wheel is still on the ground. Otherwise, the wheels will spin.
The order you remove the lug nuts doesn’t matter. If you have locking lug nuts, don’t strip them.
With the car supported on jack stands, remove the wheel from the studs.
Pull the brake caliper from the wheel hub and stow it away from the steering knuckle. You can use zip ties, baling wire, or simply tuck it away on the chassis. Do not let the caliper hang by the hose.
Remove the brake rotor disc as well if it isn’t integrated with the wheel hub.
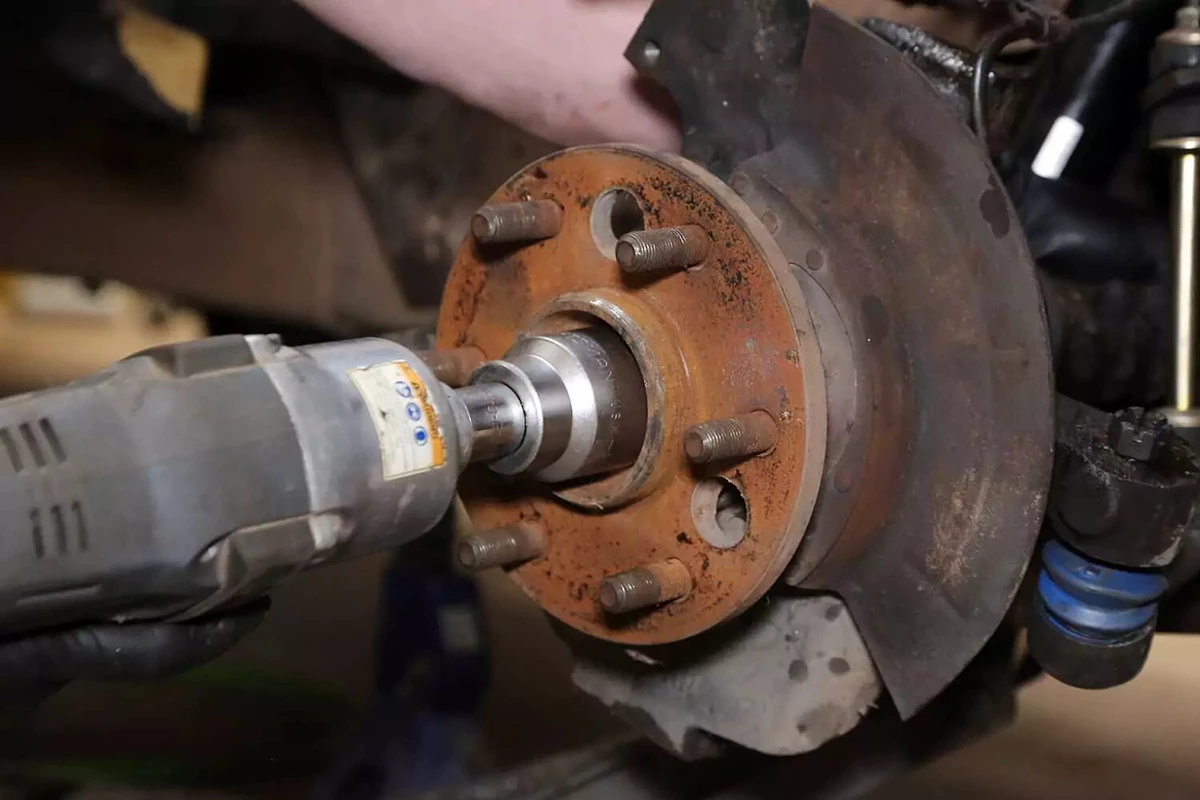
On most front-wheel-drive vehicles, you may need to remove the front axle. You can skip this step for rear-wheel-drive vehicles. Although this step is not required for all vehicles, we are showing you how to do it.
Use an impact gun so you can hold the wheel hub to stop it from spinning. If you do not have an impact gun, you may need to break the axle nut loose using a large breaker bar. Put the wheel on the ground if your axle spins in Park.

Find the lower ball joint castle nut under the spindle/knuckle. Remove the cotter pin and lubricate the nut with penetrating fluid.

Use a large socket and ratchet or impact gun to remove the castle nut.
The first thing to try with any tapered pin joint is the hammer method. Use a large hammer to smack the knuckle at the joint a few times. The shock often separates the pin from the knuckle. If that doesn’t work, smack the knuckle with two hammers at the same time—one on each side. Thread the castellated nut halfway back on so things don’t fly apart when the pin finally pops free.
Our demo vehicle has a torsion bar suspension, so there was no risk of the lower control arm moving uncontrollably. Coil-spring vehicles are trickier because there is considerable energy trapped in the spring.
Regardless, you should support the control arm while attempting to separate the joint. Put a floor jack under the control arm nearby and give it a couple of pumps. It will help steady the arm so the hammer blows are not absorbed by the flexing of the lower arm. The steering knuckle mounts under the arm, so having a floor jack under it provides more room to push the knuckle down off the tapered pin.

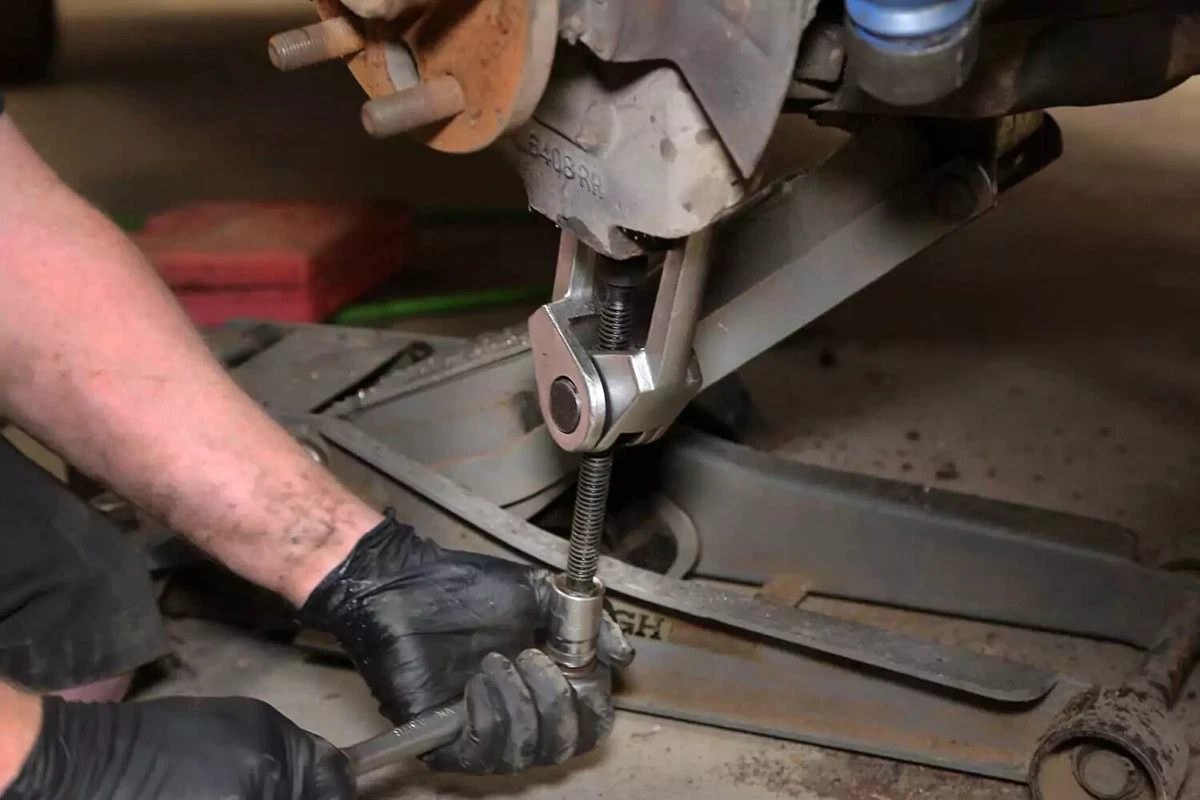
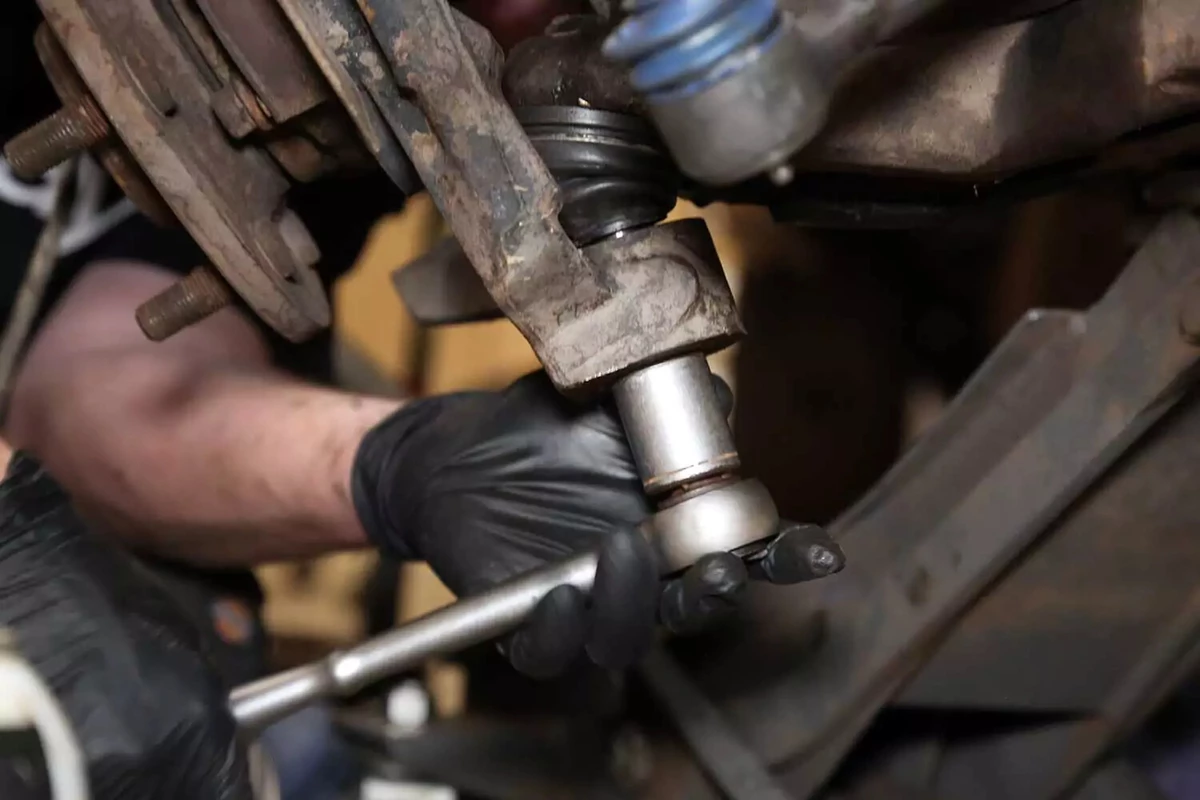
A mechanic uses a two-jaw puller to separate the ball joint pin.
If the joint’s pin is stubborn, use a separator tool like the one shown here. There are multiple types of separator tools. The best choice for your application varies by vehicle make and model.
The version we used is a two-jaw puller. The two arms hook over the edge of the knuckle, and the center jack screw is threaded up, pressing the pin out of the mount.
Be prepared for a loud pop when it separates.
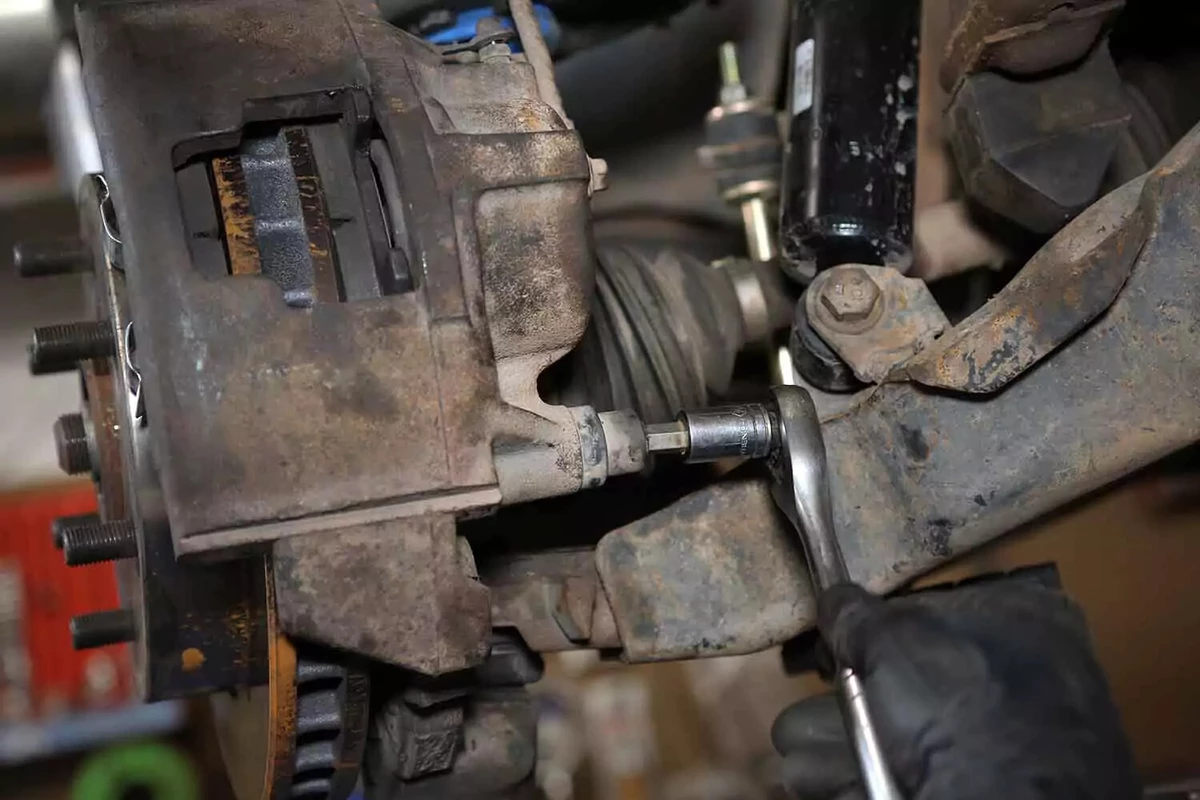
Some applications require removing the tie rod end. It depends on whether you can move the knuckle enough to get full access to the lower control arm.
To remove the tie rod end, remove the tapered pin nut, tap the mount with a hammer, and lower the tie rod end from the knuckle/spindle. If needed, use a tie rod end separator tool, but be careful not to damage the grease boot.
To access the lower ball joint in the press method, lift the steering knuckle out of the way. Use a zip tie if it’s attached to the upper control arm.
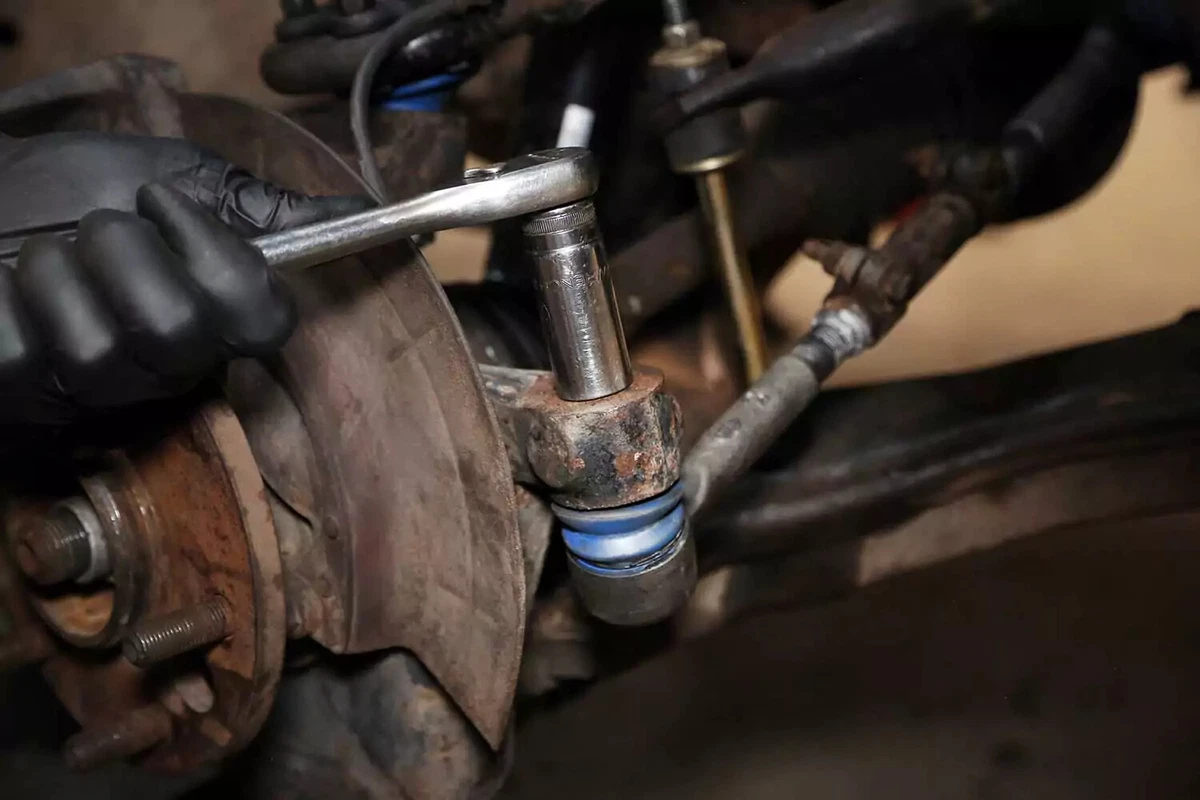
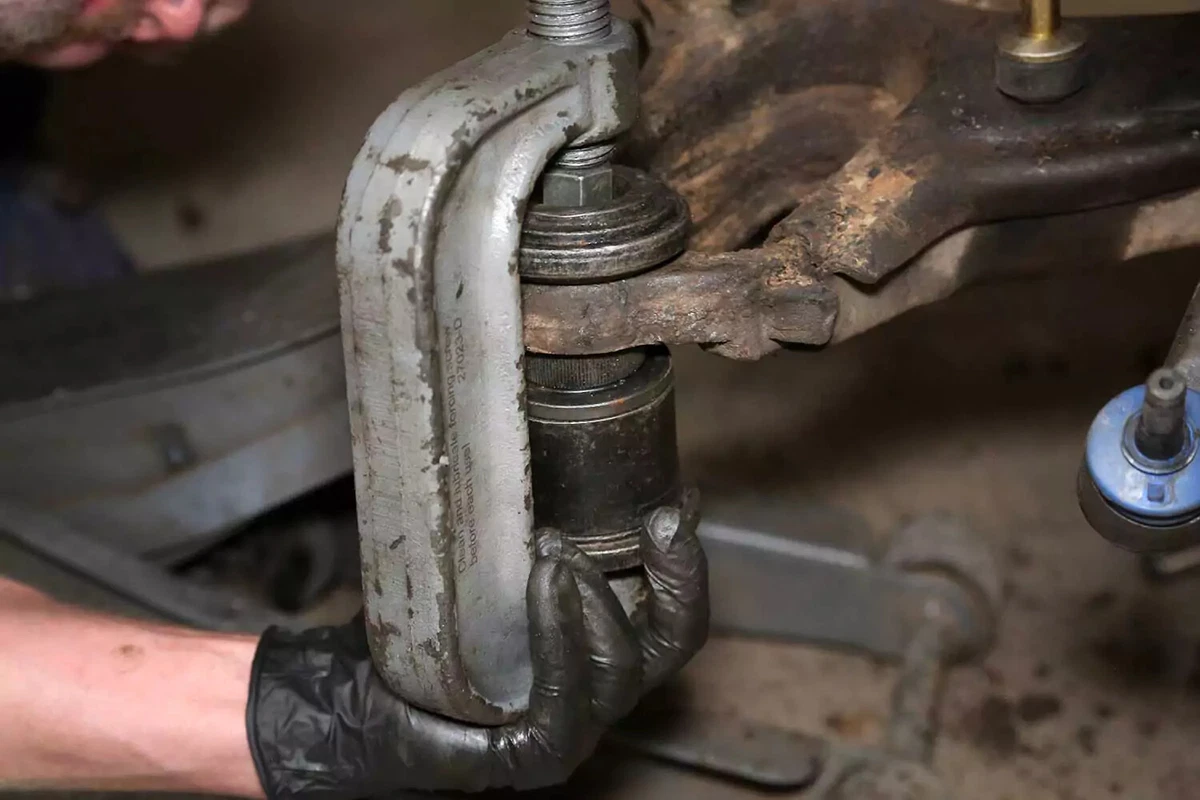
This tool is a ball joint press, which is available on eBay. Use the closest-fitting receiving cup on the bottom of the joint and the pressing head on top. Then, use a wrench or socket and ratchet to drive the ball joint out of the lower arm.
Some vehicles have odd-shaped mounts, making this press difficult to use. If you cannot get it removed with the press, you can remove the entire control arm from the vehicle and use a large hydraulic shop press to remove the joint. Most machine or mechanic shops will do this for a small fee. They can press the new one in as well.

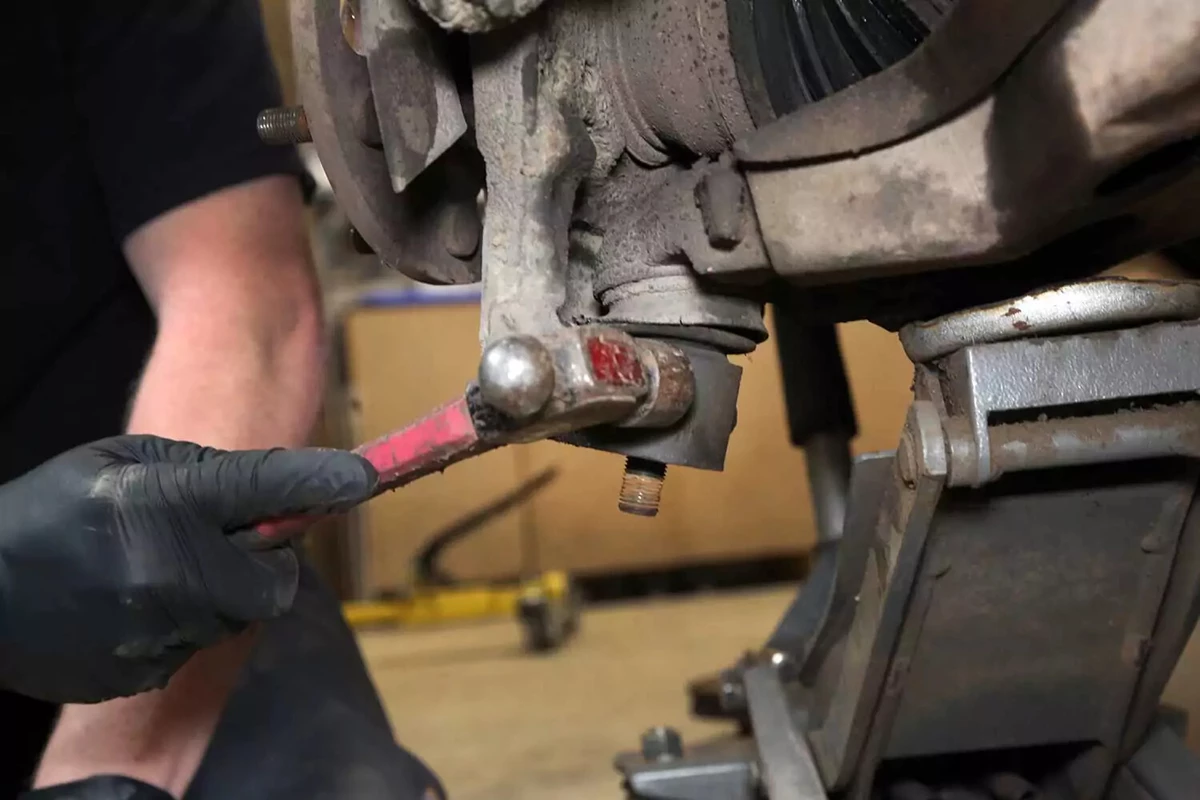
Due to the shape of our demo vehicle’s lower control arm, the receiving cup would not sit flush, putting the press in a bind. Instead of removing the entire arm, we are showing you the hammer method. This is the last resort for an on-vehicle removal.
With a floor jack under the control arm for support, a few whacks with a large five-pound hammer drove the ball joint out of the arm. This is not a hack job—this is a typical procedure when pressing fails, saving several hours of labor to remove the lower arm from the vehicle.
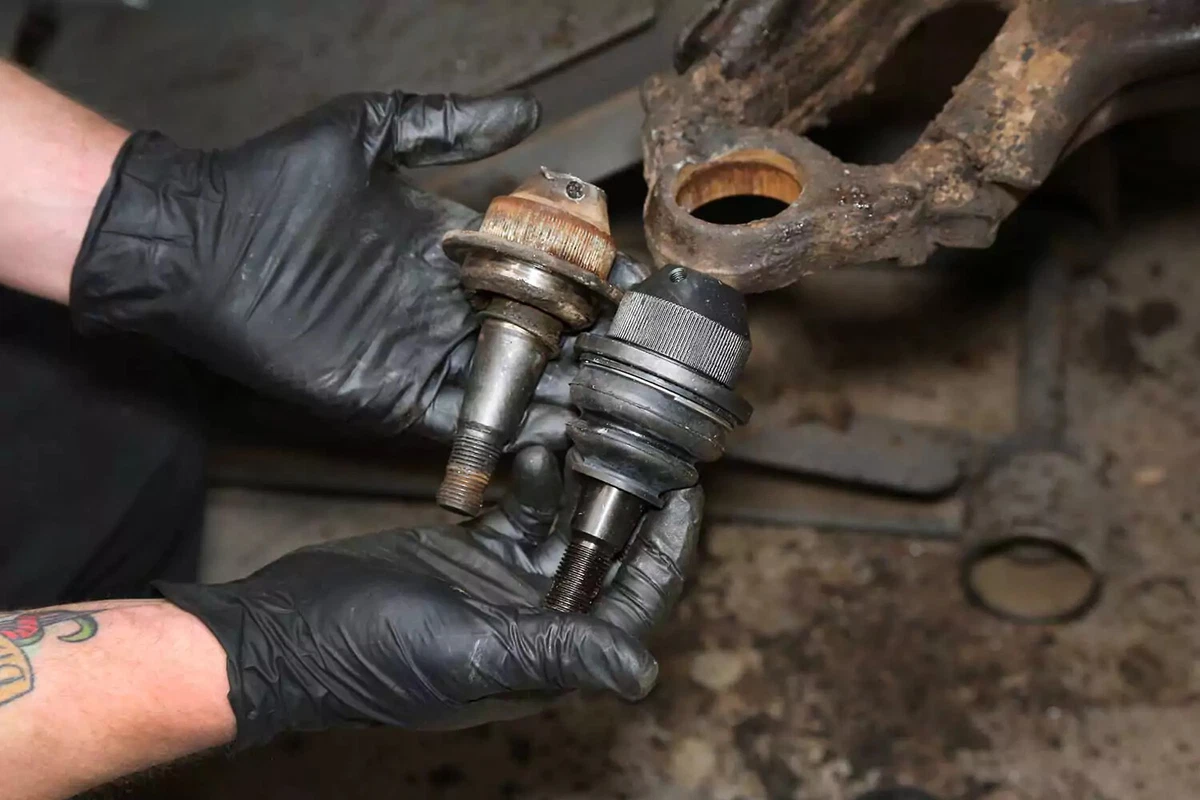
Place the old and new joints side by side. Compare them to make sure the parts match.
Although the press failed to drive out the old joint, it will likely press the new one in. That’s because the pressure is on the other flat side of the arm. You’re pressing it in, not out.
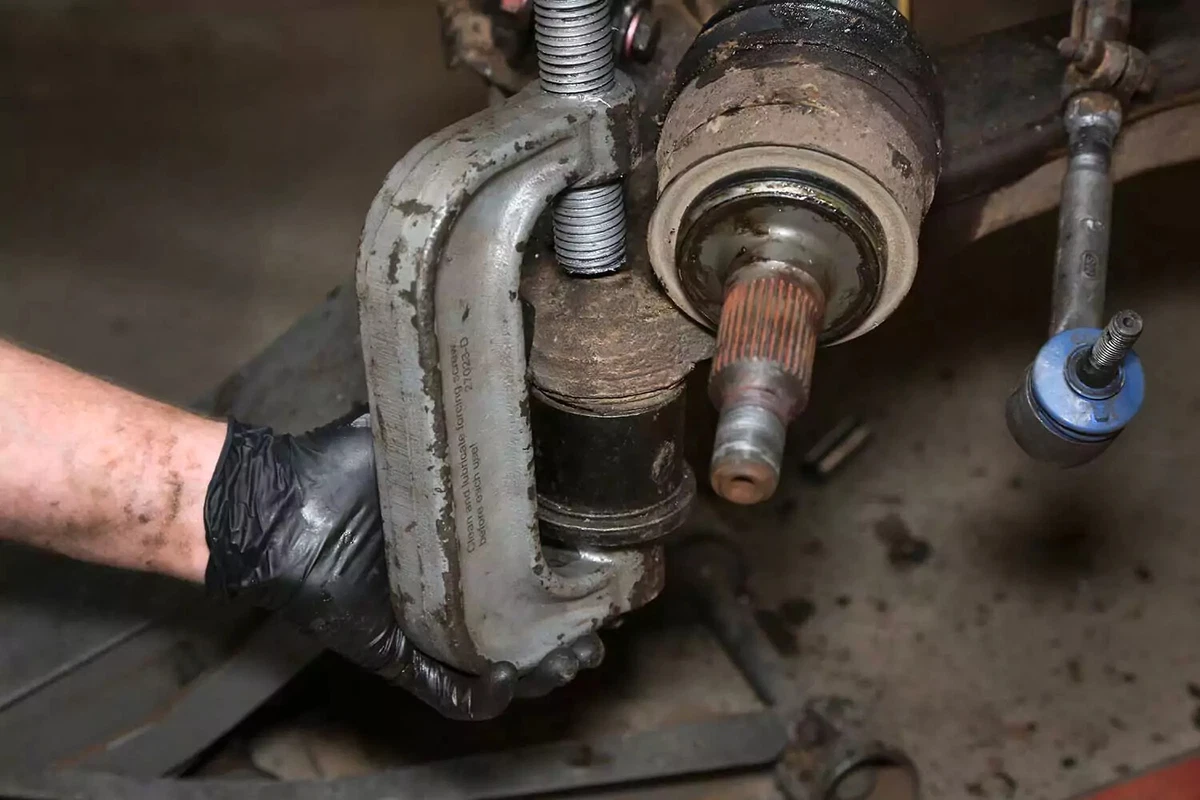
Select the receiving cup that best fits over the ball joint pin. Make sure it also seats on the flange around the joint base. Then, choose a pressing head with a large enough hole for the pin to pass through on the bottom of the press. The smaller pressing head goes on top of the control arm under the jack screw. Thread the screw down, drawing the joint into the arm.
Ensure the joint goes in straight. If it’s crooked by more than a few degrees, it will bind up. If it’s bound, pressing it in further may damage the control arm.
Make sure you can access the grease fitting location with the suspension assembled.
Reinstall the steering knuckle to the new ball joint. Thread the new castle nut on the tapered pin.
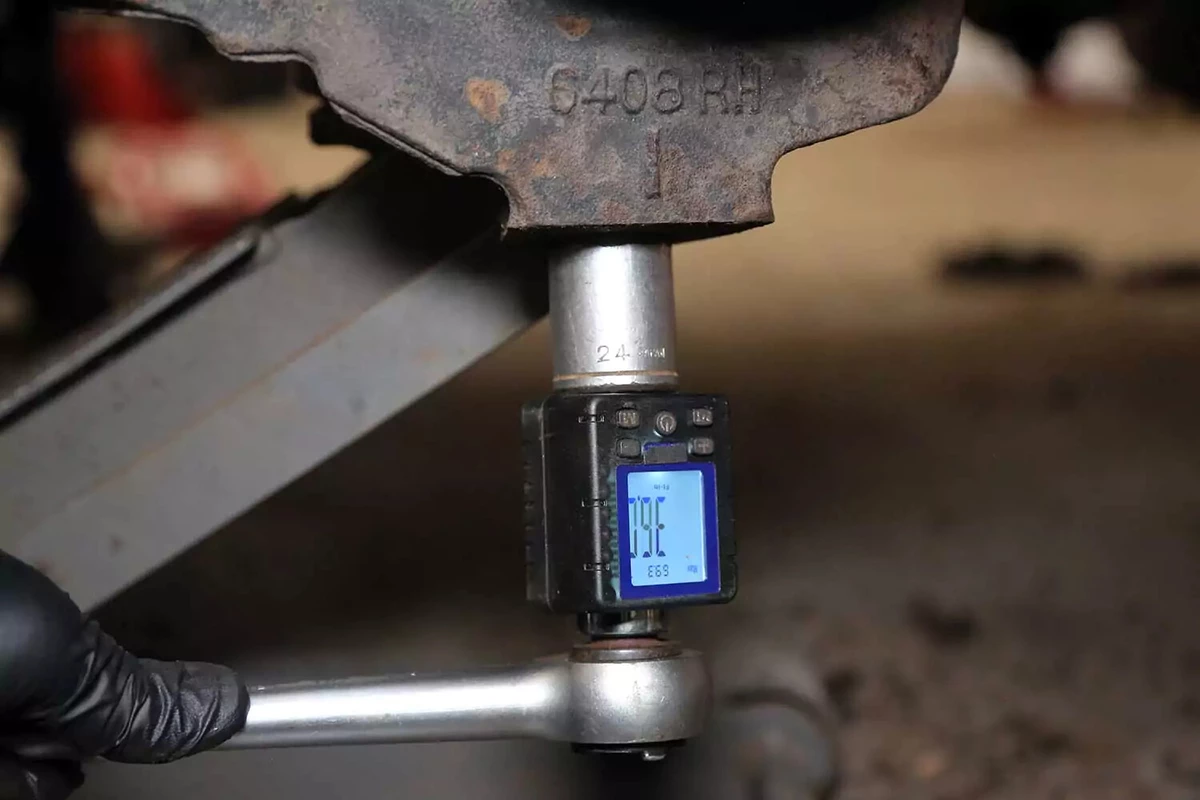
Use a torque wrench or torque gauge to tighten the castle nut to the required specification. Check your repair manual for the torque specification, which is usually 45 to 85 pound-feet.
Don’t forget to install the new cotter pin. If the castle nut slot does not reach the hole, tighten the nut to the next slot. Do not loosen the nut to install the pin.
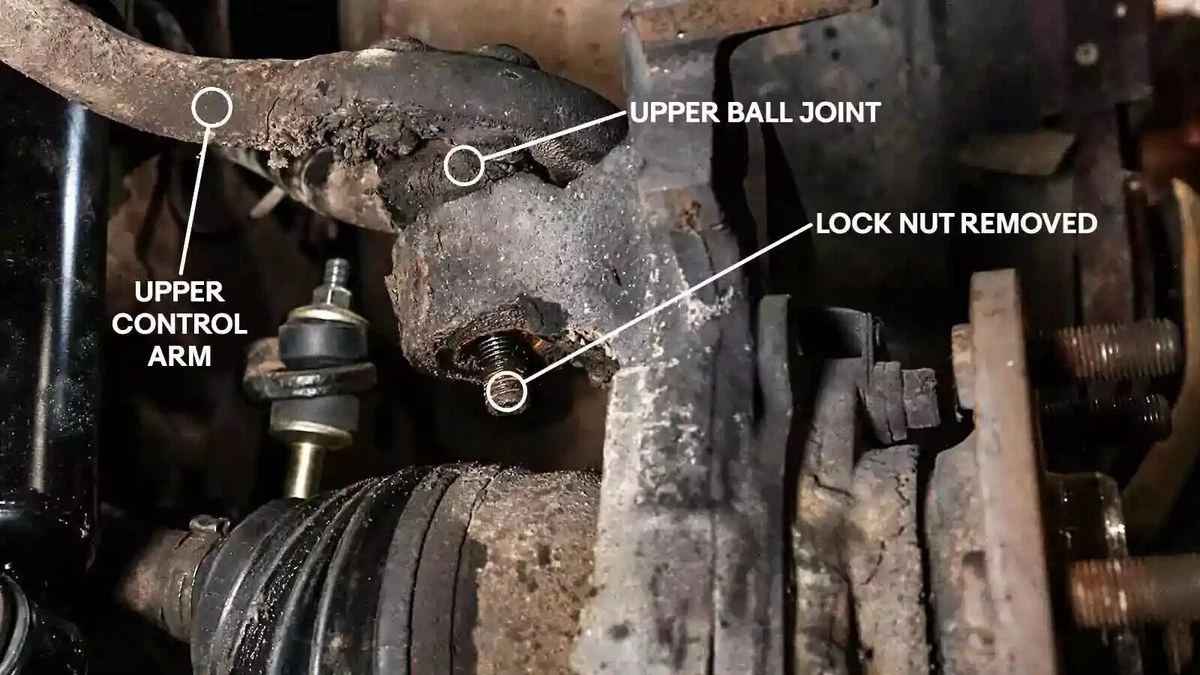
Upper ball joints are typically bolted or riveted in. To start, remove the upper castle nut. Sometimes, the upper joint does not have a cotter pin. Our demo vehicle uses a Nyloc locking nut.
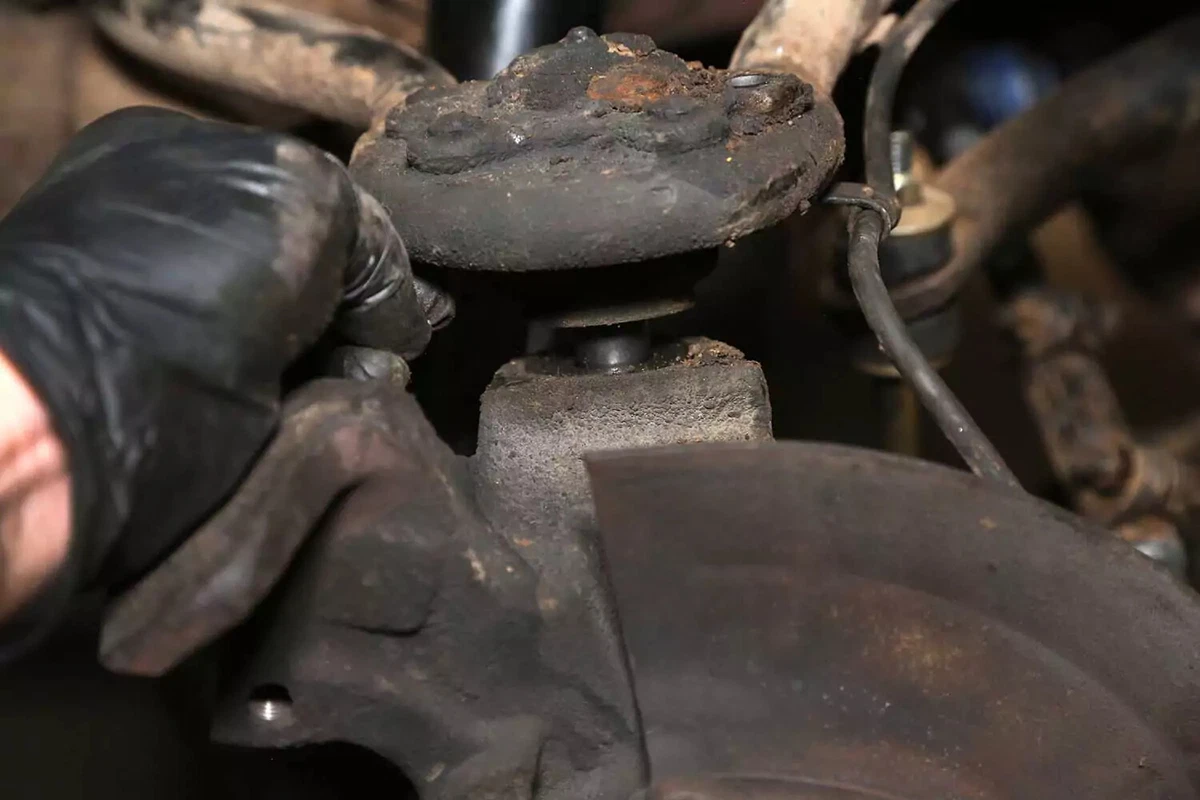
Using the hammer method dropped the upper joint from the knuckle. Otherwise, we would have used the separator tool. For this vehicle, which is four-wheel-drive, we would have removed the axle or used an offset separator.
Because this joint is riveted, we are not yet removing the arm from the knuckle.
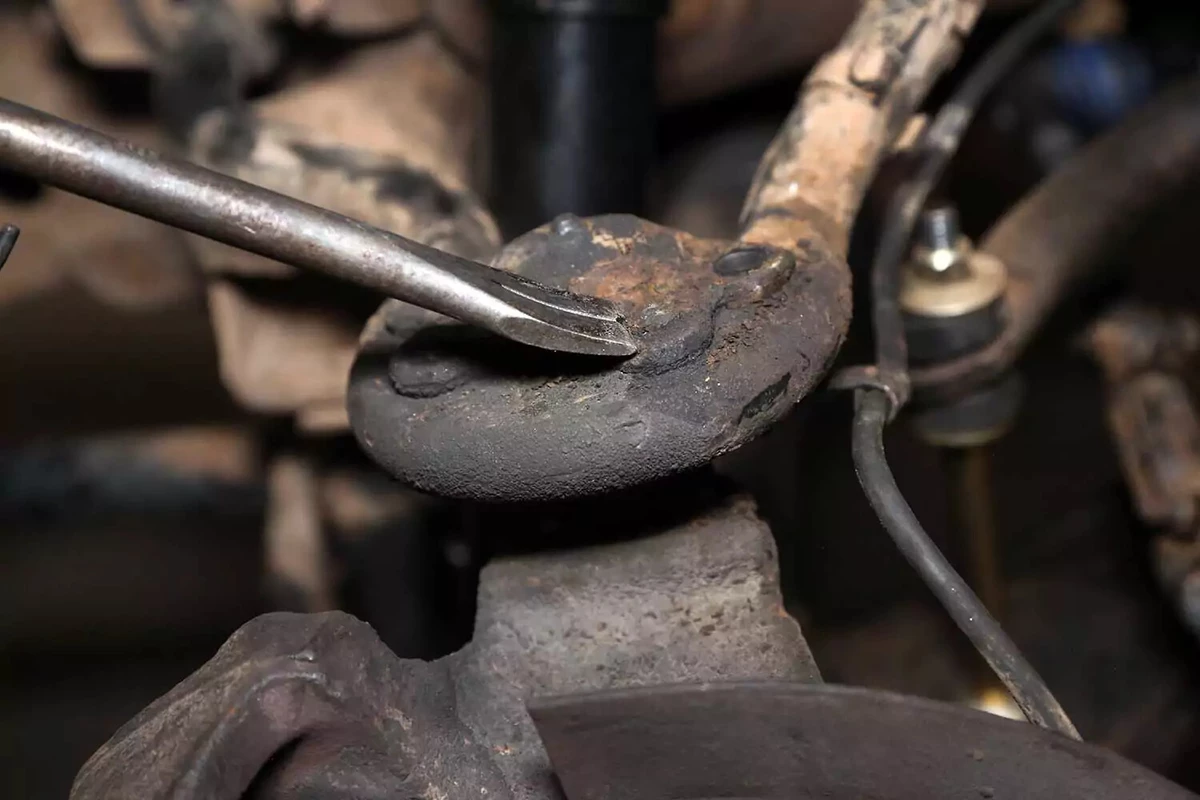
Use an air hammer with a chisel tip, a chisel and hammer, or a cut-off wheel or grinder to remove the rivet heads from the top of the joint. An air hammer makes quick work of this, but if you have never used an air chisel, it can be hard to control. A cut-off wheel or grinder takes longer but is also effective.
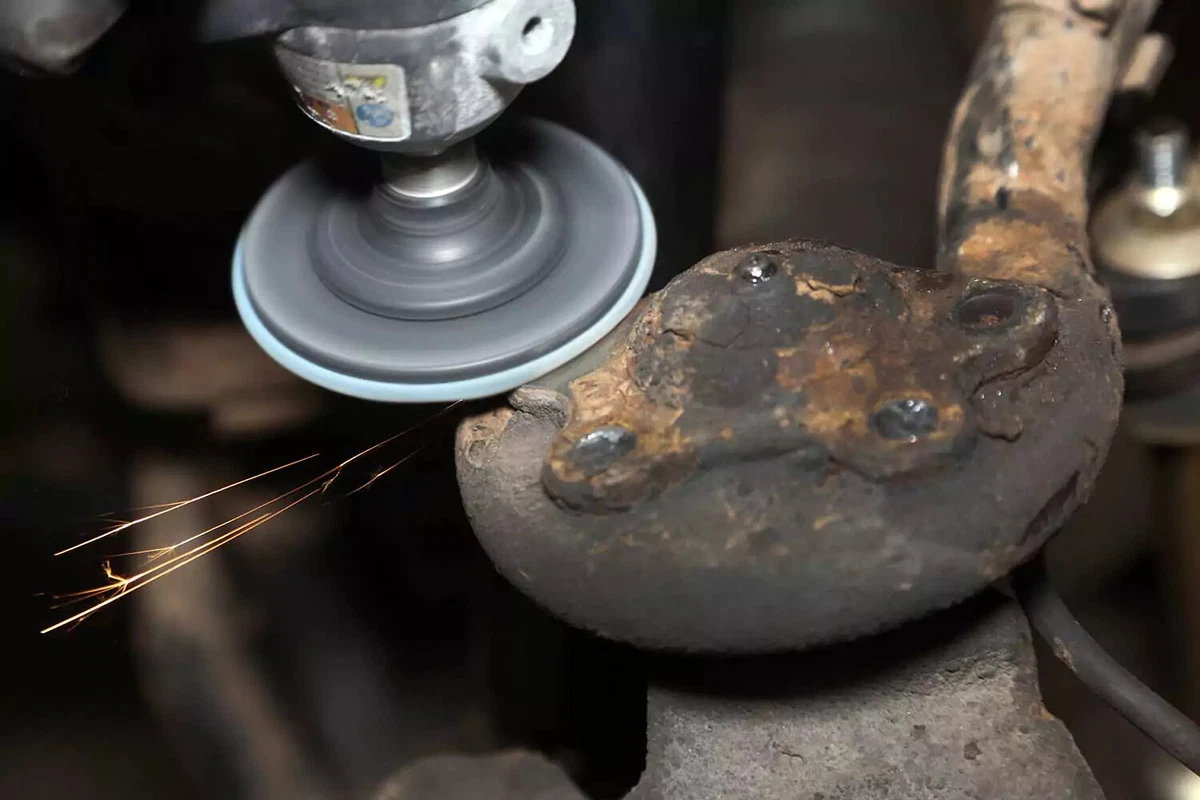
Clean up the rivet stalk with a grinder so that there are no remaining rivet head edges. Grinding also yields a flat surface to drill the rest of the rivet.
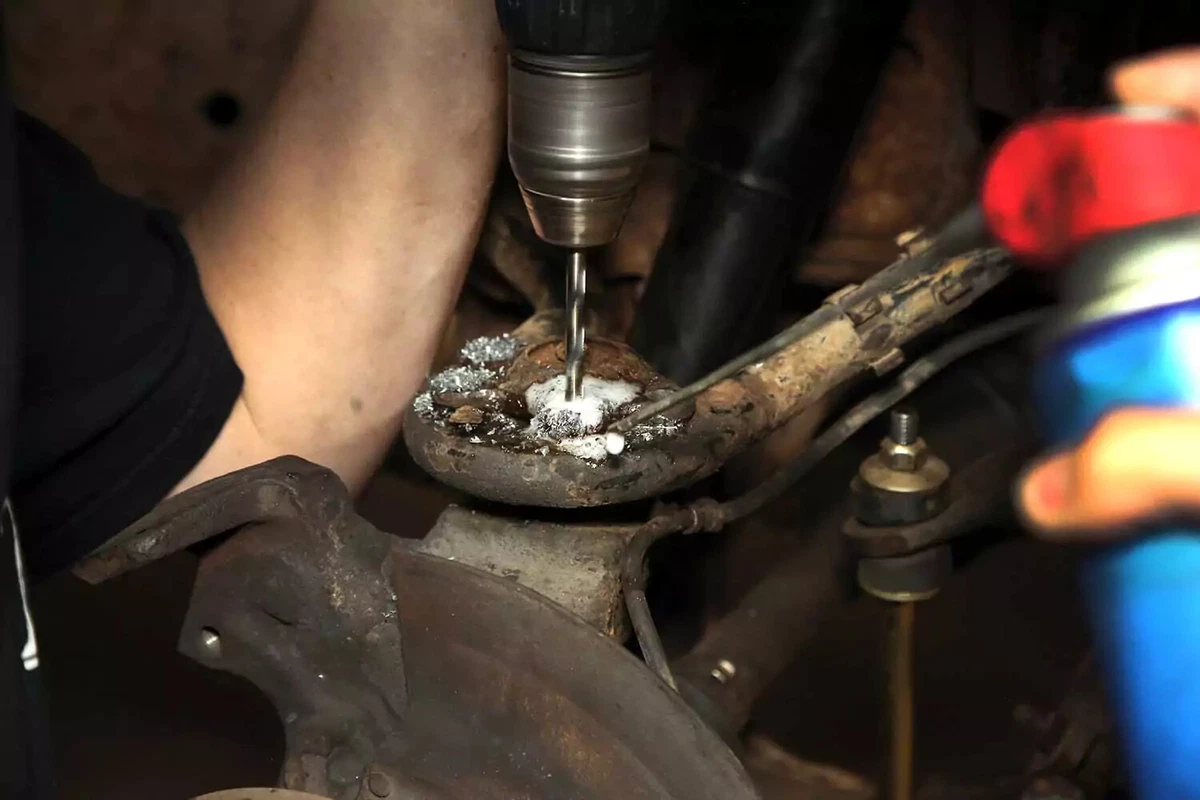
Drill the rivet stalks. Notice that the knuckle is still under the control arm. This allows you to put some pressure on the pins so the arm isn’t flexing down.
We used two bits: a ⅛-inch pilot bit and a larger 5/16-inch bit. The larger you drill out the rivet, the easier it punches out. Do not drill all the way through the rivet. About ¾ through the remaining rivet is usually enough. If you drill all the way through, you won’t have anything to stop the punch from sliding through the rivet.
Let the drill bit do the work. If you press too hard, the bit will overheat and dull quickly. Light pressure is adequate. Lubricate the drill bits with oil to keep them cool.
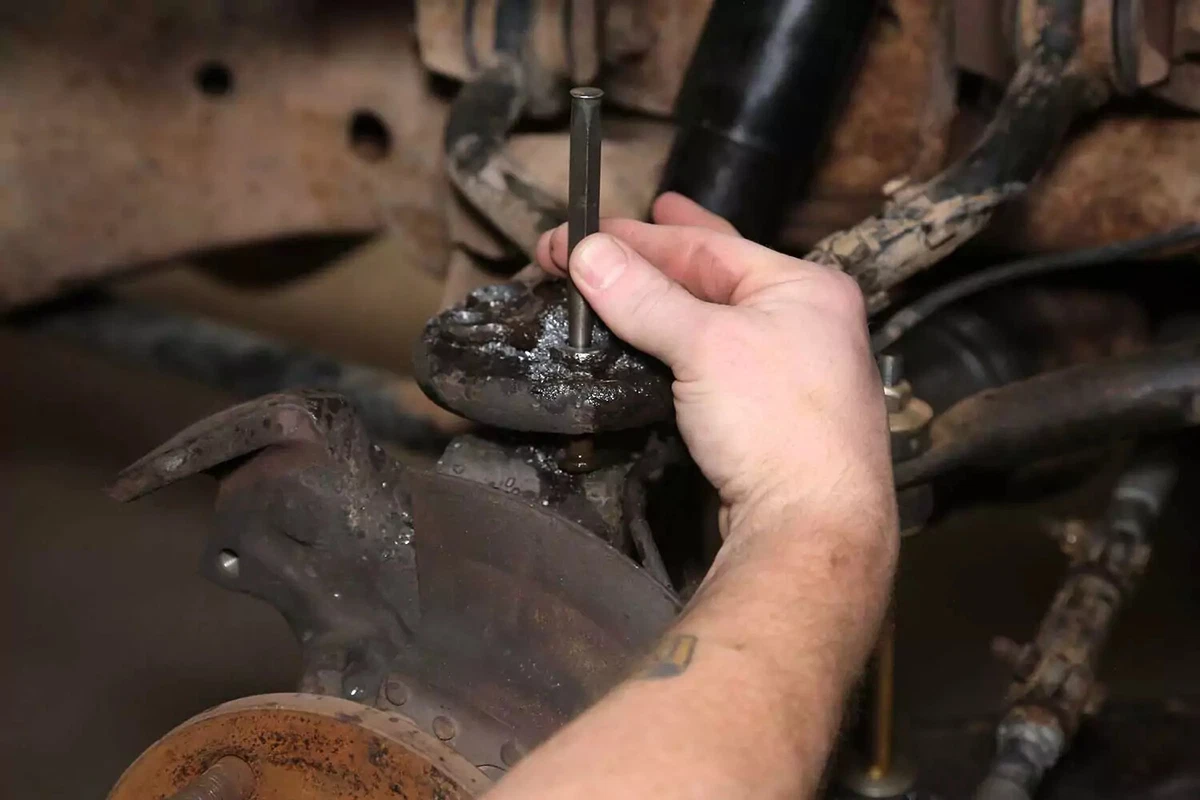
Use a punch and hammer to knock the rest of the rivets out of the arm and remove the old joint.
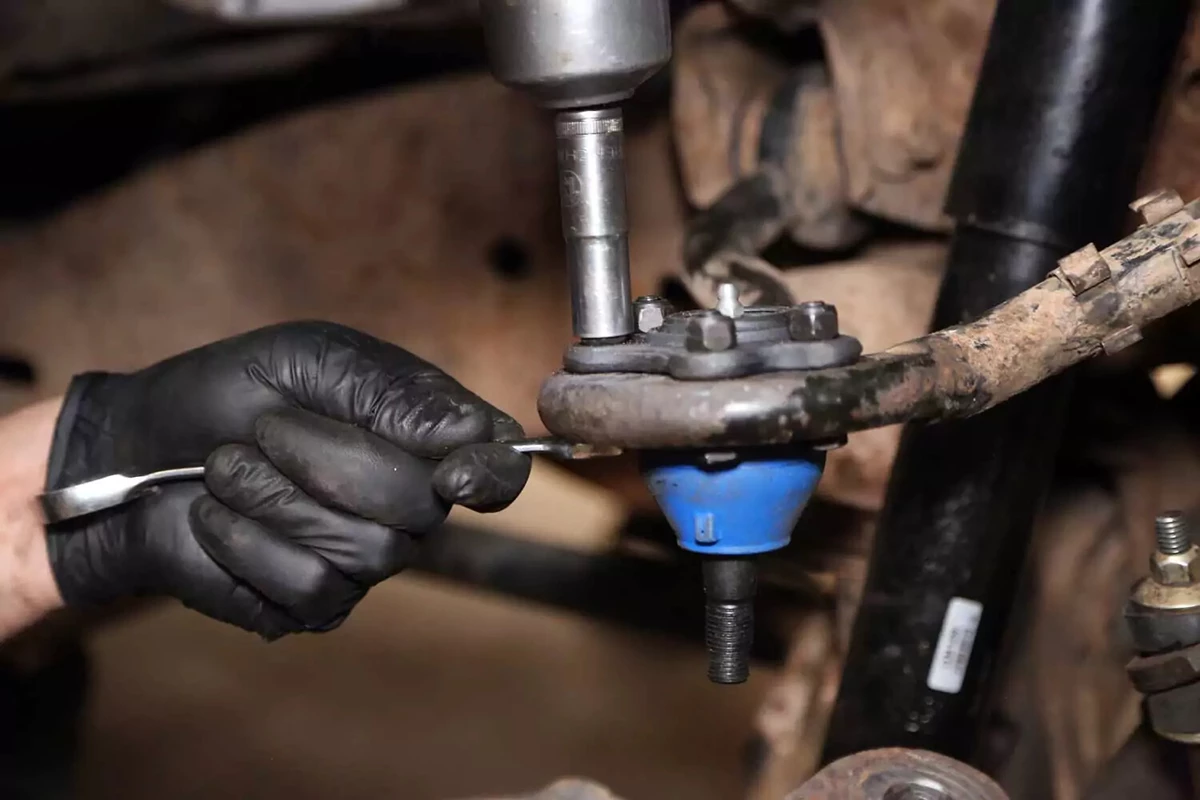
Drop the new ball joint in the upper arm and align the holes for the new bolts. Install the supplied bolts and torque to manufacturer specifications.

Thread on the new castle nut and tighten to specification.
With the axle in place, you can’t get a socket on the nut to use a torque wrench. Instead, use a crowfoot wrench on a torque wrench or remove the axle from the hub.
Alternatively, tighten the nut without a torque wrench, which requires experience with estimating torque values manually. We recommend using a torque wrench.
Don’t forget to install the cotter pin if your vehicle uses a castle nut instead of a lock nut.
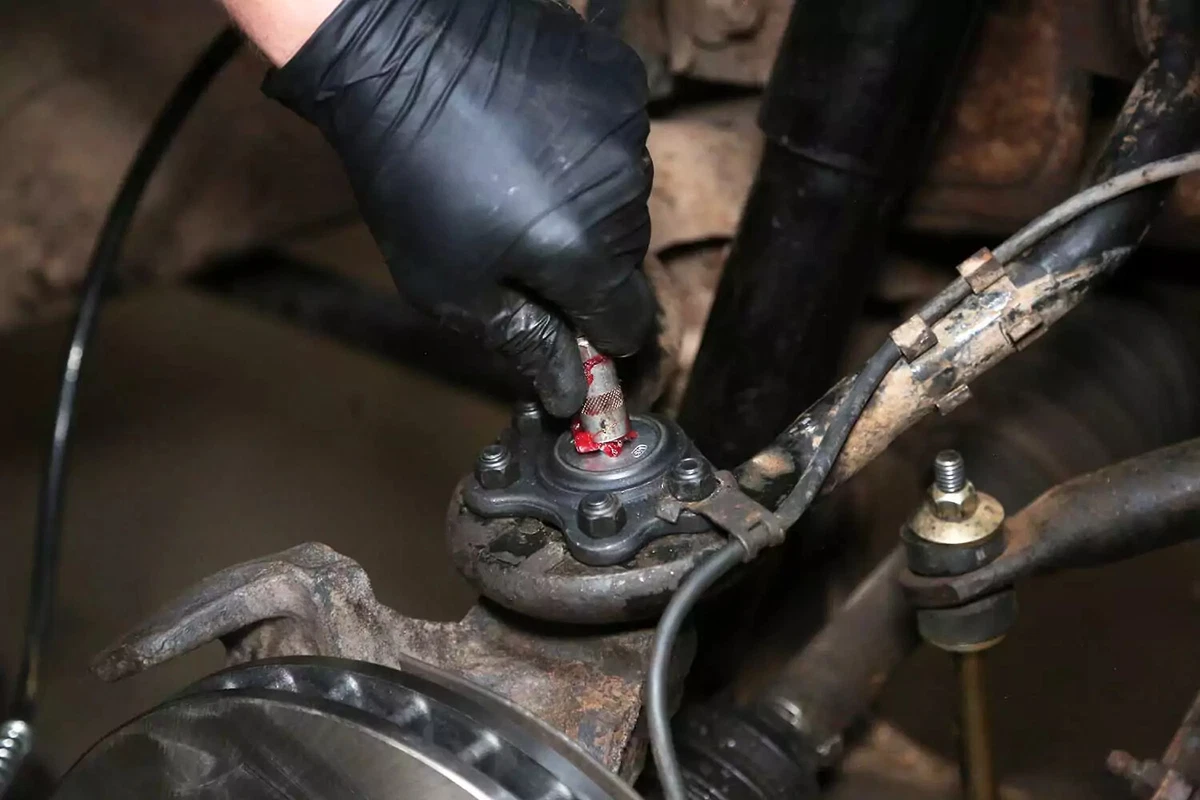
After the joint is installed and torqued to spec, use a grease gun to inject grease into the new joint.
Check your repair manual to confirm the correct grease type for your vehicle. Fill the joint with grease until the boot swells.
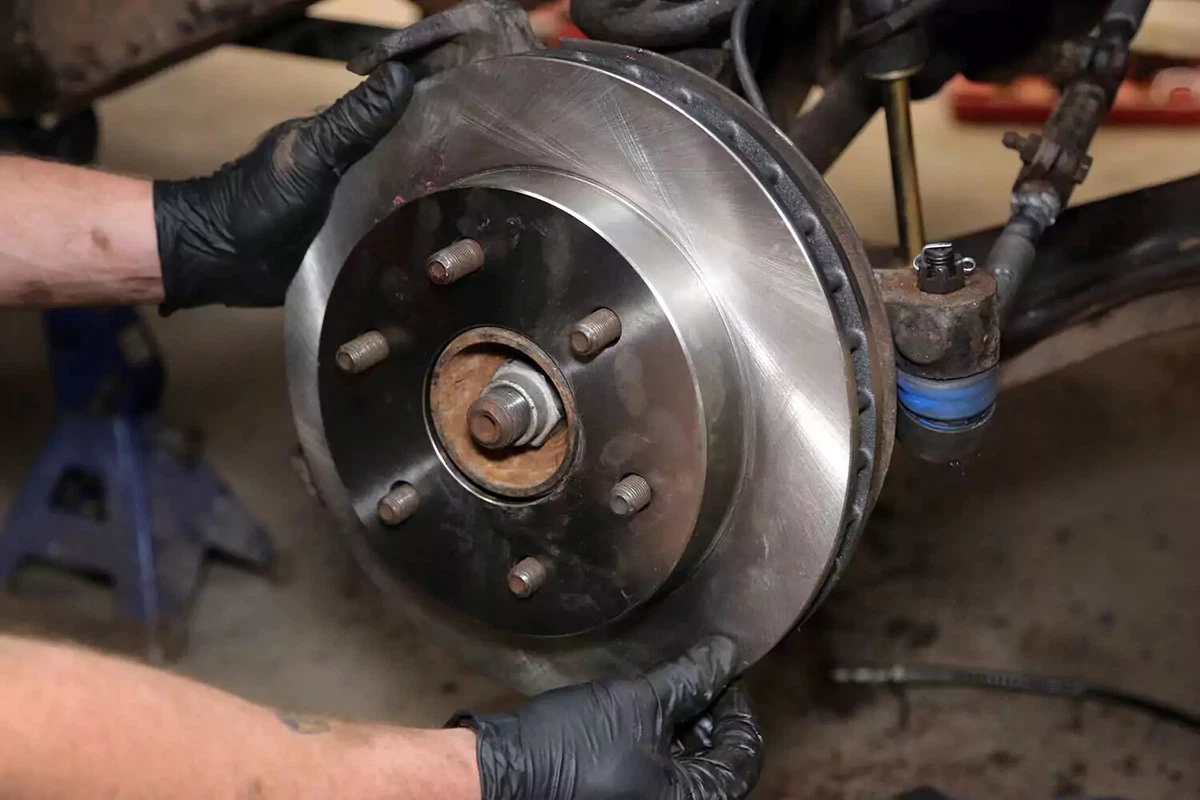
Reinstall any components that were removed, including tie rod ends, axle, brake rotor, and caliper.
Torque the tie rod castle nut to spec and install a new cotter pin.
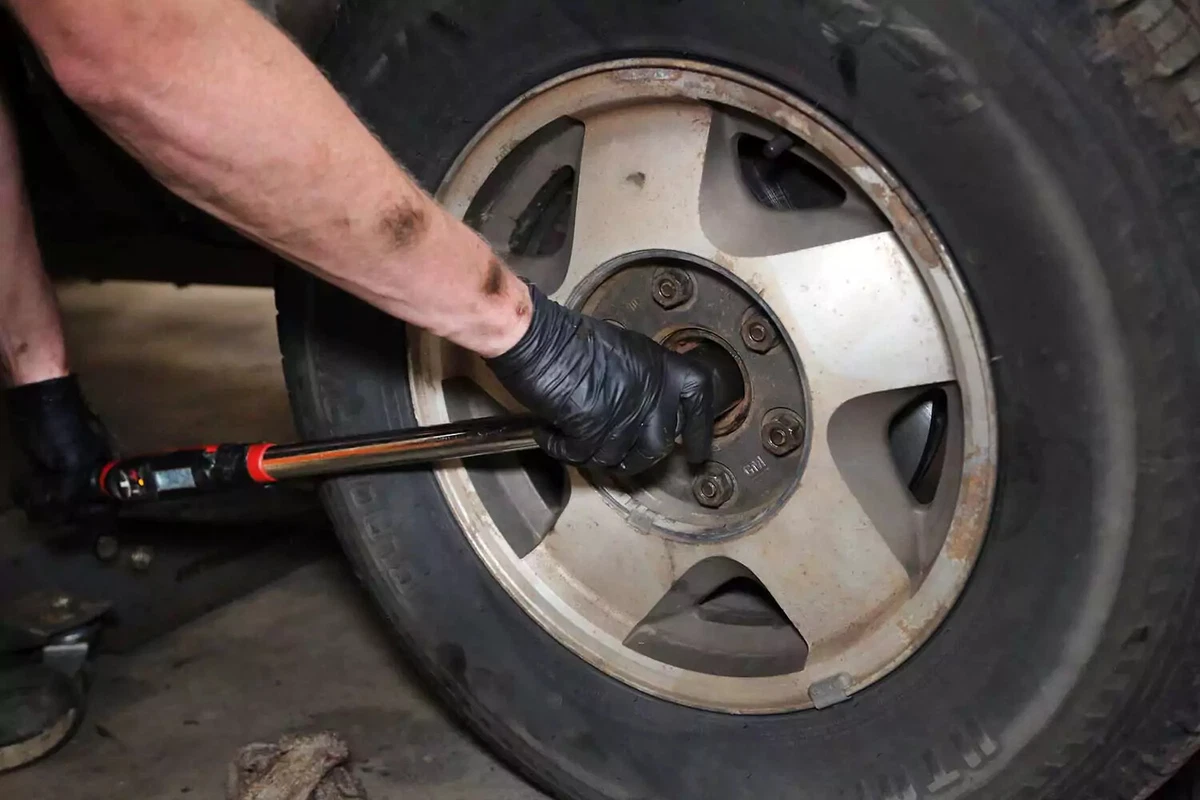
Reinstall the wheel and torque the lug nuts to spec. You can find the lug nut torque specs in your vehicle’s repair manual.
If you removed the axle, torque the axle nut to the correct specification with the vehicle on the ground. Typical axle nut torque specs range from 150 to 250 pound-feet.
About the author

Share your feedback
This article is meant to provide general guidance only. Automotive maintenance, repair, upgrade, and installation may depend on vehicle-specifics such as make and model. Always consult your owner's manual, repair guide for specific information for your particular vehicle and consider a licensed auto-care professional's help as well, particularly for advance repairs.
Recommended for you
Find answers and inspiration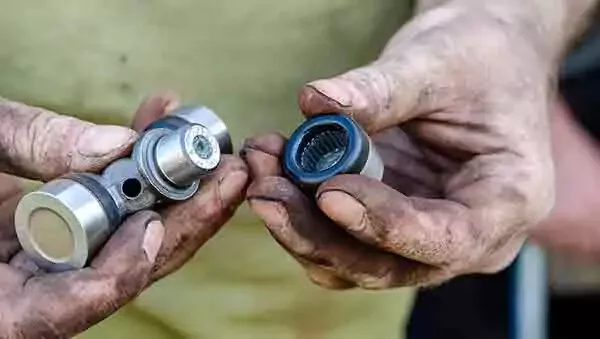
Types of U-Joints and When They Go Bad
6 min read
How to Buy the Right Differential Fluid
4 min read
An Intro to Replacing Clutch Fluid
5 min read
How to Change Manual Transmission Fluid
4 min read
Picking the Right Manual Transmission Fluid
4 min read
How to Replace Wheel Bearings
7 min read
How To Replace Differential Fluid
8 min read
Choosing the Right Clutch Fluid
6 min read
Buying the Right Transmission Fluid and Filter
4 min read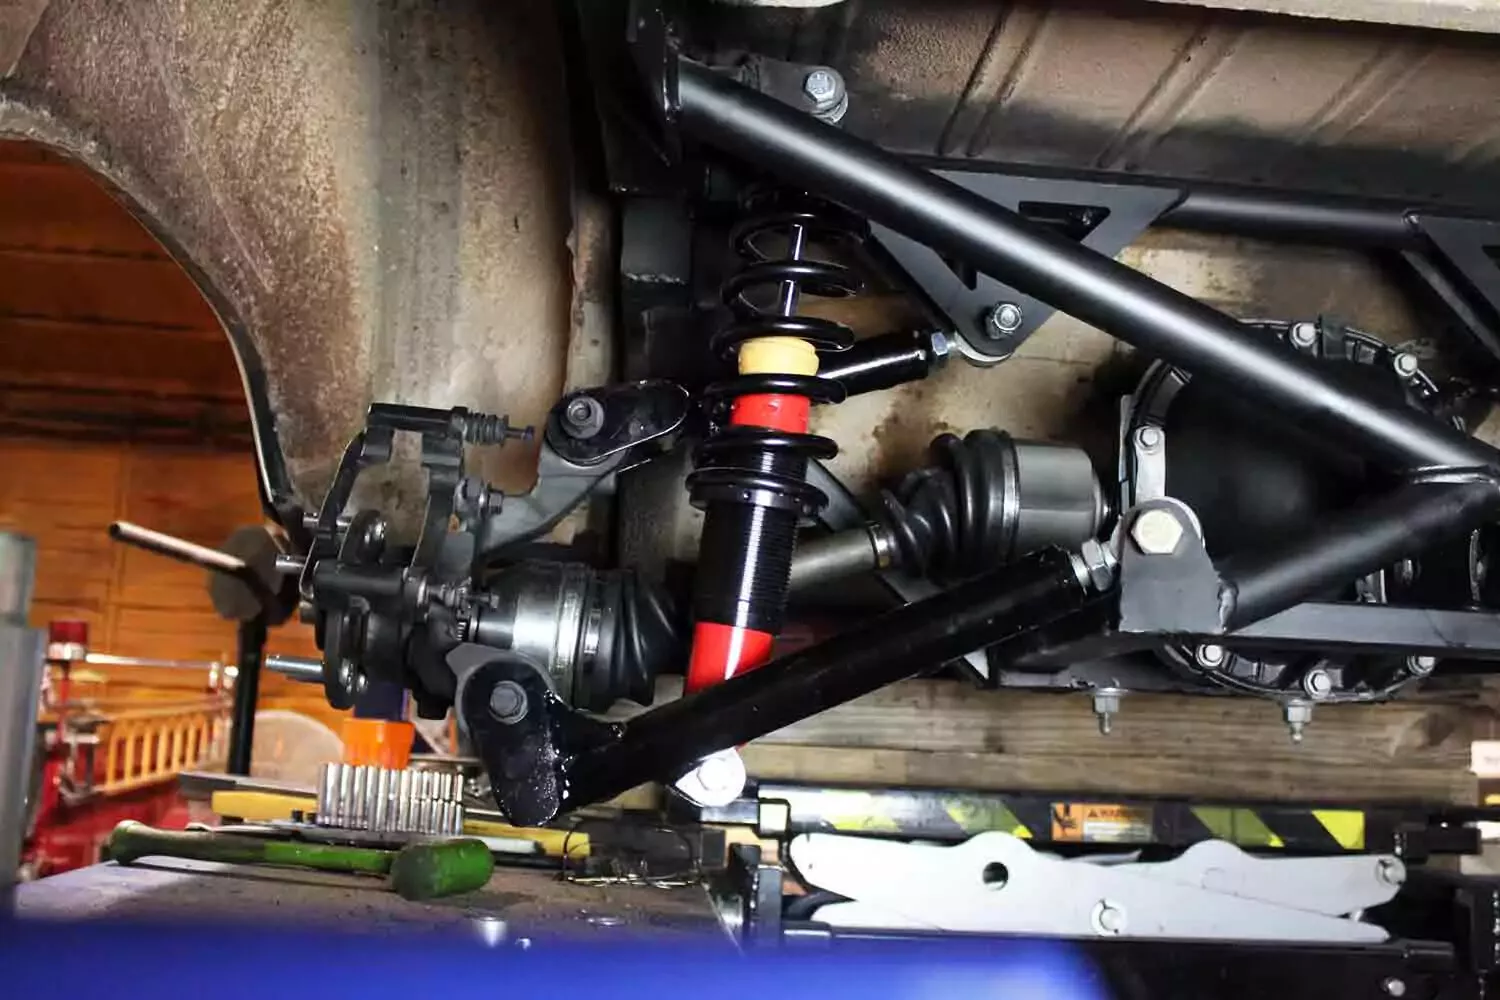
Buying the Right CV Axle
6 min read
How to Replace Transmission Fluid and Filter
11 min read
How to Change Automatic Transmission Fluid
6 min read
What to Know About Changing Transmission Fluid
6 min read
How to Replace a U-Joint
14 min read
Choosing the Best Clutch Master Cylinder
4 min read
How to Buy the Right Transmission Fluid
5 min read
Buying the Right Transmission Mounts
4 min read
A Quick Guide to Your Clutch Master Cylinder
5 min read
How to Replace a Clutch Master Cylinder
11 min read
How to Replace a Transmission Mount
7 min read
Replacing Your Transmission Fluid and Filter
5 min read
Selecting the Right Transfer Case Fluid
4 min read
What Your Differential Fluid Is Telling You
5 min read
How to Replace a CV Axle
7 min read
Everything You Need to Know About Wheel Bearings
7 min read
How to Replace an Idler Pulley
4 min read
What You Need To Know About Transfer Case Fluid
4 min read
Understanding the Purpose of Transmission Mounts
5 min read
U-Joint Buying Guide
4 min read
An Introduction to CV Axles and Joints
5 min read
How to Buy the Right Replacement Wheel Bearings
6 min read
An Intro to Replacing Manual Transmission Fluid
4 min read

