Any reduction in braking efficiency is a potential hazard. That’s why it’s critical that your brake calipers are in top condition.
A brake caliper is a metal clamp-like device. When you step on the brake pedal, it pressurizes brake fluid in the lines and pushes pistons out, thereby engaging the calipers that clamp brake pads to the rotors. That’s what slows down the vehicle and brings it to a stop.
Common brake caliper problems
A brake caliper most commonly fails when there’s a bad seal from the piston to the caliper body. The bad seal allows fluid to go past the piston instead of pushing on the piston. Other potential failures include seized pistons, a cracked caliper body, and stripped threads. If you notice an issue with a brake caliper, stop driving and take a close look. Don’t delay replacing the calipers if necessary.
This guide shows the entire process of replacing a brake caliper step by step, including how to bleed your brakes. Changing a caliper is a beginner DIY mechanic’s job that usually takes an hour or two. Basic questions about calipers are answered in our Brake Calipers 101 - opens in new window or tab. article. We also have a guide to buying the right brake calipers - opens in new window or tab..
Tips and tricks for DIY brake caliper replacement
- Most of the time, you will discover a damaged caliper while replacing worn brake pads. Asymmetrical wear is a strong clue. Also, if you need to apply excess force to push the caliper home on the sliders, the pins could be seizing. This will accelerate wear on a pad.
- Manual brake bleeding requires two people. However, you can bleed brakes by yourself with special tools and kits - opens in new window or tab., such as a power brake bleeder, vacuum bleeder, or one-way check-valve bleeders.
- Many beginner DIYers take on brake projects. We encourage all DIYers to take on challenges. However, your brakes are critical for safety. Do not take chances with your brake system. Your safety depends on it.
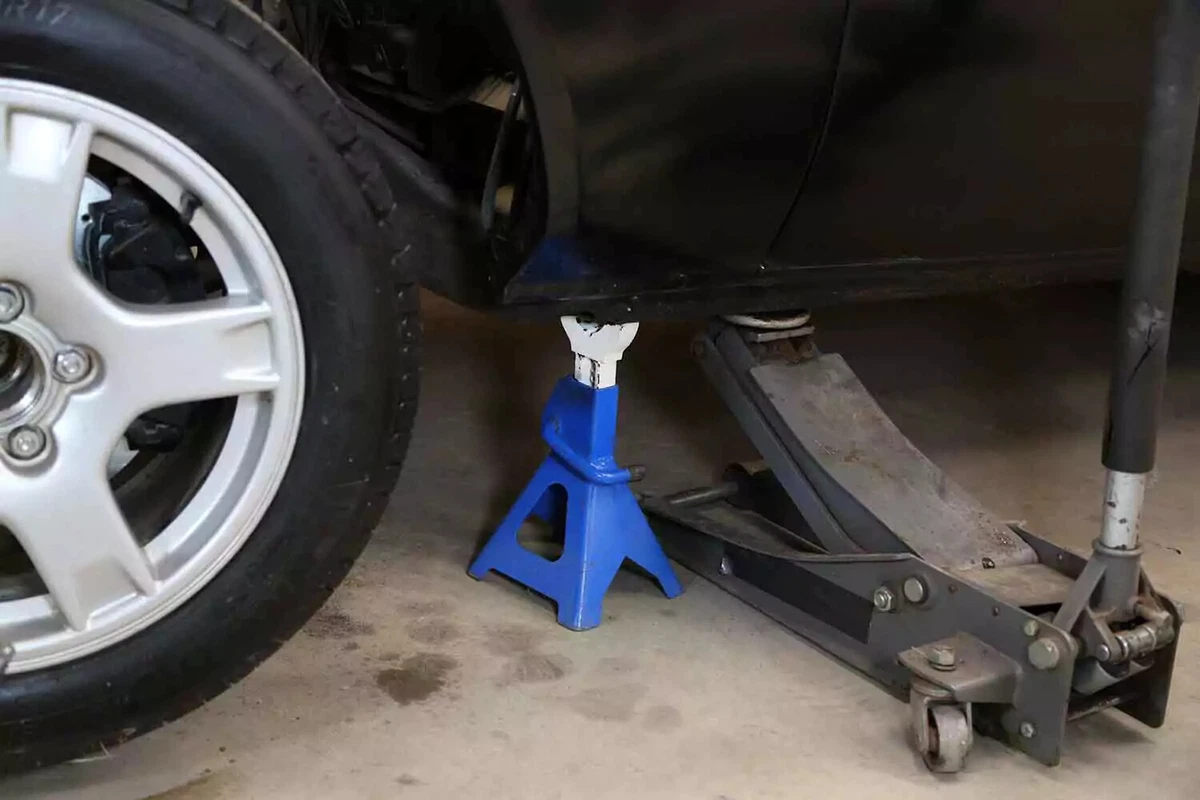
This project requires working safely under the vehicle. You will need a floor jack, and jack stands, ramps, or wheel cribs to support the vehicle.
Locate the factory jacking points just behind the front wheels or just in front of the rear wheels. The jacking point is a metal section with two V notches about two inches apart. Check your owner’s manual to confirm the lift location.
Never use jack stands on dirt, gravel, or asphalt. If you do not have access to a concrete work surface, use wheel cribs, solid-base ramps, or wide-base wood supports to support the vehicle. Never use cinder blocks or bricks as supports.

Use a tire iron, impact gun, or breaker bar to remove the wheel. If you have one bad caliper, consider replacing both of them on the same end of the car.
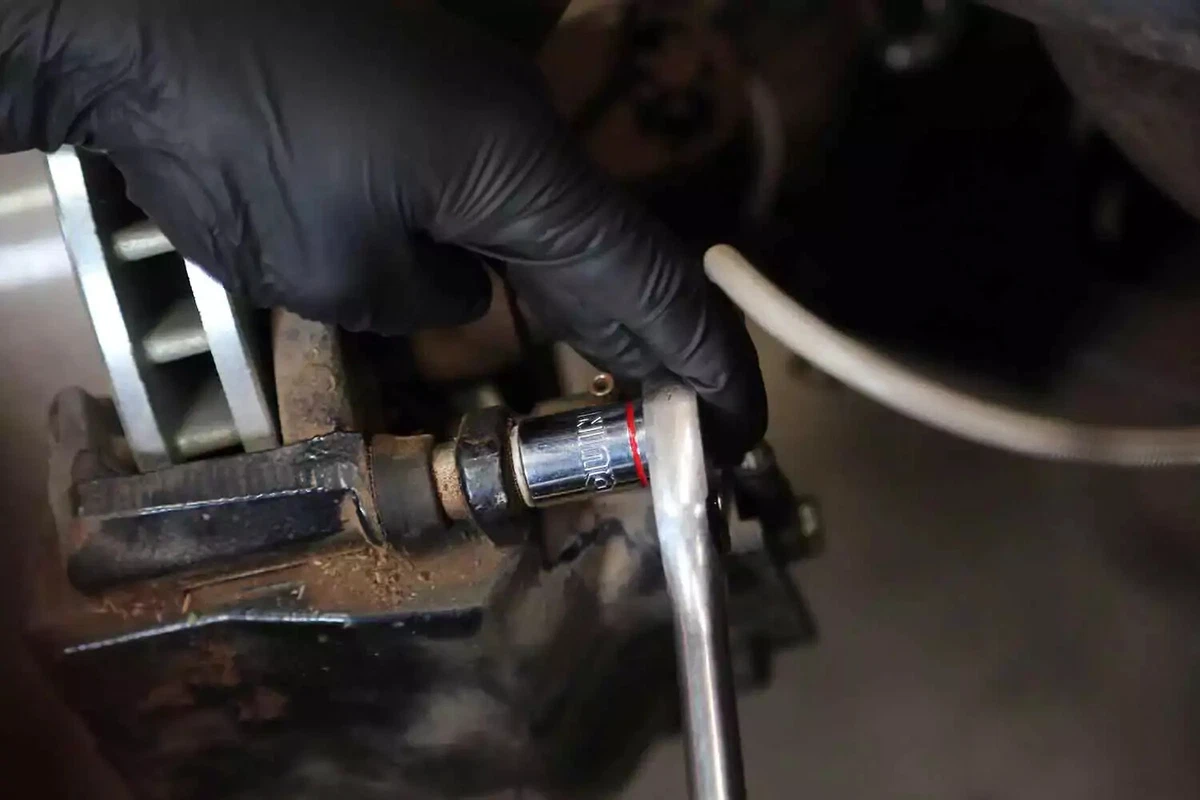
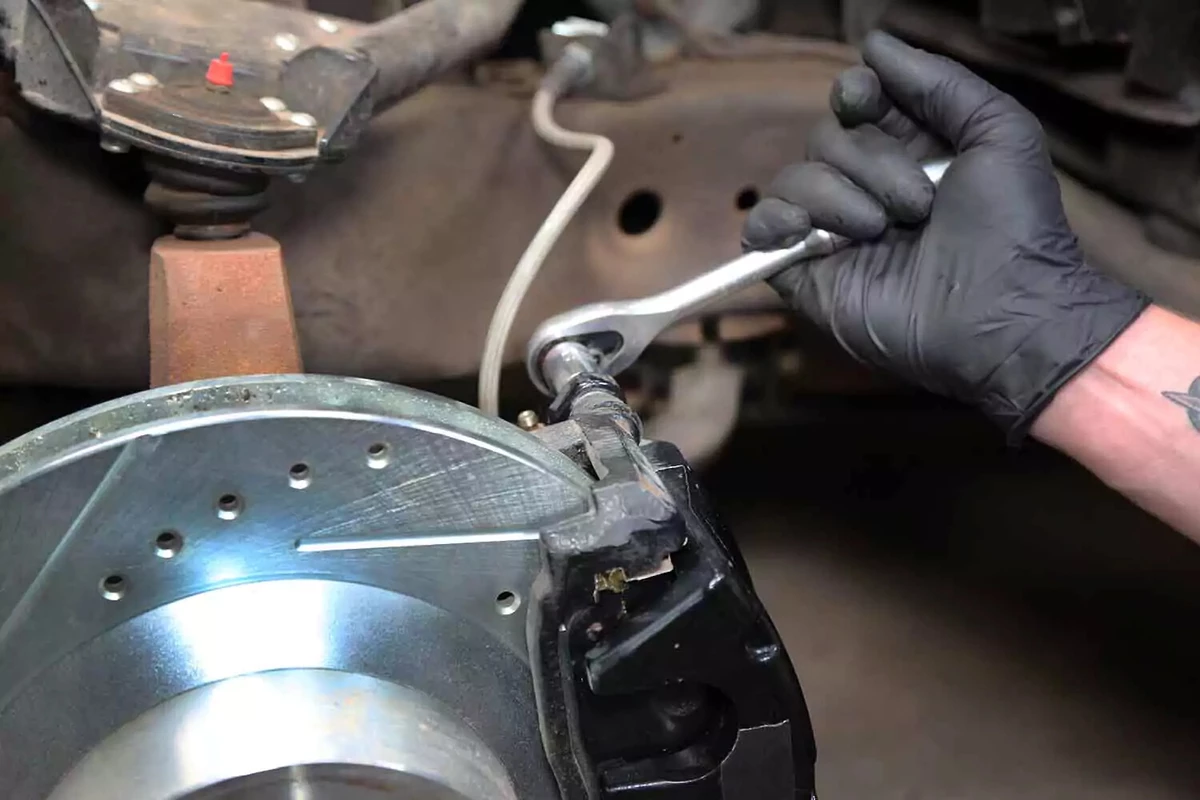
Loosen the brake line while the caliper is still solidly bolted to the bracket.
Remove the two bolts that hold the brake caliper to the mounting bracket. The bolt could be a hex bolt, Allen, or Torx.
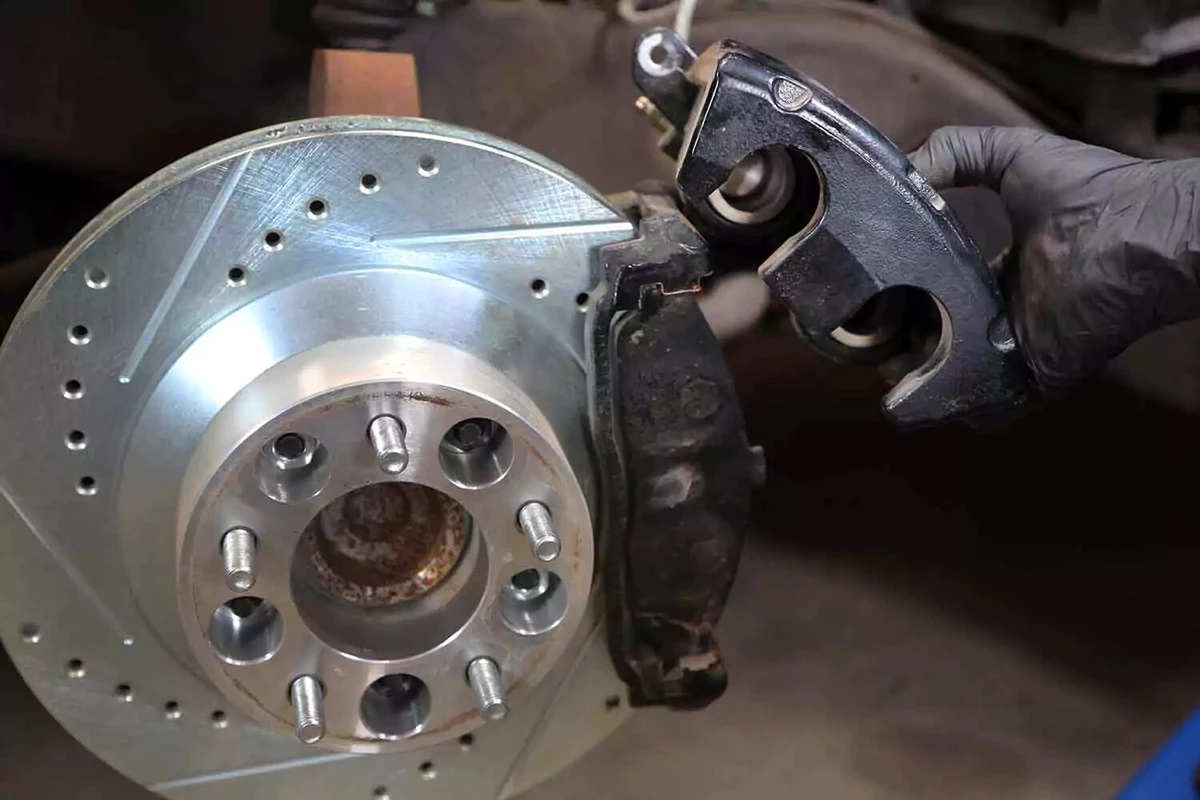
Lift the caliper to pull it off the brake pads. You might need to use a small pry bar or flat-blade screwdriver to separate the caliper from the pads. If necessary, pry the inner pad towards the piston to slightly collapse the piston.
Never hang the full weight of a caliper by the brake line. Use a zip tie or a bent wire to support the caliper as needed.
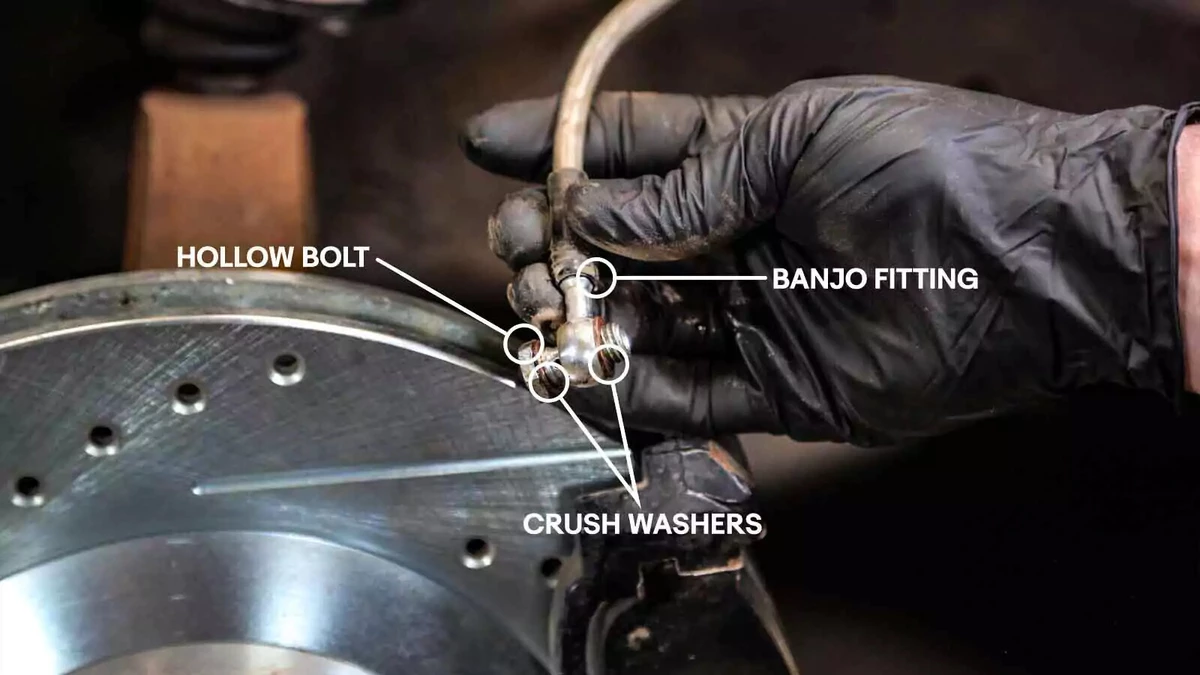
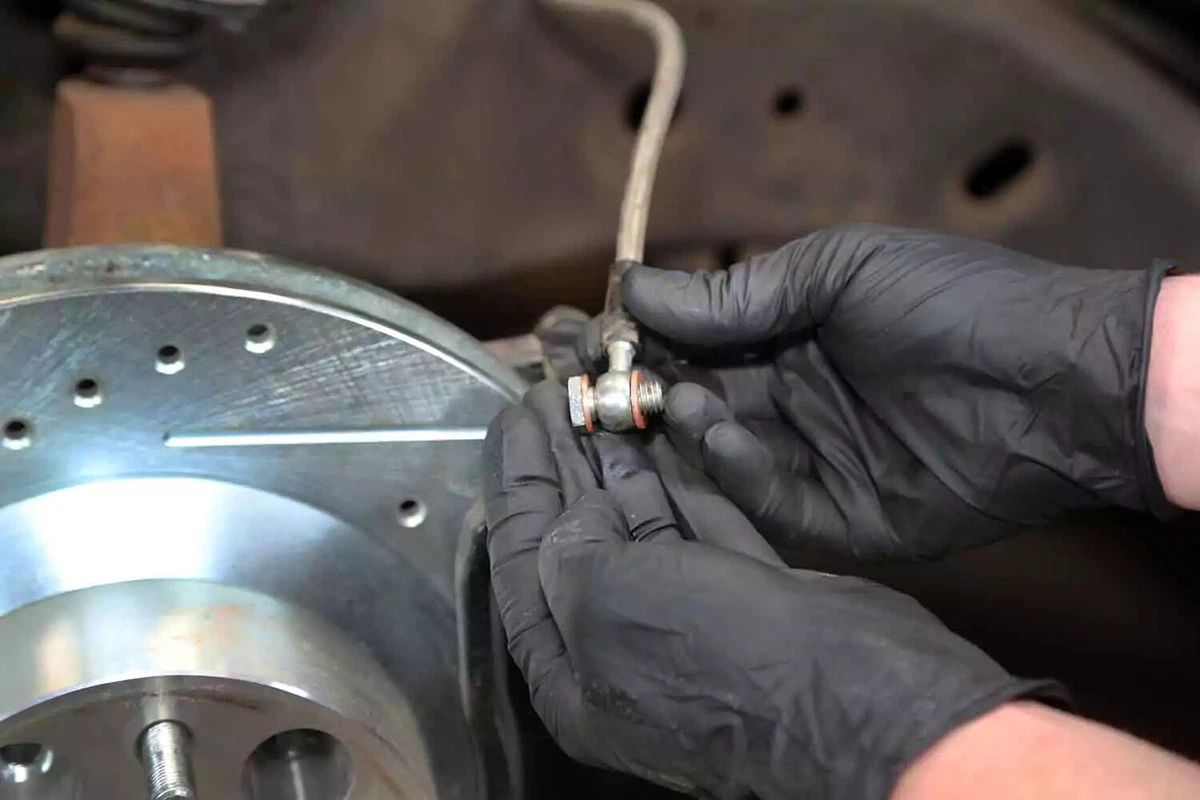
Use a line wrench or socket—for banjo bolts like the one shown here. Loosen and remove the fluid line on the caliper. Some lines screw directly into the caliper body.
Do not use an open-end or adjustable wrench to remove the brake line. That could round off the hex and ruin the banjo bolt or line.
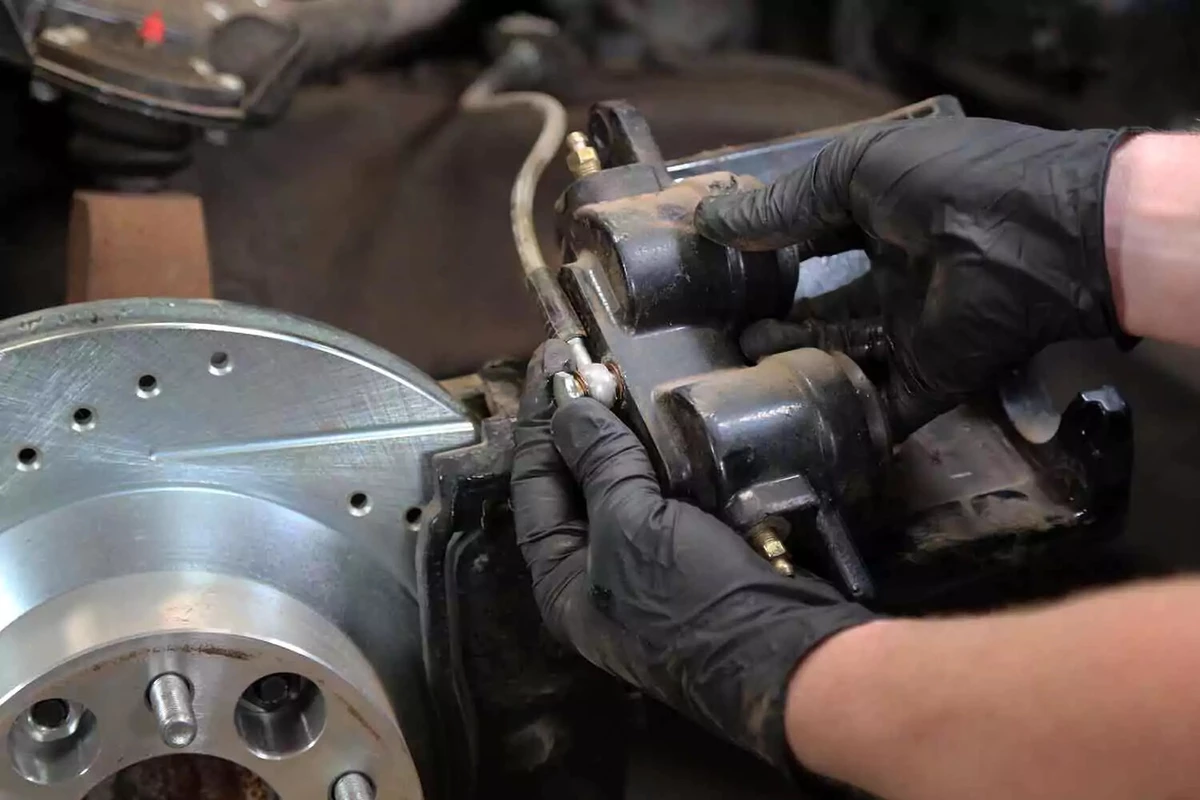
Examine the brake line and fitting to make sure the line is not collapsed, cracked, split, or otherwise damaged. A small cut or abrasion on the outer jacket can lead to a brake line failure, which is dangerous.
The line in our demo vehicle uses a banjo fitting with two copper crush washers, one on either side of the banjo ring. It’s critical to replace these with new ones every time you remove the banjo bolt. Reusing old washers poses a high risk for leaks.
Replacing a brake caliper will likely happen when you are installing new brake pads. If you discover that your pads are more than 50 percent worn while working on your caliper, replace your brake pads - opens in new window or tab.. Learning how to compress your caliper - opens in new window or tab. will make that job easier.
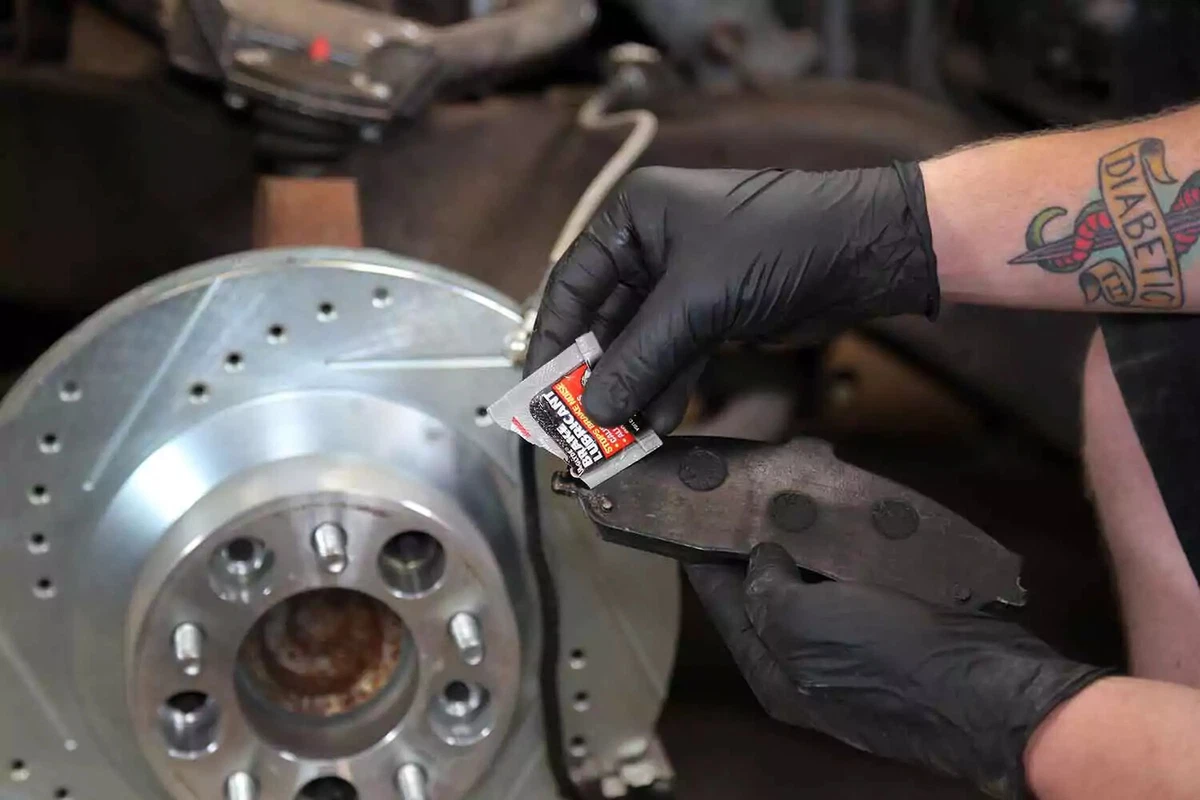
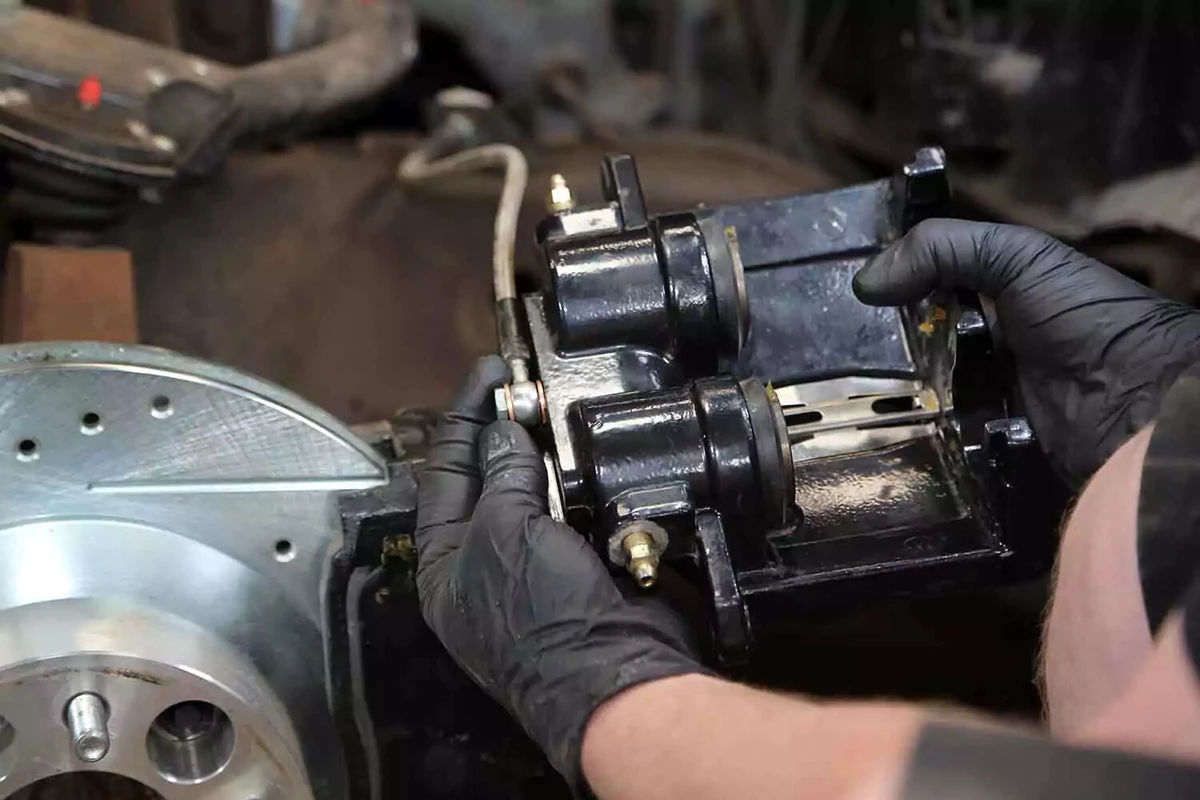
Whenever you install a new caliper, add a dab of brake grease to all metal-on-metal contact areas—including ears, sliding rings at the ends of the pads, and the piston to pad contact area. Do not allow grease to get on the friction pad or rotor.
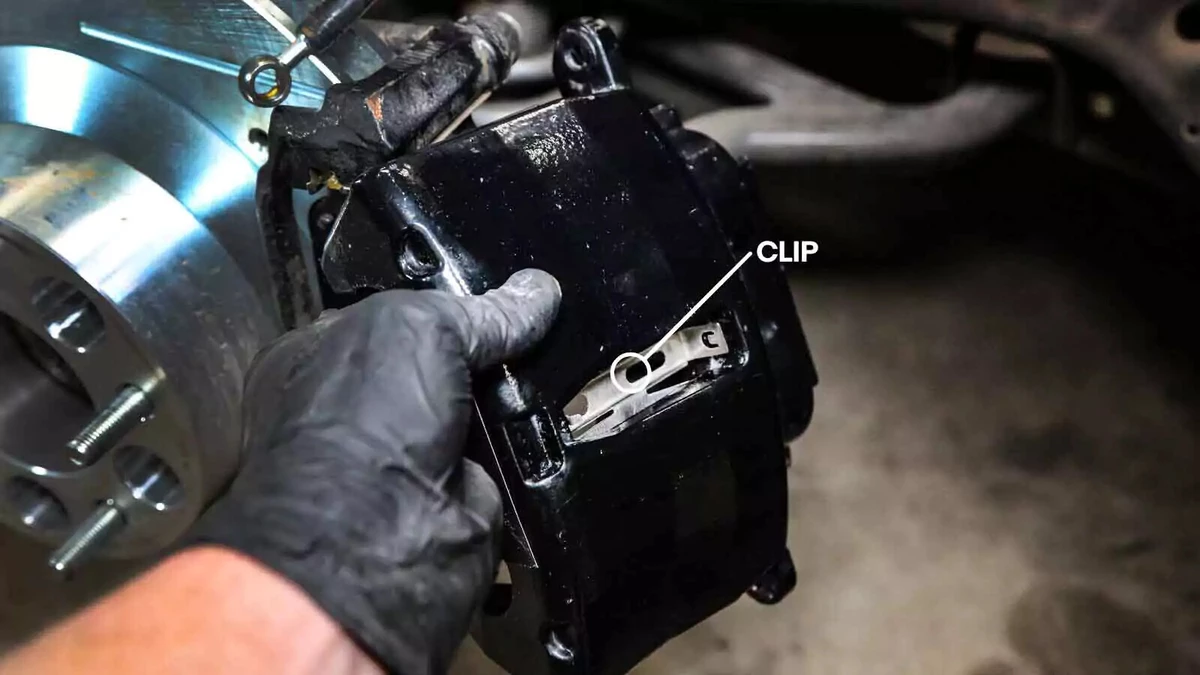
New brake pads should come with replacement clips. If you are reusing existing pads, swap the clips from the old caliper to the new one. The clip design varies by manufacturer. The caliper on our demo vehicle uses a single spring-steel center clip.
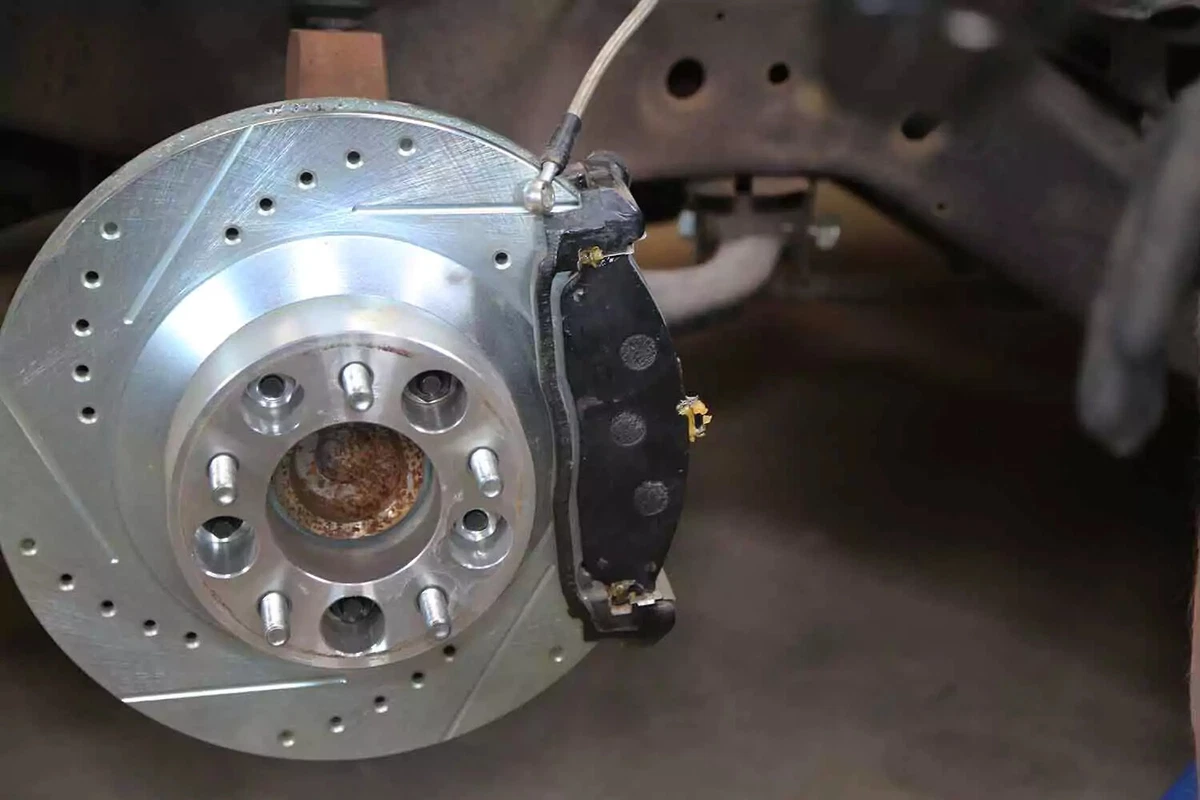
If you removed the brake pads for greasing, replace them in the pad mount.
Most calipers come with new crush washers. If your calipers use them, replace them now.
Thread the brake line into the caliper so they are snug by hand. It is usually easier to thread it in before mounting the caliper—and then tighten the line after the caliper is installed.

Slide the caliper over the brake pads. Ensure the pistons are fully retracted into the caliper body. Align the mounting bolt holes with the bracket.
Tighten the brake caliper bolts to specifications provided in your vehicle’s repair manual. Most caliper bolts need 50 to 60 pound-feet of torque.
Tighten the brake line fitting, but do not overtighten, which can strip the caliper’s threads. Most fittings use about 10 pound-feet of torque.

There are several ways to bleed brakes, but the most common way is to do it manually. If you have a power or vacuum bleeder, use it.
How to bleed brakes manually
Top off the master cylinder with new fluid. Watch the fluid level as you go. Replenish the fluid every couple of cycles to keep the level in the reservoir high enough. If there isn’t enough fluid covering the ports in the bottom of the reservoir, you might suck some air into the system. If so, you’ll need to start over from square one.
With an assistant’s help, start at the farthest brake position from the master cylinder (the passenger rear) and work your way to the closest position (the driver’s side front). It can be difficult to hear each other during this process, so use these commands. Here’s what they mean.
- Press: Press the pedal slowly to the floor.
- Hold: Hold the pedal to the floor. Do not lift it at all. Otherwise, you will draw air back into the system.
- Release: Release the brake pedal.
- Start with the farthest brake caliper/drum from the master cylinder.
- Call out, “Press,” to your assistant to actuate the brake pedal.
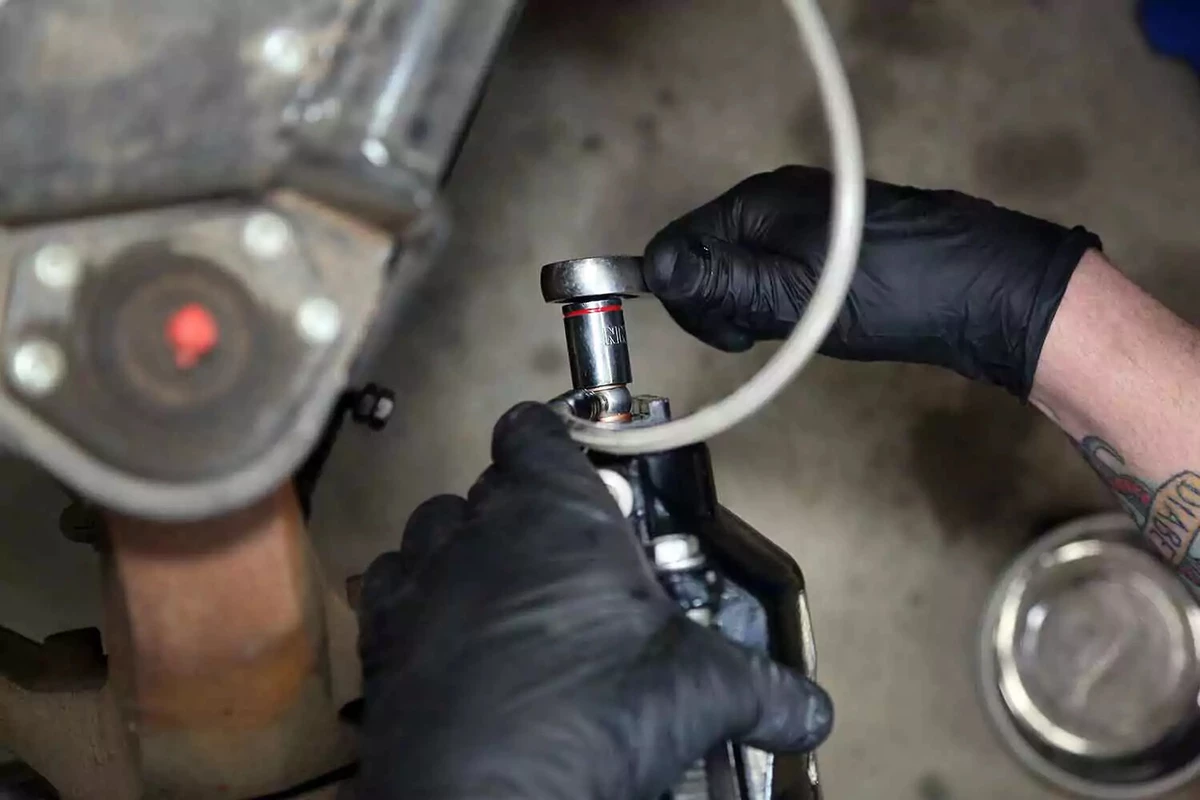
- Open the bleeder on the caliper or wheel cylinder about a half-turn.
- As the fluid comes out, watch for gurgles and sputters from air pockets. The pedal should sink slightly as the fluid rains, especially as you get most of the air out.
- Call out, “Hold,” and then tighten the bleeder.
- Call out, “Release,” to have your assistant slowly release the pedal. Wait about five seconds for fresh fluid to drain from the reservoir into the master cylinder.
Repeat this process until the fluid comes out clean without any sputtering.
Before moving to the next wheel, check the fluid level. If you drain the reservoir, start over. Check the level after each bleed operation. After you do all four wheels, start over to bleed any remaining air.
Cars with ABS may require the use of a pressure bleeder and/or an ABS-capable scan tool to get the last air out of the ABS hydraulic controller. Check your vehicle’s repair manual for details.
About the author

Share your feedback
This article is meant to provide general guidance only. Automotive maintenance, repair, upgrade, and installation may depend on vehicle-specifics such as make and model. Always consult your owner's manual, repair guide for specific information for your particular vehicle and consider a licensed auto-care professional's help as well, particularly for advance repairs.
Recommended for you
Find answers and inspiration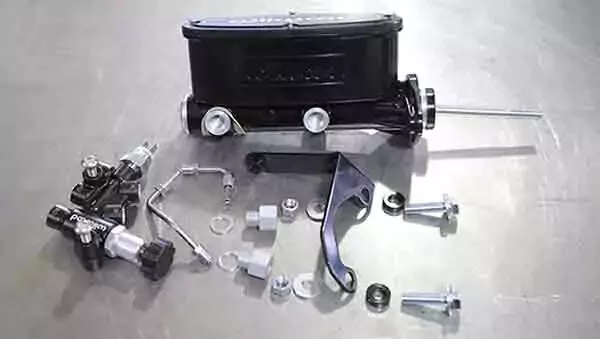
Buying the Right Brake Master Cylinder
6 min read
How to Replace Brake Fluid
10 min read
Brake Calipers 101
4 min read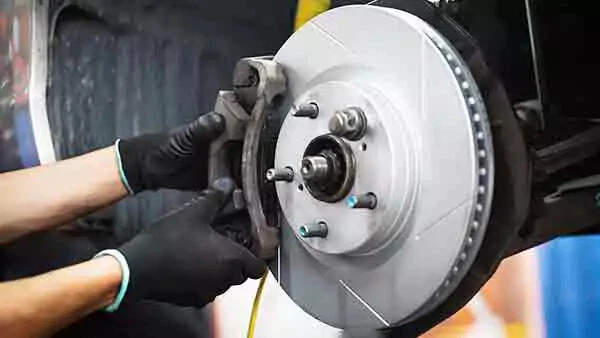
How to Buy the Right Brake Rotors
4 min read
Brake Master Cylinder Replacement: Step-by-Step
10 min read
How to Replace Brake Rotors
7 min read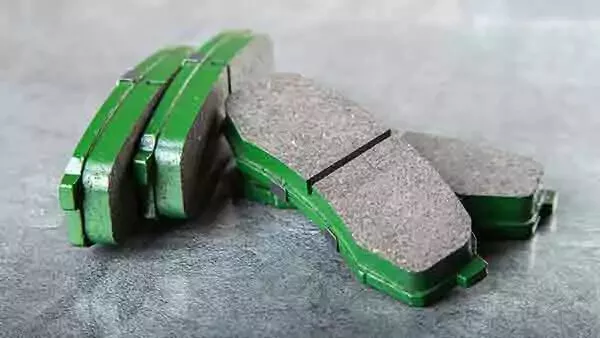
How to Find the Best Brake Pads for Your Vehicle
6 min read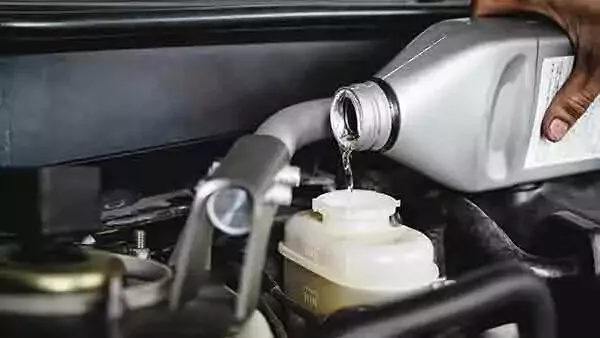
Choosing the Right Brake Fluid for Your Vehicle
5 min read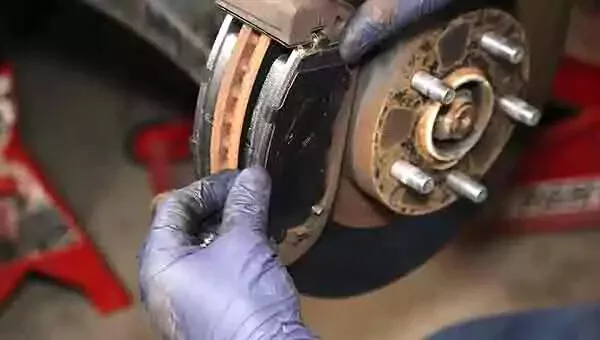
Brake Pads 101
7 min read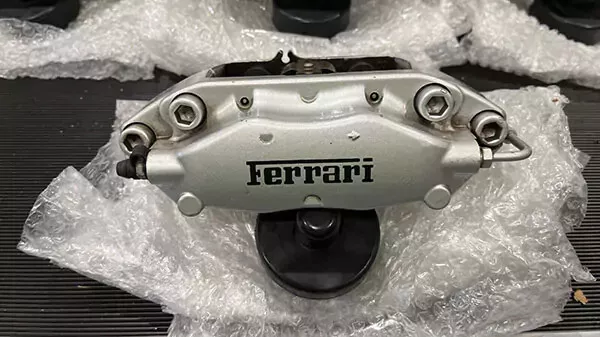
Buying the Right Brake Calipers
7 min read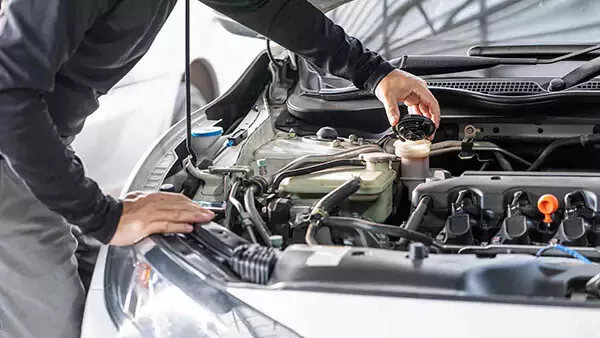
When to Replace Your Brake Fluid
5 min read
How to Change Disc Brake Pads
8 min read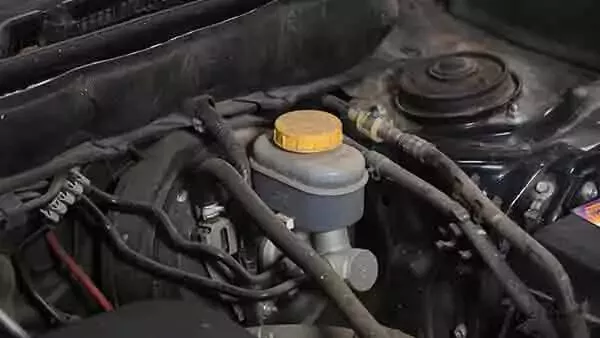
An Introduction to Brake Master Cylinders
6 min read
Explore more projects

How to Repair a Chipped Windshield
1 to 2 hours
Beginner
7 min read
How to Replace Brake Fluid
1 to 2 hours
Beginner
10 min read

How to Replace an Ignition Coil
Less than 30 minutes
Beginner
6 min read

How to Replace a Radiator Hose
Less than 30 minutes
Beginner
5 min read
How to Replace Brake Rotors
1 to 2 hours
Beginner
7 min read

How to Replace a Serpentine Belt Tensioner
Less than 30 minutes
Beginner
4 min read

How to Replace a Drive Belt
Less than 30 minutes
Beginner
5 min read

How to Rotate Your Tires
30 to 60 minutes
Beginner
5 min read

How to Refill Windshield Washer Fluid
Less than 30 minutes
Beginner
4 min read

How to Replace an Oxygen Sensor
30 to 60 minutes
Beginner
5 min read

How To Replace Differential Fluid
Less than 30 minutes
Beginner
8 min read

How to Replace Sway Bar End Links and Bushings
30 to 60 minutes
Beginner
6 min read

How to Replace Transmission Fluid and Filter
1 to 2 hours
Beginner
11 min read
How to Change Disc Brake Pads
30 to 60 minutes
Beginner
8 min read

How to Replace a Cabin Air Filter
Less than 30 minutes
Beginner
5 min read

How to Replace a Valve Cover Gasket
Less than 30 minutes
Beginner
7 min read

How to Change Windshield Wipers
Less than 30 minutes
Beginner
3 min read

How to Replace an Engine Air Filter
Less than 30 minutes
Beginner
5 min read

How to Clean Fuel Injectors
1 to 2 hours
Beginner
8 min read

How to Replace Shock Absorbers
30 to 60 minutes
Beginner
8 min read

How to Change a Car Battery
Less than 30 minutes
Beginner
6 min read
Automation How to Change a Car Battery
Less than 30 minutes
Beginner
6 min read

How to Replace a Mass Air Flow (MAF) Sensor
Less than 30 minutes
Beginner
7 min read

How to Replace a Clutch Master Cylinder
1 to 2 hours
Beginner
11 min read

How to Flush and Change Engine Coolant
30 to 60 minutes
Beginner
6 min read

How to Replace a Distributor Cap and Rotor
30 to 60 minutes
Beginner
5 min read

How to Check Tire Pressure and Change a Tire
Less than 30 minutes
Beginner
9 min read

How to Replace a Fuel Filter
30 to 60 minutes
Beginner
7 min read

How to Replace a PCV Valve
30 to 60 minutes
Beginner
6 min read

How to Replace an Idler Pulley
30 to 60 minutes
Beginner
4 min read

How to Change a Headlight Bulb
Less than 30 minutes
Beginner
6 min read

How to Replace an Exhaust Gasket
1 to 2 hours
Beginner
9 min read

How to Replace a Throttle Body
30 to 60 minutes
Beginner
6 min read

How to Change Oil in a Car
Less than 30 minutes
Beginner
8 min read

How to Replace an Alternator
1 to 2 hours
Beginner
11 min read

How to Replace an EGR Valve
30 to 60 minutes
Beginner
5 min read

How to Jump Start a Car
Less than 30 minutes
Beginner
9 min read