In a disc brake system - opens in new window or tab., the brake caliper sits over the rotor, which is a spinning disc. When you press the brake pedal, the caliper pushes the brake pads to clamp down on the rotor. That friction brings your vehicle to a stop.
However, if you let your brake pads become thin or wear out, the same friction could scar your rotors. Eventually, metal-on-metal friction will destroy your rotor.
If your rotor is scarred, rusted, or damaged, you have a choice: replace the damaged rotor with a new one or remove the old rotor to repair it.
A slightly worn rotor can be repaired at a machine shop. Machining—also called turning—removes the worn area, restoring the rotor’s braking function. That said, a minimum rotor thickness is required to provide safe braking. Turning makes a rotor thinner. In many cases, a warped or badly scarred rotor requires replacement. Our blog post about turning versus replacing - opens in new window or tab. will help you decide between the two options.
How do you tell if your brake rotors are bad?
How do you know when a rotor needs to be replaced or machined? If your brake pedal pulsates under moderate braking, it’s probably out-of-true. If the brake pads are so worn that the steel backing plate wore grooves into the surface, it should be replaced.
Learn more about how brake rotors work and when it’s time to replace them - opens in new window or tab..
How hard is it to replace brake rotors?
Changing brake rotors is considered a beginner do-it-yourself job, usually taking one or two hours. However, when you replace rotors, it almost always means you need new brake pads as well. That’s also a beginner task that usually takes another 30 to 60 minutes. See our guide about how to buy the right brake rotors - opens in new window or tab..
Tips and Tricks for DIY Brake Rotors Replacement
- Most of the time, you will replace a brake rotor when replacing brake pads.
- If you install a new rotor, you also need to install new brake pads. Old pads on a new rotor will wear unevenly.
- Most modern cars are front-wheel or all-wheel-drive. The rotor for a drive wheel—a wheel delivering power—floats on the drive hub. These configurations simplify the process of replacing a rotor. However, for a front rotor on a rear-wheel-drive or rear wheel on a front-wheel-drive vehicle, the rotor is often part of the wheel hub. That means you have to remove the hub from the spindle. That process is not covered in this article.
- When working on any vehicle raised with a jack, always support the vehicle with a jack stand. Never rely on a jack alone.
- Turning (or machining) a rotor is usually less expensive than buying new ones—but not by much. Remachining damaged brake rotors is a dying art, usually reserved for heavy-duty or hard-to-find rotors.
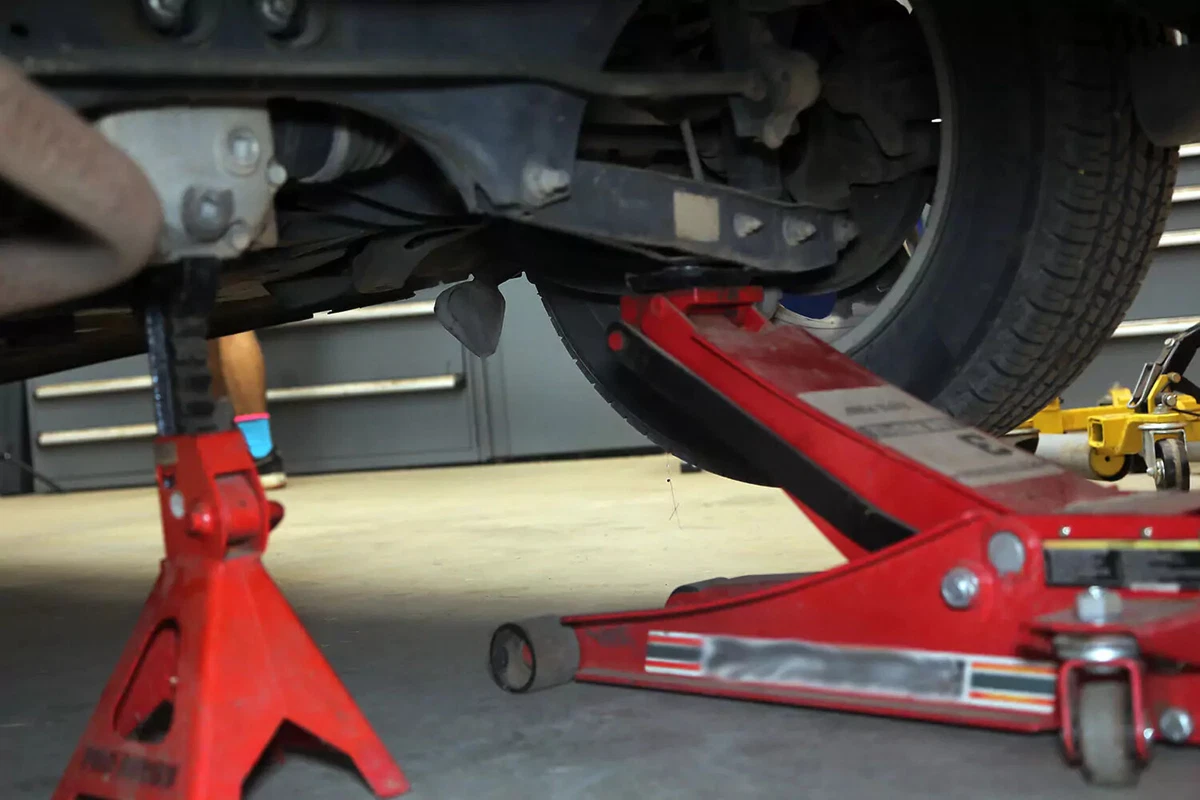
This project requires working safely under the vehicle. You will need a floor jack, and jack stands, ramps, or wheel cribs to support the vehicle.
Locate the factory jacking points just behind the front wheels or just in front of the rear wheels. The jacking point is a metal section with two V notches about two inches apart. Check your owner’s manual to confirm the lift location.
Never use jack stands on dirt, gravel, or asphalt. If you do not have access to a concrete work surface, use wheel cribs, solid-base ramps, or wide-base wood supports to support the vehicle. Never use cinder blocks or bricks as supports.
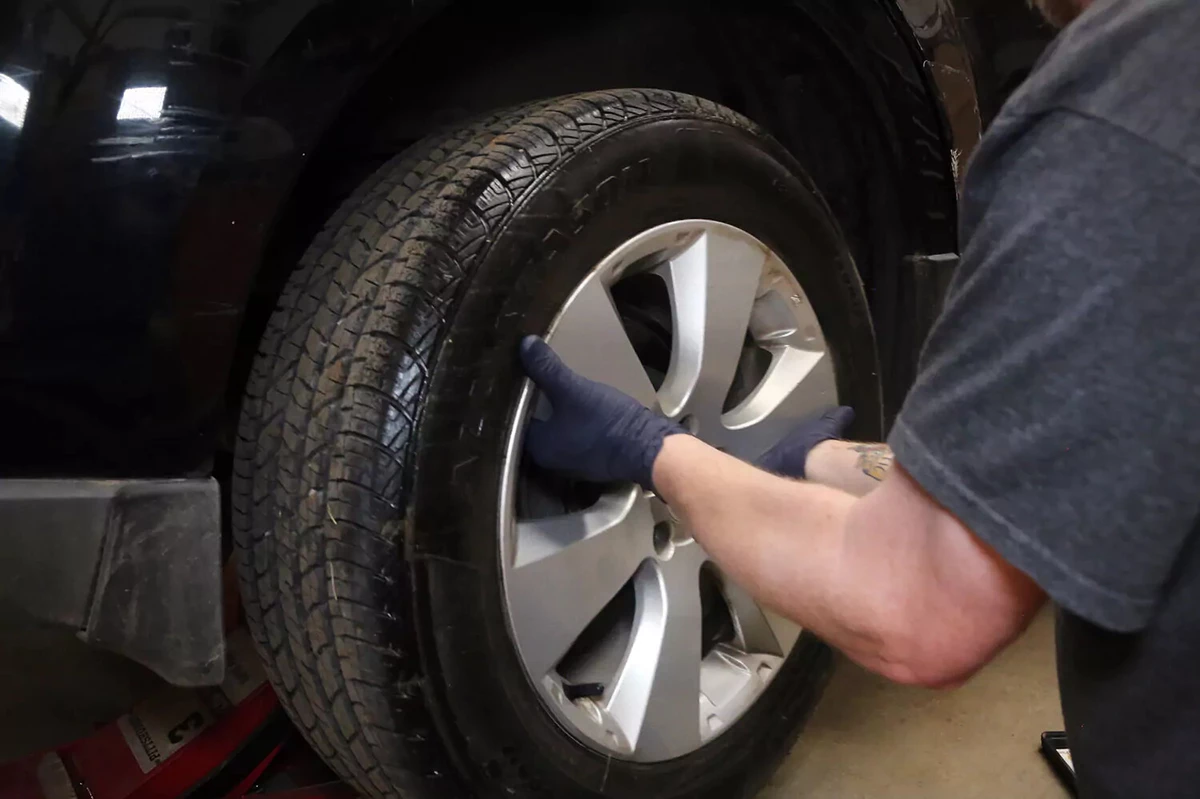
Remove the lug nuts. Pull the wheel off the hub.
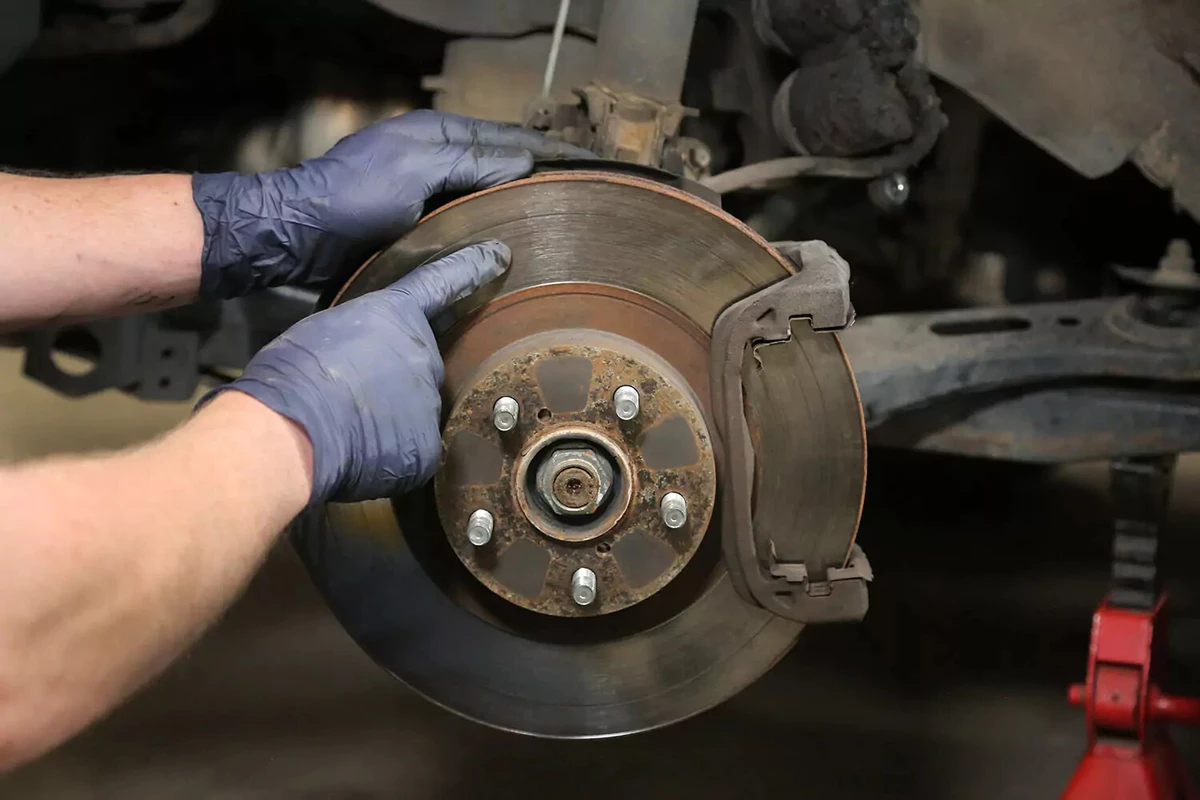
We were replacing the brake pads on our demonstration vehicle when we noticed that the rotor was scarred. The rotor could be machined (or turned on a brake lathe), but we opted to replace it.
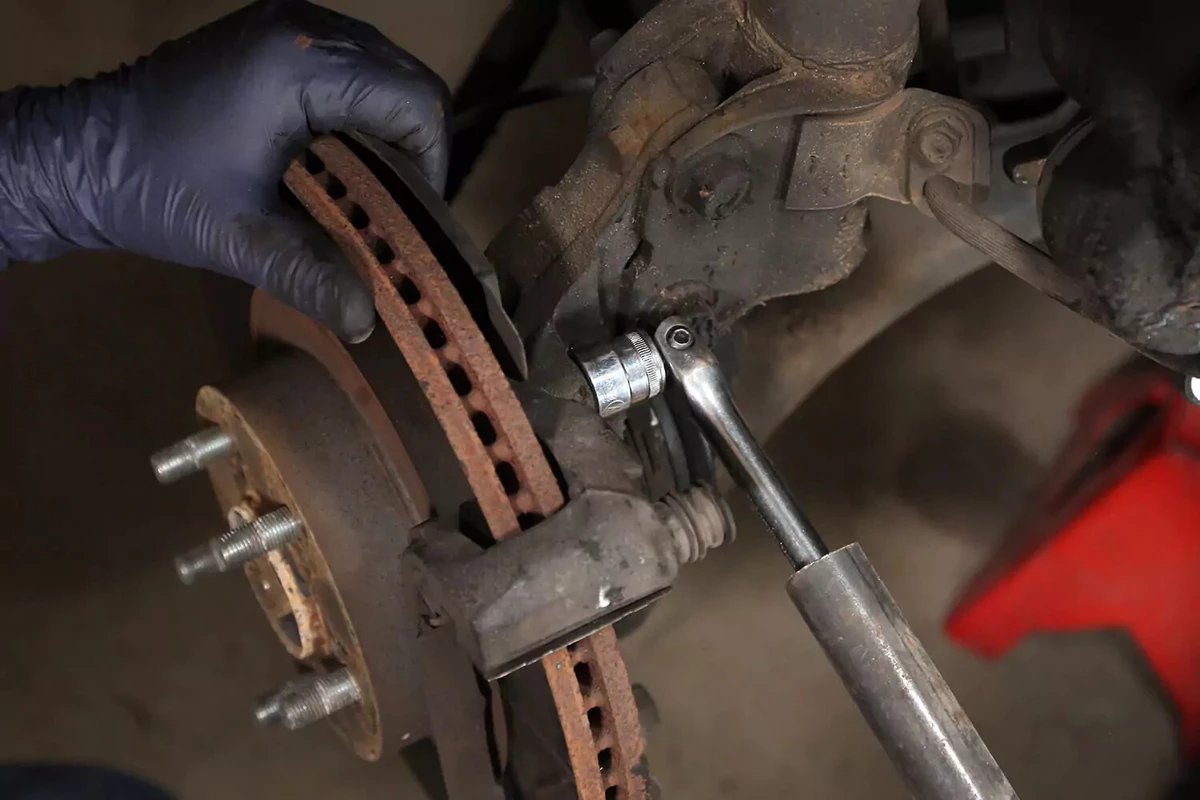
On most modern vehicles, the caliper mount straddles the rotor. These bolts are typically installed with medium-strength threadlocker adhesives, which can be difficult to break free.
We used a ½-inch drive breaker bar, socket, and a piece of heavy-wall steel tubing as a “cheater bar” to loosen the bolts. An impact gun might not fit behind the rotor.
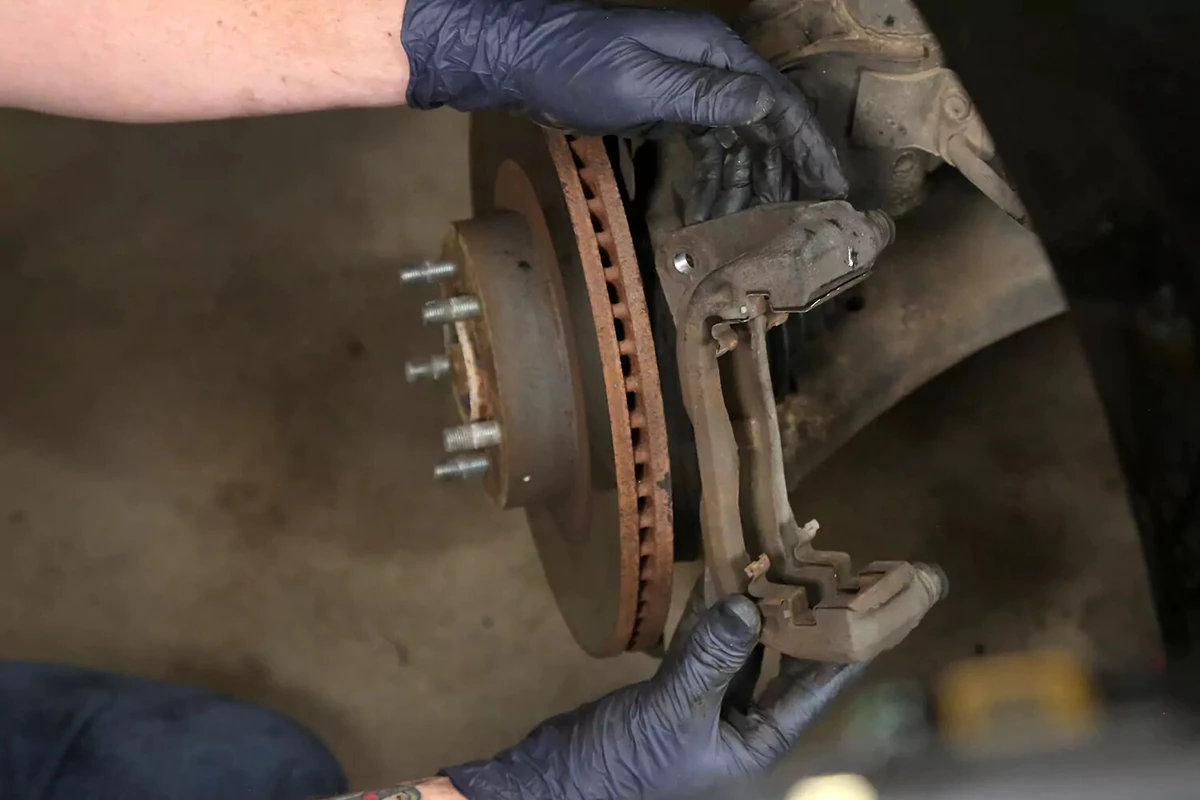
Lift the caliper mount off the rotor after the bolts are loosened and removed.

Floating rotors (used on most front-wheel and all-wheel-drive vehicles) tend to seize onto the wheel hub.
Use brake cleaner to clean corrosion from where the hub connects to the rotor.
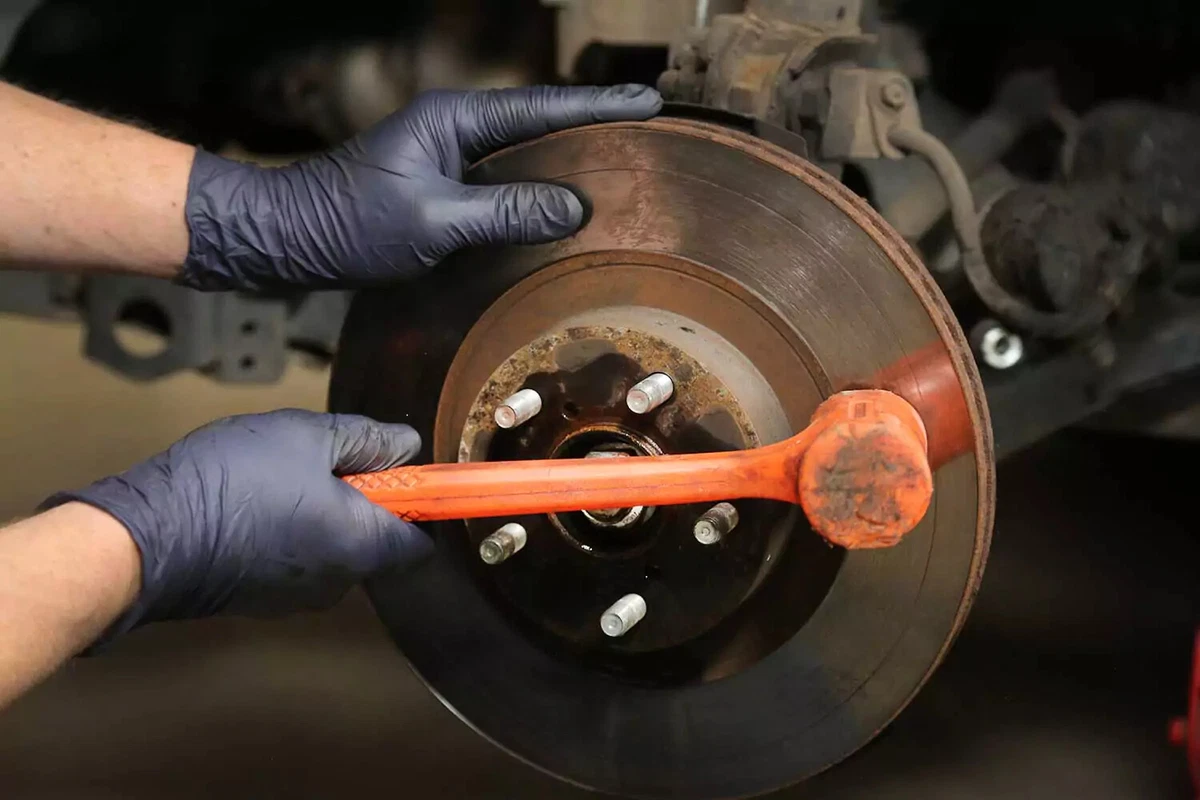
This step isn’t always necessary. But if the rotor is stuck on the hub—which happens about half the time—use a rubber mallet or dead blow hammer to free the rotor.
Be prepared to use a lot of force. But don’t use a metal hammer, which can damage the rotor. If there is a threaded hole in the rotor, you can thread a small bolt into the hole and use it to push the rotor away from the hub. Penetrating oil can help, too.
Some vehicles use one or two small fasteners to keep the rotor in place. If your vehicle has this feature, remove the bolts and keep them for reuse.
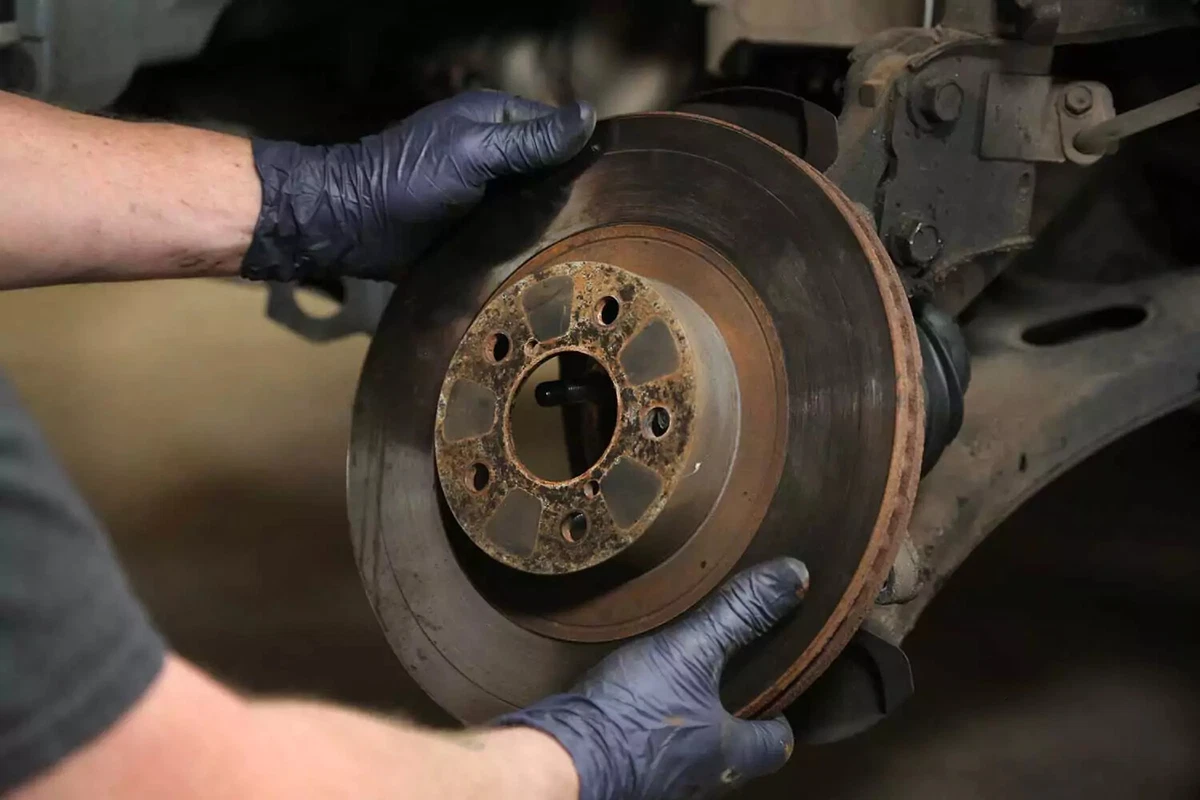
After the rotor is loose, slide it off the hub. If you want to save the rotor, bring it to a local brake-rotor servicer to be measured and turned. Measurement is necessary because safety standards require a minimum thickness for brake rotors. Turning makes a rotor thinner.
Use a stiff steel brush and brake cleaner to remove rust, scale, grease, and other debris from the hub. This will make the new (or turned) rotor easier to install.
If your hub is heavily corroded, use Scotch-Brite or 180-grit sandpaper to remove the extra rust.
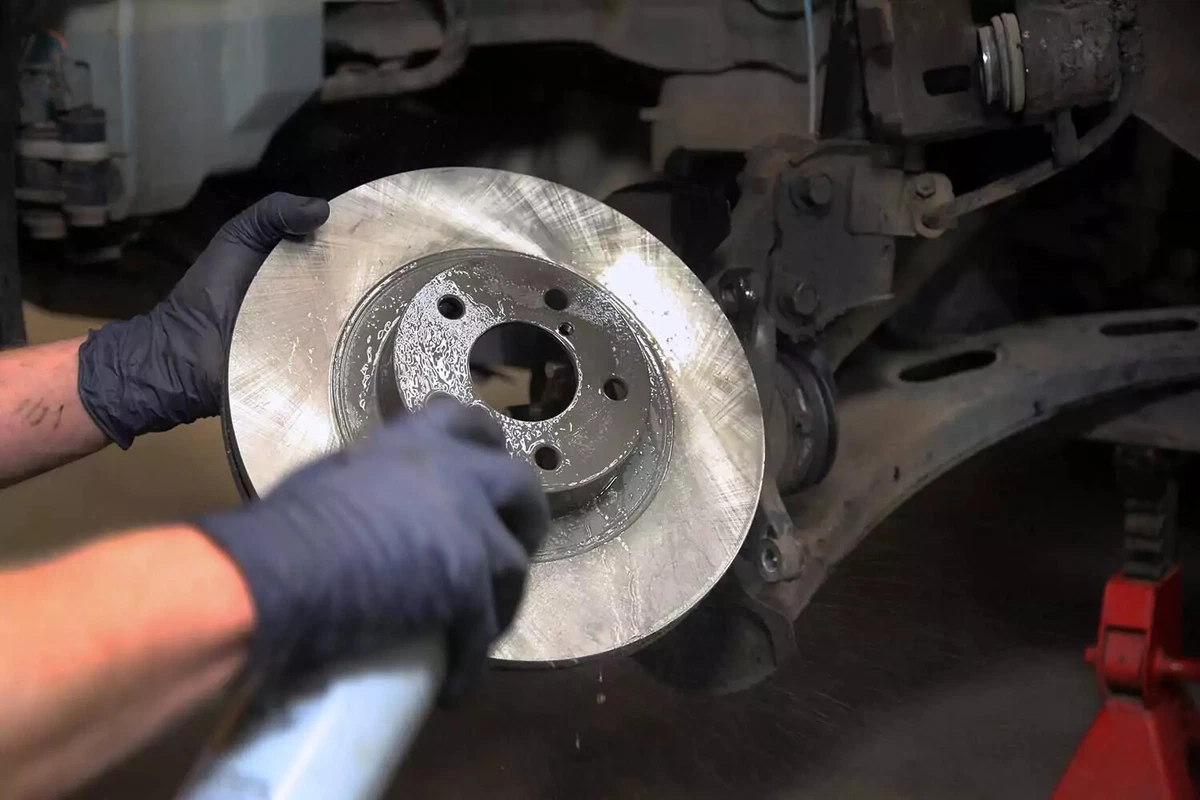
Before installing a new (or turned) rotor, clean it with a brake cleaner. New rotors have anti-corrosion coatings that can cause problems for the brake pads.
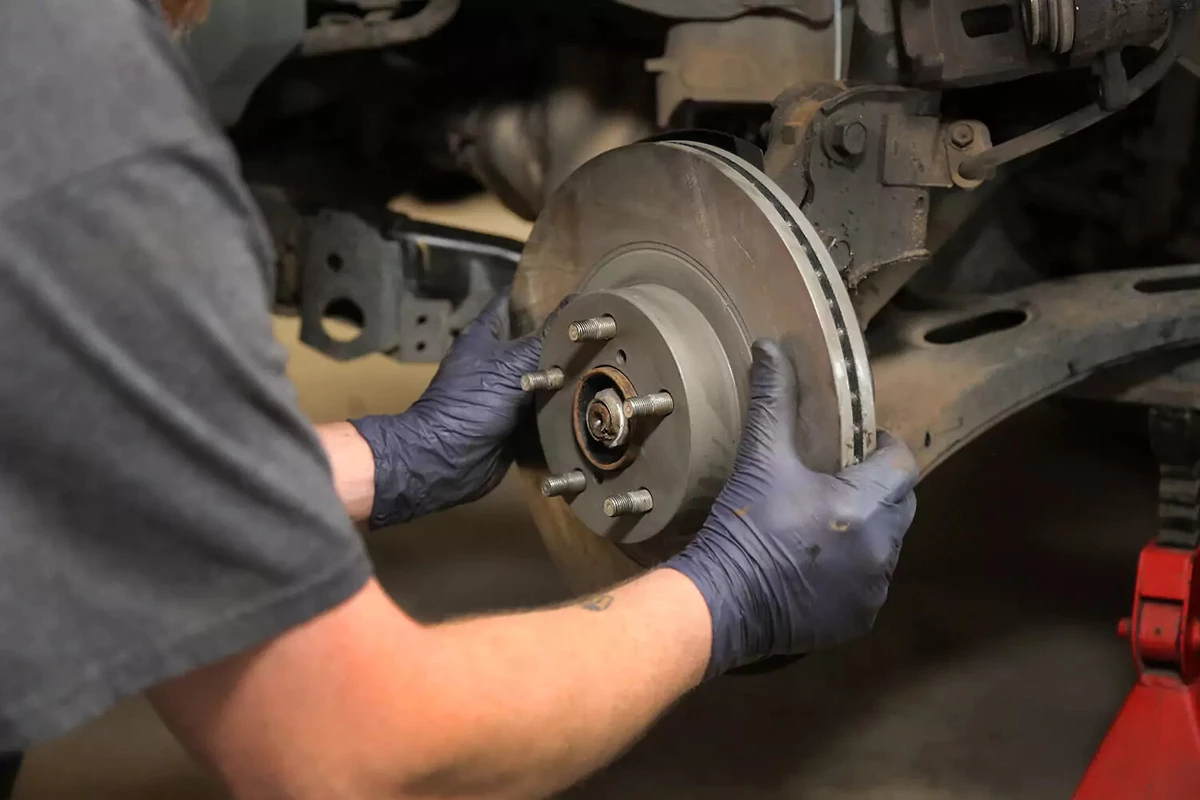
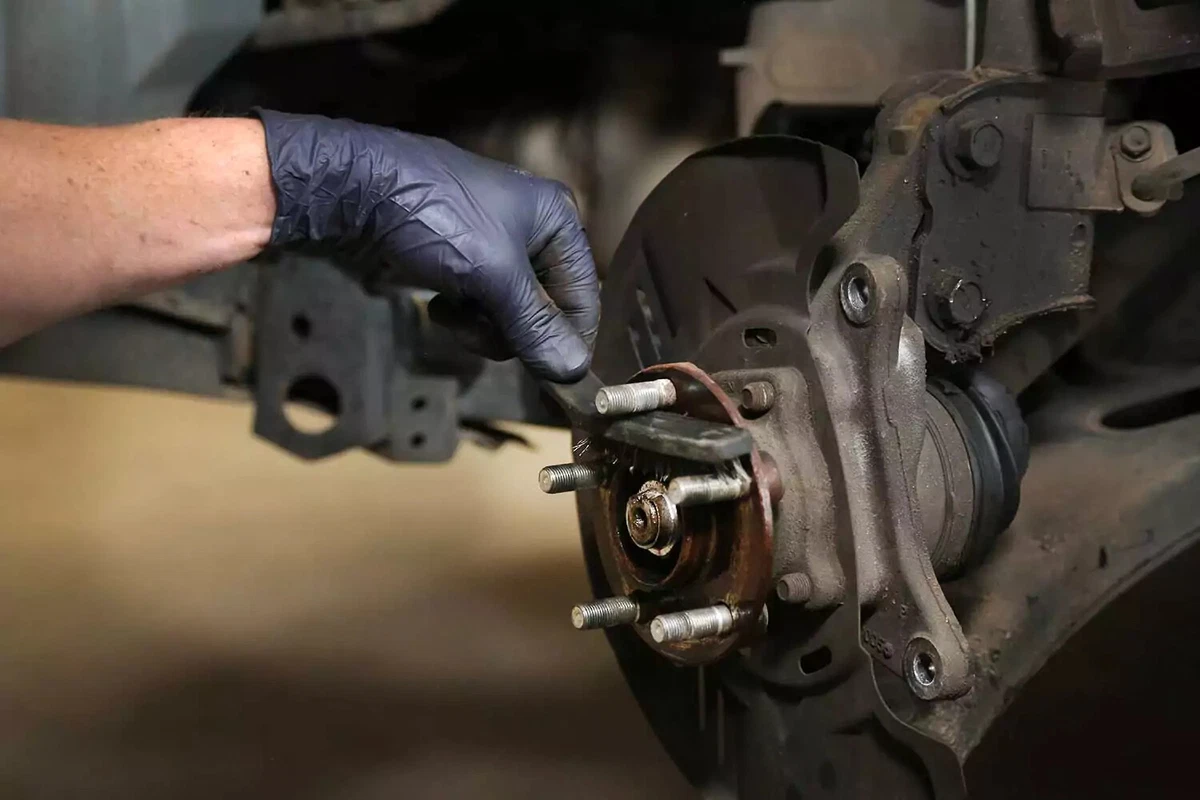
After the new rotor is squeaky clean, install it on the wheel hub. A thin coating of anti-seize compound where the rotor sits on the hub helps if you need to remove the rotor again later. Be careful not to let the anti-seize compound get on the rotor surface.
Installing the new rotor should not require any force. It should slide easily over the wheel lugs and center hub. It will probably flop to one side. That’s okay.
If your rotor has a mounting bolt, reinstall it at this time.
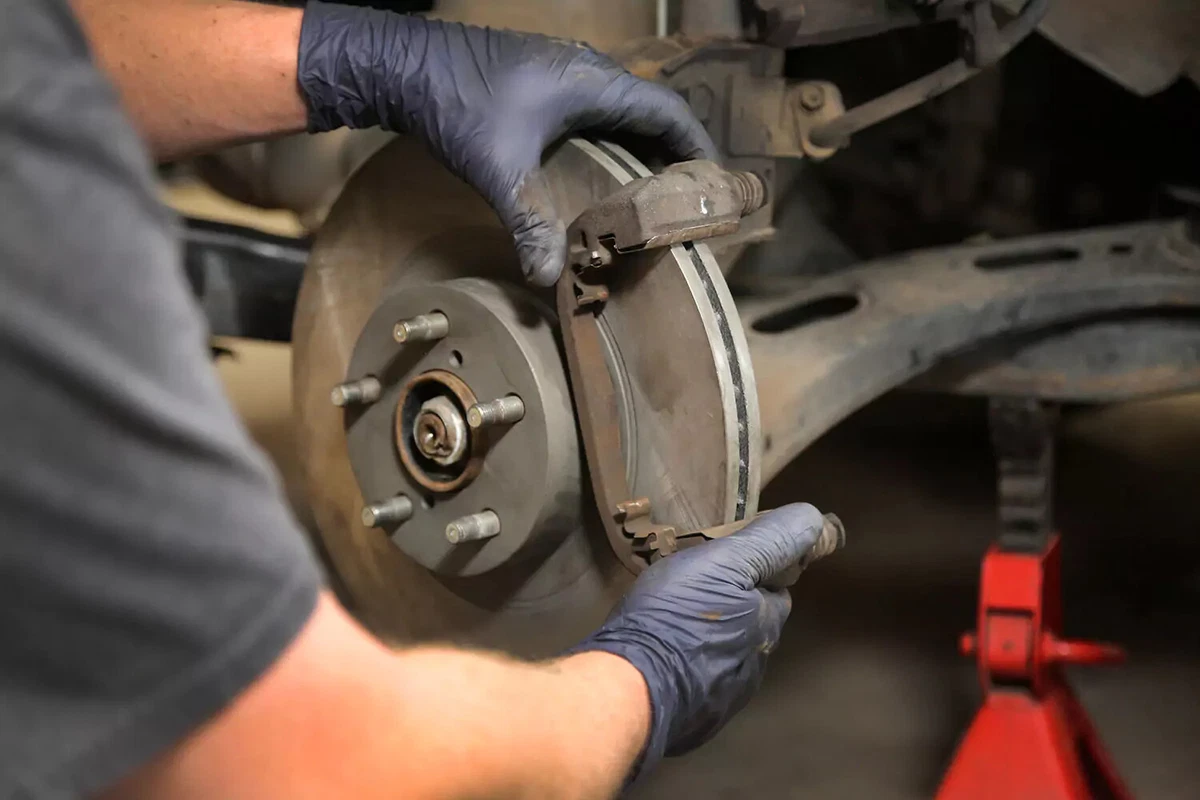
Slip the original brake caliper bracket over the rotor. Move it into position on the suspension spindle.
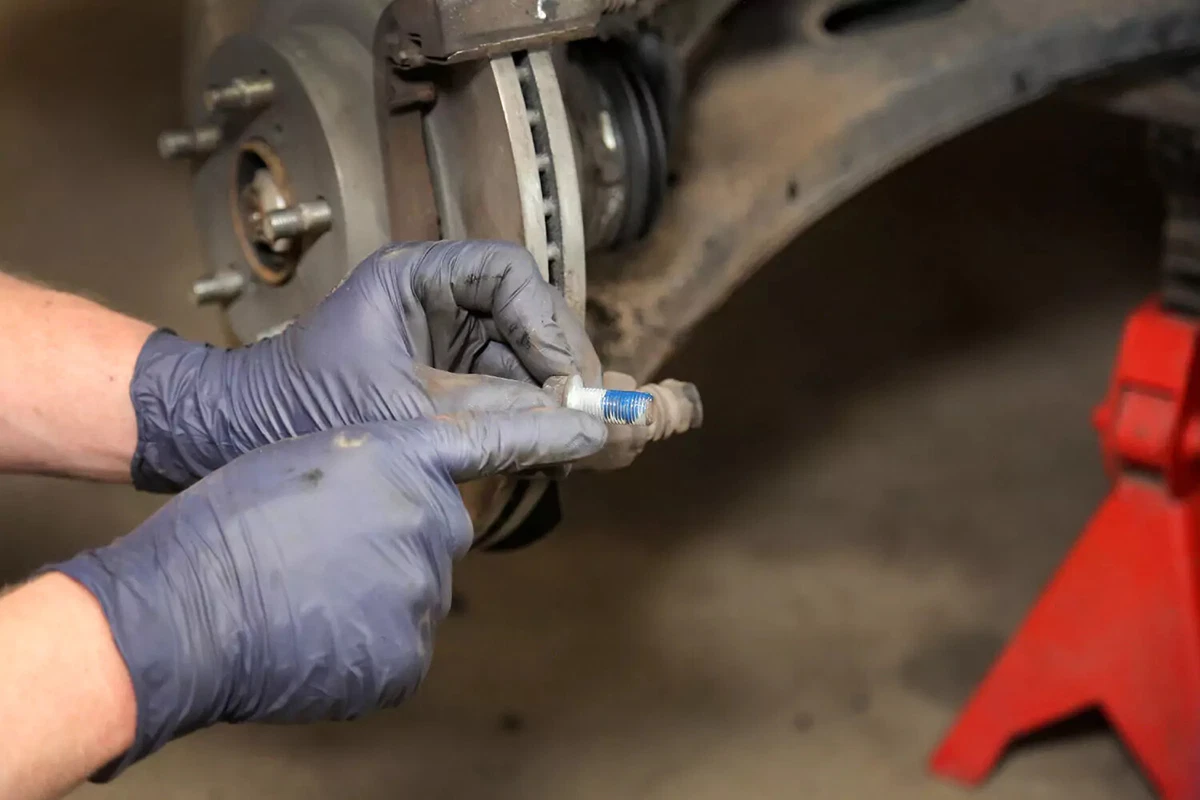
Most vehicles utilize medium threadlockers on the caliper bracket bolts. Clean the old thread locker and apply fresh blue medium-strength threadlocker.
Don’t use red high-strength threadlocker on these bolts unless your repair manual recommends it. High-strength thread locker is not removable without heat.
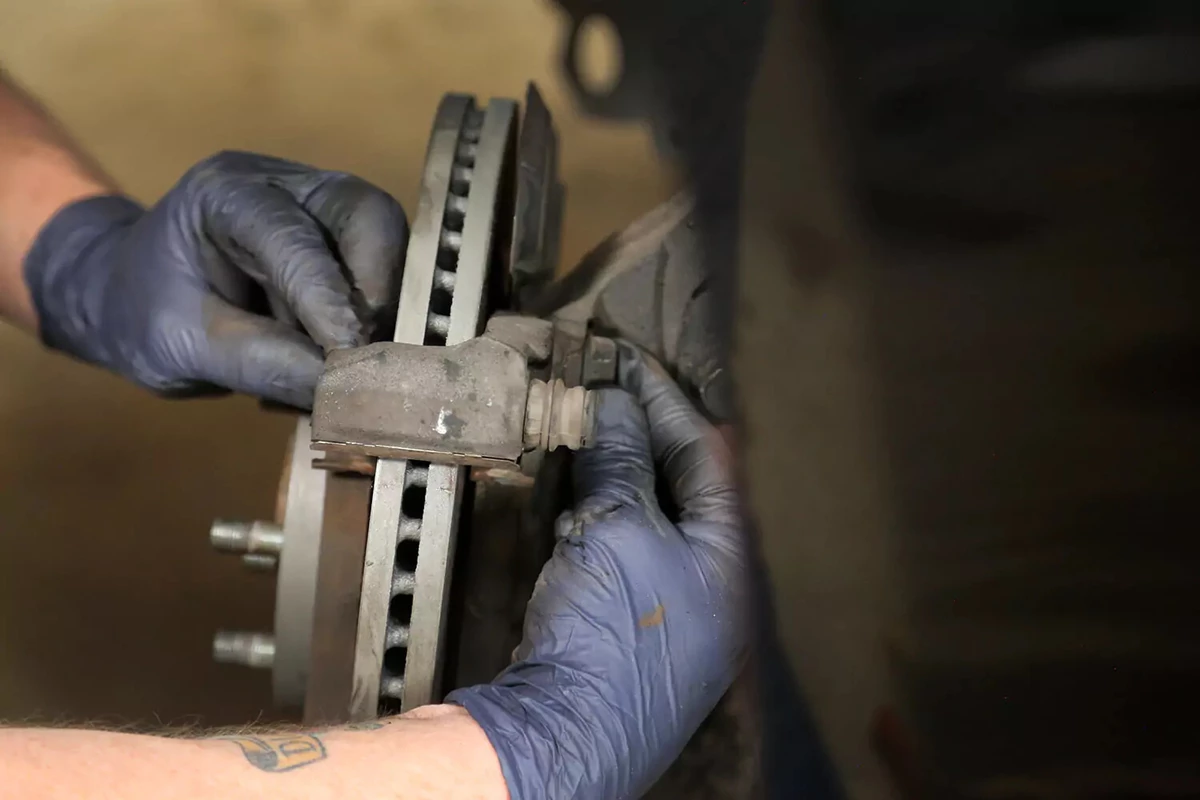
Thread the bolts through the caliper mount into the spindle. The bolts hold the rotor in place.
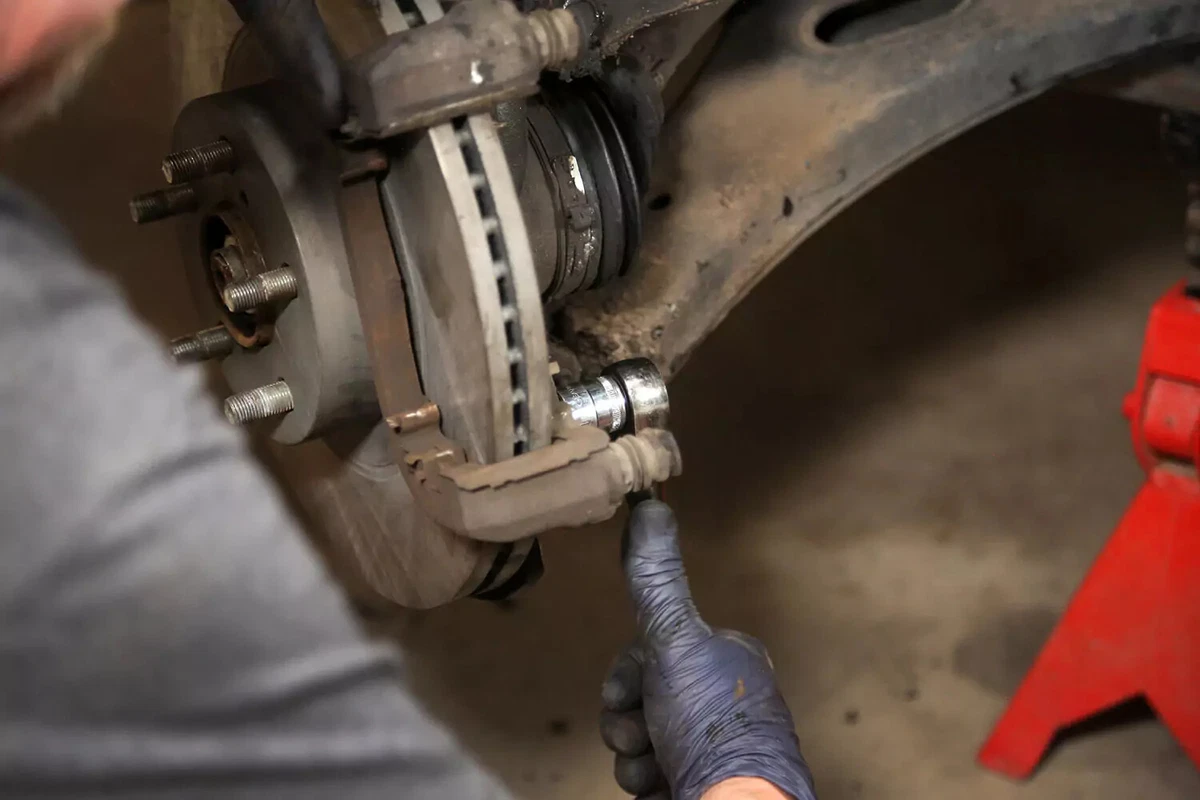
Use a wrench, or socket and ratchet, to tighten the bolts snug to the caliper mount.
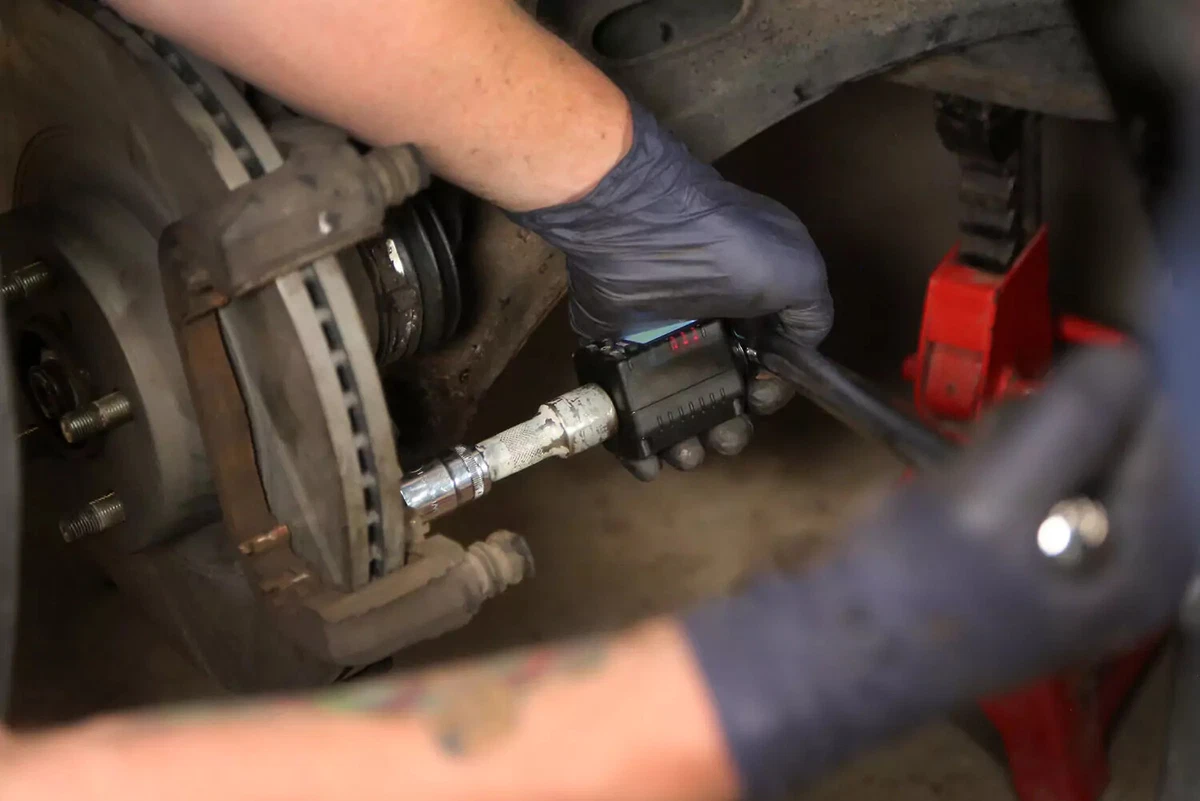
Tighten the bolts to factory specs, which you can find in the vehicle’s repair manual. We used a torque wrench adapter on a ½-inch breaker bar with a short extension and socket. This digital adapter works well in tight locations.
Your new rotor is now installed. Complete the brake job by bedding your brake pads.
How to Bed Your Brakes After Installing New Rotors
Bedding your brakes is an easy process that extends their life. Drive the vehicle to 35 miles per hour and apply the brakes moderately to slow the vehicle to about 10 mph. Don’t come to a complete stop. Accelerate again to 35 mph, then slow to 10 mph. Repeat this five times.
Increase your speed to about 60 miles per hour and apply the brakes harder—although not a full panic stop—to bring the car to approximately 10 mph. Repeat these higher-speed stops three times. Now, you’re ready to drive and brake with confidence.
About the author

Share your feedback
This article is meant to provide general guidance only. Automotive maintenance, repair, upgrade, and installation may depend on vehicle-specifics such as make and model. Always consult your owner's manual, repair guide for specific information for your particular vehicle and consider a licensed auto-care professional's help as well, particularly for advance repairs.
Recommended for you
Find answers and inspiration
Buying the Right Brake Master Cylinder
6 min read
How to Replace Brake Fluid
10 min read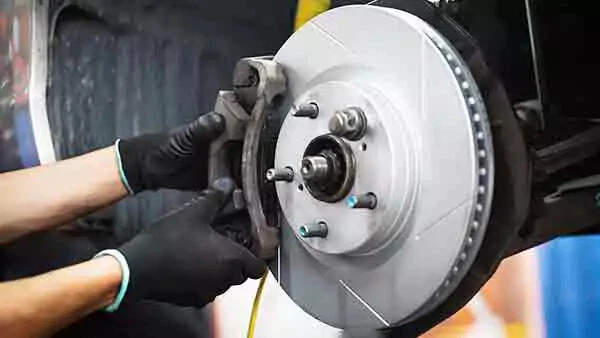
How to Buy the Right Brake Rotors
4 min read
Brake Calipers 101
4 min read
Brake Master Cylinder Replacement: Step-by-Step
10 min read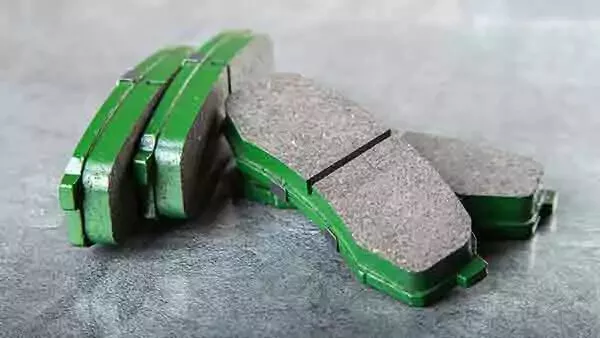
How to Find the Best Brake Pads for Your Vehicle
6 min read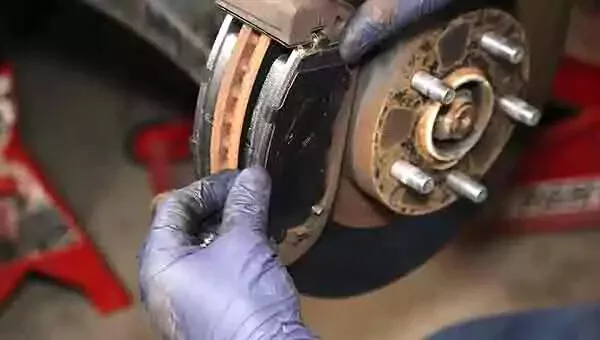
Brake Pads 101
7 min read
How to Replace a Brake Caliper
7 min read
Choosing the Right Brake Fluid for Your Vehicle
5 min read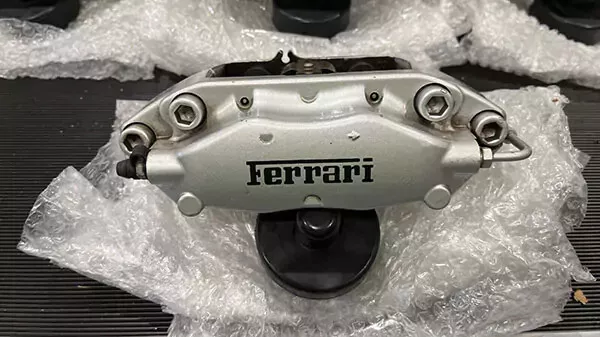
Buying the Right Brake Calipers
7 min read
When to Replace Your Brake Fluid
5 min read
How to Change Disc Brake Pads
8 min read
An Introduction to Brake Master Cylinders
6 min read
Explore more projects

How to Repair a Chipped Windshield
1 to 2 hours
Beginner
7 min read
How to Replace Brake Fluid
1 to 2 hours
Beginner
10 min read

How to Replace an Ignition Coil
Less than 30 minutes
Beginner
6 min read

How to Replace a Radiator Hose
Less than 30 minutes
Beginner
5 min read

How to Replace a Serpentine Belt Tensioner
Less than 30 minutes
Beginner
4 min read

How to Rotate Your Tires
30 to 60 minutes
Beginner
5 min read

How to Replace a Drive Belt
Less than 30 minutes
Beginner
5 min read

How to Refill Windshield Washer Fluid
Less than 30 minutes
Beginner
4 min read

How to Replace an Oxygen Sensor
30 to 60 minutes
Beginner
5 min read

How To Replace Differential Fluid
Less than 30 minutes
Beginner
8 min read

How to Replace Sway Bar End Links and Bushings
30 to 60 minutes
Beginner
6 min read

How to Replace Transmission Fluid and Filter
1 to 2 hours
Beginner
11 min read
How to Change Disc Brake Pads
30 to 60 minutes
Beginner
8 min read

How to Replace a Valve Cover Gasket
Less than 30 minutes
Beginner
7 min read

How to Replace a Cabin Air Filter
Less than 30 minutes
Beginner
5 min read

How to Change Windshield Wipers
Less than 30 minutes
Beginner
3 min read

How to Replace an Engine Air Filter
Less than 30 minutes
Beginner
5 min read

How to Replace Shock Absorbers
30 to 60 minutes
Beginner
8 min read

How to Clean Fuel Injectors
1 to 2 hours
Beginner
8 min read

How to Change a Car Battery
Less than 30 minutes
Beginner
6 min read
Automation How to Change a Car Battery
Less than 30 minutes
Beginner
6 min read

How to Replace a Mass Air Flow (MAF) Sensor
Less than 30 minutes
Beginner
7 min read

How to Replace a Clutch Master Cylinder
1 to 2 hours
Beginner
11 min read

How to Flush and Change Engine Coolant
30 to 60 minutes
Beginner
6 min read

How to Replace a Distributor Cap and Rotor
30 to 60 minutes
Beginner
5 min read

How to Check Tire Pressure and Change a Tire
Less than 30 minutes
Beginner
9 min read

How to Replace a Fuel Filter
30 to 60 minutes
Beginner
7 min read

How to Replace a PCV Valve
30 to 60 minutes
Beginner
6 min read
How to Replace a Brake Caliper
1 to 2 hours
Beginner
7 min read

How to Replace an Idler Pulley
30 to 60 minutes
Beginner
4 min read

How to Change a Headlight Bulb
Less than 30 minutes
Beginner
6 min read

How to Replace an Exhaust Gasket
1 to 2 hours
Beginner
9 min read

How to Replace a Throttle Body
30 to 60 minutes
Beginner
6 min read

How to Change Oil in a Car
Less than 30 minutes
Beginner
8 min read

How to Jump Start a Car
Less than 30 minutes
Beginner
9 min read

How to Replace an Alternator
1 to 2 hours
Beginner
11 min read

How to Replace an EGR Valve
30 to 60 minutes
Beginner
5 min read