Since the early 2000s, most new vehicles have a cabin air filter. The cabin air filter cleans the air coming into your vehicle’s passenger area. Most fresh-air inlets are on the passenger side cowl below the windshield.
We recommend replacing the cabin filter every 15,000 to 30,000 miles (or every three years). A clogged cabin air filter can put a strain on the AC fan. That can lead to weak airflow or overheating.
If your HVAC system gives off a foul odor, your cabin air filter might be clogged. Other symptoms of a clogged cabin air filter include a whistling noise or a musty smell. Don’t ignore the smell. Mold can form if moisture accumulates in the HVAC passages.
It only takes a few minutes to change the cabin air filters.
Tips and Tricks
- Most cabin air filters are made from cotton or paper gauze.
- Filters with activated charcoal pads can absorb odors. Charcoal filters are more expensive and must be replaced more often—about every six months.
- Another option is a reusable cabin filter. That’s what we used in our demo. These are much more expensive, but they last several years. Clean a reusable filter with a special solution and reinstall it. Reusable filters are a greener option.
- If you live in an area with high pollen, or if you smoke inside your car, replace the cabin filter more often.

The cabin filter is found behind the glove box for nearly all vehicles. That’s the location of the filter for our demo vehicle.
Some vehicles, such as German luxury brands, have two filters under the hood. Check your owner’s manual for the location.
Open and empty the glove box.
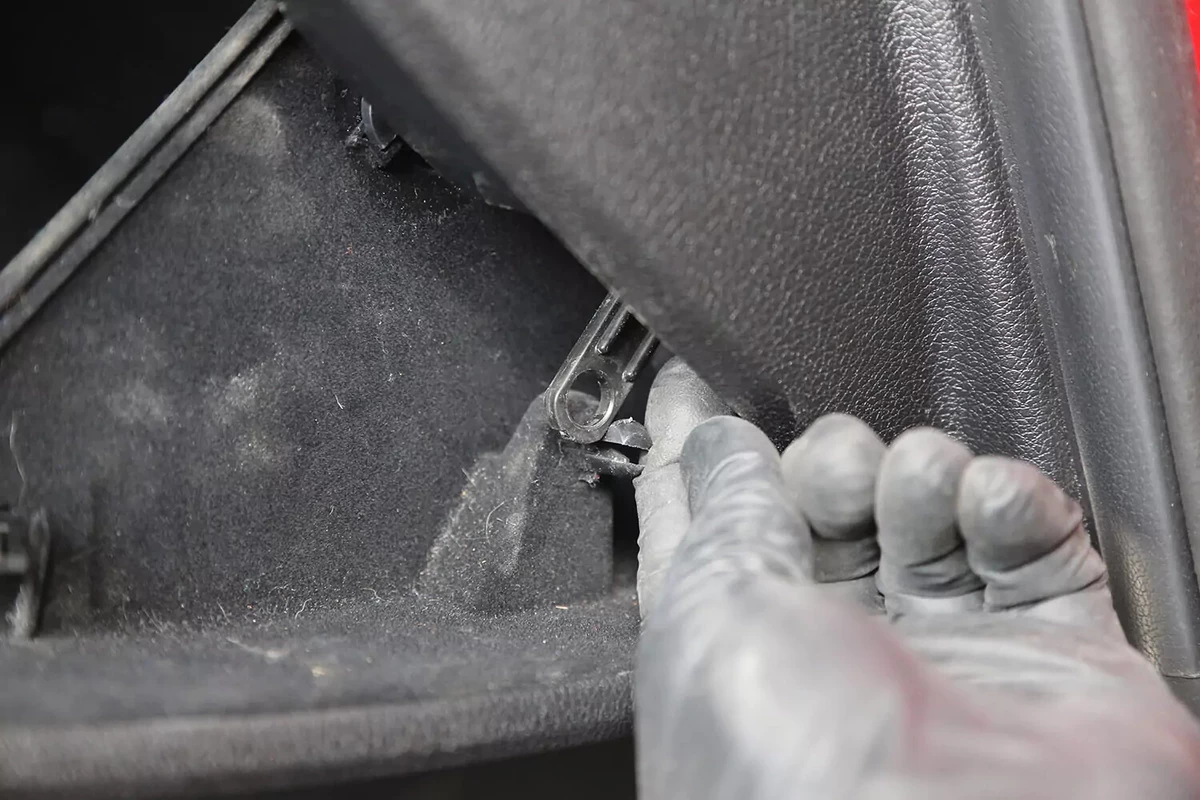
Locate the stops—small pieces of plastic that limit the glove box door’s travel. Pop the lever off the attachment point. If you can’t get it to release, squeeze the tab or use a small pry tool to carefully detach the arm.
Newer vehicles may have a soft-open mechanism that keeps the glove box door from slamming down. This is usually on the outside of the box as shown.
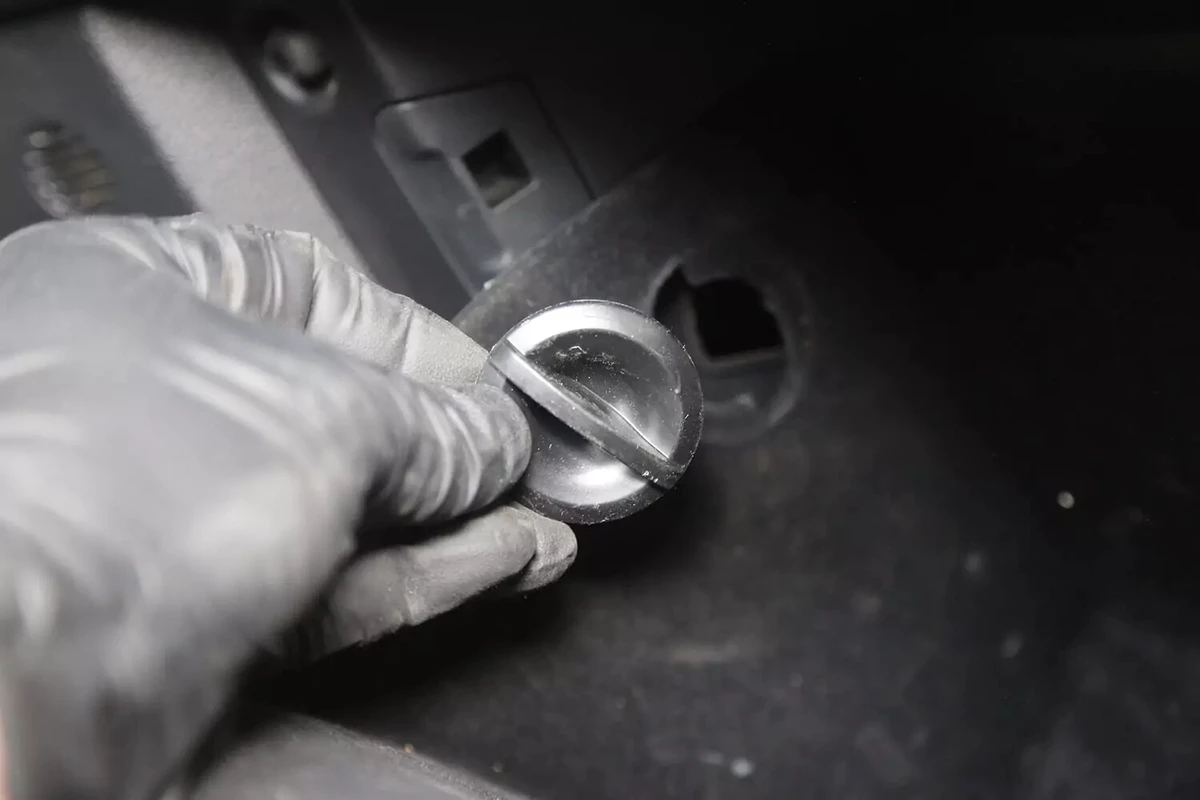
Most glove boxes have one or two removable stops. They are usually twist-and-pull plugs like the one shown.
Some glove boxes have molded tabs (at the top or sides) that hit the edge of the dash to stop the box from opening all the way. If your vehicle has these, gently pull on the wall of the glove box until the tab clears the edge. To avoid damage, don’t pull hard or jerk on the tabs.
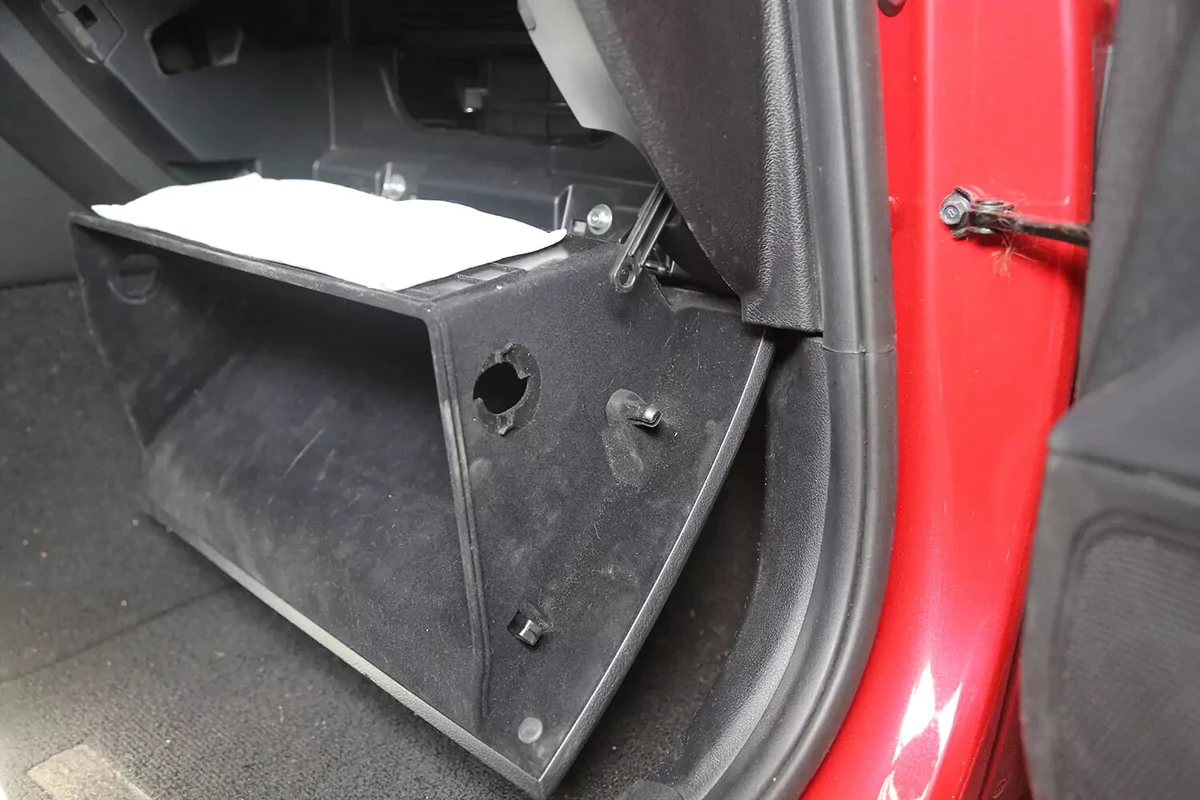
After the stops are removed, the glove box door should drop fully, giving you access to the filter.
Locate the filter’s access door. It should look similar to the one shown here. It may be hinged on the side or bottom (or is removable without hinges). This one has a pinch tab on the left side and a slot tab on the right.
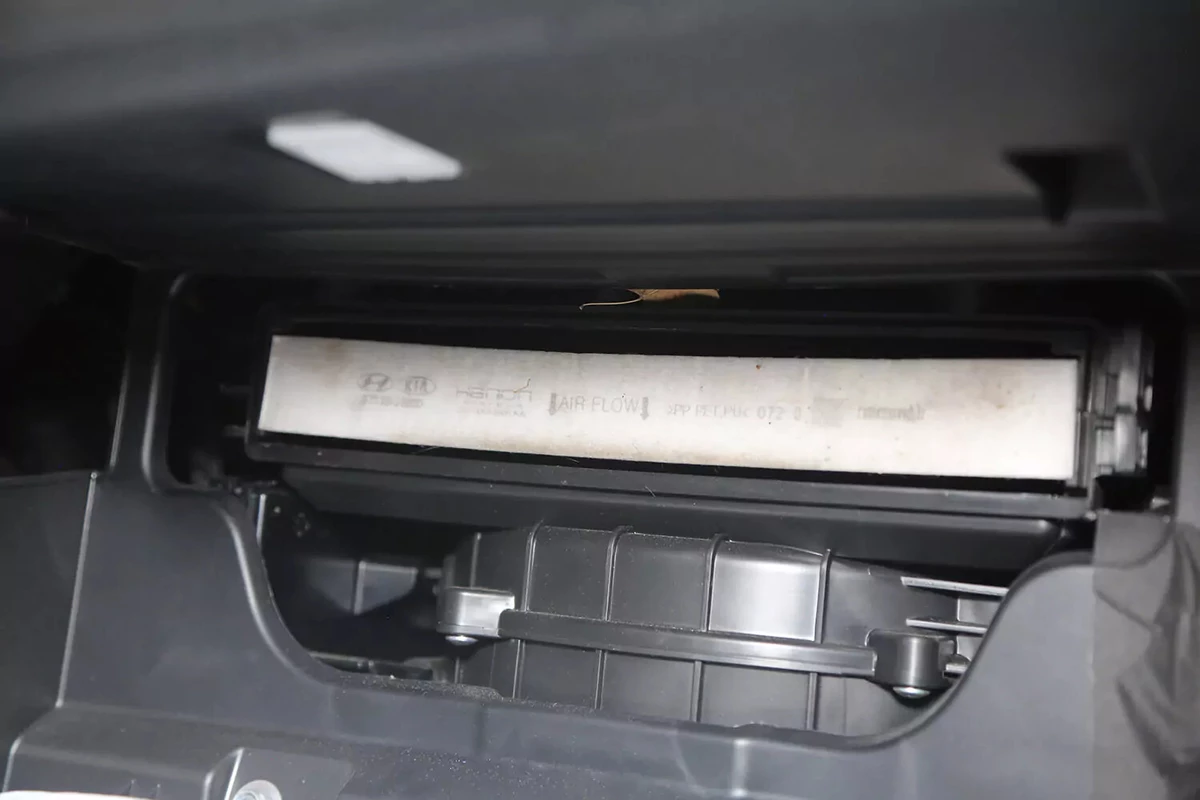
Open or remove the cover to access the filter. The original filter for our 2020 vehicle had not been changed for 38,000 miles.
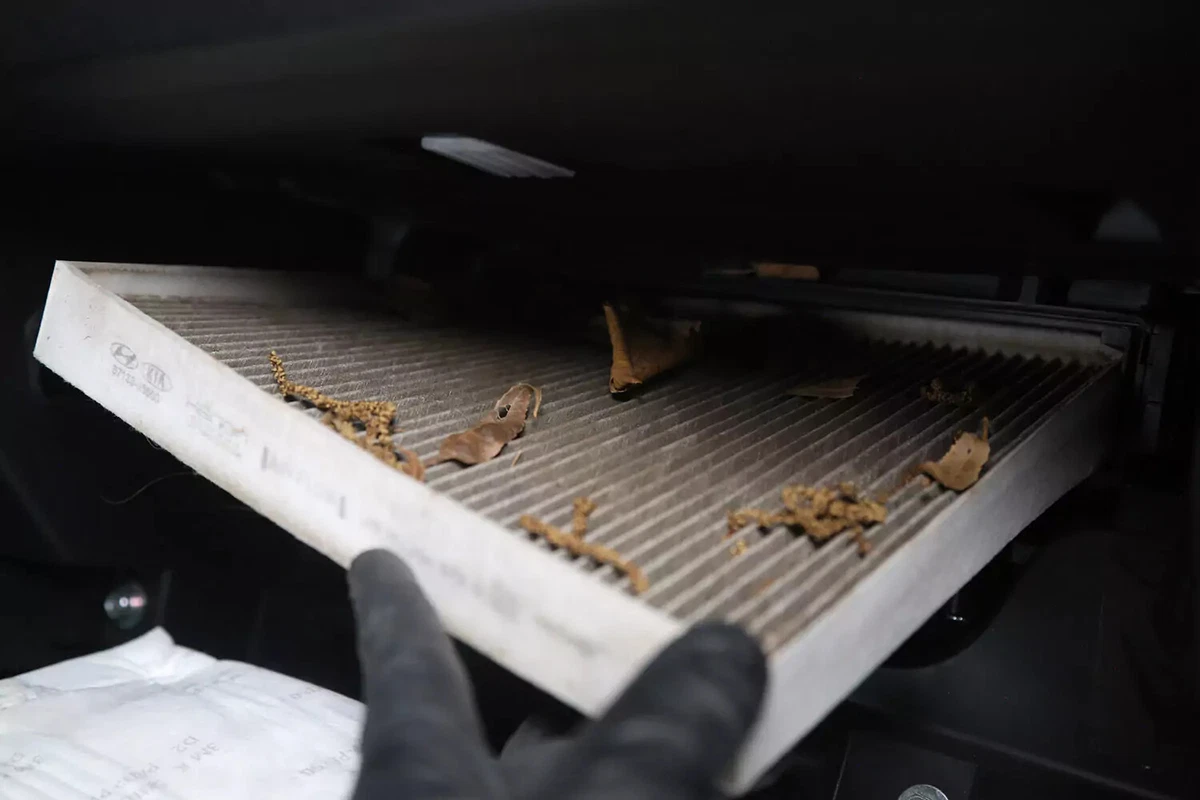
Carefully remove the old filter. There could be leaves and other debris on top of the filter.
Avoid allowing the debris to fall into the air box. Remove any debris that might have fallen into the cavity. Anything that falls into the air box will wind up in the fan and may cause noise or vibration.
Spray automotive HVAC cleaner into the air box to kill bacteria or mold.
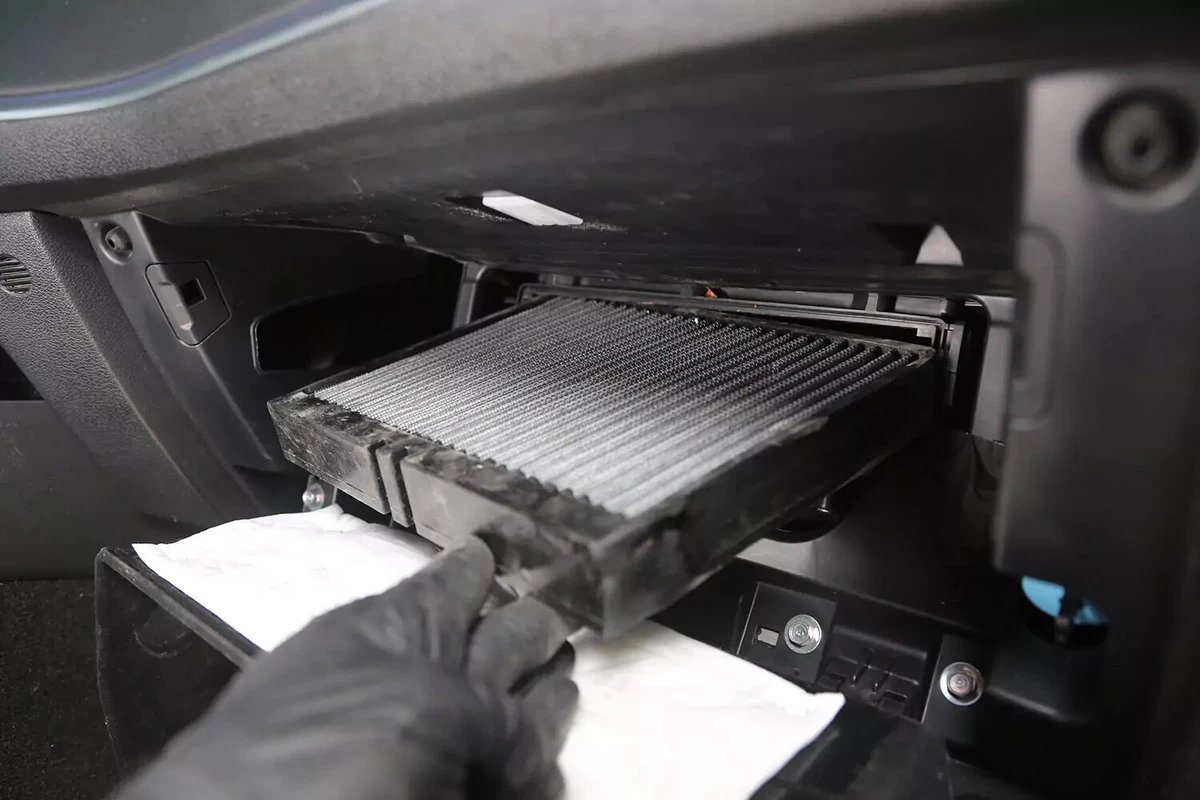
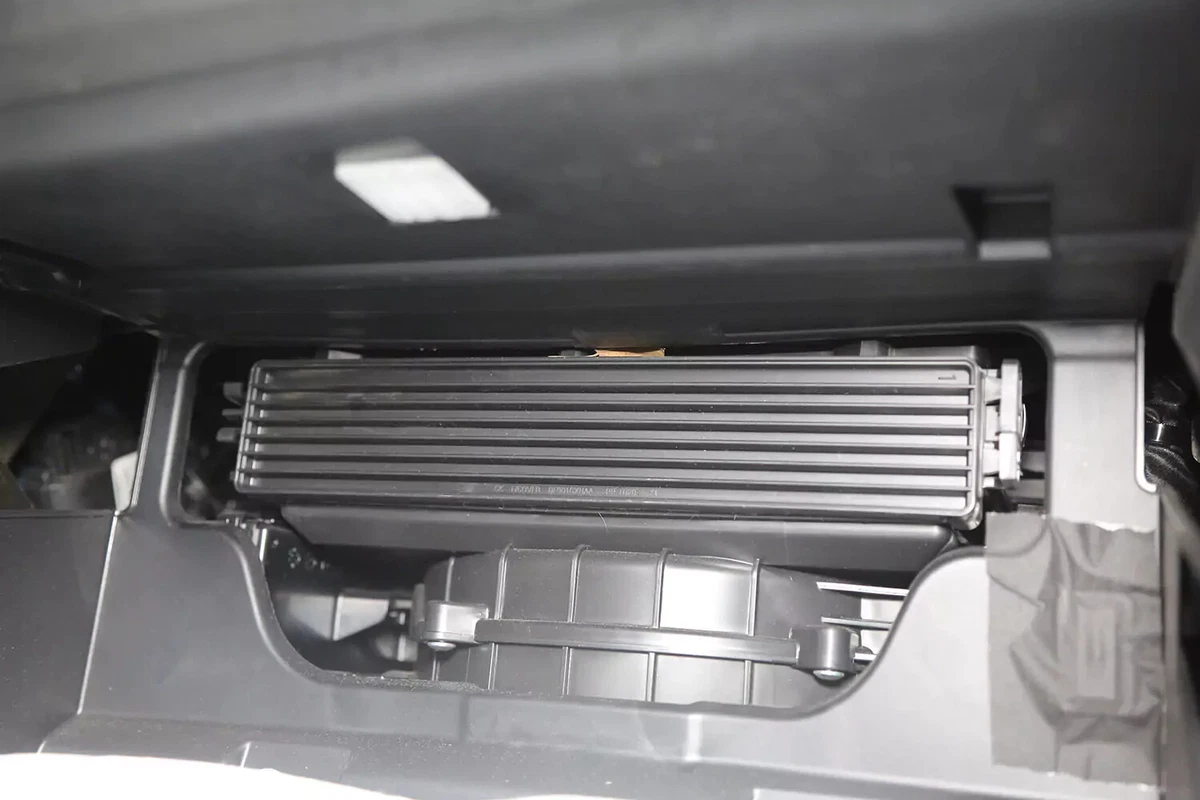
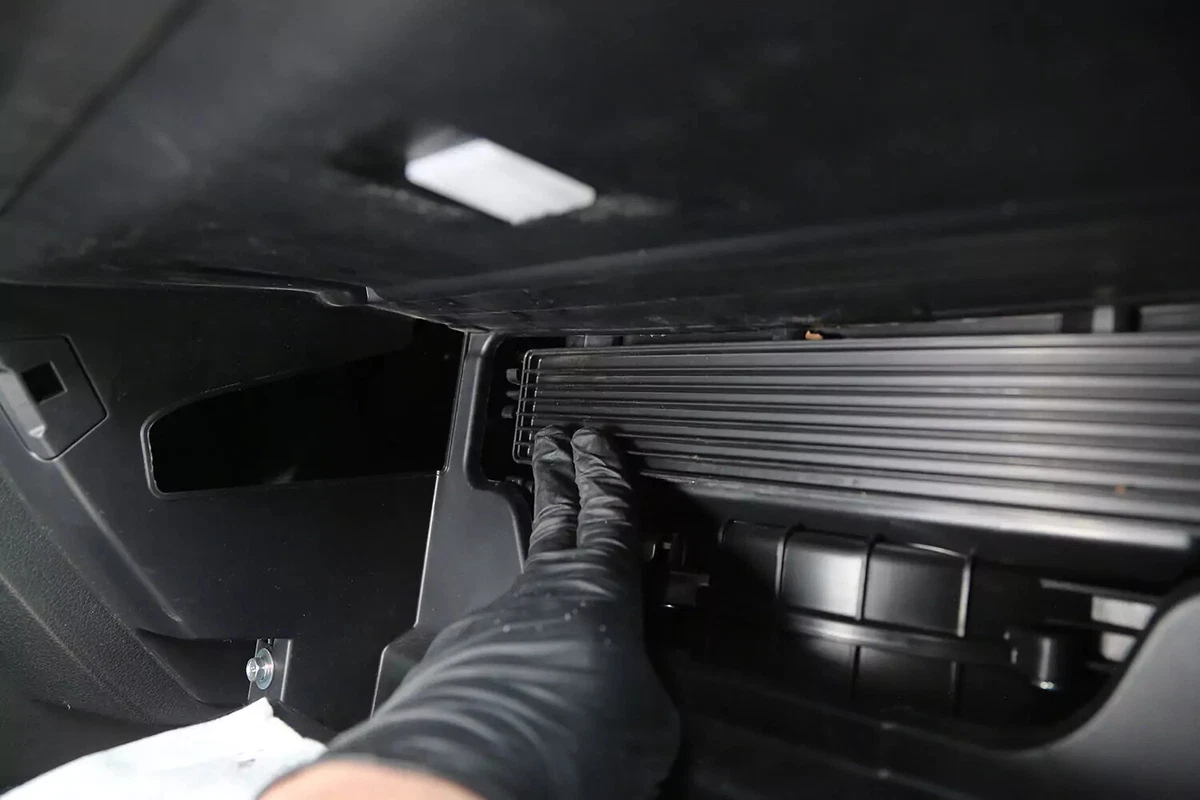
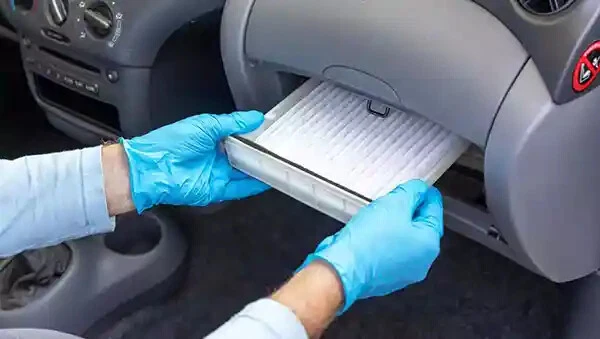
Slide the new cabin air filter into position. Most filters have a flow direction noted on the frame.
We installed a reusable filter, so we only have to clean it periodically but don’t need to replace it.
Insert the filter fully into position. Some vehicles have extra space around the filter. Ensure the filter fully seals the outside vent from the air box. If the filter is not fully seated, it can’t perform its job.
Reusable filters have rubber frames, which might require slightly more force to insert.
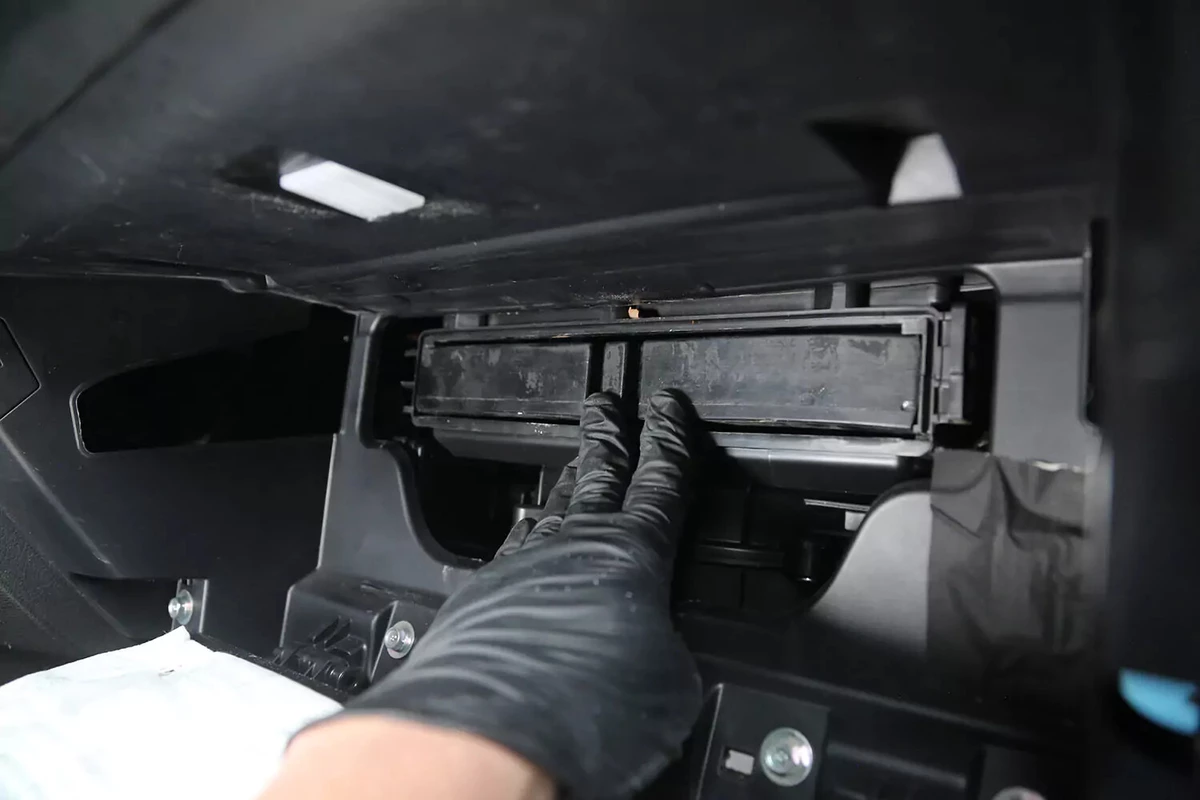
Replace the door (the cover) and snap it into place. Ensure the cover is fully locked into place. Otherwise, air from the HVAC system can leak behind the dash.

Reinstall the travel limiters and soft-open arm (if equipped). Close the glove box. Enjoy clean cabin air.
About the author

Share your feedback
This article is meant to provide general guidance only. Automotive maintenance, repair, upgrade, and installation may depend on vehicle-specifics such as make and model. Always consult your owner's manual, repair guide for specific information for your particular vehicle and consider a licensed auto-care professional's help as well, particularly for advance repairs.
Recommended for you
Find answers and inspiration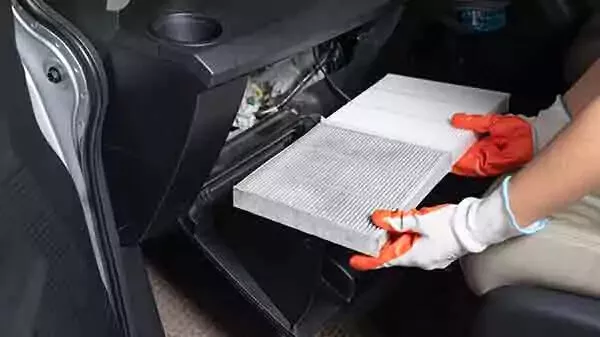
Explore more projects

How to Repair a Chipped Windshield
1 to 2 hours
Beginner
7 min read

How to Replace Brake Fluid
1 to 2 hours
Beginner
10 min read

How to Replace an Ignition Coil
Less than 30 minutes
Beginner
6 min read

How to Replace a Radiator Hose
Less than 30 minutes
Beginner
5 min read

How to Replace Brake Rotors
1 to 2 hours
Beginner
7 min read

How to Replace a Serpentine Belt Tensioner
Less than 30 minutes
Beginner
4 min read

How to Replace a Drive Belt
Less than 30 minutes
Beginner
5 min read

How to Rotate Your Tires
30 to 60 minutes
Beginner
5 min read

How to Refill Windshield Washer Fluid
Less than 30 minutes
Beginner
4 min read

How to Replace an Oxygen Sensor
30 to 60 minutes
Beginner
5 min read

How To Replace Differential Fluid
Less than 30 minutes
Beginner
8 min read

How to Replace Sway Bar End Links and Bushings
30 to 60 minutes
Beginner
6 min read

How to Replace Transmission Fluid and Filter
1 to 2 hours
Beginner
11 min read

How to Change Disc Brake Pads
30 to 60 minutes
Beginner
8 min read

How to Replace a Valve Cover Gasket
Less than 30 minutes
Beginner
7 min read

How to Change Windshield Wipers
Less than 30 minutes
Beginner
3 min read

How to Replace an Engine Air Filter
Less than 30 minutes
Beginner
5 min read

How to Clean Fuel Injectors
1 to 2 hours
Beginner
8 min read

How to Replace Shock Absorbers
30 to 60 minutes
Beginner
8 min read

How to Change a Car Battery
Less than 30 minutes
Beginner
6 min read
Automation How to Change a Car Battery
Less than 30 minutes
Beginner
6 min read

How to Replace a Mass Air Flow (MAF) Sensor
Less than 30 minutes
Beginner
7 min read

How to Replace a Clutch Master Cylinder
1 to 2 hours
Beginner
11 min read

How to Flush and Change Engine Coolant
30 to 60 minutes
Beginner
6 min read

How to Replace a Distributor Cap and Rotor
30 to 60 minutes
Beginner
5 min read

How to Check Tire Pressure and Change a Tire
Less than 30 minutes
Beginner
9 min read

How to Replace a Fuel Filter
30 to 60 minutes
Beginner
7 min read

How to Replace a PCV Valve
30 to 60 minutes
Beginner
6 min read

How to Replace a Brake Caliper
1 to 2 hours
Beginner
7 min read

How to Replace an Idler Pulley
30 to 60 minutes
Beginner
4 min read

How to Change a Headlight Bulb
Less than 30 minutes
Beginner
6 min read

How to Replace an Exhaust Gasket
1 to 2 hours
Beginner
9 min read

How to Replace a Throttle Body
30 to 60 minutes
Beginner
6 min read

How to Change Oil in a Car
Less than 30 minutes
Beginner
8 min read

How to Replace an Alternator
1 to 2 hours
Beginner
11 min read

How to Replace an EGR Valve
30 to 60 minutes
Beginner
5 min read

How to Jump Start a Car
Less than 30 minutes
Beginner
9 min read