Fuel is inherently dirty. A small filter sock that traps debris larger than about 100 microns, roughly the thickness of a human hair, protects the fuel sender in your tank. A 10-micron filter (30-micron for diesel) is used after the fuel pump to trap the smaller particles.
Dirty fuel is bad for your engine, regardless of whether it has a carburetor or fuel injection. Over time, the fuel filter clogs with debris from the fuel tank. Changing your fuel filter every 30,000 miles prevents strain on fuel system components.
How long does it take to replace a fuel filter?
Replacing the fuel filter is a beginner DIY job that usually takes 30 to 60 minutes. For most vehicles, the filter is under the vehicle, centered between the front and rear wheels, although some are closer to the fuel tank. Some vehicles use a filter/regulator combination that filters the fuel and controls the output pressure to the engine.
Safety is paramount when replacing a fuel filter. You will get gas on your hands. Always wear gloves and safety goggles. Have several towels handy, and make sure to keep your face and body away from where the fuel is dripping. To avoid chemical burns, wash any body part that touches fuel as soon as possible. Allow fuel to evaporate from your towels and rags before properly disposing of them.
Tips and tricks for DIY fuel filter replacement
- Most automakers now use nylon or plastic retainer clips that require a special tool to release the fuel line from the filter. These fuel filter removal tools come in different designs. Kits that include all styles of fuel filter clip removers are available.
- If your vehicle doesn’t use clips, your fuel filter is likely retained by threaded fittings. This is the most common style for older vehicles.
- If your vehicle has threaded fittings, you’ll need a set of line wrenches, also called flare nut wrenches. A line wrench is like a box-end wrench with a notch cut out so it can slide on fluid hard lines. Open-end wrenches only grab the fitting on two sides, which can round off the hex edges. A line wrench is the best tool for the job because it contacts the fitting on all sides, reducing the chances of rounding off a fitting.
- Vehicles with low-pressure fuel systems or older electronic fuel-injection systems have spring or worm-gear clamps on the fuel lines. You can remove them with pliers (or a spring clamp tool for spring clamps) or a socket or flat blade screwdriver for worm gear clamps.
- Some vehicles have flexible rubber lines that can be clamped to minimize fuel spillage. Our demo vehicle has solid hard lines, so we had more fuel spillage. Perform this job quickly after the fuel lines are opened.
- Many current-production vehicles have no serviceable filter, just the one inside the fuel tank.
- Diesel fuel filter replacement often involves changing multiple, larger filters.
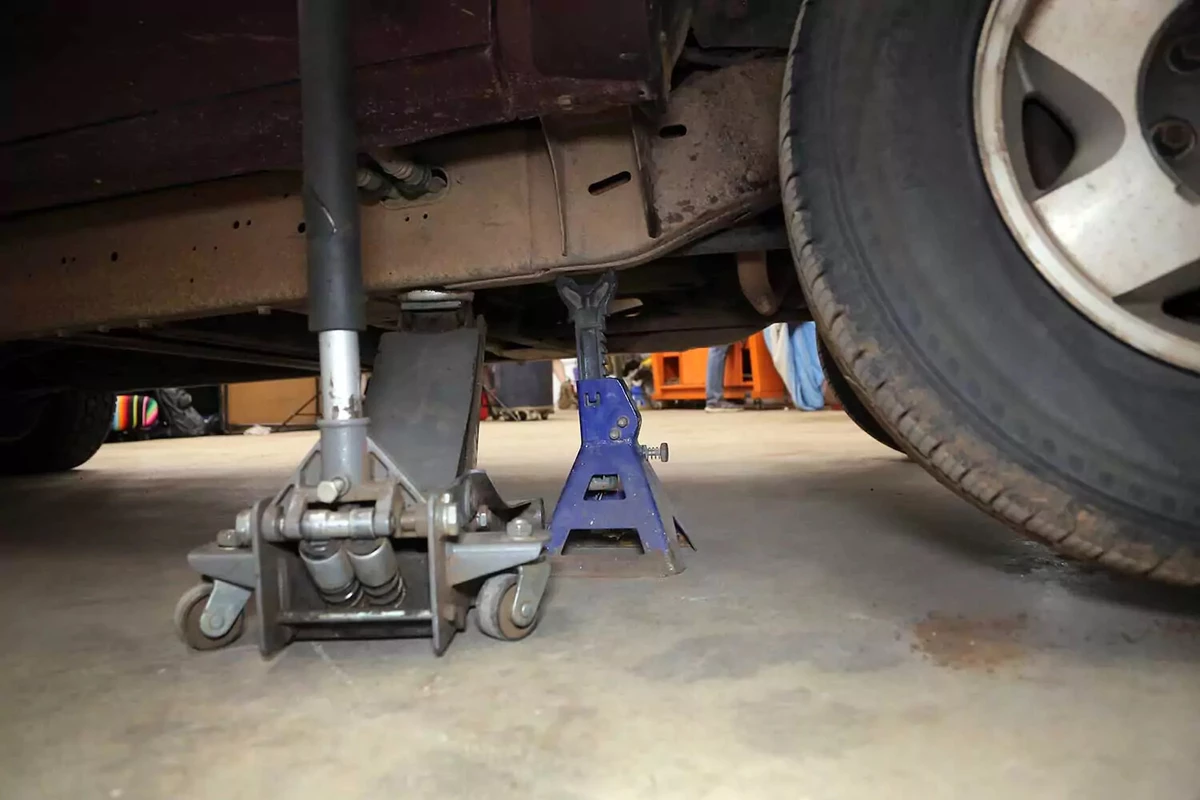
This project requires working safely under the vehicle. You will need a floor jack, and jack stands, ramps, or wheel cribs to support the vehicle.
Locate the factory jacking points just behind the front wheels or just in front of the rear wheels. The jacking point is a metal section with two V notches about two inches apart. Check your owner’s manual to confirm the lift location.
Never use jack stands on dirt, gravel, or asphalt. If you do not have access to a concrete work surface, use wheel cribs, solid-base ramps, or wide-base wood supports to support the vehicle. Never use cinder blocks or bricks as supports.
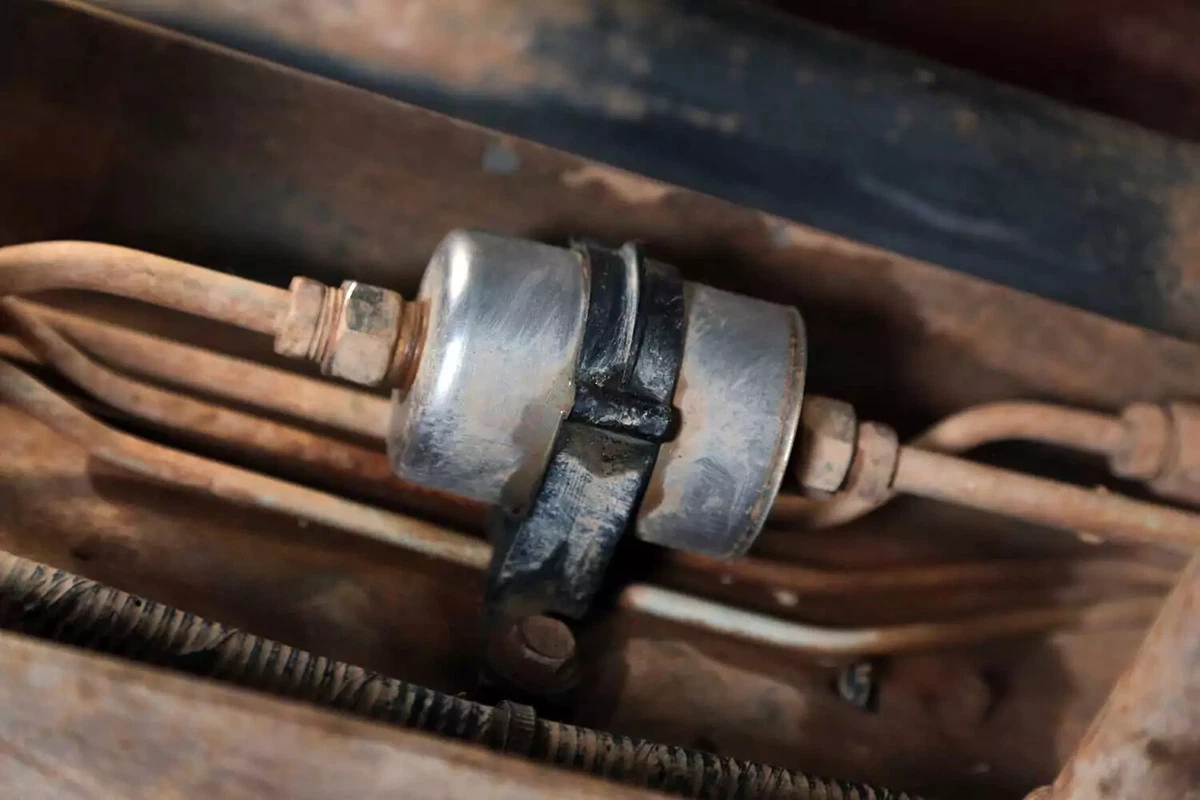
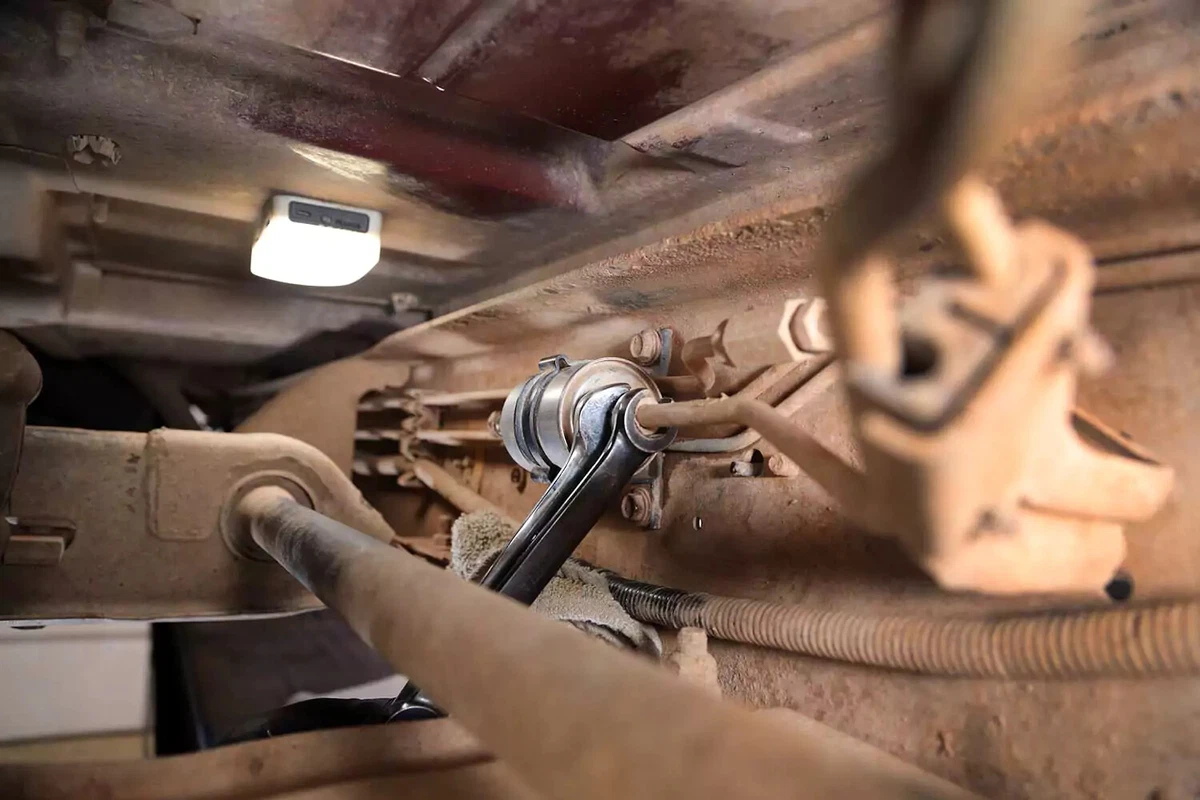
Look under the vehicle for your fuel filter, or consult your vehicle’s repair manual to find its location. Sometimes, the filter is hidden by a trim panel. Most fuel filters, like the one shown here, have two or three fuel lines attached.
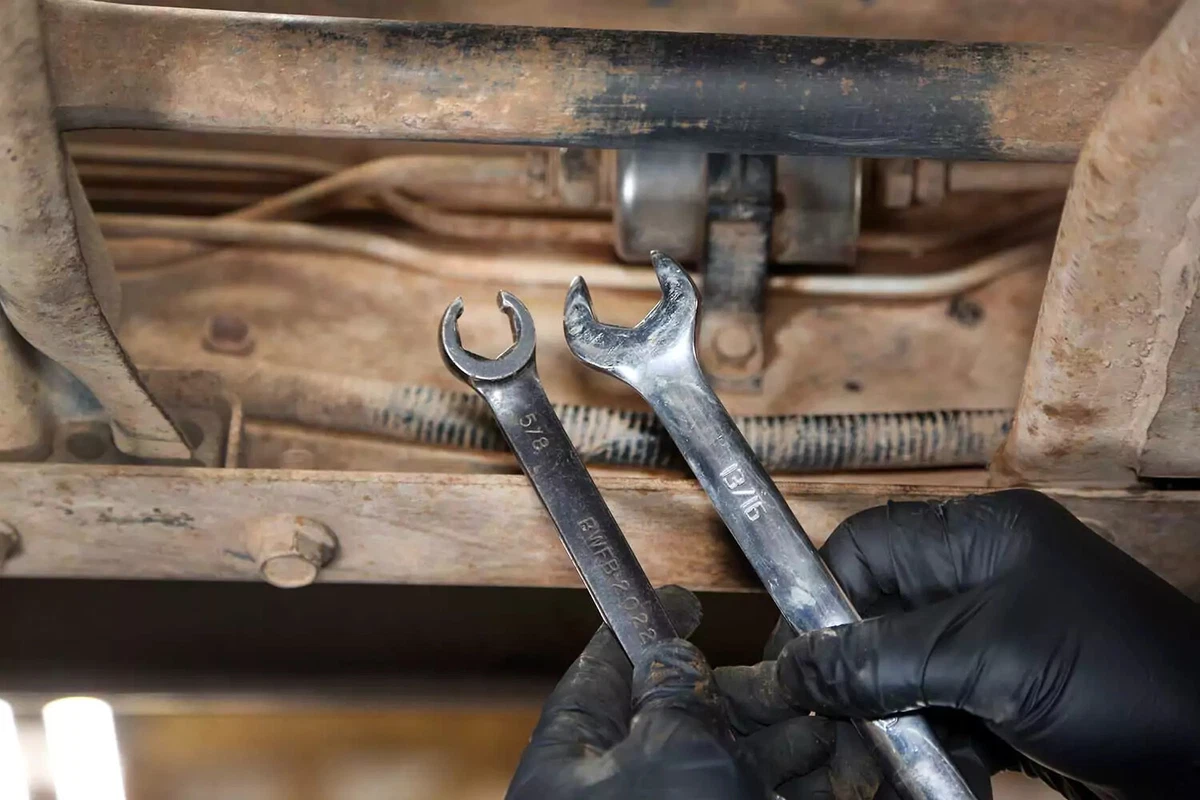
Our filter has threaded fittings, so we selected the correct wrench sizes. The larger open-end wrench is for the hex on the filter, while the line wrench is for the fuel line fitting.
A line wrench is like a box-end wrench with a section cut out. Because it grips the fitting at six places instead of two, it’s less likely to round off the fitting. It’s used for fluid lines that open-end wrenches can round off. They also work well on brake lines.

If your vehicle’s filter is held in place by retainer clips, you will need one of the fuel filter release tools pictured here. The exact tool varies by manufacturer, so verify the kind you need in your vehicle’s repair manual.
A master removal tool kit is not costly. If your vehicle uses these for the fuel lines, it probably uses them for transmission fluid lines and some cooling system hoses.
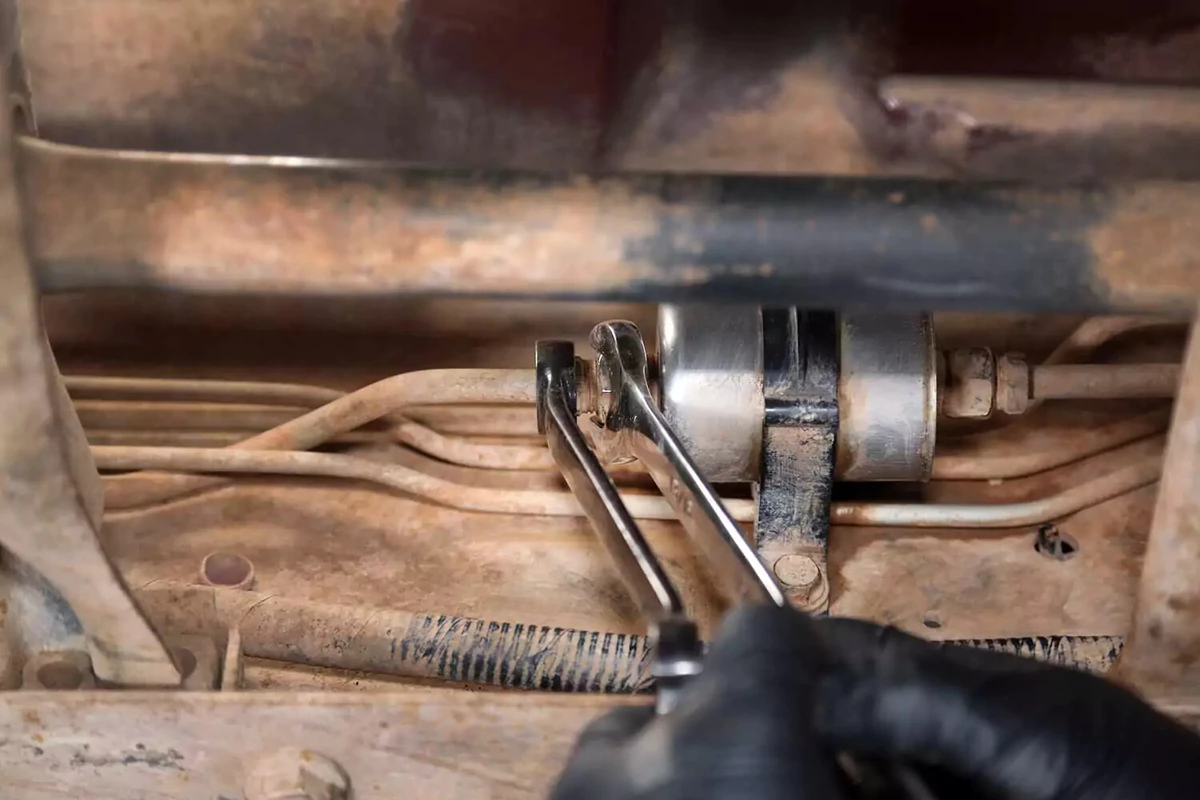
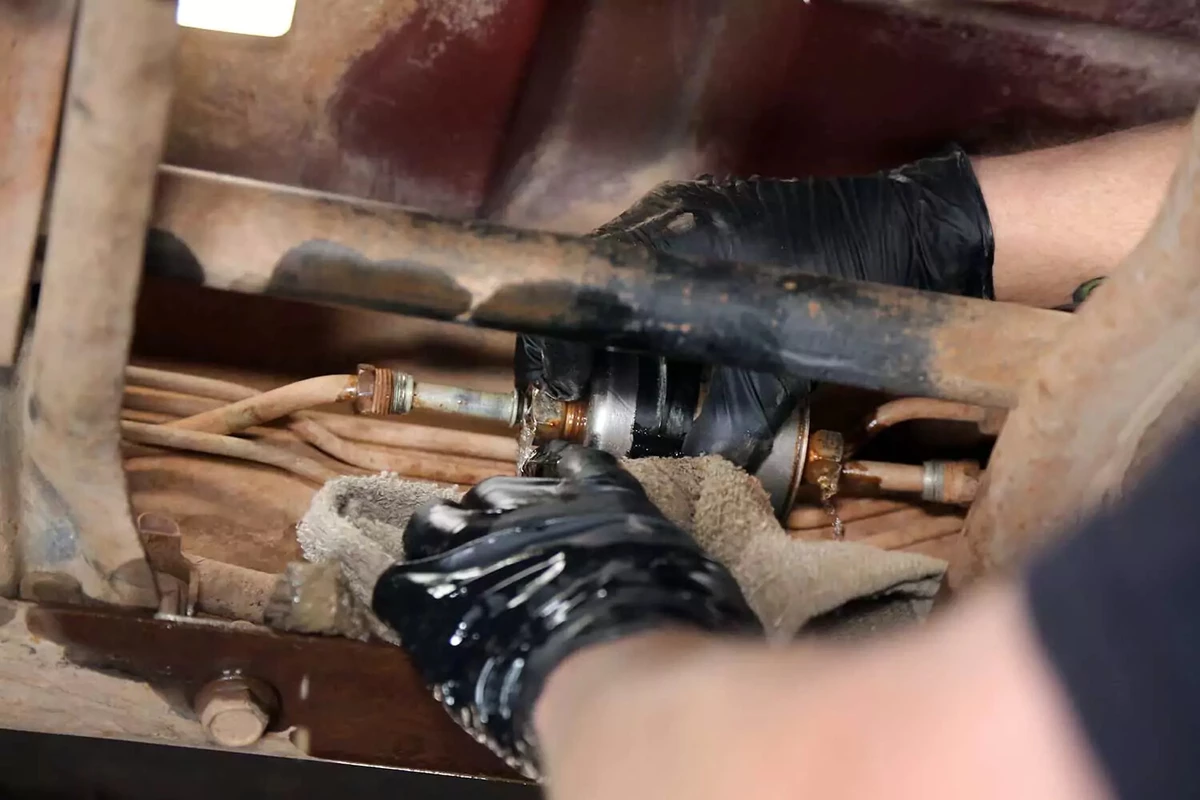
With tools in hand, carefully loosen one side of the fuel line. If you start on the fuel tank side, quickly remove the line and cap it to reduce fuel spillage.
Most vehicles hold pressure in the fuel system for hours, even days, after being run. When the lines are loosened, a brief spray of pressurized fuel may be released from the fittings. After applying the tools, wrap a towel around the fittings to catch sprayed fuel in the towel (and avoid it spraying on you).
If your engine has a fuel pressure test port on the fuel rail, which looks like a tire valve, you can place a towel underneath the valve and press the center pin with a small flat-blade screwdriver to release the pressure before removing the lines.
For vehicles with retainer clips, insert the tool behind the fitting, press toward the filter, and hold the tool in position. With your other hand, pull the fuel line out of the fitting.

After the pressure has escaped, unthread the fitting from the filter by hand. Some fuel will spill, so be prepared with towels. Don’t pull the line yet.
Using the same wrenches, loosen the fitting from the filter.
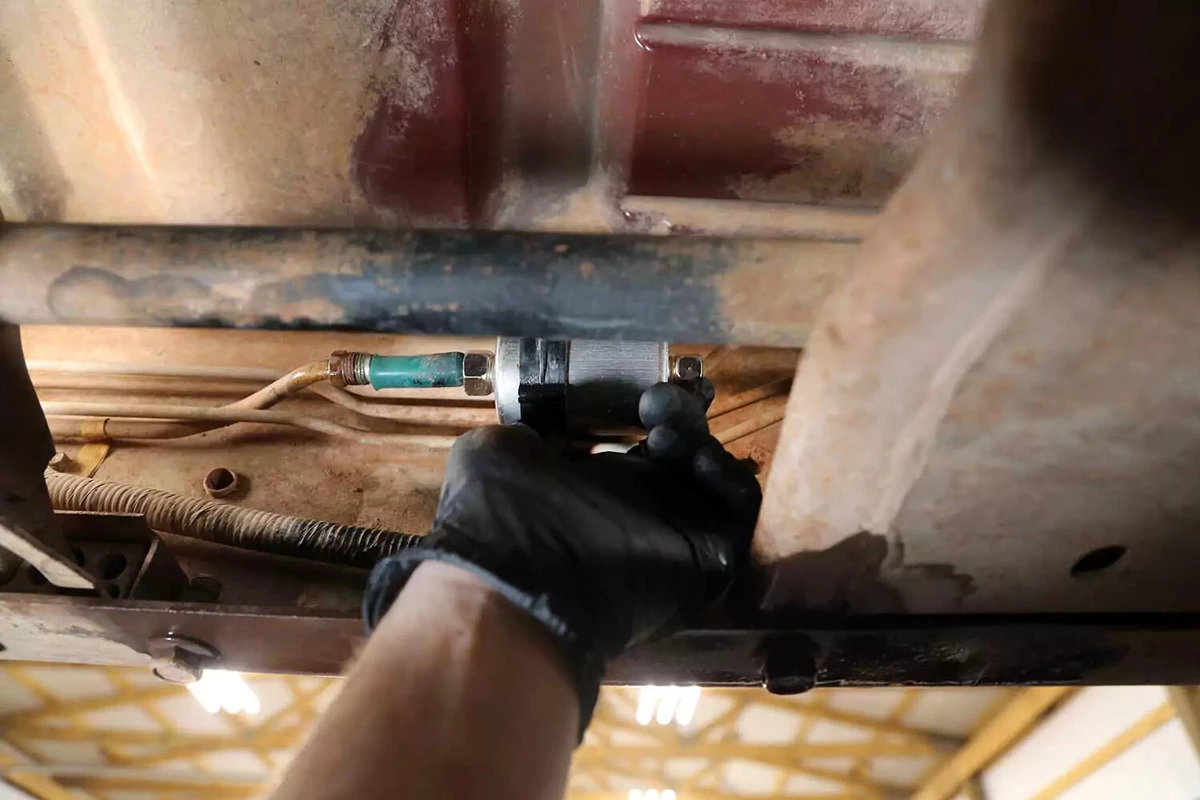
With a towel in hand, push the filter away from the fuel tank line, separating the line from the fuel filter. Then, pull the filter off the engine-side line.

To minimize fuel spillage, cover the fuel tank line with a silicone cap. If you don’t have one, you can use a short piece of fuel line with a bolt in it.

Check the markings on the new fuel filter to verify the flow direction. Avoid installing it backward, which will produce higher fuel pressure. This could damage the pump, filter, and possibly the engine.
Slide the new fuel filter into the mount (if so equipped).
Some filters are secured with a strap and bolts, while others, like the one shown here, slide into a plastic ring mount. Some vehicles don’t have a filter mount.
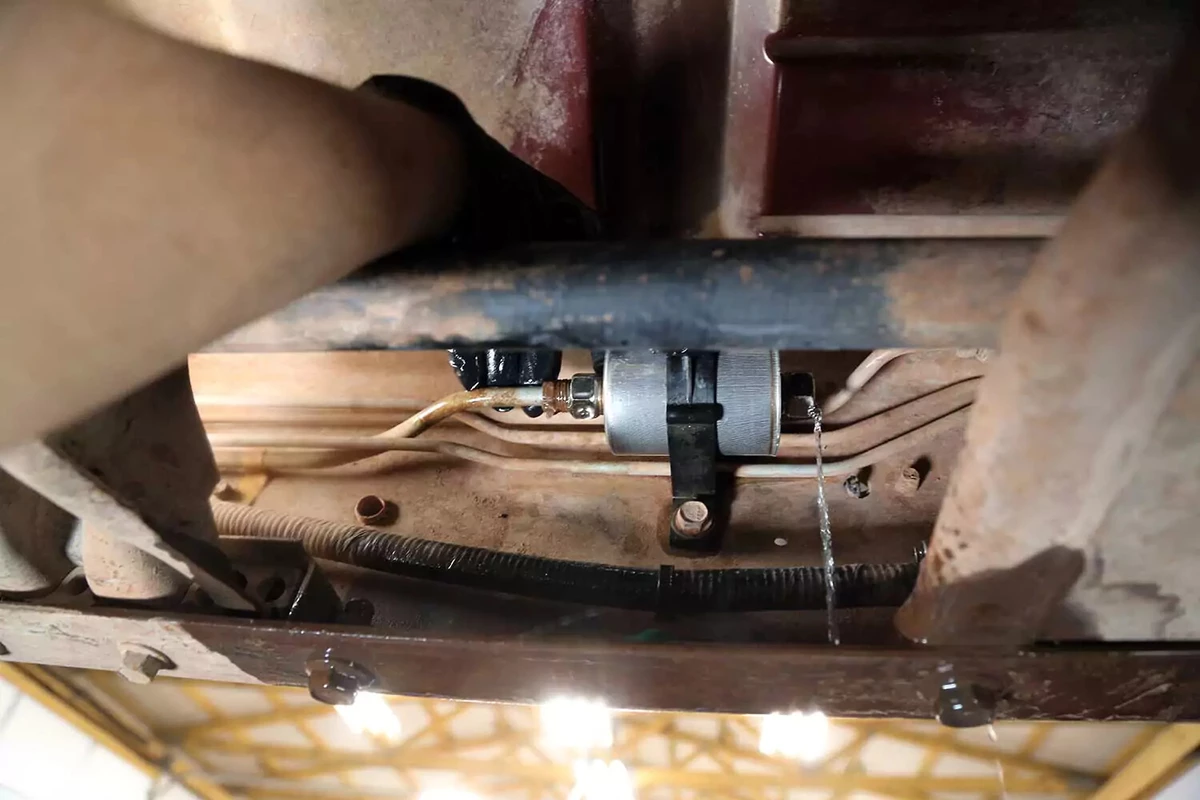
Remove the cap and install the fuel tank line to the filter. Thread the fitting in hand tight. Then, install the engine-side line.
You can do this in any order, although sometimes you have to do one first and then the other, depending on the available movement in the lines. Our demo vehicle had a static hard line for the tank, but the engine-side line had more room.

Use wrenches to tighten the fittings on the fuel filter until they are snug and not leaking. They should be snug but don’t overtighten. Tightening them too much can strip the threads or damage the sealing surfaces.
Clean up the area, dispose of the filter properly, and let your towels dry before washing them.
Note the mileage when you replace the filter.
Before starting the engine, turn the key to the run position and inspect the filter to ensure there are no leaks. If you have a push-button starter, push the button twice, but don’t depress the brake pedal.
It may take a couple of extra seconds for your vehicle to start after changing the filter.
About the author

Share your feedback
This article is meant to provide general guidance only. Automotive maintenance, repair, upgrade, and installation may depend on vehicle-specifics such as make and model. Always consult your owner's manual, repair guide for specific information for your particular vehicle and consider a licensed auto-care professional's help as well, particularly for advance repairs.
Recommended for you
Find answers and inspiration
A Quick Guide to Valve Cover Gaskets
6 min read
When to Replace Your Exhaust Manifold Gasket
6 min read
How to Replace an Ignition Coil
6 min read
How to Buy the Right EGR Valve and Gasket
6 min read
Your Complete Idler Pulley Buying Guide
5 min read
How to Buy the Right Throttle Body
5 min read
Buying the Right Distributor Cap and Rotor
4 min read
How to Replace a Drive Belt
5 min read
How to Replace an Intake Manifold Gasket
7 min read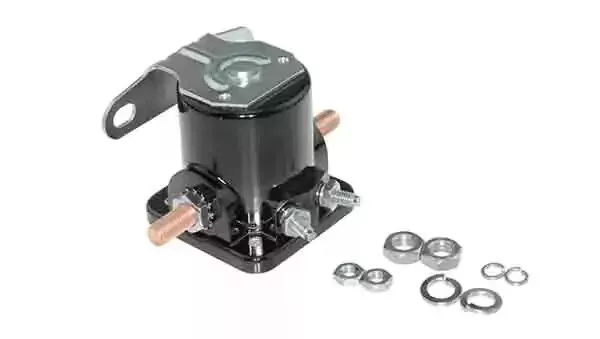
How to Buy the Right Car Starter
5 min read
How to Replace a Valve Cover Gasket
7 min read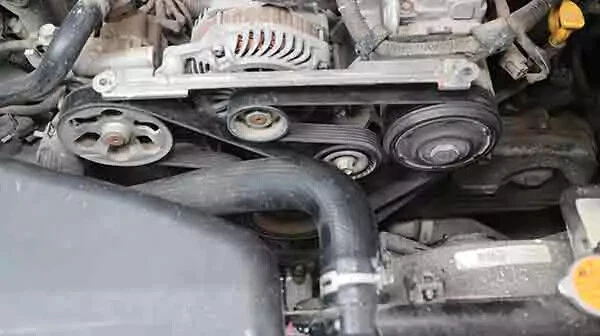
Diagnosing Your Serpentine Belt and Tensioner
6 min read
How to Change a Timing Belt
12 min read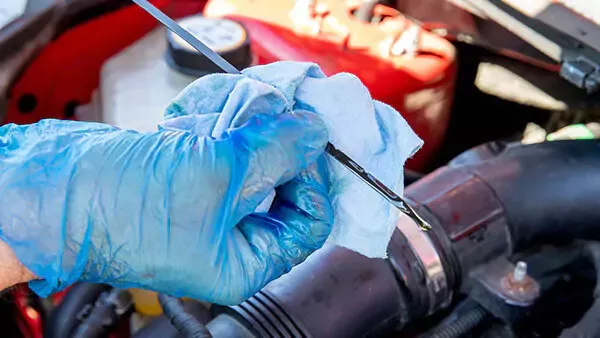
Changing Your Oil: 5 Things to Know
6 min read
How to Clean Fuel Injectors
8 min read
Automation How to Change a Car Battery
6 min read
How to Replace a Mass Air Flow (MAF) Sensor
7 min read
Distributors 101
6 min read
How to Replace Spark Plugs
7 min read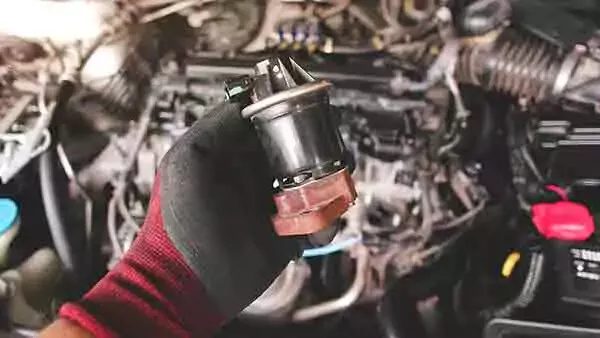
Everything You Should Know About EGR Valves
5 min read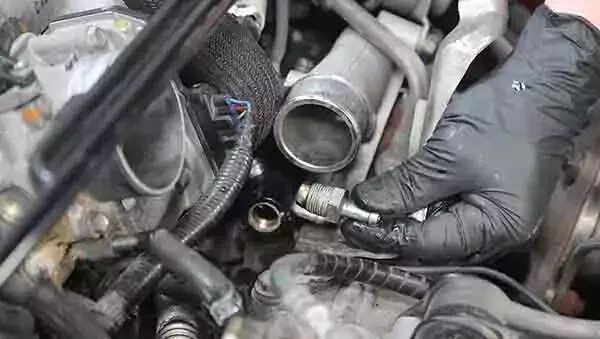
How to Test Your PCV Valve
6 min read
Buying the Best Portable Car Battery Jump Starter
6 min read
An Introduction to Cleaning Fuel Injectors
5 min read
A Deep-Dive Guide to Ignition Wires
7 min read
How to Replace Engine Mounts
4 min read
The Right Tools to Clean Your Fuel Injectors
6 min read
How Do Ignition Coils Work?
5 min read
Spark Plugs 101
7 min read
When to Replace Your Drive Belt
6 min read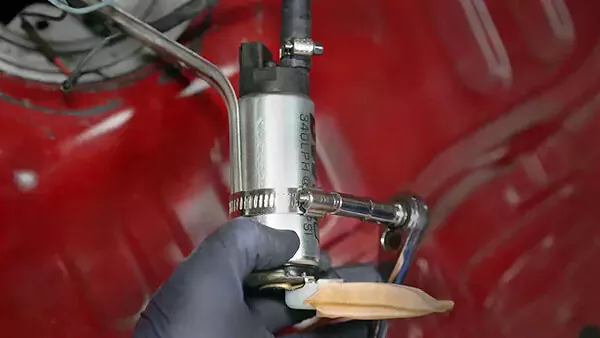
Fuel Pumps and How They Work
8 min read
What to Know About Your Vehicle's Throttle Body
6 min read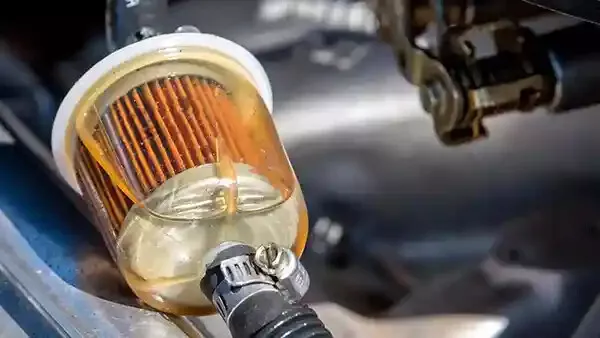
Everything You Need to Know About Fuel Filters
6 min read
How to Buy the Right Ignition Coils
7 min read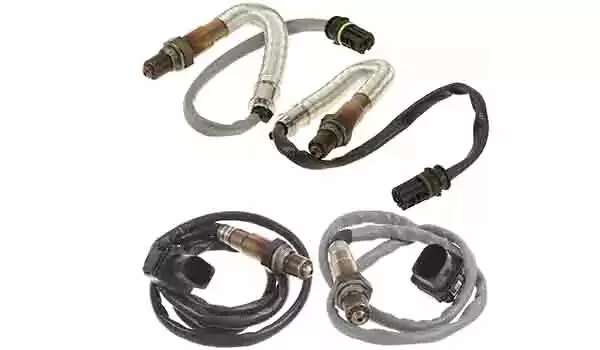
How to Buy the Right O2 Sensor
5 min read
How to Replace a Serpentine Belt Tensioner
4 min read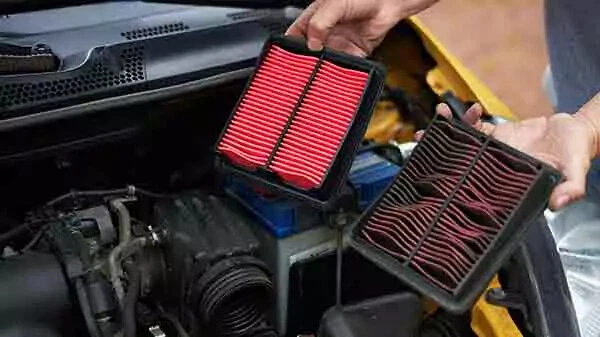
When to Replace Your Engine Air Filter
5 min read
How to Replace an Oxygen Sensor
5 min read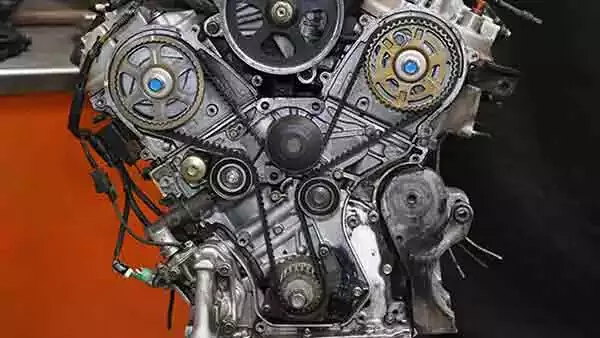
How to Buy the Right Timing Belt and Related Tools
5 min read
How to Buy the Right Car Distributor
6 min read
Timing Belts 101
5 min read
How to Replace an Engine Air Filter
5 min read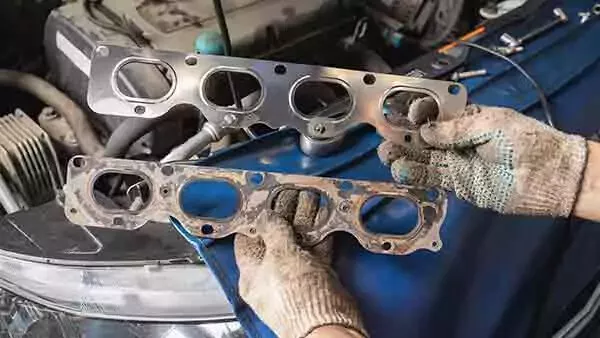
How to Buy the Right Exhaust Manifold Gasket
6 min read
How to Choose the Best Spark Plugs
5 min read
How to Replace a Car Starter
7 min read
What You Should Know About O2 Sensors
6 min read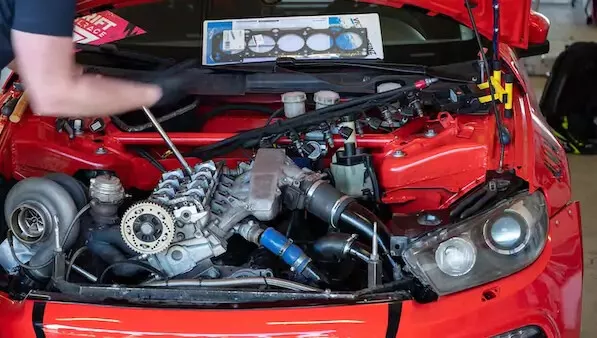
How to Buy the Right Valve Cover Gasket
4 min read
How to Replace a Distributor Cap and Rotor
5 min read
Understanding Your Car's Idler Pulley
4 min read
How to Replace a PCV Valve
6 min read
Do You Have a Faulty Mass Air Flow Sensor?
4 min read
Everything You Need to Know About Car Starters
7 min read
How to Replace an Exhaust Gasket
9 min read
Ignition Wire Buying Guide
6 min read
All About Your Distributor Cap and Rotor
7 min read
How to Replace a Throttle Body
6 min read
Spotting Intake Manifold Gasket Problems
7 min read
How to Change Oil in a Car
8 min read
How to Buy the Best MAF Sensor
4 min read
How to Replace an EGR Valve
5 min read
How to Change an In-Tank Fuel Pump
9 min read
Explore more projects

How to Repair a Chipped Windshield
1 to 2 hours
Beginner
7 min read

How to Replace Brake Fluid
1 to 2 hours
Beginner
10 min read
How to Replace an Ignition Coil
Less than 30 minutes
Beginner
6 min read

How to Replace a Radiator Hose
Less than 30 minutes
Beginner
5 min read

How to Replace Brake Rotors
1 to 2 hours
Beginner
7 min read
How to Replace a Serpentine Belt Tensioner
Less than 30 minutes
Beginner
4 min read

How to Rotate Your Tires
30 to 60 minutes
Beginner
5 min read
How to Replace a Drive Belt
Less than 30 minutes
Beginner
5 min read

How to Refill Windshield Washer Fluid
Less than 30 minutes
Beginner
4 min read
How to Replace an Oxygen Sensor
30 to 60 minutes
Beginner
5 min read

How To Replace Differential Fluid
Less than 30 minutes
Beginner
8 min read

How to Replace Sway Bar End Links and Bushings
30 to 60 minutes
Beginner
6 min read

How to Replace Transmission Fluid and Filter
1 to 2 hours
Beginner
11 min read

How to Change Disc Brake Pads
30 to 60 minutes
Beginner
8 min read
How to Replace a Valve Cover Gasket
Less than 30 minutes
Beginner
7 min read

How to Replace a Cabin Air Filter
Less than 30 minutes
Beginner
5 min read

How to Change Windshield Wipers
Less than 30 minutes
Beginner
3 min read
How to Replace an Engine Air Filter
Less than 30 minutes
Beginner
5 min read

How to Replace Shock Absorbers
30 to 60 minutes
Beginner
8 min read
How to Clean Fuel Injectors
1 to 2 hours
Beginner
8 min read
How to Change a Car Battery
Less than 30 minutes
Beginner
6 min read
Automation How to Change a Car Battery
Less than 30 minutes
Beginner
6 min read
How to Replace a Mass Air Flow (MAF) Sensor
Less than 30 minutes
Beginner
7 min read

How to Replace a Clutch Master Cylinder
1 to 2 hours
Beginner
11 min read

How to Flush and Change Engine Coolant
30 to 60 minutes
Beginner
6 min read
How to Replace a Distributor Cap and Rotor
30 to 60 minutes
Beginner
5 min read

How to Check Tire Pressure and Change a Tire
Less than 30 minutes
Beginner
9 min read
How to Replace a PCV Valve
30 to 60 minutes
Beginner
6 min read

How to Replace a Brake Caliper
1 to 2 hours
Beginner
7 min read

How to Replace an Idler Pulley
30 to 60 minutes
Beginner
4 min read

How to Change a Headlight Bulb
Less than 30 minutes
Beginner
6 min read
How to Replace an Exhaust Gasket
1 to 2 hours
Beginner
9 min read
How to Replace a Throttle Body
30 to 60 minutes
Beginner
6 min read
How to Change Oil in a Car
Less than 30 minutes
Beginner
8 min read

How to Jump Start a Car
Less than 30 minutes
Beginner
9 min read

How to Replace an Alternator
1 to 2 hours
Beginner
11 min read
How to Replace an EGR Valve
30 to 60 minutes
Beginner
5 min read