Most modern cars use rack-and-pinion steering. However, older vehicles and trucks commonly use a gearbox with arms and links, which has these essential components: a recirculating ball steering gearbox, pitman arm, center drag link, tie rods, and an idler arm. This job focuses on the idler arm.
An idler arm is a fixed-position arm that allows the steering links to slide left and right in a determined direction. Without the idler arm, the links would move up and down without transferring the motion of the pitman arm to the wheels. When an idler arm wears out, there’s too much lateral play in the steering wheel.
How Long Does it Take to Replace an Idler Arm?
Fortunately, with the right tools, replacing an idler arm is an easy DIY job that usually takes between 30 and 60 minutes.
What to Do After Replacing Your Idler Arm
Front-end alignment is required whenever you remove or replace a steering or major suspension component. This procedure can only be done at an alignment shop. Don’t drive the vehicle after this job is completed until you align the front end and steering. It’s safe to drive short distances to the alignment shop.
Tips and Tricks for DIY Idler Arm Replacement
- You might have a strong suspicion that your idler arm is the cause of poor steering. But closely examine all front-end parts—such as ball joints - opens in new window or tab., tie rod ends - opens in new window or tab., and suspension bushings—before isolating any single part as the cause.
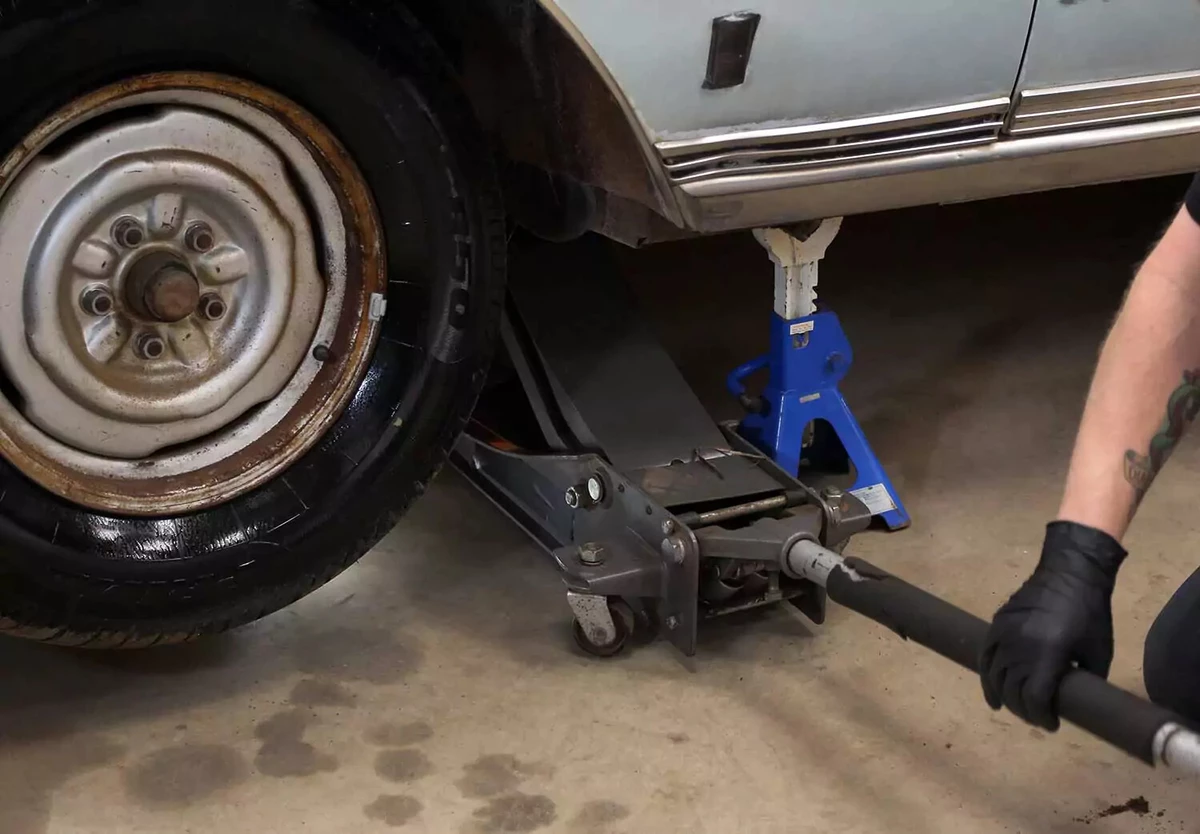
This project requires working safely under the vehicle. You will need a floor jack, and jack stands, ramps, or wheel cribs to support the vehicle.
Locate the factory jacking points just behind the front wheels or just in front of the rear wheels. The jacking point is a metal section with two V notches about two inches apart. Check your owner’s manual to confirm the lift location.
Never use jack stands on dirt, gravel, or asphalt. If you do not have access to a concrete work surface, use wheel cribs, solid-base ramps, or wide-base wood supports to support the vehicle. Never use cinder blocks or bricks as supports.
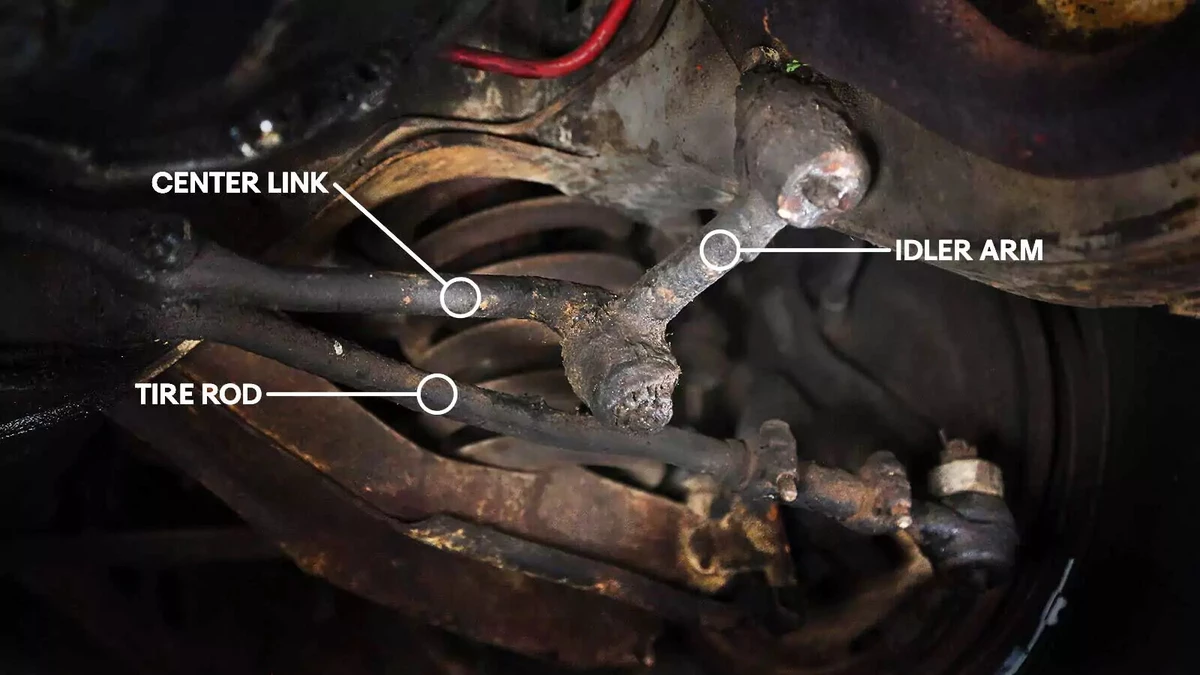
With the vehicle safely raised and supported, locate the idler arm. It’s typically on the passenger side of the vehicle. Two bolts hold the frame bracket to the frame.
The idler arm pivots on the frame bracket and the steering center link.
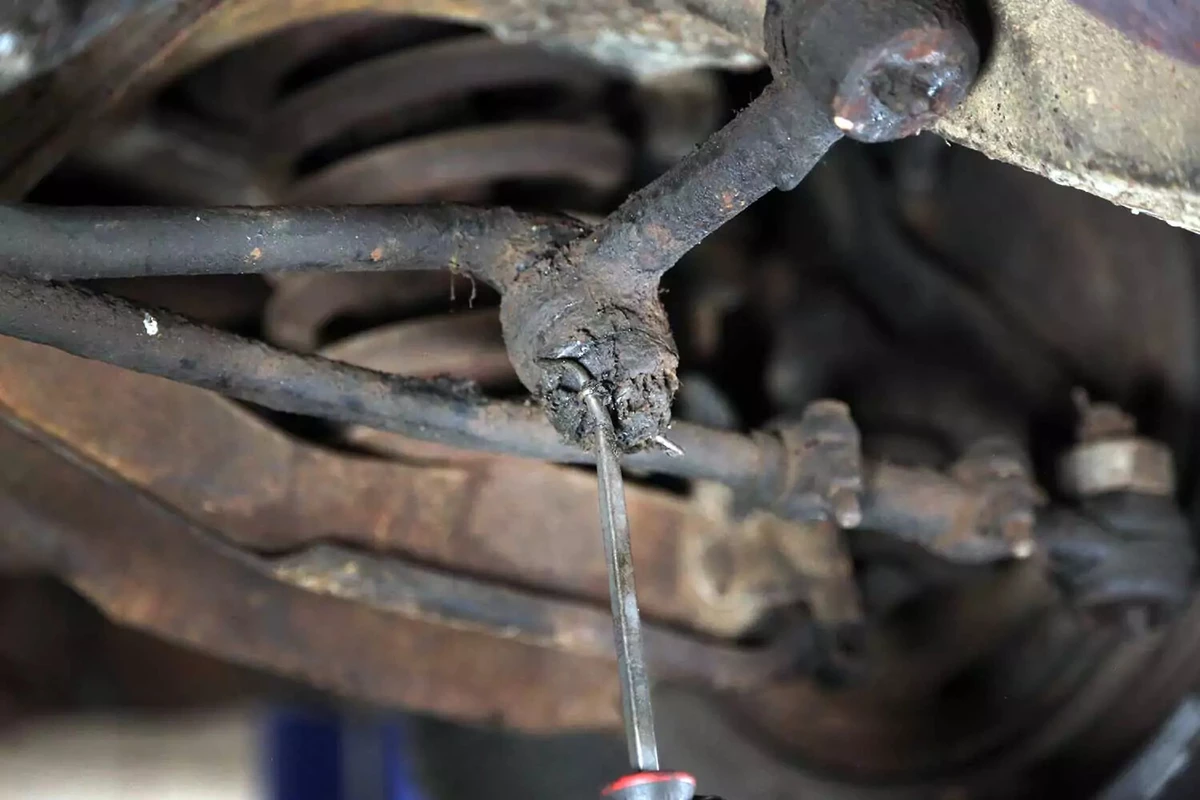
Use a cotter pin removal tool or needle-nosed pliers to remove the cotter pin. A cotter pin secures bolts or other fasteners in place.
In most cases, you only need to remove one end of the tie rod because most new idler arms come with the frame bracket. If your new idler arm does not have the frame bracket, remove the cotter pin from the frame side as well.
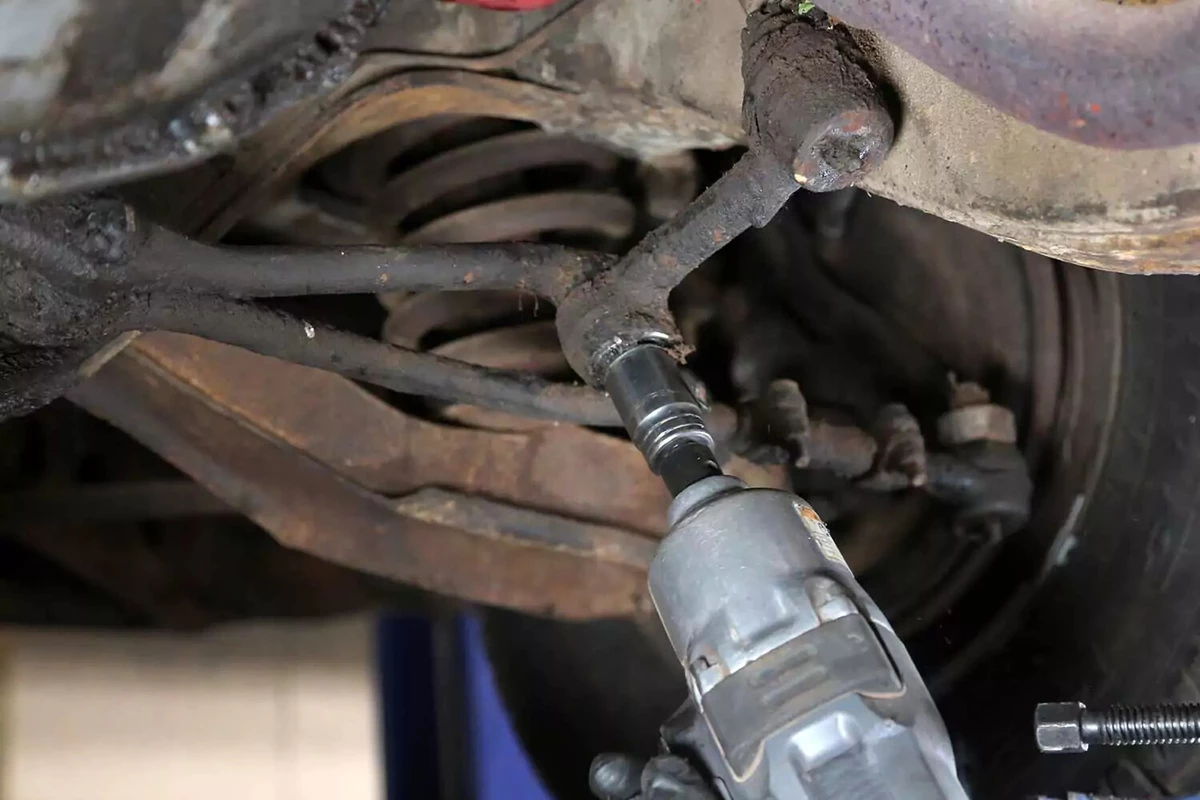
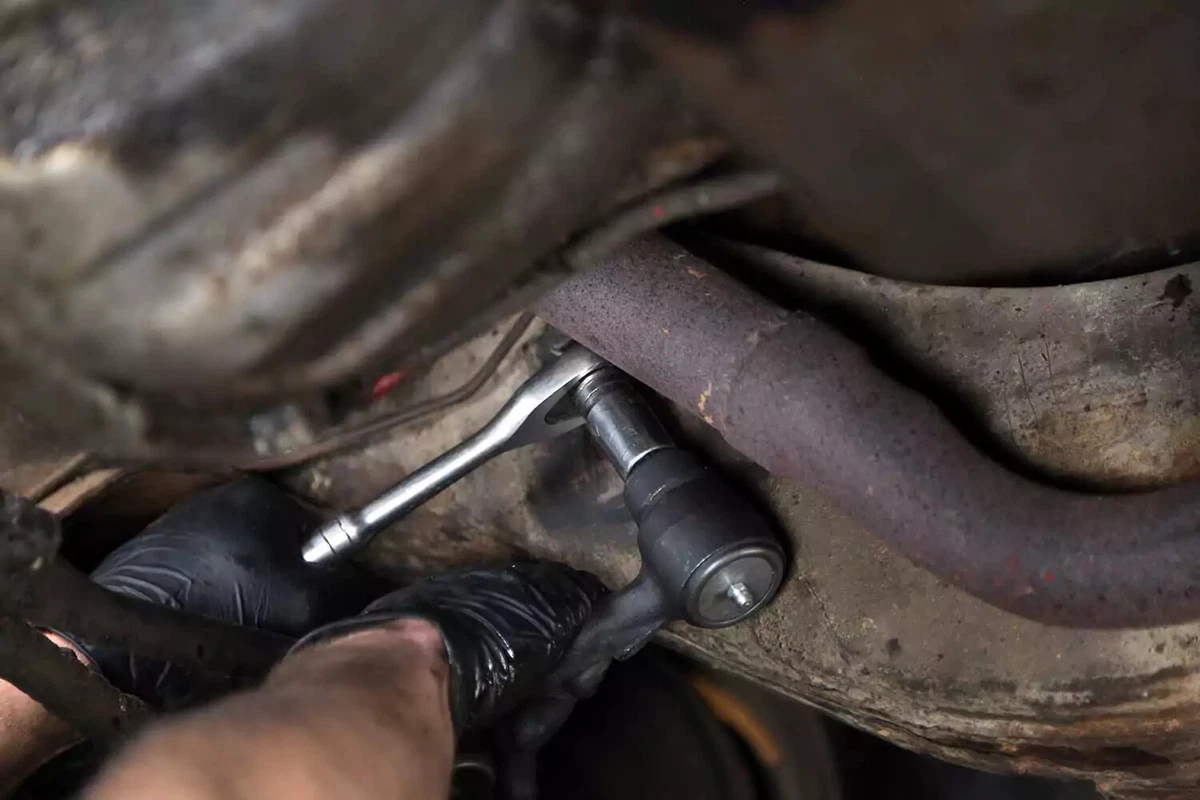
Use a socket and ratchet or impact gun to remove the castle nut from the idler arm.
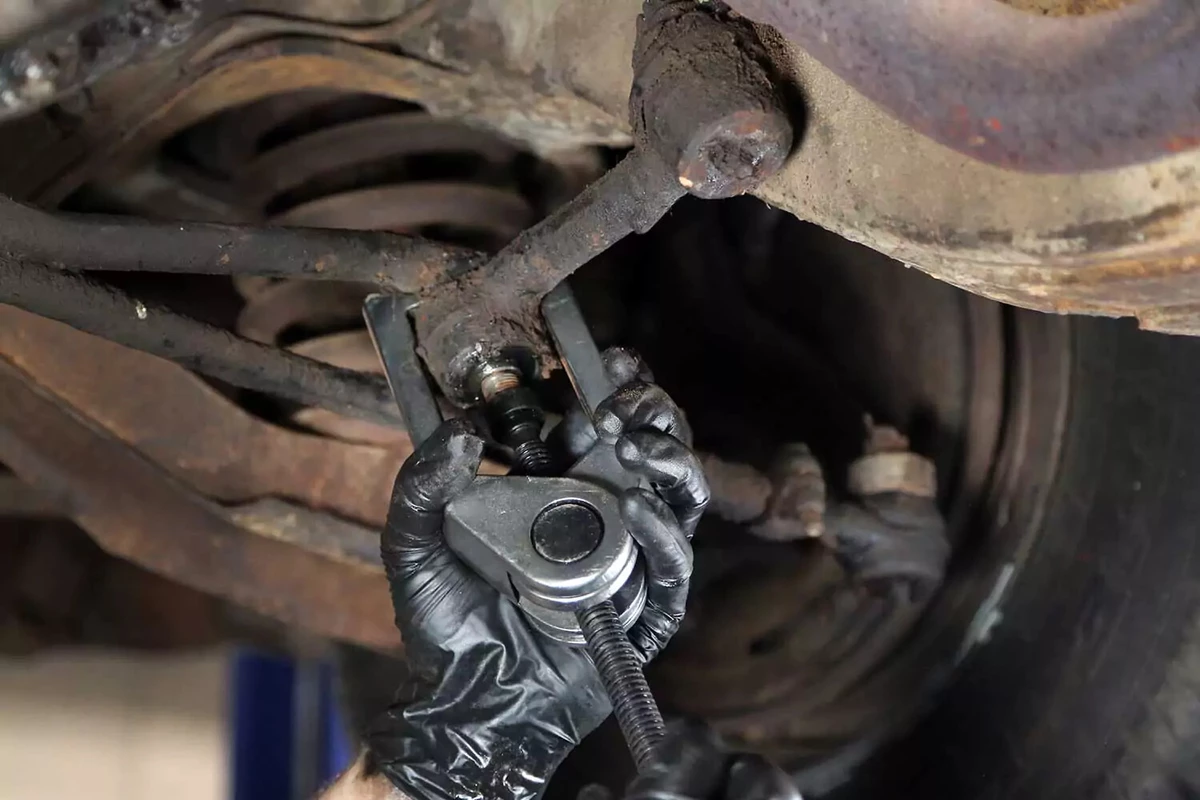
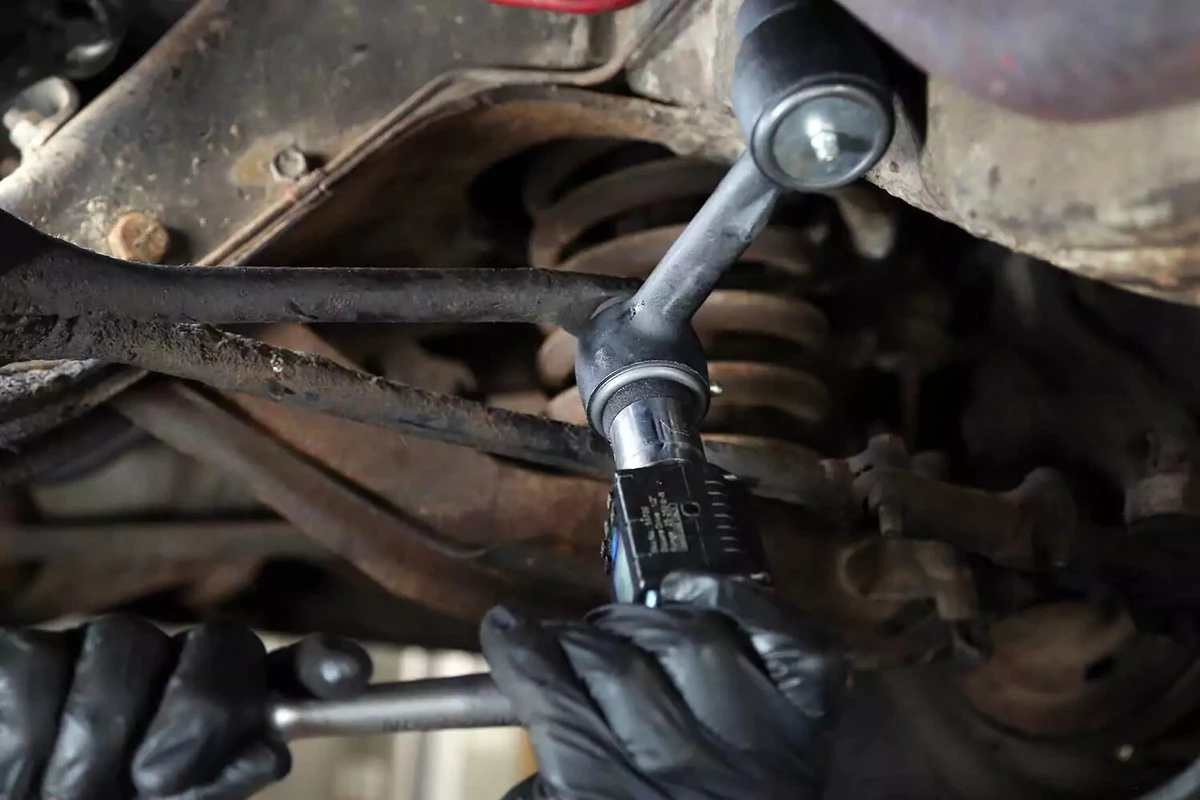
Use a puller tool to separate the idler arm from the center link. Depending on your vehicle, you may be able to use a tie-rod separator. Sometimes, the idler arm body is too thick for a tie-rod tool. Our demo vehicle required a two-jaw puller.
Align the jaws into the space between the two parts and thread the jackscrew until the parts separate. After you have a bit of tension on the puller, tap the sides of the idler arm with a hammer. This shock often helps loosen the parts for an easier separation.
There may be a loud pop when they come apart.
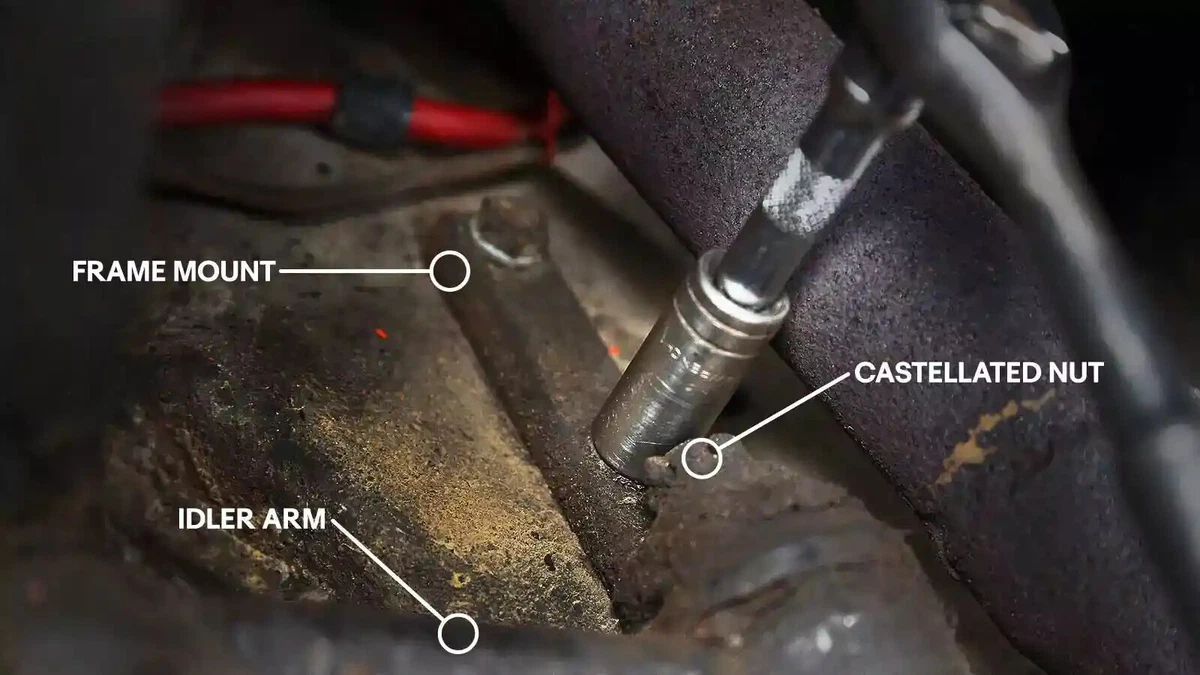
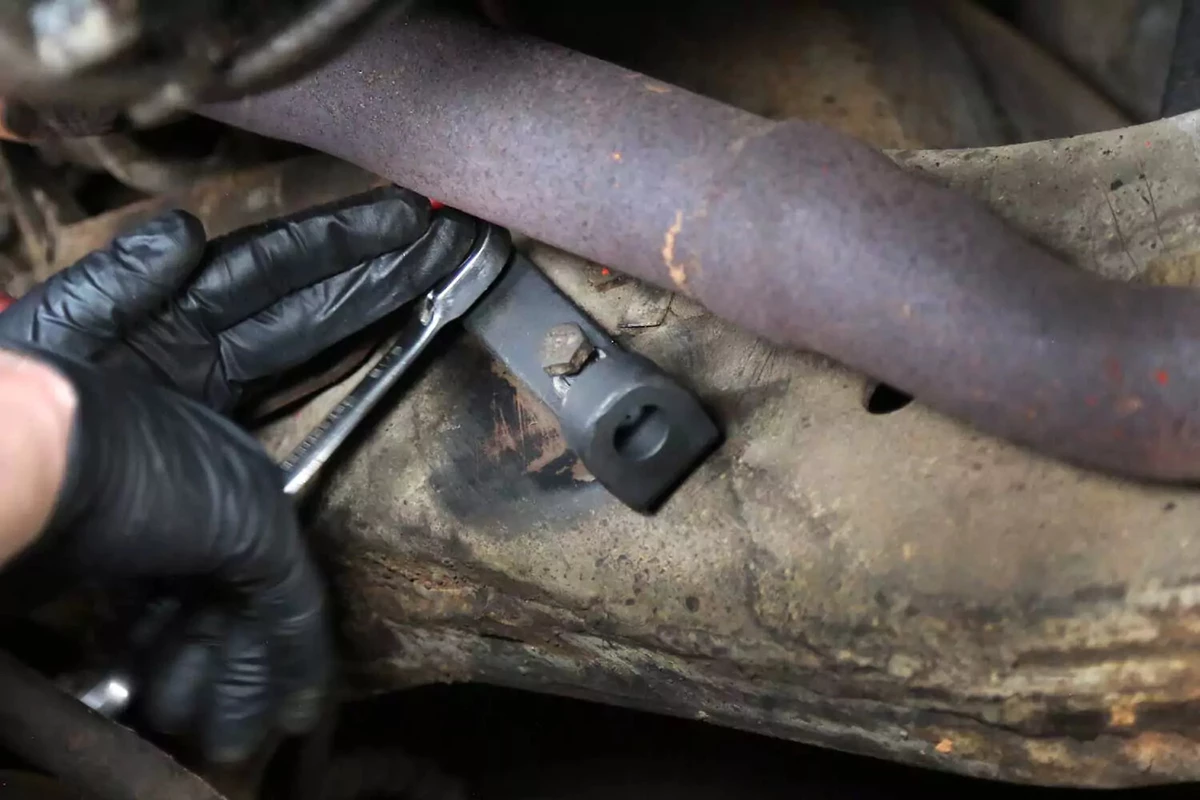
Use a socket to remove the frame mount bolts at the idler arm’s inner end. Keep these bolts for reuse.
If your idler arm came without the frame mount, leave these bolts in place. Instead, remove the cotter pin and castellated nut.
Install the new frame mount using the original bolts unless new ones are supplied.
If the exhaust or other components are in the way, you may need to use a wrench instead of a socket.
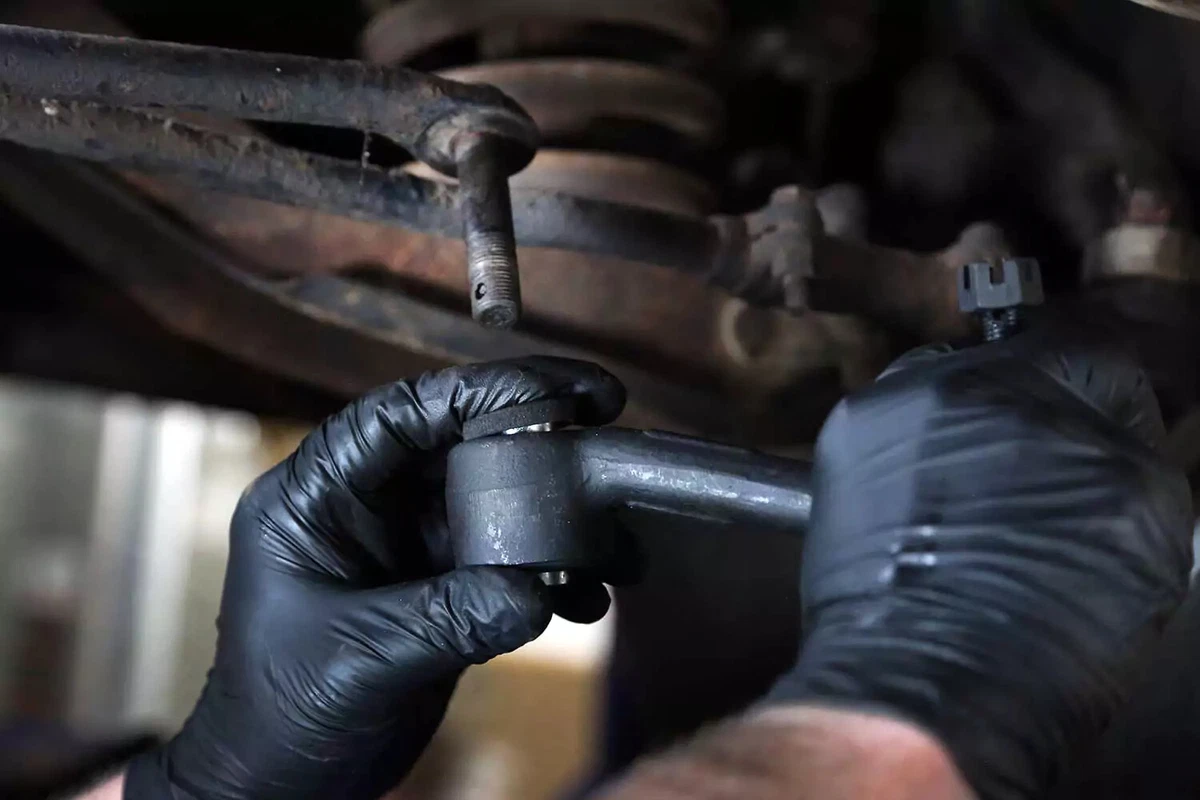
Assemble the new idler arm with any supplied washers or bushings. Our idler arm came with new foam rubber seals, which we used on the center link connection.

Install the new castle nut to the center link shaft. If the grease fittings are not already installed to the idler arm, install them now.
Slide the idler arm post into the frame mount and install the new castle nut. You may need to remove the lower frame mount bolt.
Use a torque wrench or torque gauge to tighten the castle nuts on the idler arm. Check your repair manual for the recommended torque specifications.
The castle nut may not align with the hole in the shaft for the cotter pin. You can back the castle nut off a little (or tighten it) to reach the closest slot in the nut.
Never use a torque wrench to loosen a nut or bolt. You might damage the wrench’s calibration.
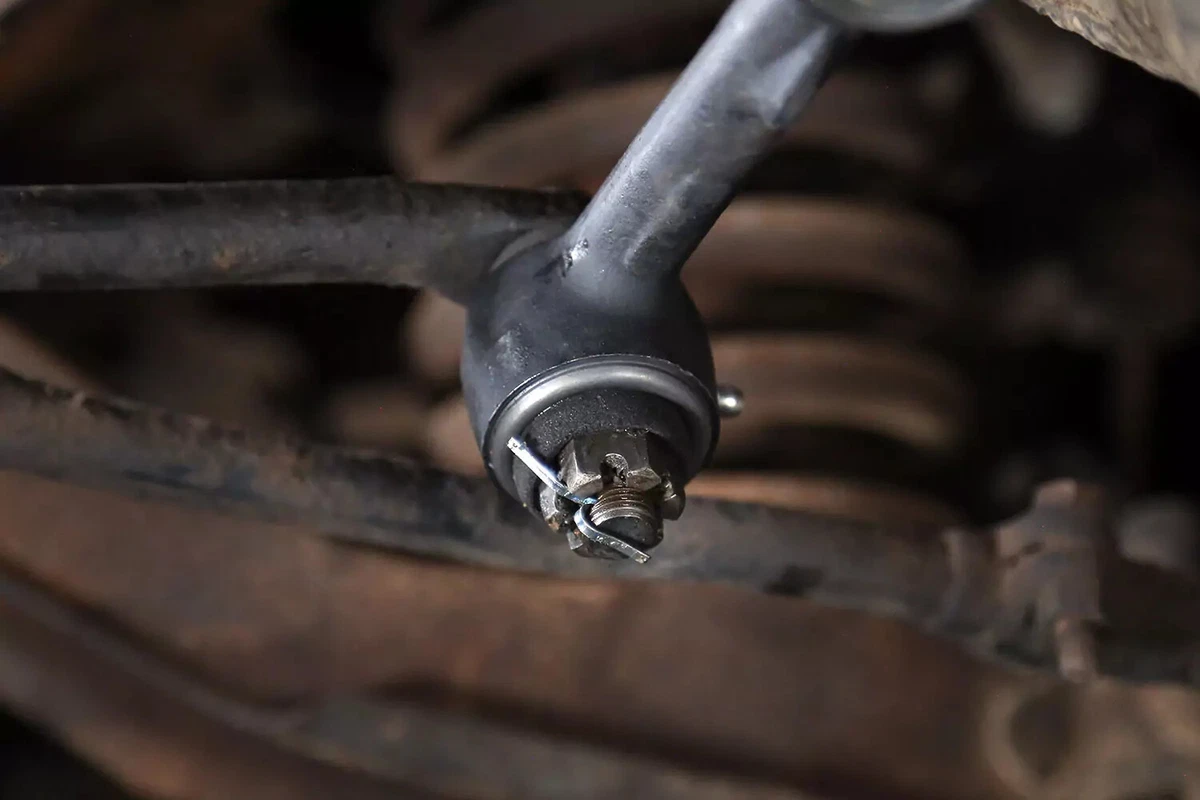
Install a new cotter pin into each castle nut. Bend both sides over as shown.
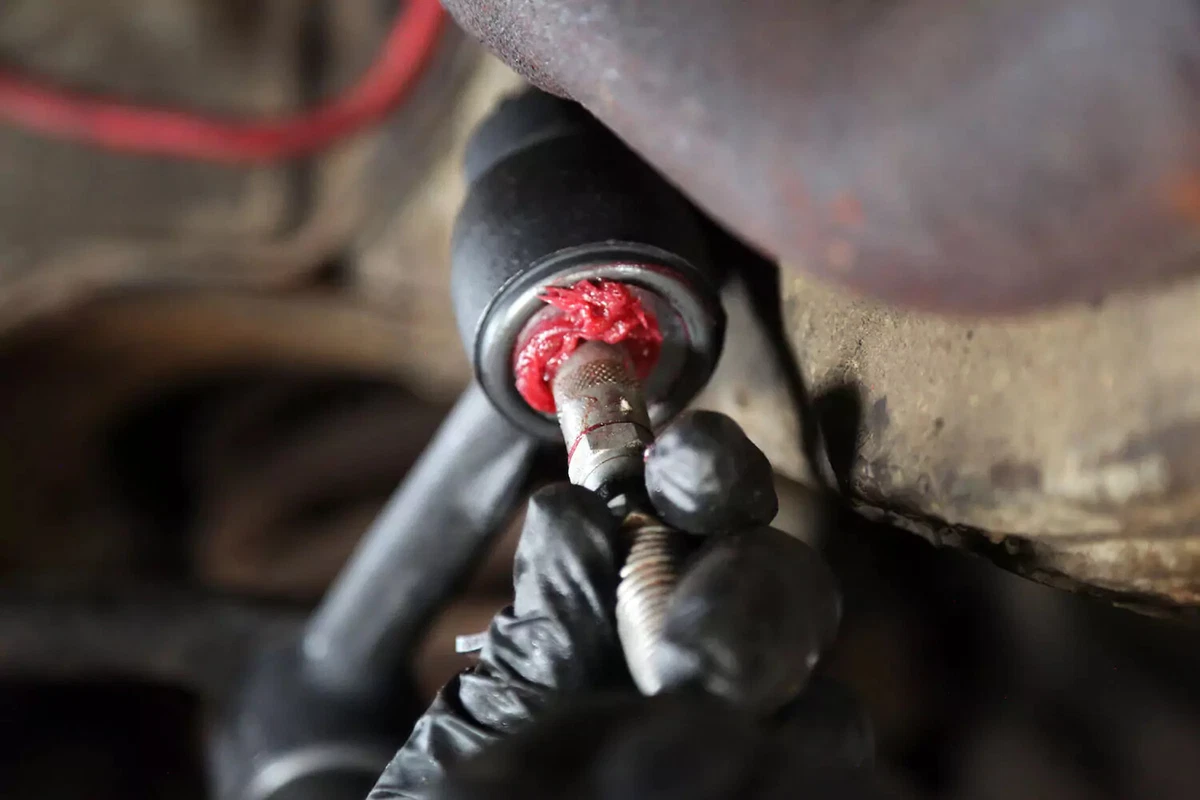
Use a grease gun to fill the idler arm’s ball joints with grease. Pump the grease gun until grease starts to leak out.
You should grease these joints at least once a year. Greasing your chassis and steering components—an often overlooked maintenance task—greatly extends the life of bushings and joints.
Your new idler is now installed. Have your vehicle’s front-end and steering aligned after you replace steering or suspension components, including the idler arm.
About the author

Share your feedback
This article is meant to provide general guidance only. Automotive maintenance, repair, upgrade, and installation may depend on vehicle-specifics such as make and model. Always consult your owner's manual, repair guide for specific information for your particular vehicle and consider a licensed auto-care professional's help as well, particularly for advance repairs.