The brake master cylinder is the heart of a modern braking system. It pushes hydraulic fluid through lines to the wheel cylinders or calipers. That hydraulic pressure is then transferred to the brake pads, which clamp on a drum or rotor to slow the vehicle. Thus, brake master cylinder replacement is key to the well-being of your vehicle.
Since the late 1960s, vehicles have used dual-chamber master cylinders, which feature a fluid reservoir for the front brakes and a separate one for the rear brakes. In case of a failure, you always have half of the brakes available.
The most common cause of a brake master cylinder failing is a leak between the master cylinder and vacuum booster—the large canister behind the master cylinder—or the hydroboost.
Signs of a bad master cylinder
- Weak braking performance
- An overly hard or soft brake pedal
- Rear brakes locking up
- Brake pedal doesn’t return to the resting position
How to diagnose a bad master cylinder
- There are a couple of quick tests you can do to determine whether your master cylinder is working properly. Press the brake pedal once and hold. Does it build pressure? If not, then you likely have air in the system. Pump the brakes a few times and then hold. Does pressure build? If so, then you definitely have air in the system. Bleed the brakes and retest.
- Does brake pressure fade? That also indicates a leak. If the pressure fades fast, the leak is likely internal to the master cylinder. Look under the vehicle around the brake line connections for leaking fluid. If you don’t see any, have an assistant press the pedal while you hold each flexible brake hose to see if they swell. If the hoses and lines are in good shape, the master cylinder is probably the problem.
- Pop off the brake fluid reservoir cap and check the level. If it is full or above half, proceed to the next test. If it is low or empty, you likely have a leak. Refill the chamber and test the brakes. If the chamber is empty, you will have to bleed the brakes to test.
- If your brake fluid is more than half full, leave the cap off and have an assistant operate the brakes. You should see a stream of fluid emerge from each chamber as the pedal returns to the top. If not, the master cylinder is likely failing. Replace the cap and move on to the next step.
- Use a brake caliper (disc brakes) or wheel cylinder (drum brakes) to open the bleeder screw. Have an assistant press and hold the brake pedal. If fluid comes out, tighten the screw and check the next wheel. If no fluid comes out or it sputters (which means there’s air in the line), tighten the bleeder and bleed the braking system.
- If you try to bleed the brake system but nothing comes out from the front or rear half, then the master cylinder has likely failed.
Difficulty of replacing a brake master cylinder
Changing a brake master cylinder is an advanced do-it-yourself mechanic job taking one or two hours. One of the reasons the task takes time is the need to both bleed the cylinder on a bench and bleed the brake lines in the vehicle.
How to change your brake master cylinder: tips and tricks
- Clean up any spilled brake fluid with a wet rag. It’s water-soluble.
- Only use brake fluid from a freshly opened container for master cylinder repair.
- Bleeding the master control and brakes can be challenging. Even professionals can get flustered when bleeding the system.

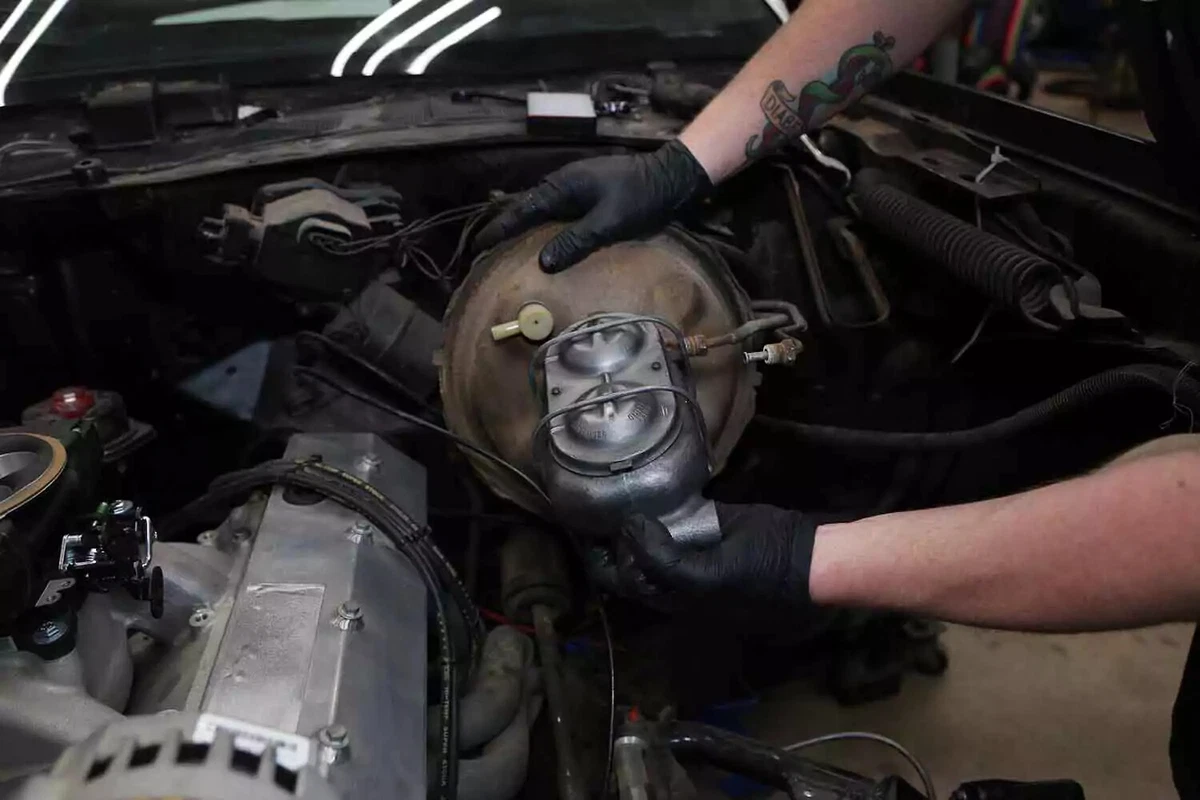
The master cylinder in our demo vehicle is located on the driver’s side under the hood, directly in front of the brake pedal position. That’s its location in nearly every modern vehicle. There’s almost always a brake vacuum booster behind it.
The brake booster, which reduces brake pedal pressure, looks like two large bowls put together.
Some vehicles—and most trucks—don’t have vacuum boosters. They use what is referred to as a hydroboost system, which uses the power steering pump to generate brake boost power.
The hydroboost has three lines: coming from the power steering pump, the reservoir, and the steering box. The master cylinder follows the same basic design for a conventional brake booster and a hydroboost setup.
Your master cylinder may have a built-in reservoir, a plastic reservoir mounted on top, or, in rare cases, a remote-mount reservoir.
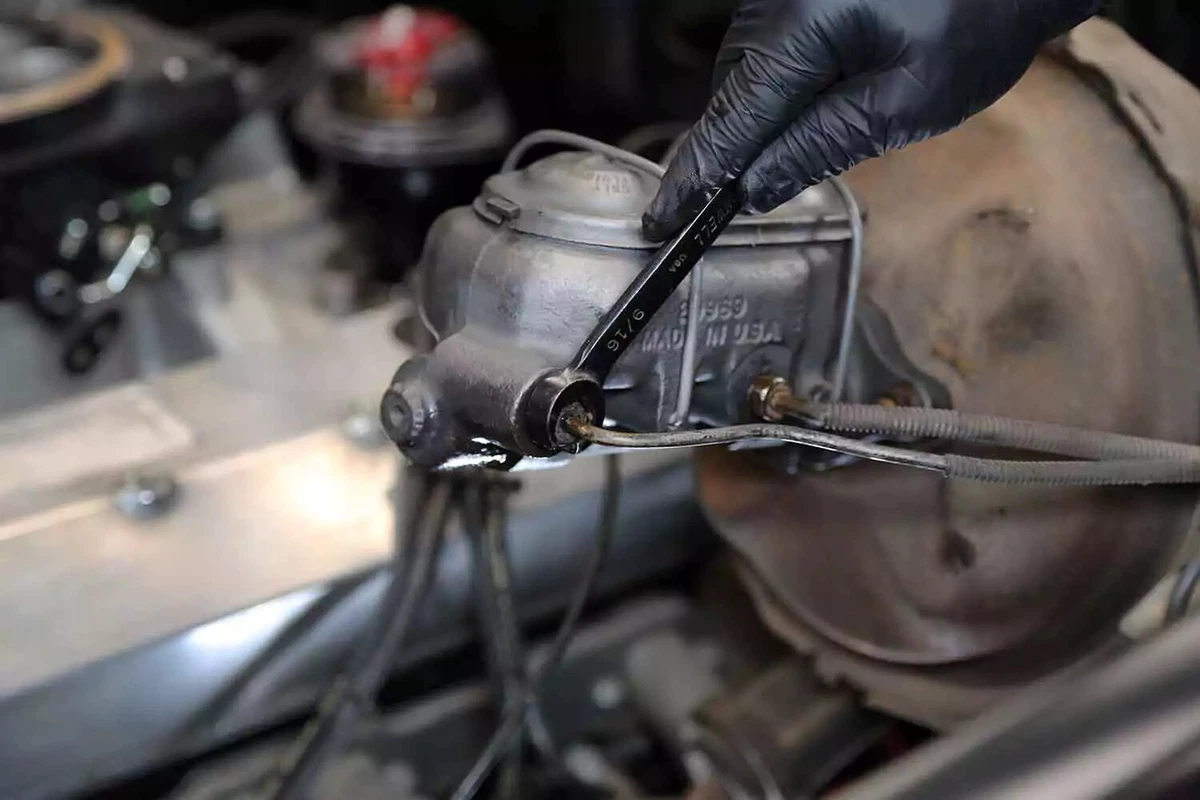
After you locate the master cylinder, open the top to check the fluid level. On our demo vehicle, both bowls on the master cylinder were empty. Also, the front sealing boot is fully expanded, which indicates a problem. Our master cylinder, which rusted, is no longer functional.

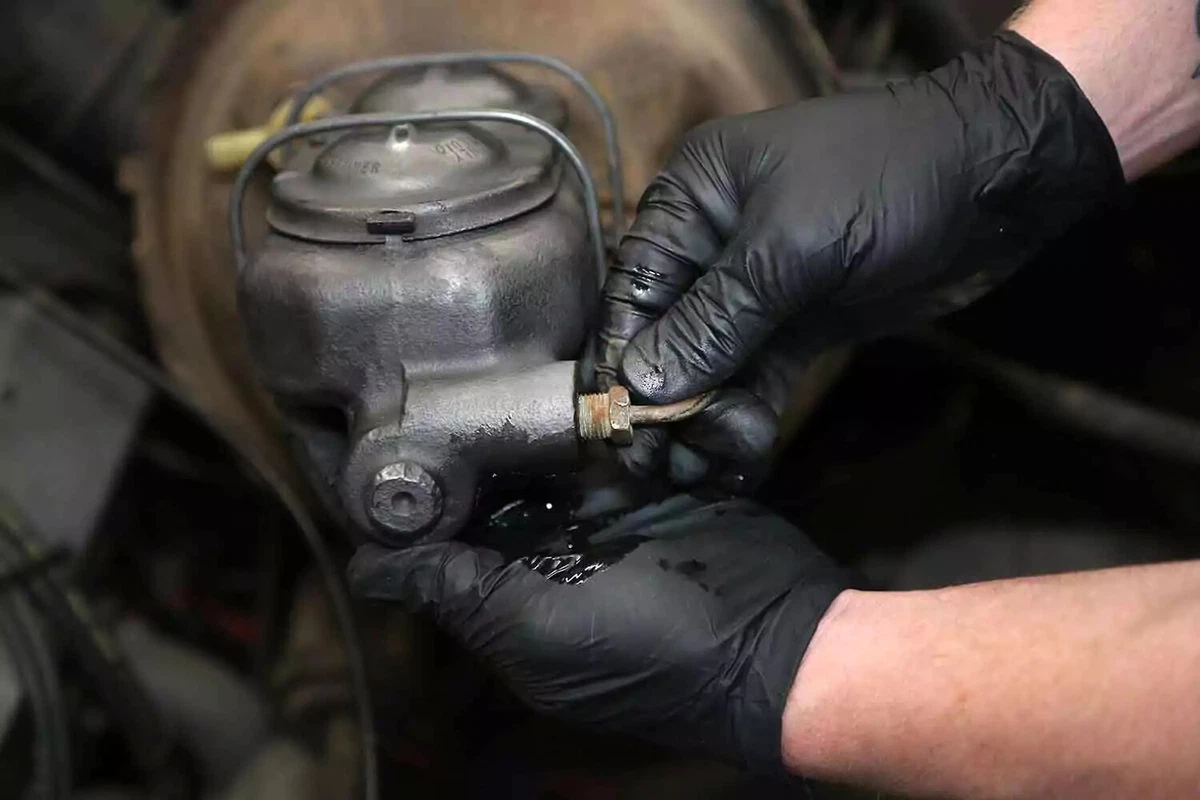
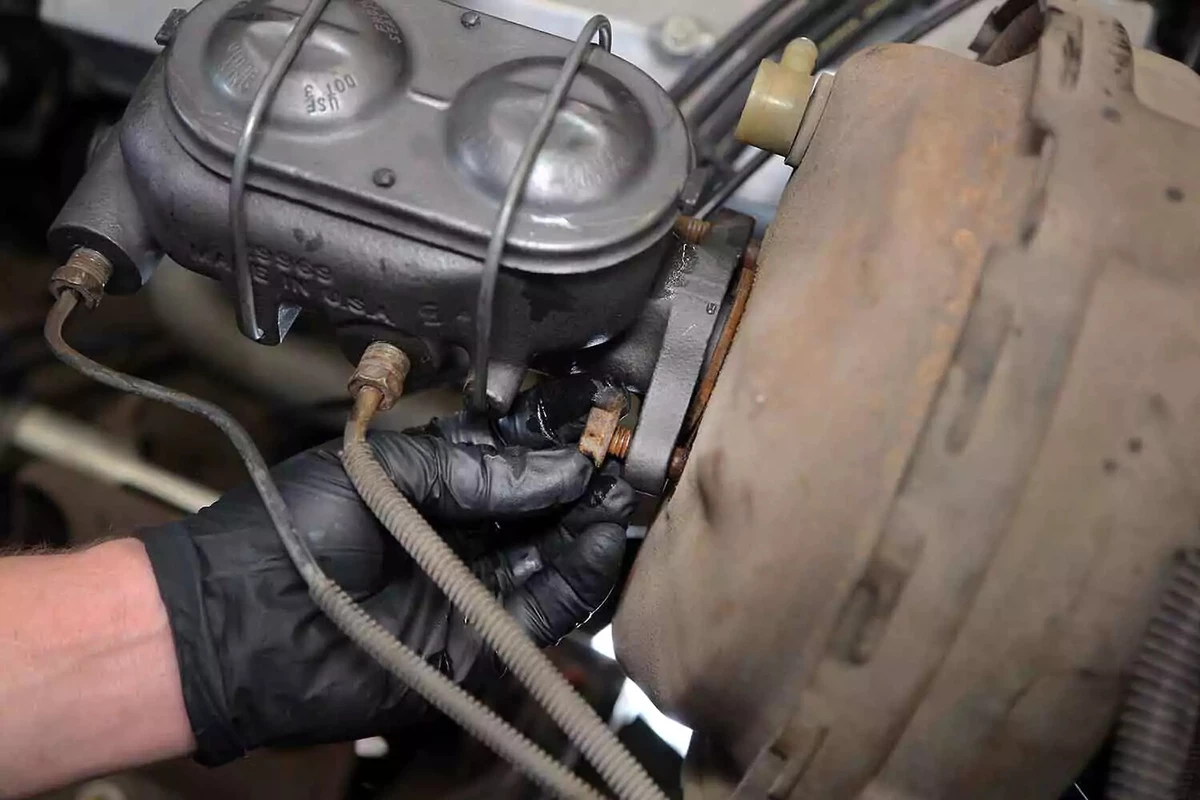
Use a line wrench, such as a box-end wrench with an opening for a hard line, to loosen each brake line fitting. These can be difficult to remove, especially on older vehicles with cast iron master cylinders.
Line wrenches are necessary because a regular open-end wrench will round off the fitting hex. Use penetrating fluid to loosen corrosion on stubborn brake lines.
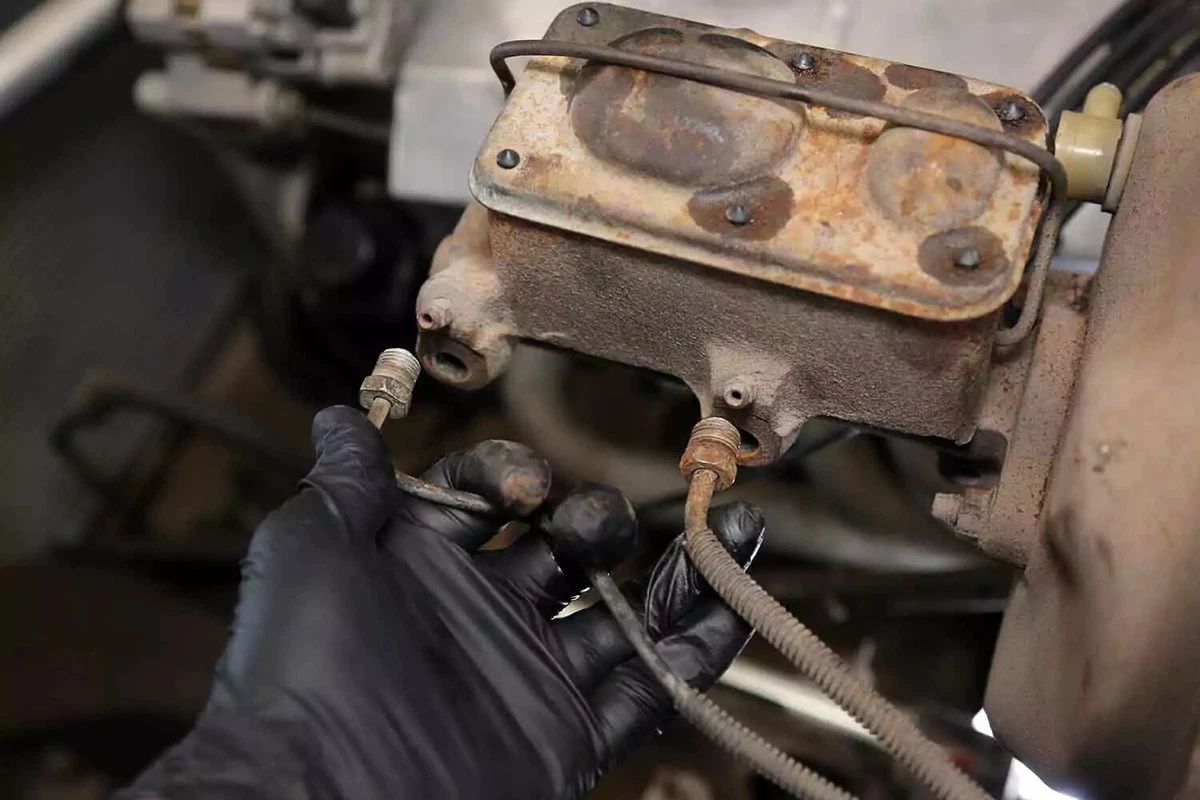
After they’re loosened, remove both brake lines. If your master cylinder is full of fluid and dripping, you can leave the lines in the ports to keep fluid from leaking until you disconnect the master cylinder from the brake booster.
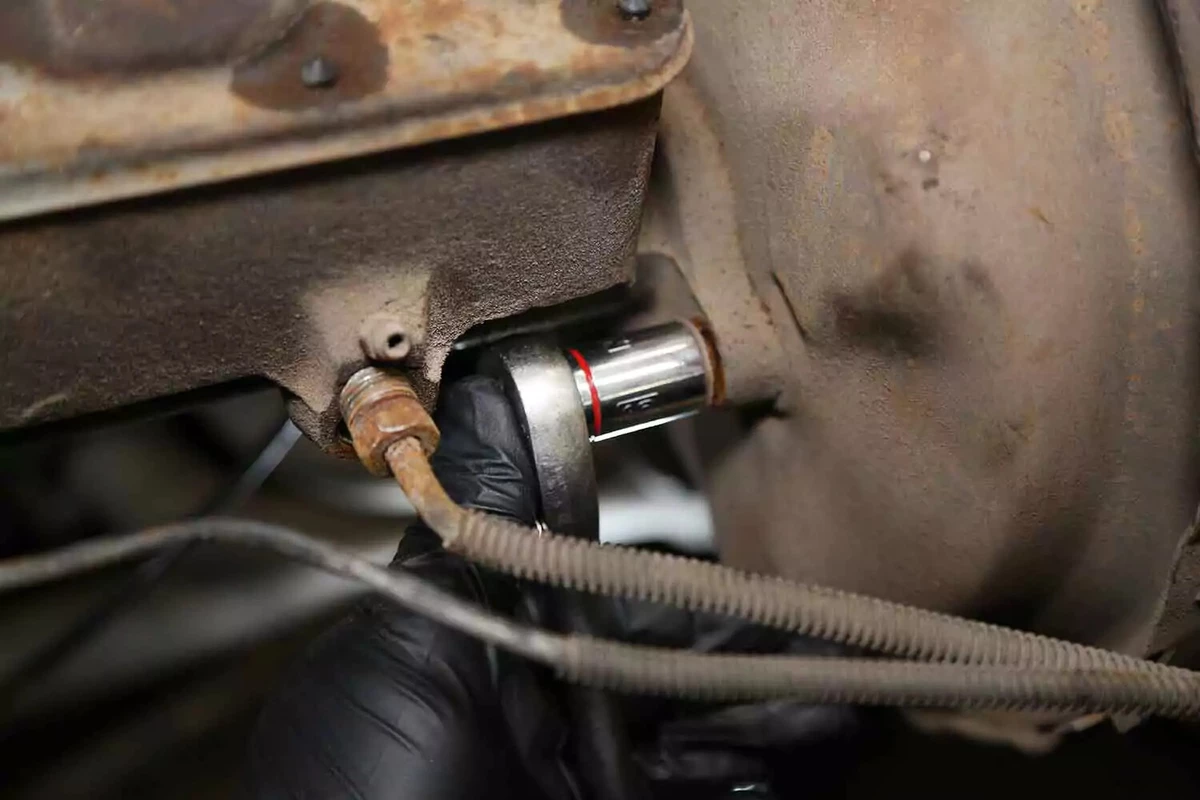
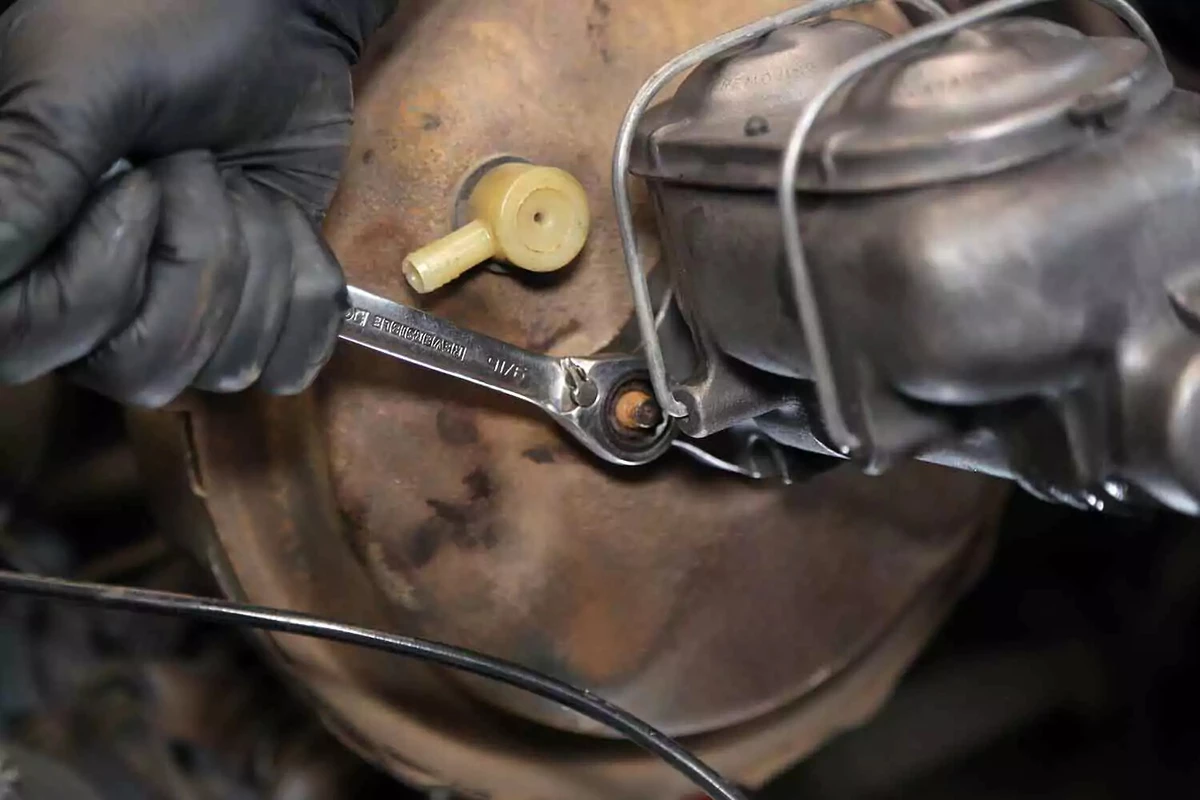
Use a socket or wrench to loosen and remove the nuts holding the master cylinder to the brake booster.
Use penetrating fluid to help break the nut free.
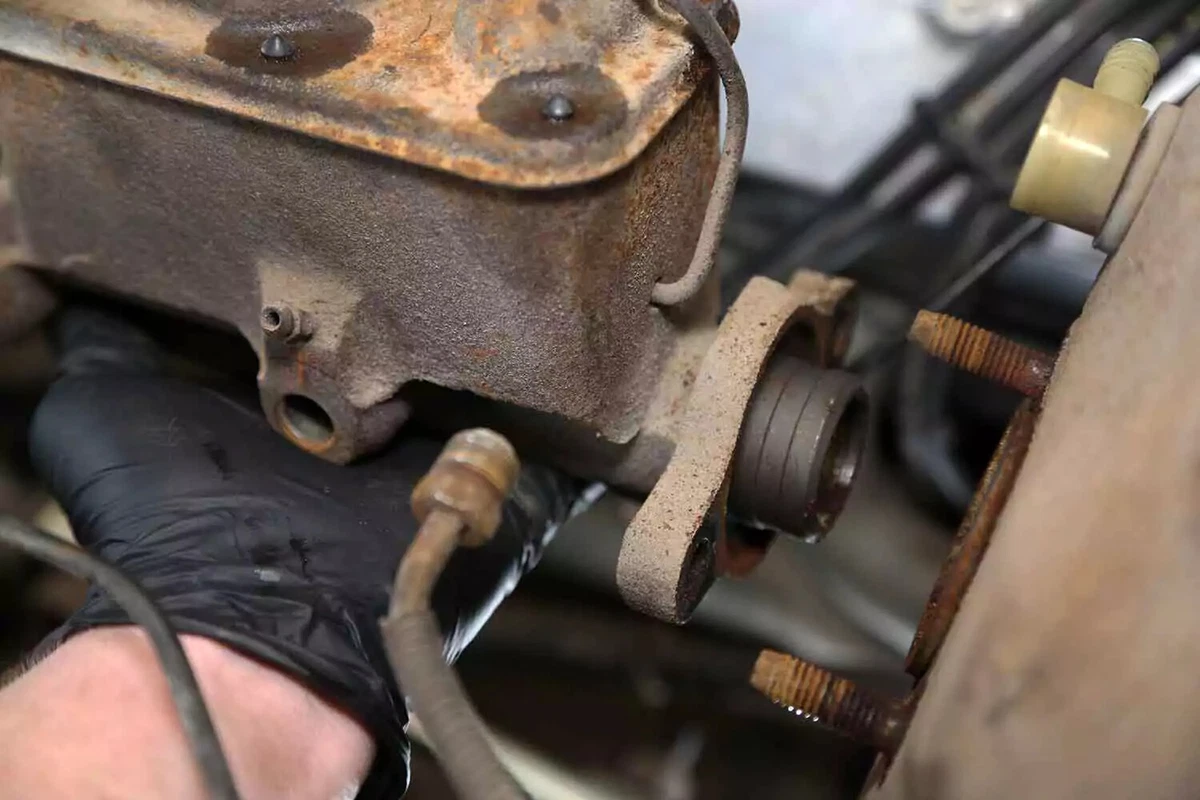
Slide the master cylinder off the studs. Remove it from the vehicle.

Before installing a master cylinder, you must bleed it on a bench. This means cycling the master cylinder’s piston to remove air from the internal passages. Most new master cylinders come with one of two bleeder styles.
Types of Bleeder Styles for Master Cylinder Replacement
Bleeder hose kit: We used this method. Our kit came with two small clear hoses, a couple of plastic port adapters, and a clip for the lines. Attach the hoses to the port adapters and push one adapter into each brake line port. The open side of the hose runs to the corresponding reservoir. Use the clip to hold the lines in place at the bottom of the reservoir. It’s critical that the hose ends are fully submerged in brake fluid so they can’t suck air into the master cylinder.
Bleeder plugs: With this bleeder type, you close the outlet ports with a pair of plastic plugs. It takes longer to bleed the master cylinder this way, but it works well, and there are no leaks.
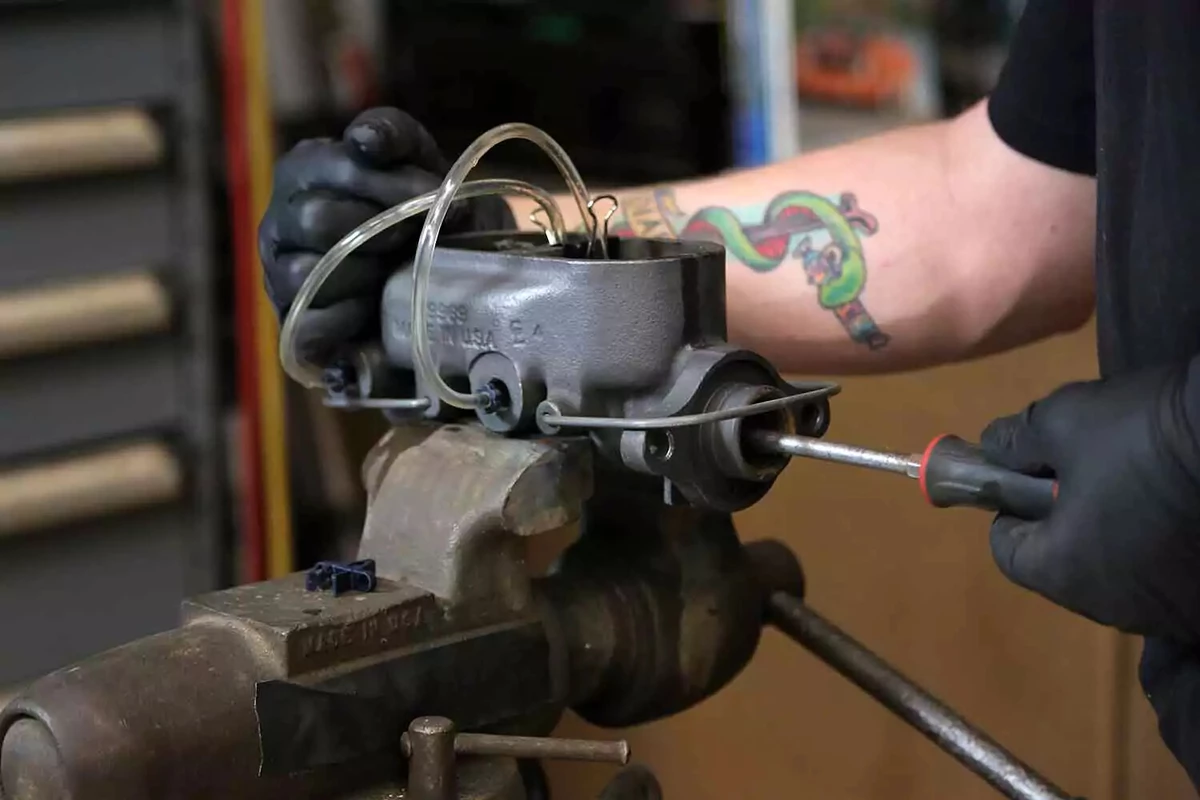
The process is the same regardless of bleeder style. With the master cylinder locked in a vice—or clamped on a bench top—fill the reservoir halfway with fresh brake fluid. Now use a large screwdriver to slowly press the piston until it stops. Slowly release the piston and repeat until there are no bubbles in the air lines.
After you get most of the air out, the piston may become difficult to press. Push hard as necessary.
If you’re using bleeder plugs, depress the piston to force brake fluid out the top of the reservoir from the orifices that let the fluid drain into the piston bore. This is normal and one reason you want to go slow.
One bowl will bleed faster than the other. The first bowl could shoot fluid. Drape a shop towel over the master cylinder to avoid getting sprayed.
Hold the piston partly pushed and slowly cycle the piston back and forth to finish bleeding the second bowl without causing the spray of fluid. Keep enough fluid in the reservoir to prevent air from being sucked in as the piston returns.
After there are no more bubbles in the lines (or coming out of the bowl orifices when using plugs), you can safely remove the bleeder lines or plug and transfer the MC to the vehicle.
Slide the pre-bled master cylinder onto the studs of the brake booster. If you bled with hoses, hold the ports slightly upward to reduce fluid spillage.
Thread the brake lines into the master cylinder in their original position.
If you used bleeder plugs, remove the plugs immediately before installing the lines.
Reinstall the original nuts to the brake booster’s studs. Thread them on by hand until the master cylinder seats square on the booster.
Tighten each fastener about halfway (about 10 pound-feet of torque) to ensure the master cylinder is square and not binding up. Then, complete the task by tightening them to the specifications provided in your vehicle’s repair manual. This is typically 15 to 30 pound-feet.
Use a line wrench to tighten the brake lines on the master cylinder. Do not overtighten the lines because it can crush the flare and cause a leak. Brake lines need about 12 pound-feet of torque, which is hand-tight plus a quarter turn.

There are several ways to bleed brakes, but the most common way for DIYers is to do it manually. If you have a power or vacuum bleeder, use it.
How to manually bleed brakes
Top off the master cylinder with new fluid. Watch the fluid level as you go. Replenish the fluid every couple of cycles to keep the level in the reservoir high enough. If there isn’t enough fluid covering the ports in the bottom of the reservoir, you might suck some air into the system. If so, you’ll need to start bleeding all over from square one.
With an assistant’s help, start at the farthest brake from the master cylinder (the passenger rear) and work your way to the closest position (the driver’s side front). It can be difficult to hear each other during this process, so use these commands. Here’s what they mean.
- Press: Press the pedal slowly to the floor.
- Hold: Hold the pedal to the floor. Do not lift it at all. Otherwise, you will draw air back into the system.
- Release: Release the brake pedal.
- Start with the farthest brake caliper/drum from the master cylinder.
- Call out, “Press,” to your assistant to actuate the brake pedal.
- Open the bleeder on the caliper or wheel cylinder about a half-turn.
- As the fluid comes out, watch for gurgles and sputters from air pockets. The pedal should sink slightly as the fluid rains, especially as you get most of the air out.
- Call out, “Hold,” and then tighten the bleeder.
- Call out, “Release,” to have your assistant slowly release the pedal. Wait about five seconds for fresh fluid to drain from the reservoir into the master cylinder.
Repeat this process until the fluid comes out clean without any sputtering.
Before moving to the next wheel, check the fluid level. If you drain the reservoir, start over. Check the level after each bleed operation. After you do all four wheels, start over to bleed any remaining air.
Cars with ABS may require the use of a pressure bleeder and/or an ABS-capable scan tool to get the last air out of the ABS hydraulic controller. Check your vehicle’s repair manual for details.
About the author

Share your feedback
This article is meant to provide general guidance only. Automotive maintenance, repair, upgrade, and installation may depend on vehicle-specifics such as make and model. Always consult your owner's manual, repair guide for specific information for your particular vehicle and consider a licensed auto-care professional's help as well, particularly for advance repairs.
Recommended for you
Find answers and inspiration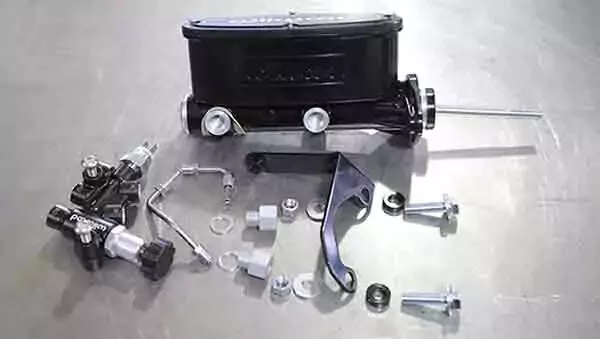
Buying the Right Brake Master Cylinder
6 min read
How to Replace Brake Fluid
10 min read
How to Buy the Right Brake Rotors
4 min read
Brake Calipers 101
4 min read
How to Replace Brake Rotors
7 min read
How to Find the Best Brake Pads for Your Vehicle
6 min read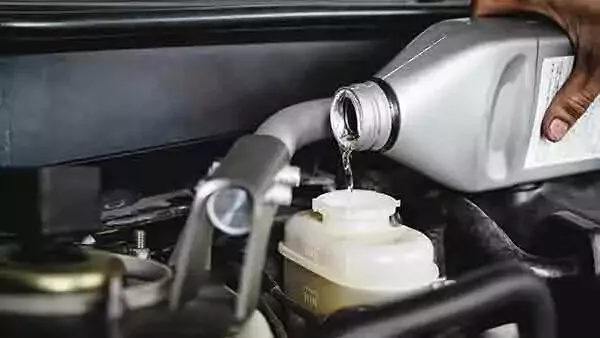
Choosing the Right Brake Fluid for Your Vehicle
5 min read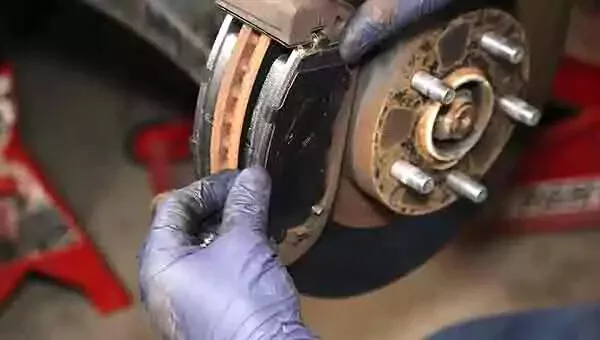
Brake Pads 101
7 min read
How to Replace a Brake Caliper
7 min read
Buying the Right Brake Calipers
7 min read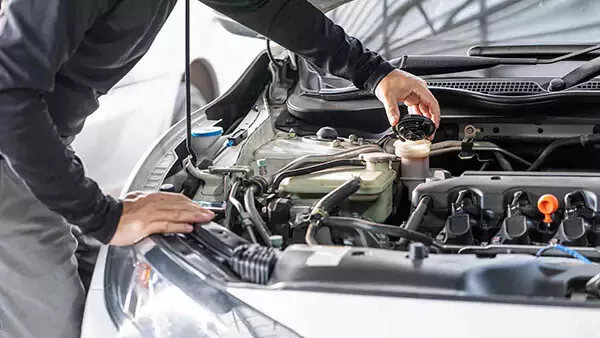
When to Replace Your Brake Fluid
5 min read
How to Change Disc Brake Pads
8 min read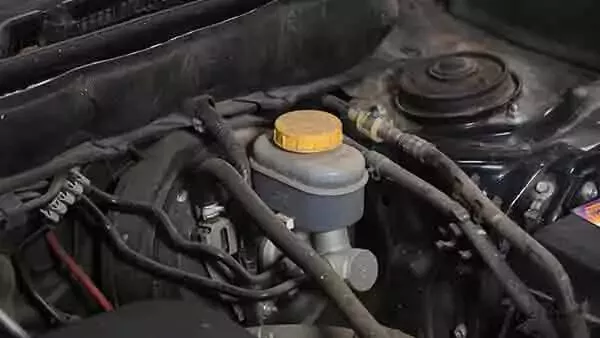
An Introduction to Brake Master Cylinders
6 min read


