Modern engines use a positive crankcase ventilation (PCV) system to evacuate combustion gasses that sneak past the rings into the crankcase. When the PCV valve gets plugged, the engine becomes less efficient, and the oil becomes contaminated faster. Symptoms of a failed PCV valve include increased oil consumption, blue smoke from the exhaust, oil leaks through the crank seals and oil pan, and whistling from the engine bay. The check engine light might illuminate on the dash.
It’s crucial to replace a failed PCV valve quickly. The process of replacing the PCV valve is easy, but you might have to remove a lot of components to reach the valve. Refer to your vehicle’s repair manual for details about the PCV’s location.
Here’s why a functioning PCV valve is important. As the pistons move up and down inside your engine, they compress incoming air and fuel. That generates the pressure required for the combustion that powers your vehicle. A byproduct of this action is pressure that leaks past the piston rings, which goes into the engine crankcase (where the oil and rotating components live). This is called “blow-by.”
Blow-by usually only gets noticed when your piston rings are worn and the engine starts to burn oil—showing up in your exhaust as a faint blue tint. This blow-by is always present, even in brand-new engines, because the pistons are not fully sealed.
This pressure in the crankcase can cause oil leaks through the gaskets, blown-out seals, and acid formation in the oil. If the gasses that cause this pressure remain in the crankcase, they mix with the oil, forming acids that eat the internals of the engine. To reduce these effects, since the 1960s, engines have had a PCV system. It uses an engine vacuum (from the intake manifold) to pull a vacuum or negative pressure on the crankcase. This removes most of the gasses, reducing any negative effects.
Tips and Tricks
- There can be a associated with the PCV system. Ensure it’s clean and in place.
- Rubber hoses and grommets that lead from the PCV valve to the intake manifold deteriorate from exposure to corrosive, oil-laden fumes. Check and replace them if necessary.
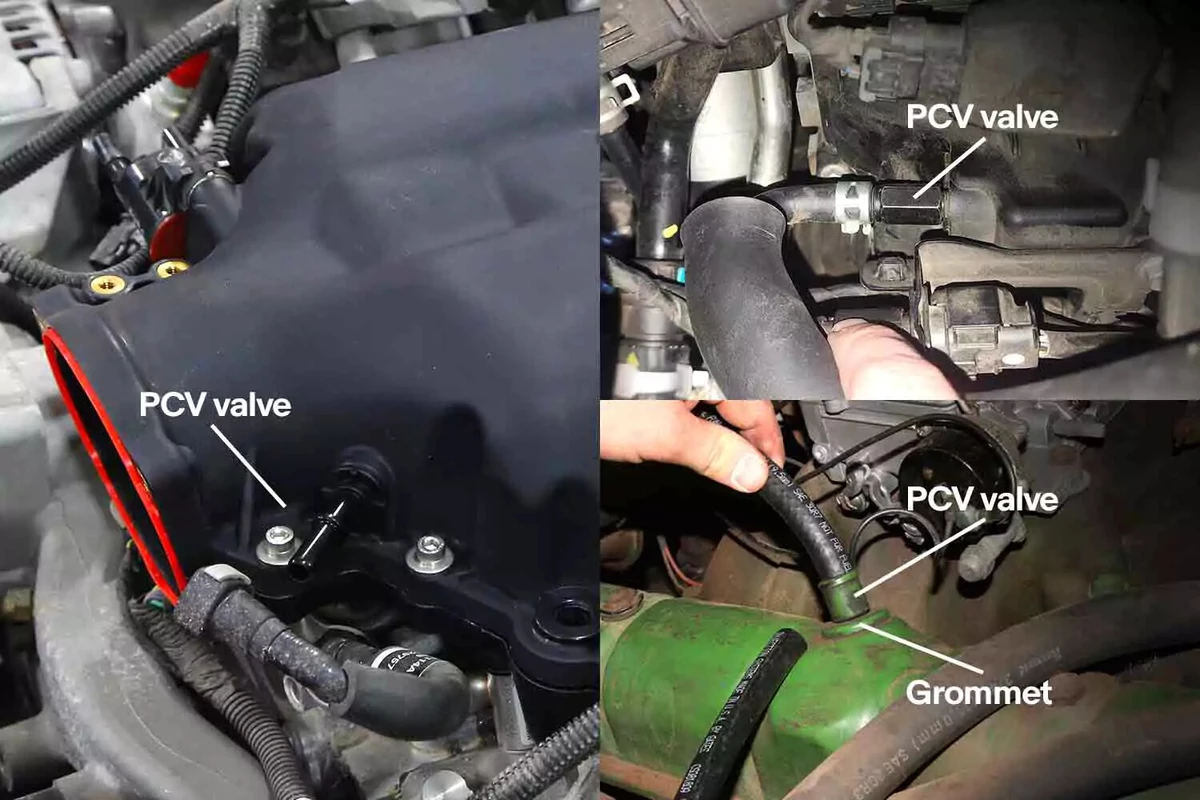
Modern engines place the PCV valve in many different locations. Some of them are hard to access.
The Gen IV GM LT-series engine (left) positions the PCV valve directly behind the throttle body below the intake in the valley cover. We’ve disconnected the vent hose from the intake port to visualize the actual valve. This style of valve uses a push-connect fitting, so there are no hose clamps.
In the twin-turbo Kia Stinger 3.3l (top right), the PCV valve is threaded into the back of the intake under hoses and covers. That makes it difficult to find.
Prior to the mid-1990s, most PCV valves were located in a rubber grommet on the valve cover (bottom right). A 1960s V-8 engine is typical of that style.

For most modern vehicles, you will need to remove components or engine bay trim to gain access to the PCV valve. For our demo, it took an hour to remove parts in the way—but only five minutes to change the valve.
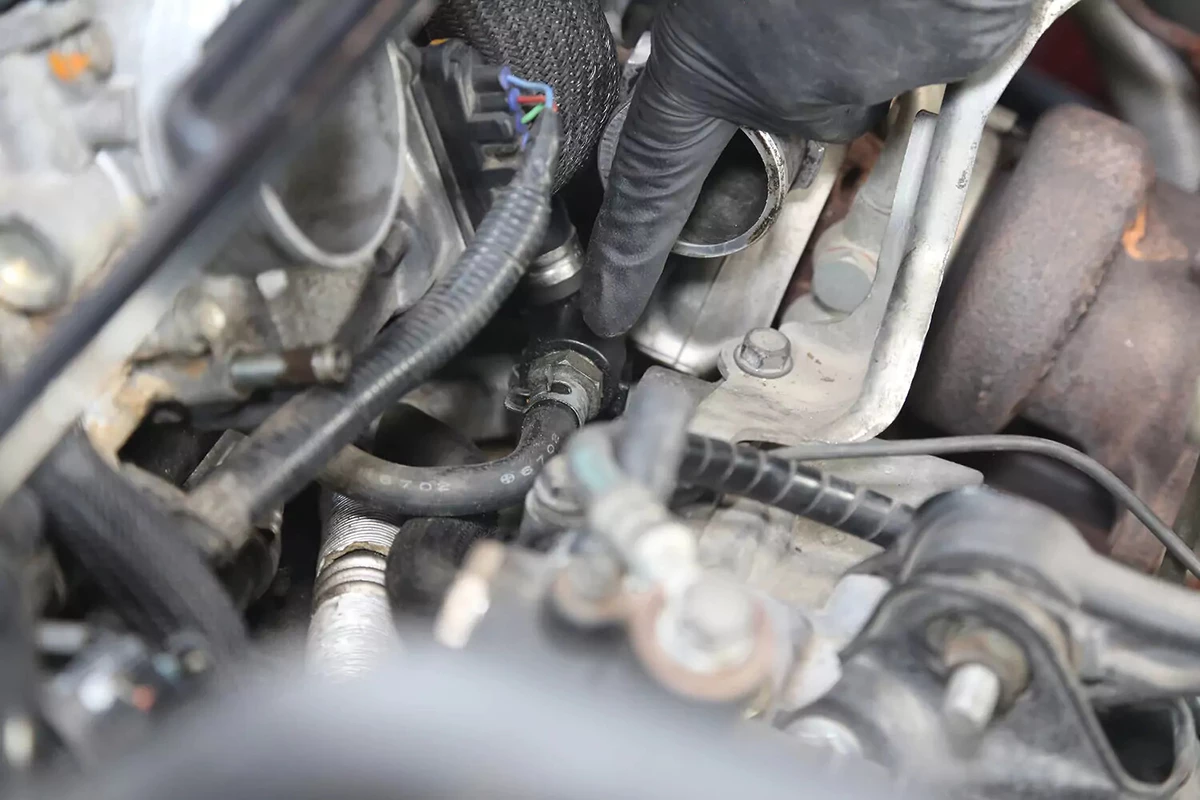
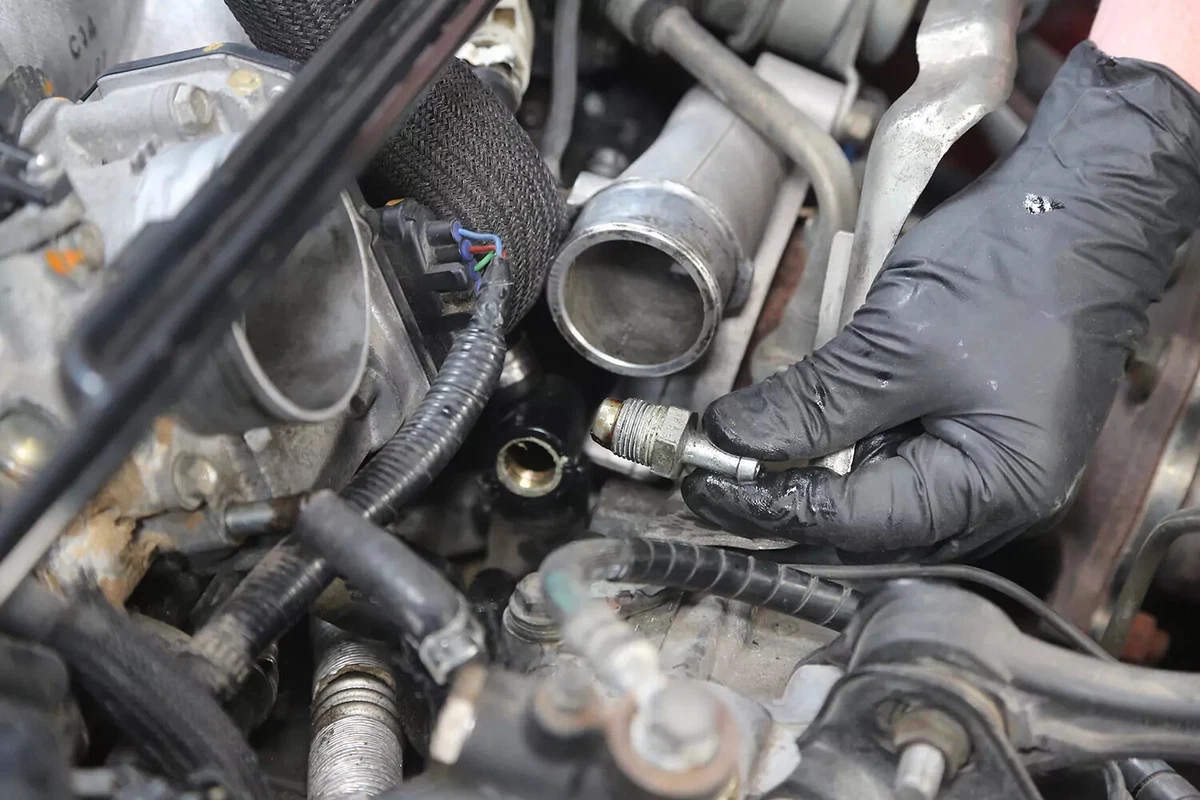
After the offending items are removed, you can verify the PCV’s exact location. On our demo vehicle, the valve is threaded into a plastic T connected to several hoses. For this model, you can replace just the valve or the entire assembly.
Remove the clamp and hose from the valve. Most OEM clamps are the spring-steel type, although some use a worm-gear clamp.
Squeeze the clamp ears and slide them over the hose so you can pull the hose off.
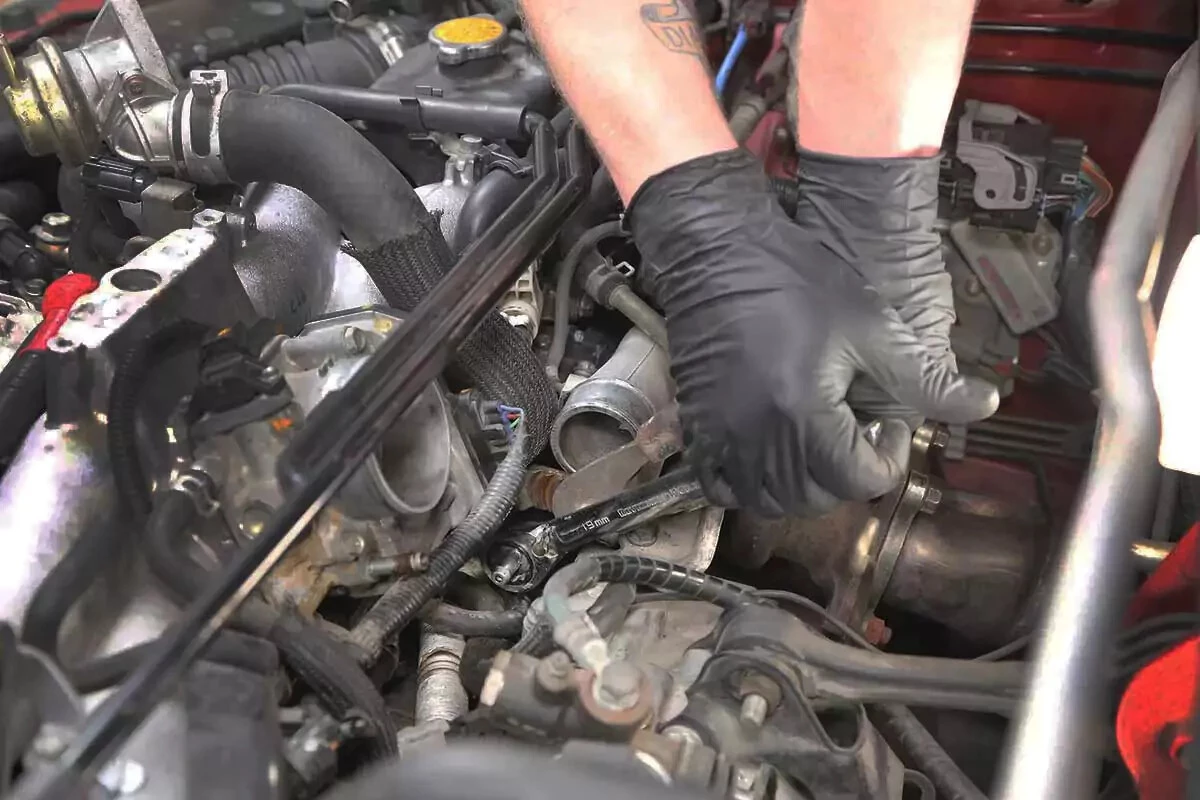
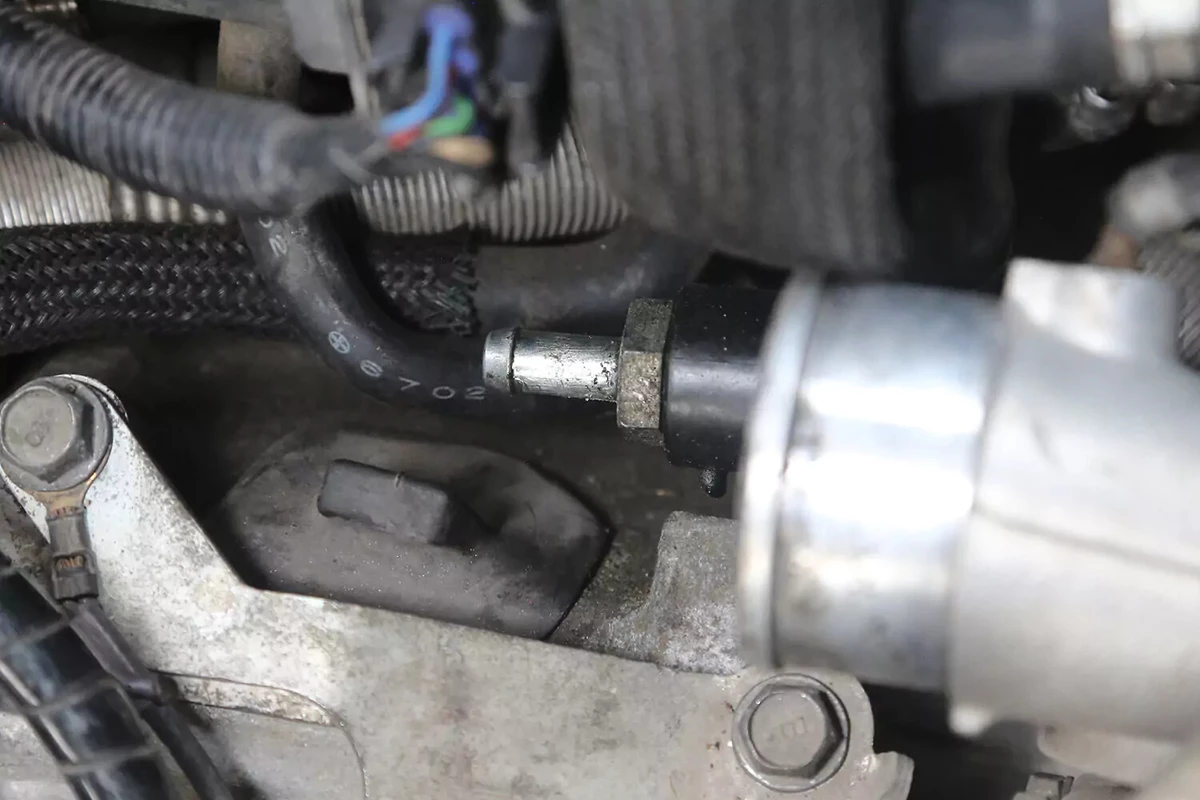
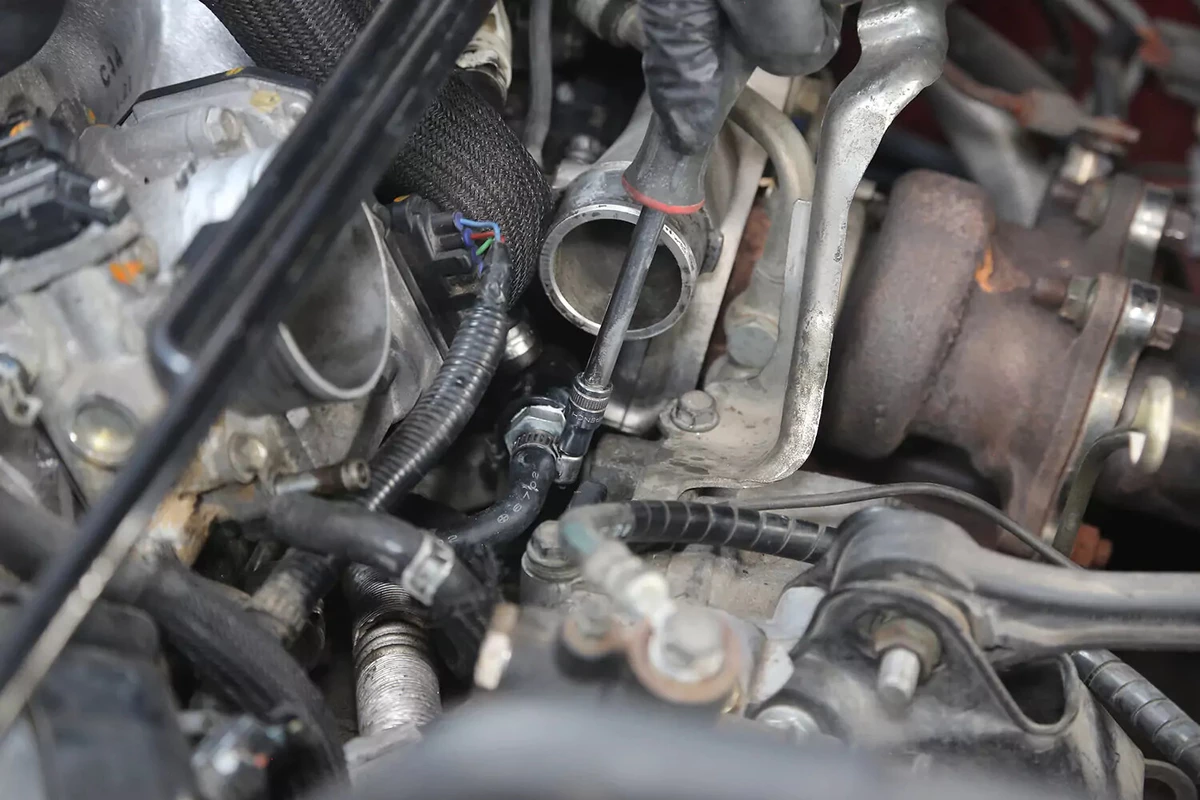
Use the appropriate tool to loosen the valve from its mount. Our demo vehicle has a metal threaded valve, which took a lot of muscle and a big box wrench to remove from the plastic T. That’s why we suggest replacing the entire assembly for this model.
Most modern engines use threaded PCV valves. Older engines use valves that push into a rubber grommet by hand.
Remove the valve and examine it. If a PCV does not rattle when you shake it, it’s no longer usable. That rattle is a one-way check valve that meters the crankcase fumes into the intake manifold. They eventually get clogged with sludge.
See the thread sealant on the threads? When threads are coated with a hardening sealant, the valve is difficult to remove.
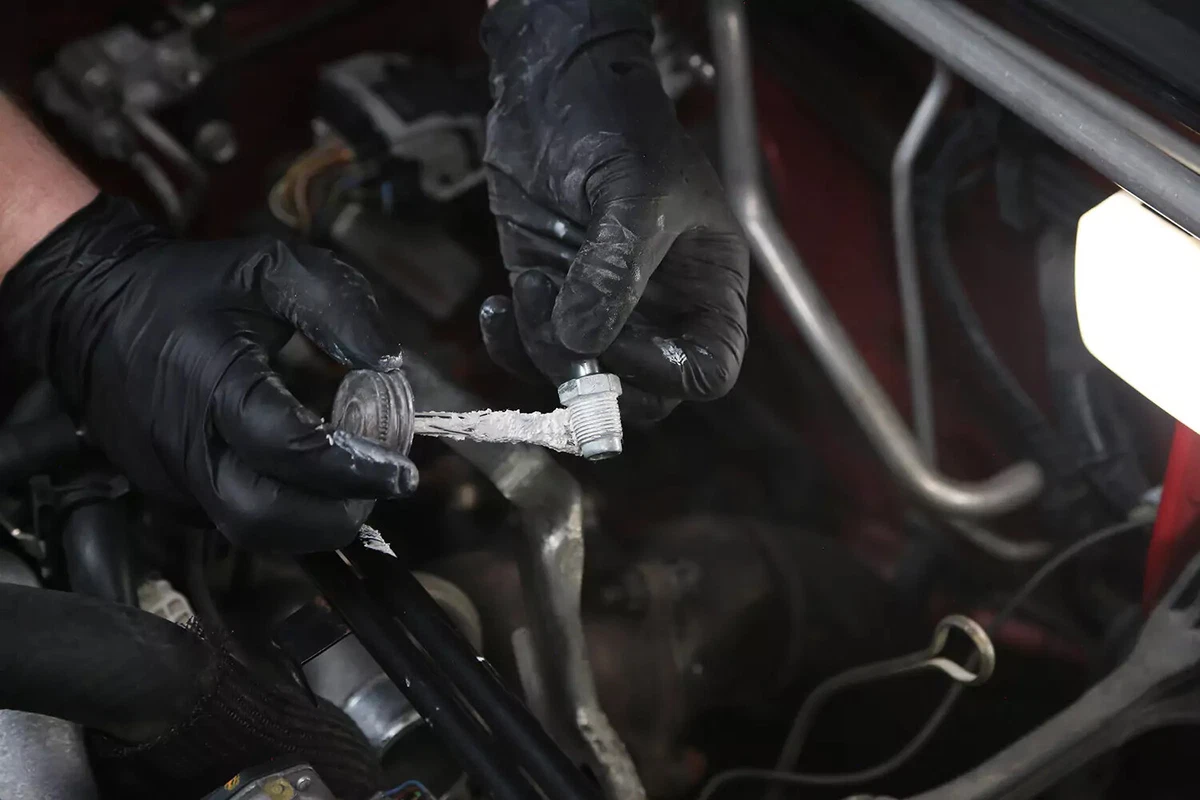
Apply a coating sealant to the threads on a thread-in PCV valve. This prevents air leaks through the threads.
Use a flexible sealant (not one that hardens). A flexible sealant makes it easier to replace the PCV valve in the future.

Install the new valve into the port.
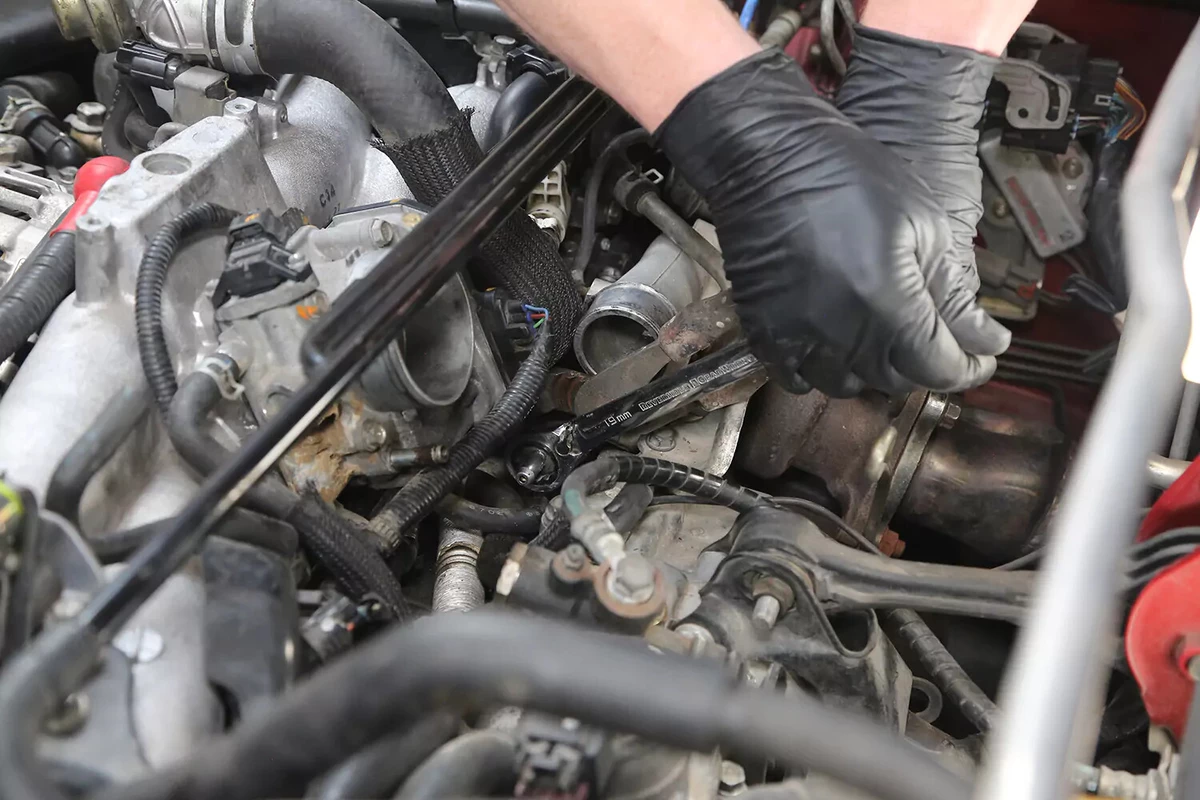
Use the appropriate tool to tighten. Do not overtighten a thread-in valve. It’s easy to strip the threads or damage the fitting or valve. Other valves pop into a grommet.
Push the hose onto the new valve. Seat it fully. Then, reinstall the clamp.
For our demo vehicle, we replaced the spring clamp because it was difficult to reach it with pliers. We used a worm-gear clamp instead.
Some engines have a push-on fitting that locks into place with a clip.
Finish the job by replacing all of the components removed to gain access to the PCV valve.
About the author

Share your feedback
This article is meant to provide general guidance only. Automotive maintenance, repair, upgrade, and installation may depend on vehicle-specifics such as make and model. Always consult your owner's manual, repair guide for specific information for your particular vehicle and consider a licensed auto-care professional's help as well, particularly for advance repairs.
Recommended for you
Find answers and inspiration
A Quick Guide to Valve Cover Gaskets
6 min read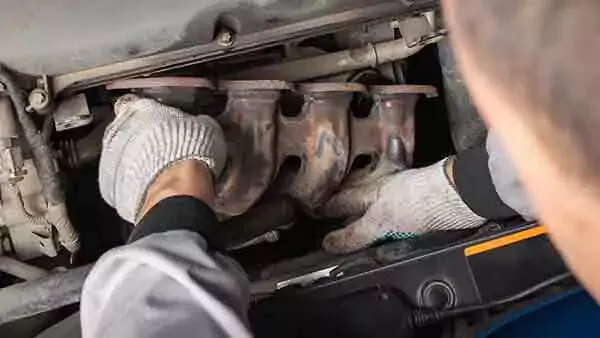
When to Replace Your Exhaust Manifold Gasket
6 min read
How to Replace an Ignition Coil
6 min read
How to Buy the Right EGR Valve and Gasket
6 min read
Your Complete Idler Pulley Buying Guide
5 min read
How to Buy the Right Throttle Body
5 min read
Buying the Right Distributor Cap and Rotor
4 min read
How to Replace a Drive Belt
5 min read
How to Replace an Intake Manifold Gasket
7 min read
How to Buy the Right Car Starter
5 min read
How to Replace a Valve Cover Gasket
7 min read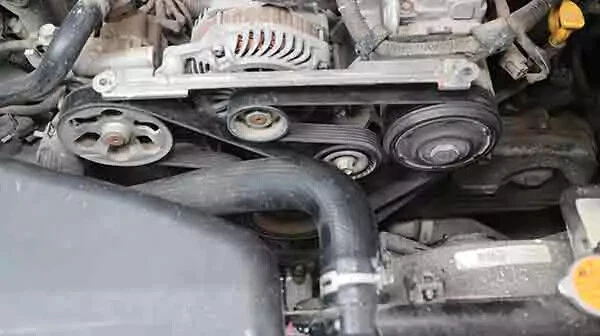
Diagnosing Your Serpentine Belt and Tensioner
6 min read
How to Change a Timing Belt
12 min read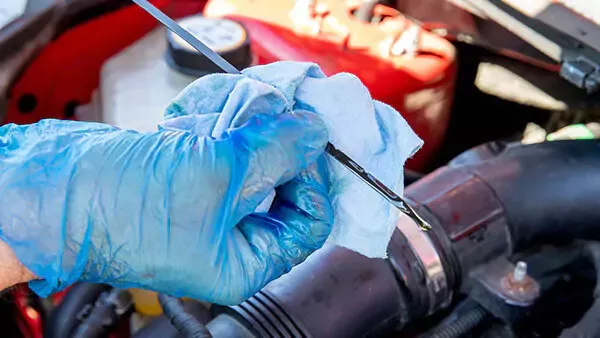
Changing Your Oil: 5 Things to Know
6 min read
How to Clean Fuel Injectors
8 min read
Automation How to Change a Car Battery
6 min read
How to Replace a Mass Air Flow (MAF) Sensor
7 min read
Distributors 101
6 min read
How to Replace Spark Plugs
7 min read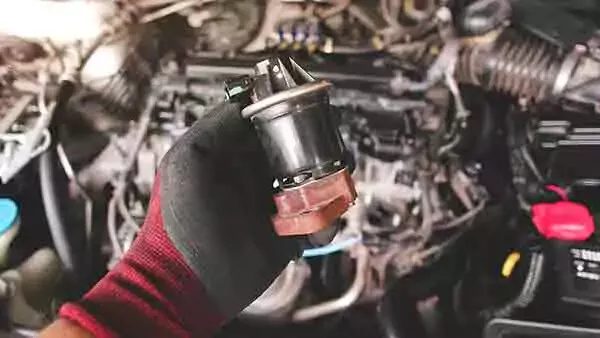
Everything You Should Know About EGR Valves
5 min read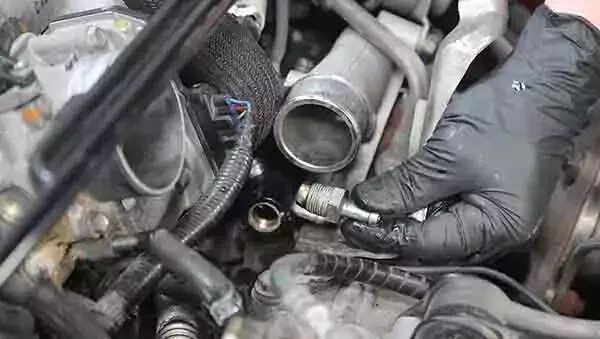
How to Test Your PCV Valve
6 min read
Buying the Best Portable Car Battery Jump Starter
6 min read
An Introduction to Cleaning Fuel Injectors
5 min read
A Deep-Dive Guide to Ignition Wires
7 min read
How to Replace Engine Mounts
4 min read
The Right Tools to Clean Your Fuel Injectors
6 min read
How Do Ignition Coils Work?
5 min read
Spark Plugs 101
7 min read
When to Replace Your Drive Belt
6 min read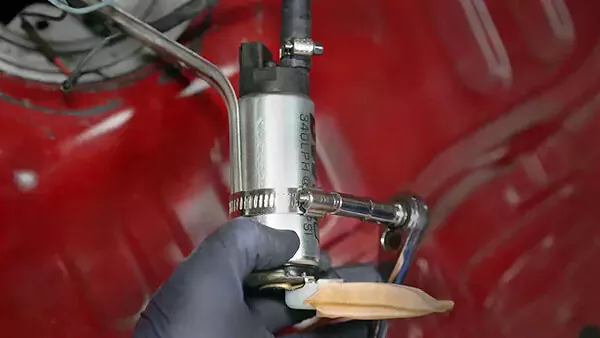
Fuel Pumps and How They Work
8 min read
What to Know About Your Vehicle's Throttle Body
6 min read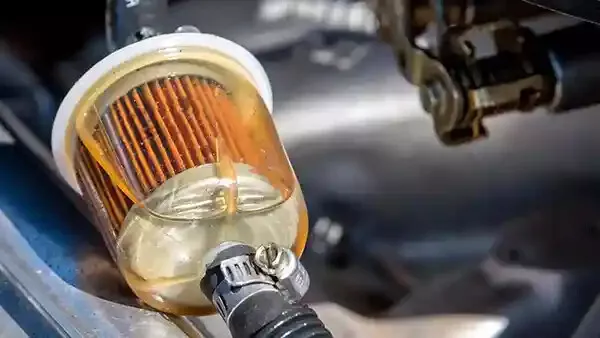
Everything You Need to Know About Fuel Filters
6 min read
How to Buy the Right Ignition Coils
7 min read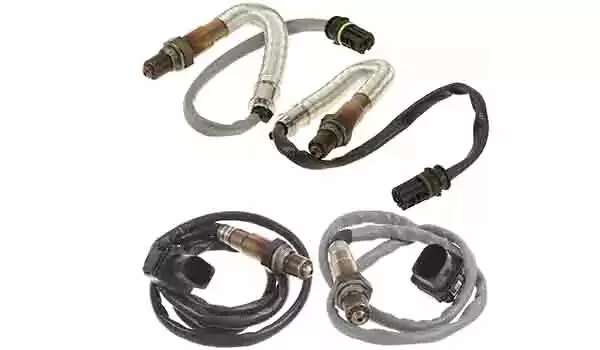
How to Buy the Right O2 Sensor
5 min read
How to Replace a Serpentine Belt Tensioner
4 min read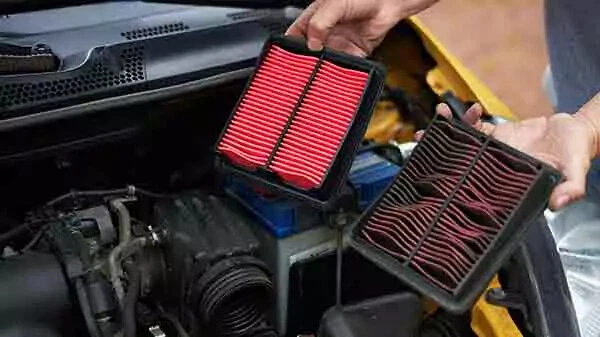
When to Replace Your Engine Air Filter
5 min read
How to Replace an Oxygen Sensor
5 min read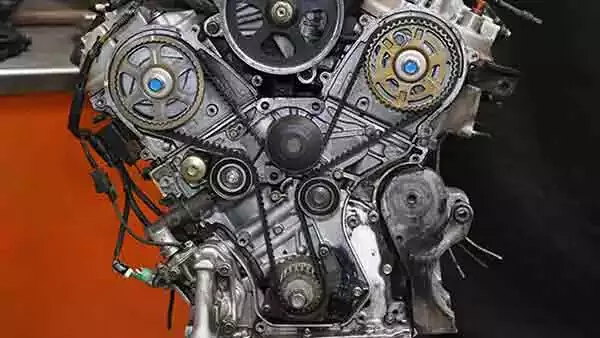
How to Buy the Right Timing Belt and Related Tools
5 min read
How to Buy the Right Car Distributor
6 min read
Timing Belts 101
5 min read
How to Replace an Engine Air Filter
5 min read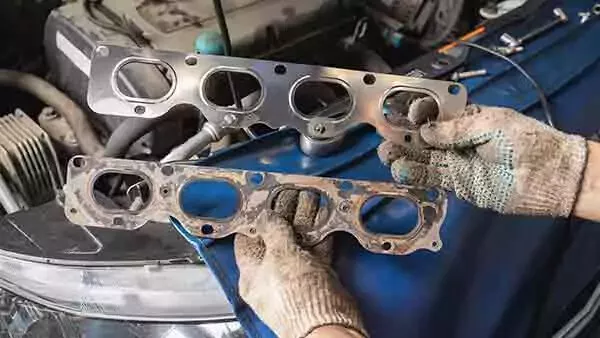
How to Buy the Right Exhaust Manifold Gasket
6 min read
How to Choose the Best Spark Plugs
5 min read
How to Replace a Car Starter
7 min read
What You Should Know About O2 Sensors
6 min read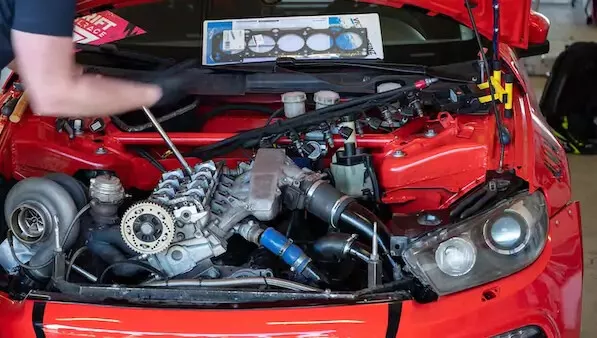
How to Buy the Right Valve Cover Gasket
4 min read
How to Replace a Distributor Cap and Rotor
5 min read
Understanding Your Car's Idler Pulley
4 min read
How to Replace a Fuel Filter
7 min read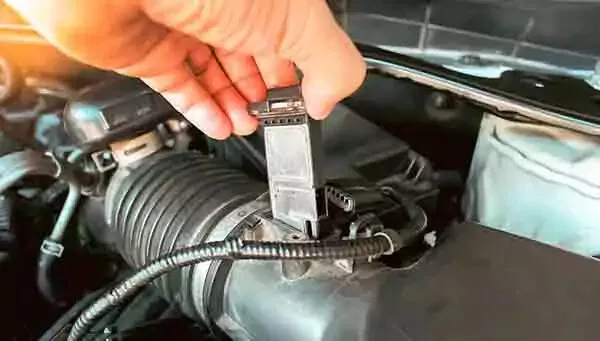
Do You Have a Faulty Mass Air Flow Sensor?
4 min read
Everything You Need to Know About Car Starters
7 min read
How to Replace an Exhaust Gasket
9 min read
Ignition Wire Buying Guide
6 min read
All About Your Distributor Cap and Rotor
7 min read
How to Replace a Throttle Body
6 min read
Spotting Intake Manifold Gasket Problems
7 min read
How to Change Oil in a Car
8 min read
How to Buy the Best MAF Sensor
4 min read
How to Replace an EGR Valve
5 min read
How to Change an In-Tank Fuel Pump
9 min read
Explore more projects

How to Repair a Chipped Windshield
1 to 2 hours
Beginner
7 min read

How to Replace Brake Fluid
1 to 2 hours
Beginner
10 min read
How to Replace an Ignition Coil
Less than 30 minutes
Beginner
6 min read

How to Replace a Radiator Hose
Less than 30 minutes
Beginner
5 min read

How to Replace Brake Rotors
1 to 2 hours
Beginner
7 min read
How to Replace a Serpentine Belt Tensioner
Less than 30 minutes
Beginner
4 min read
How to Replace a Drive Belt
Less than 30 minutes
Beginner
5 min read

How to Rotate Your Tires
30 to 60 minutes
Beginner
5 min read

How to Refill Windshield Washer Fluid
Less than 30 minutes
Beginner
4 min read
How to Replace an Oxygen Sensor
30 to 60 minutes
Beginner
5 min read

How To Replace Differential Fluid
Less than 30 minutes
Beginner
8 min read

How to Replace Sway Bar End Links and Bushings
30 to 60 minutes
Beginner
6 min read

How to Replace Transmission Fluid and Filter
1 to 2 hours
Beginner
11 min read

How to Change Disc Brake Pads
30 to 60 minutes
Beginner
8 min read

How to Replace a Cabin Air Filter
Less than 30 minutes
Beginner
5 min read
How to Replace a Valve Cover Gasket
Less than 30 minutes
Beginner
7 min read

How to Change Windshield Wipers
Less than 30 minutes
Beginner
3 min read
How to Replace an Engine Air Filter
Less than 30 minutes
Beginner
5 min read
How to Clean Fuel Injectors
1 to 2 hours
Beginner
8 min read

How to Replace Shock Absorbers
30 to 60 minutes
Beginner
8 min read
How to Change a Car Battery
Less than 30 minutes
Beginner
6 min read
Automation How to Change a Car Battery
Less than 30 minutes
Beginner
6 min read
How to Replace a Mass Air Flow (MAF) Sensor
Less than 30 minutes
Beginner
7 min read

How to Replace a Clutch Master Cylinder
1 to 2 hours
Beginner
11 min read

How to Flush and Change Engine Coolant
30 to 60 minutes
Beginner
6 min read
How to Replace a Distributor Cap and Rotor
30 to 60 minutes
Beginner
5 min read

How to Check Tire Pressure and Change a Tire
Less than 30 minutes
Beginner
9 min read
How to Replace a Fuel Filter
30 to 60 minutes
Beginner
7 min read

How to Replace a Brake Caliper
1 to 2 hours
Beginner
7 min read

How to Replace an Idler Pulley
30 to 60 minutes
Beginner
4 min read

How to Change a Headlight Bulb
Less than 30 minutes
Beginner
6 min read
How to Replace an Exhaust Gasket
1 to 2 hours
Beginner
9 min read
How to Replace a Throttle Body
30 to 60 minutes
Beginner
6 min read
How to Change Oil in a Car
Less than 30 minutes
Beginner
8 min read

How to Replace an Alternator
1 to 2 hours
Beginner
11 min read
How to Replace an EGR Valve
30 to 60 minutes
Beginner
5 min read

How to Jump Start a Car
Less than 30 minutes
Beginner
9 min read