Most vehicles made after the 1980s have engines that use a fuel-injection throttle body to control incoming air. A throttle body assembly typically consists of a large butterfly valve and a couple of sensors. Throttle body designs vary, but all operate similarly.
When a throttle body fails, your engine can run poorly, hesitate, or operate erratically, triggering the check engine light. First, determine that the throttle body is causing the problem. Then, clean or replace the throttle body assembly.
Our guide takes you through the process of replacing a drive-by-wire throttle body. You can follow similar steps to clean a dirty throttle body, which is recommended when diagnosing throttle body issues.
Learn about what a throttle body does - opens in new window or tab. and when to replace yours. Also, check out our guide to buying a new throttle body - opens in new window or tab..
How hard is it to replace a throttle body?
Changing a throttle body assembly is considered a beginner DIY auto repair job. On most vehicles it should take less than 30 minutes.
Tips and tricks for DIY throttle body replacement
- Early electronic fuel injection (EFI) throttle bodies were much larger than today’s smaller units. The first EFI systems were essentially electronic carburetors with fuel injectors sitting above the throttle blade or butterfly valve. That style was quickly replaced with today’s designs.
- There are two styles of modern throttle bodies: drive-by-cable (DBC) and drive-by-wire (DBW).
- DBC throttle bodies, which fell out of use around 2007, are simple devices. This design uses a throttle position sensor attached to the throttle pivot shaft opposite the cable actuator. This type of mechanical throttle body is less prone to failure. When failures happen, they usually relate to bearings, internal gears, physical damage, or contamination of moving parts from debris that got past the air cleaner.
- DBW throttle bodies, which were first used in 1988, operate electronically. There are no mechanical connections from your foot to the throttle. Your accelerator pedal serves only as an electronic actuator that measures how far you press or release your foot. It then sends a signal to the engine control module (ECM). In turn, the ECM interprets that signal and sends a corresponding cue to the throttle body to open or close. Most vehicles built since 2008 use a DBW throttle body. These more complicated devices are more prone to failure.
- Some throttle bodies have a computer-based idle air controller (IAC). The IAC may not be included with the new throttle body. Check your repair manual to see if the IAC needs a “relearn” procedure when replaced.
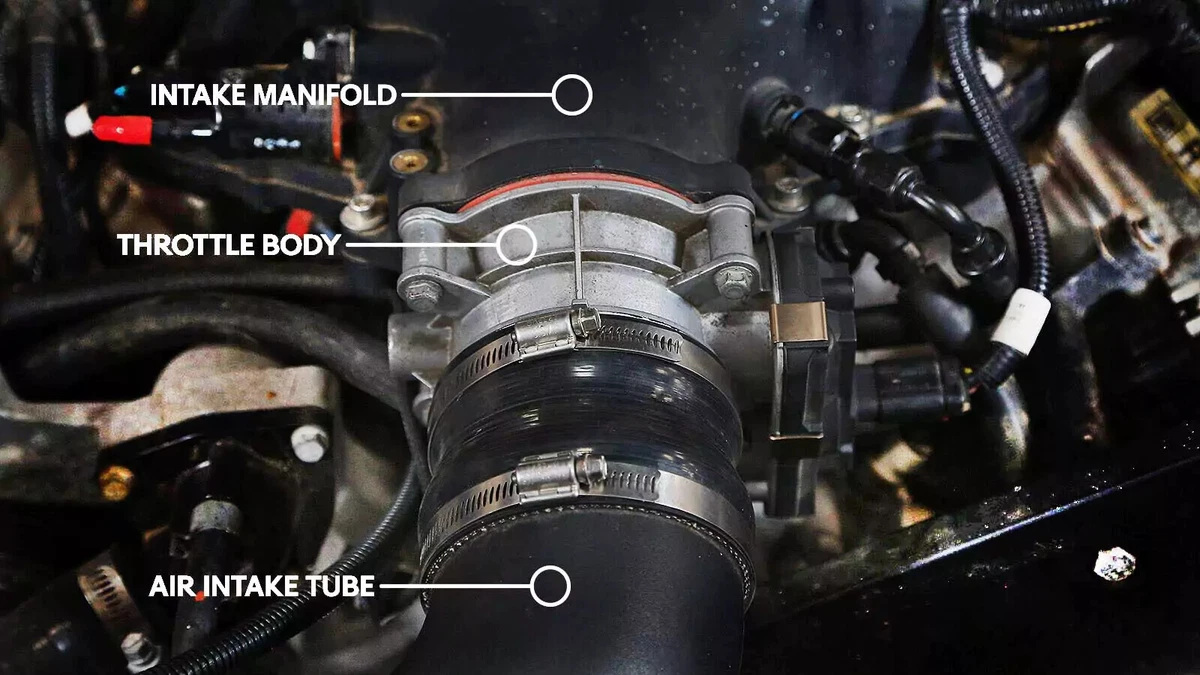
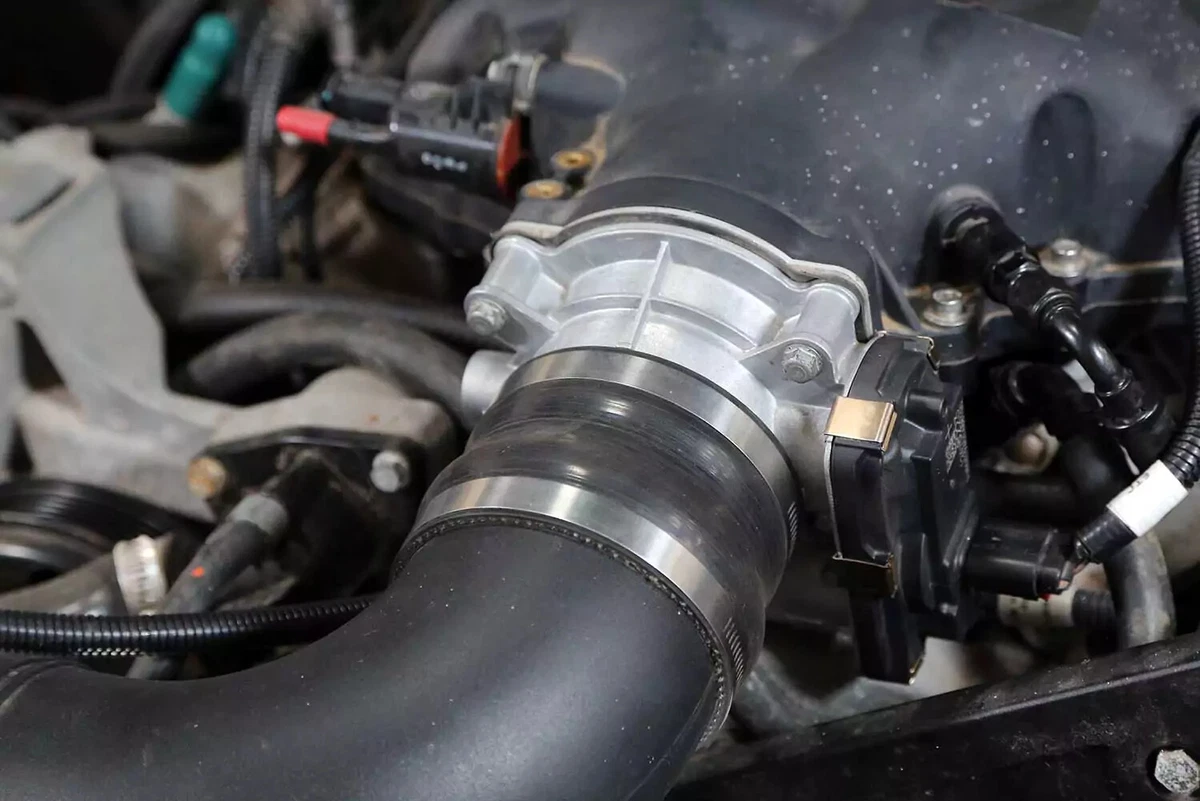
Open the hood to locate the throttle body. It will be connected to the air filter box with a large hard plastic tube. You may need to remove an engine cover to see it.
Starting at the air cleaner, follow the path of the air into the manifold. The throttle body will be the first aluminum casting the air intake pipe is attached to.
After you locate the throttle body, remove any objects blocking access to its removal.
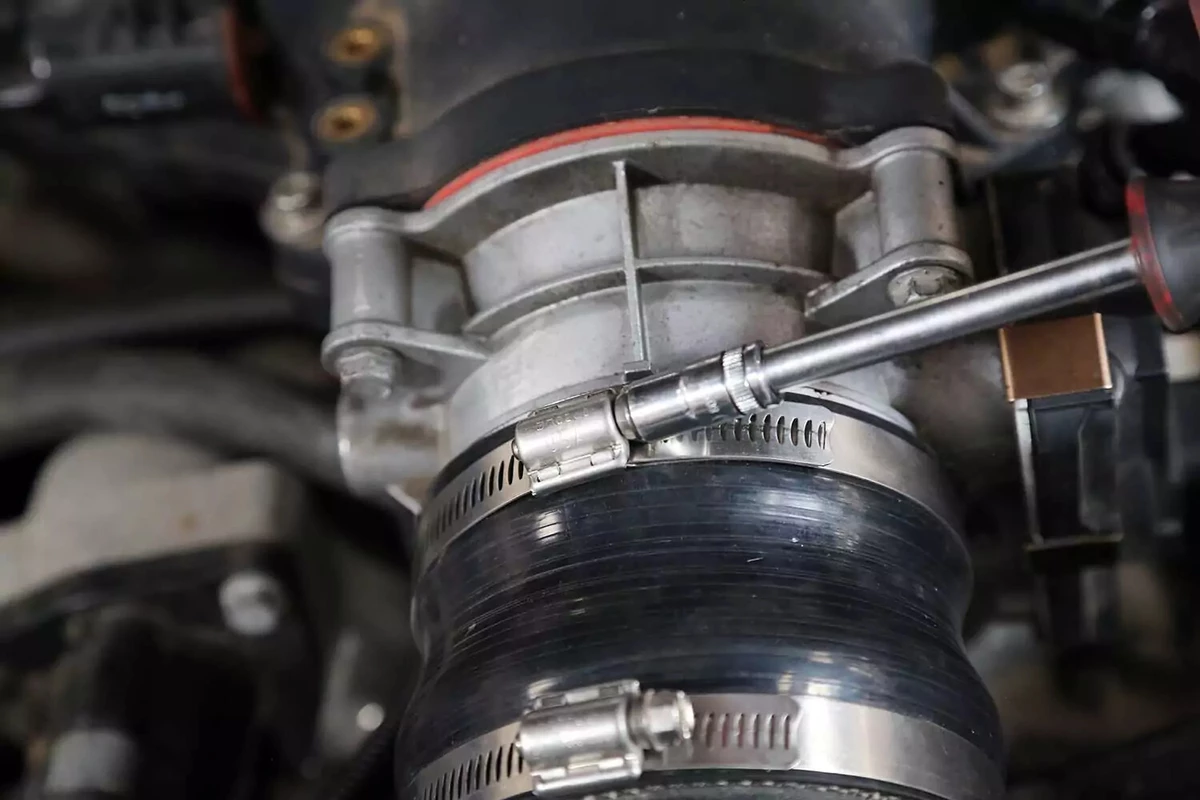
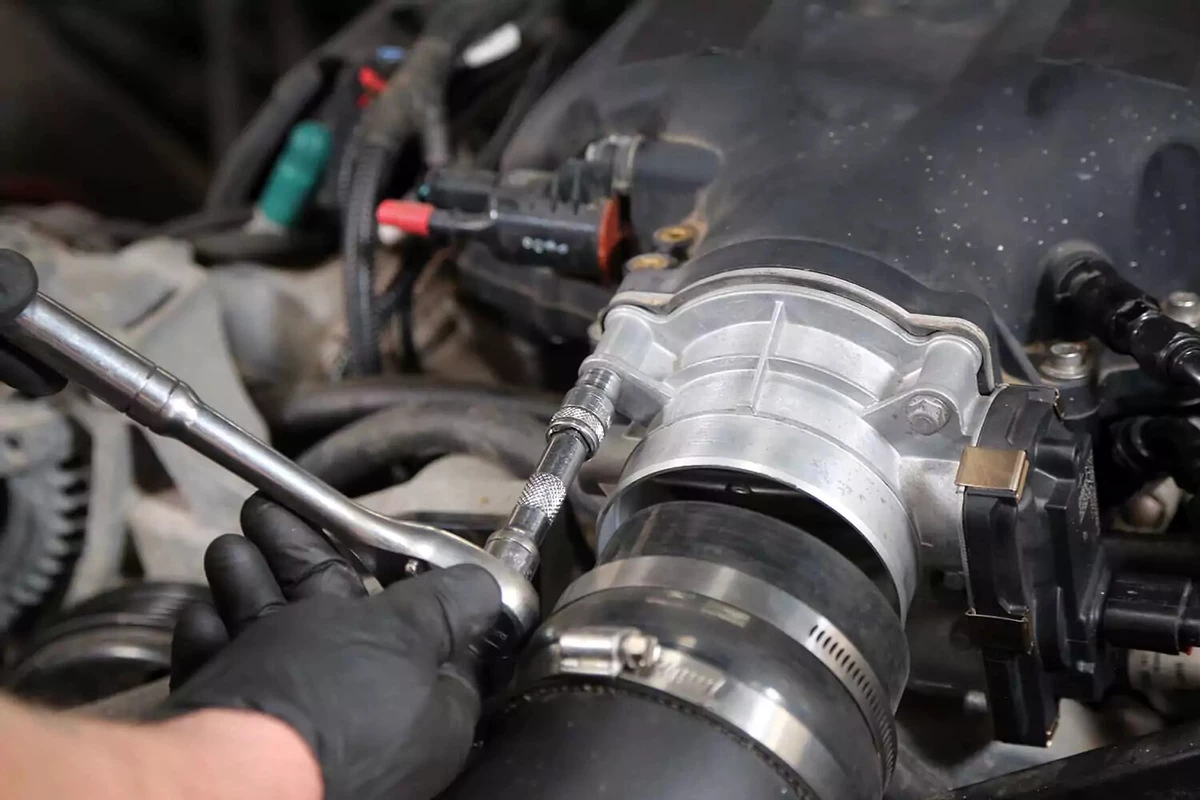
Use a small socket, flat-blade screwdriver, or spring clamp tool to loosen the clamp on the hose connecting the throttle body to the air intake hose.
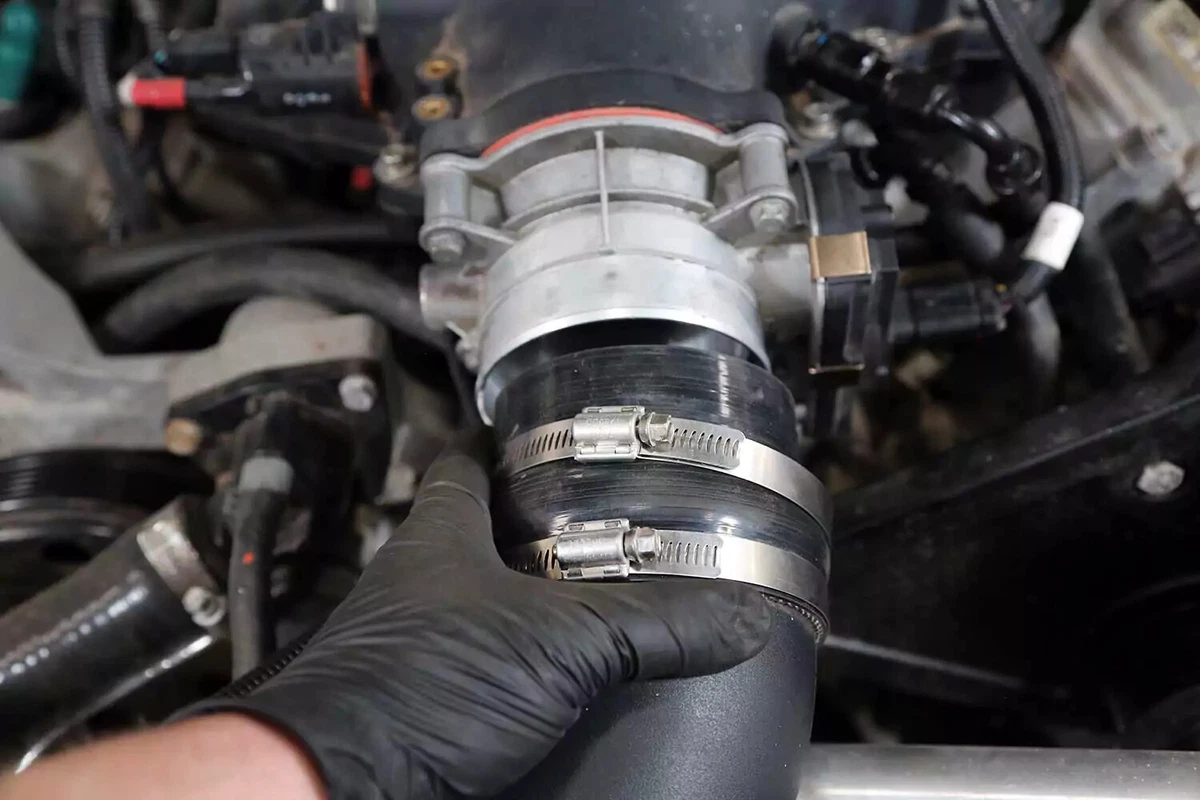
Remove the air intake tube and set it aside. To get it out of the way, you may need to loosen or disconnect the other end of the tube.
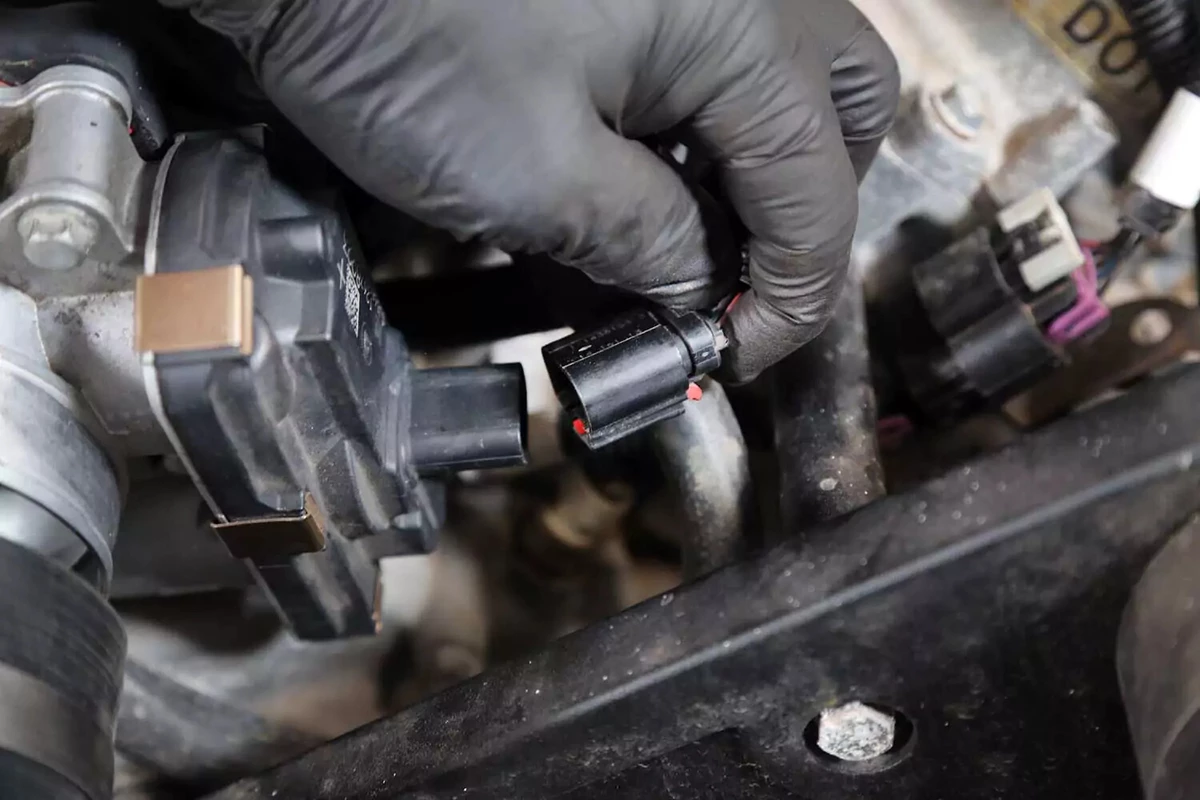
Most modern drive-by-wire throttle bodies have a single plug connecting the unit to the ECM. However, some may have more than one.
If your plug has a locking tab, unlock it first and press the release tab to remove the plug.
For drive-by-cable models, disconnect the sensor plugs and remove any vacuum lines and the throttle cable. On most models, you can do this by rolling the throttle to the full-open position by hand and giving the cable slack so you can slide the T-bar out of the throttle arm.
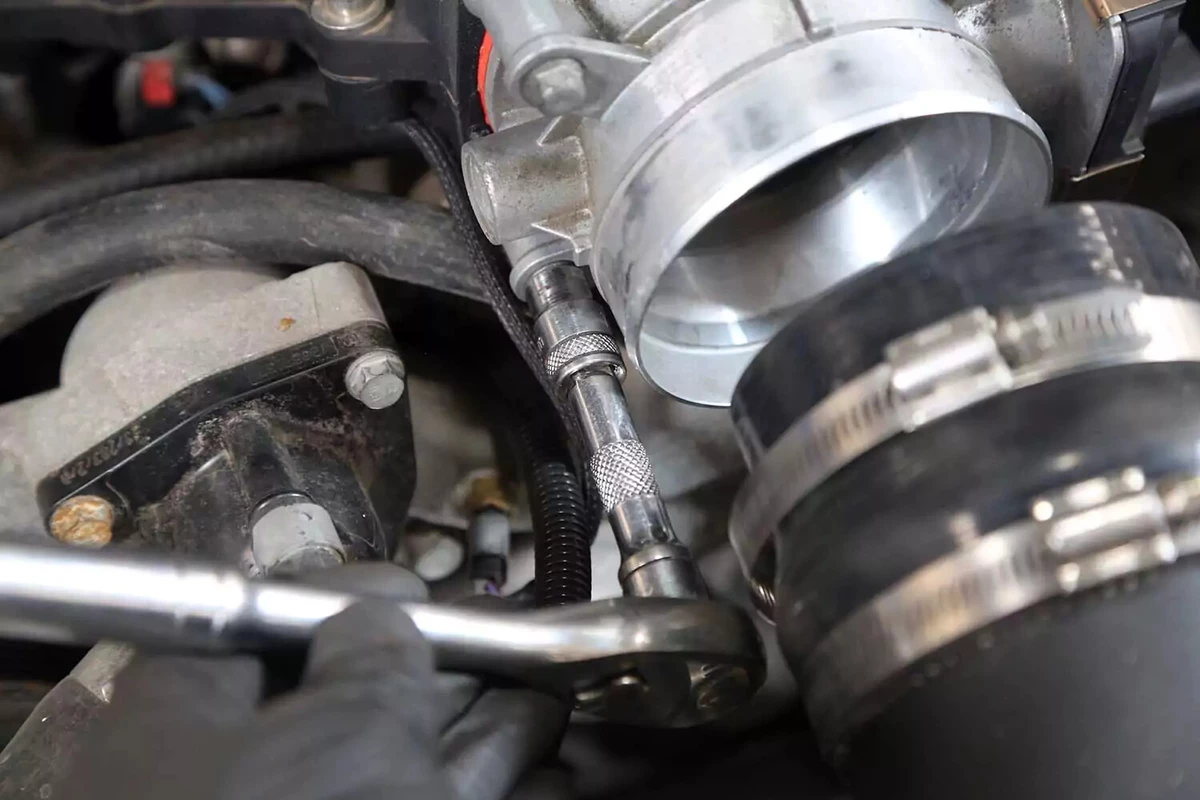
Remove the bolts holding the throttle body to the intake. Most vehicles have four bolts, but some may use three to six bolts. Retain these for reuse.
Carefully remove the throttle body from the intake and set it aside. Examine the intake gasket for damage. Most modern engines use a large O-ring to seal the throttle body, but some use an aluminum or stainless-steel gasket frame with integral silicone seals. Occasionally, you’ll find a formed steel gasket. These are typically not reusable and should be replaced.
- Silicone gaskets and O-rings only need to be replaced when the seal is damaged or the metal frame is bent.
- If a silicone gasket or O-ring is older than 20 years, replace it now.
- The proper gasket should be in the box with your new throttle body.
- Don’t use an RTV silicone gasket sealer.
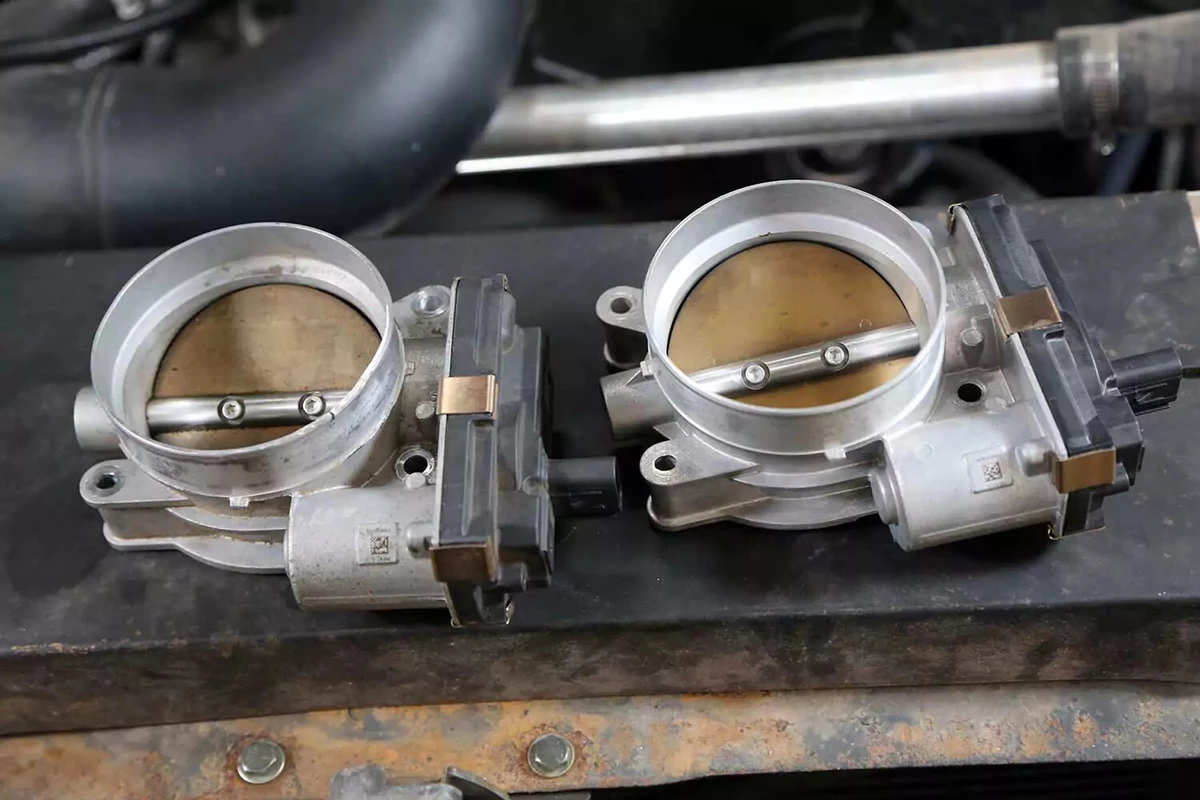
Place the new and old throttle bodies side by side. Verify that they are the same size and shape and have the same connections. Mid-year changes and model variations can produce parts designed for the same vehicle, but they might not be compatible.
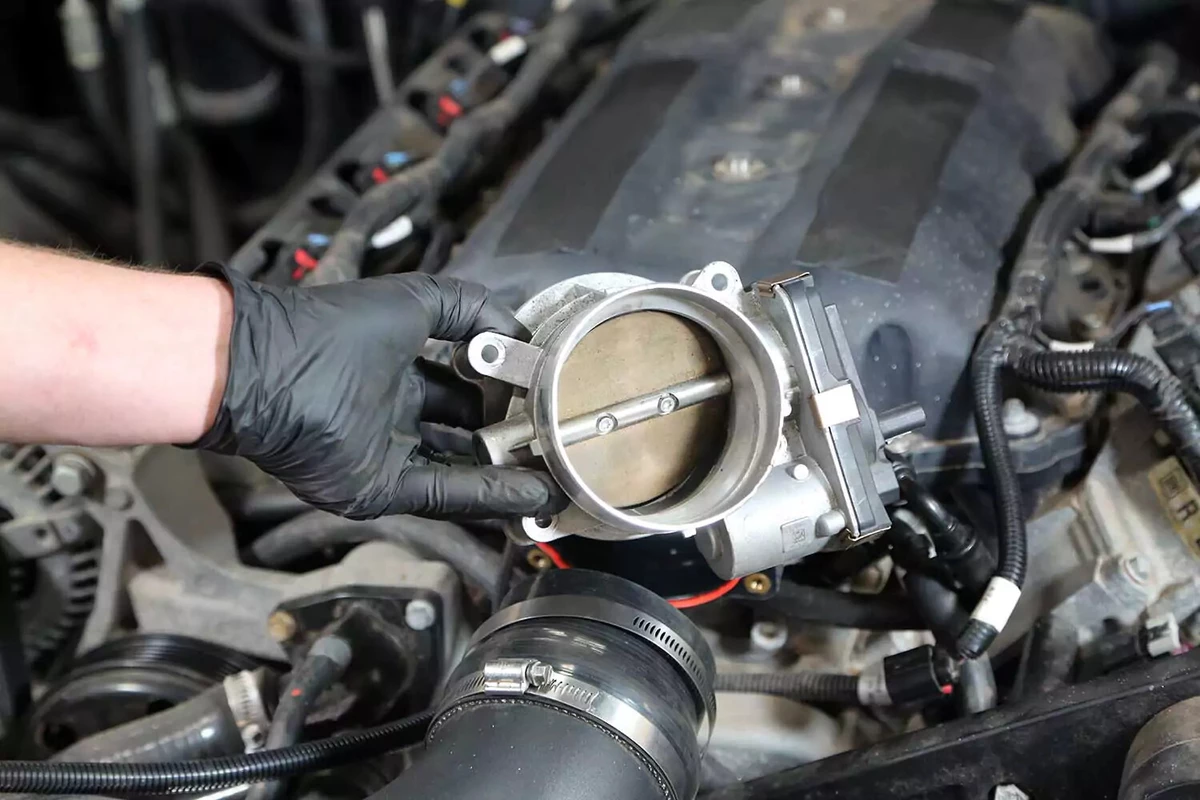
Line up the new throttle body with the intake. Install the gasket. Thread in the bolts by hand, but don’t tighten them yet.
This is the most important step in the process. It’s easy to overtighten the bolts going into the small threaded inserts in a plastic intake. That’s also true for engines with an aluminum intake.
- Thread each bolt to finger tightness.
- Tighten a single bolt, but only halfway.
- Now, slightly tighten the bolt diagonally opposite the one you just tightened.
- Next, partially tighten the adjacent bolt and then the bolt diagonally across again.
- Following the same criss-cross pattern, tighten the remaining bolts, finishing on the first bolt that was tightened halfway.
This process allows the throttle body to seat and seal properly. It also reduces the chances of distorting the intake manifold or the throttle body casting. Improper tightening can damage parts and result in a poor seal.
A leak between the throttle body and the manifold could produce high engine idle or misfiring, which could cause the check engine light to illuminate.

Connect the throttle body’s electrical wiring and vacuum lines.
For drive-by-cable models, connect the throttle cable and make sure it is fully seated into the actuator groove. Have an assistant operate the accelerator pedal a few times while you watch the throttle body and cable connection. Confirm that the throttle body goes to the wide open position and then closes completely.
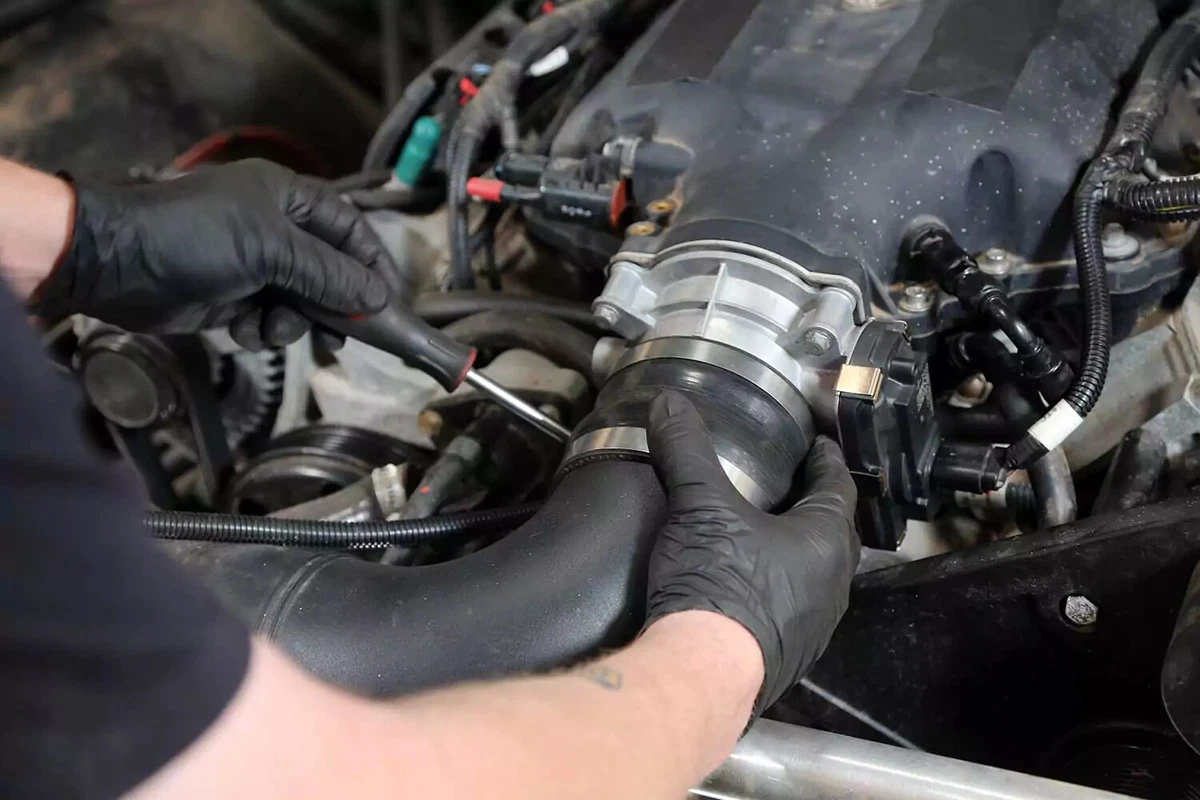
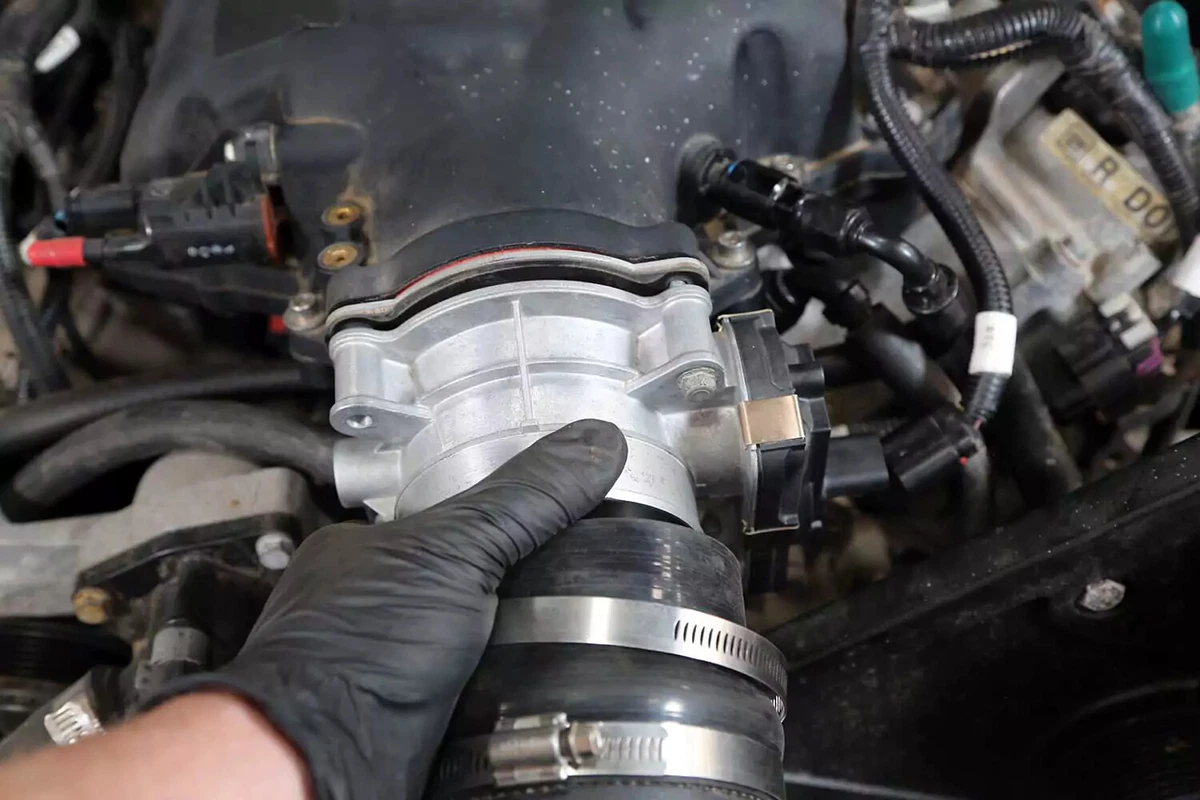
Connect the air intake tubing to the throttle body and tighten the hose clamp.
Reinstall anything you removed to gain access to the throttle body.
Most ECMs need to pair with (or “relearn”) the new throttle body. The process varies by make and model. Verify the procedure in your owner’s manual.
Clear any trouble codes, then perform the relearn procedure for your vehicle.
Start the engine and verify correct throttle operation with a short test drive.
About the author

Share your feedback
This article is meant to provide general guidance only. Automotive maintenance, repair, upgrade, and installation may depend on vehicle-specifics such as make and model. Always consult your owner's manual, repair guide for specific information for your particular vehicle and consider a licensed auto-care professional's help as well, particularly for advance repairs.
Recommended for you
Find answers and inspiration
A Quick Guide to Valve Cover Gaskets
6 min read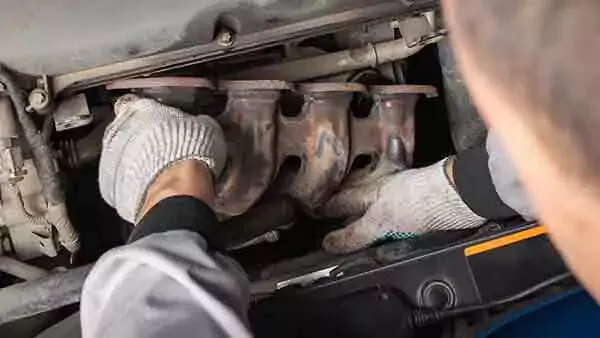
When to Replace Your Exhaust Manifold Gasket
6 min read
How to Replace an Ignition Coil
6 min read
How to Buy the Right EGR Valve and Gasket
6 min read
Your Complete Idler Pulley Buying Guide
5 min read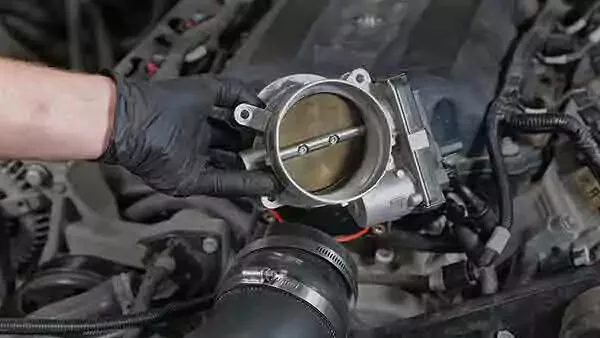
How to Buy the Right Throttle Body
5 min read
Buying the Right Distributor Cap and Rotor
4 min read
How to Replace a Drive Belt
5 min read
How to Replace an Intake Manifold Gasket
7 min read
How to Buy the Right Car Starter
5 min read
How to Replace a Valve Cover Gasket
7 min read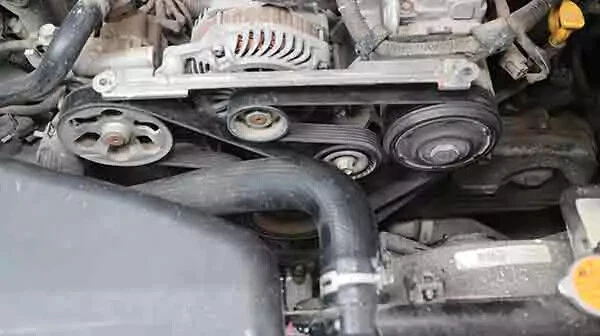
Diagnosing Your Serpentine Belt and Tensioner
6 min read
How to Change a Timing Belt
12 min read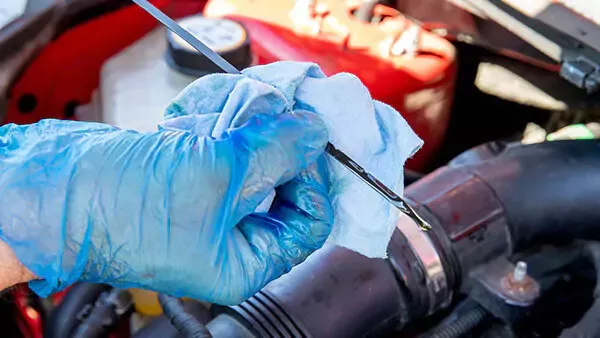
Changing Your Oil: 5 Things to Know
6 min read
How to Clean Fuel Injectors
8 min read
Automation How to Change a Car Battery
6 min read
How to Replace a Mass Air Flow (MAF) Sensor
7 min read
Distributors 101
6 min read
How to Replace Spark Plugs
7 min read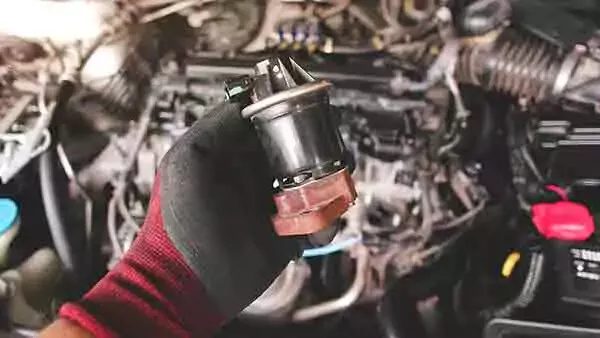
Everything You Should Know About EGR Valves
5 min read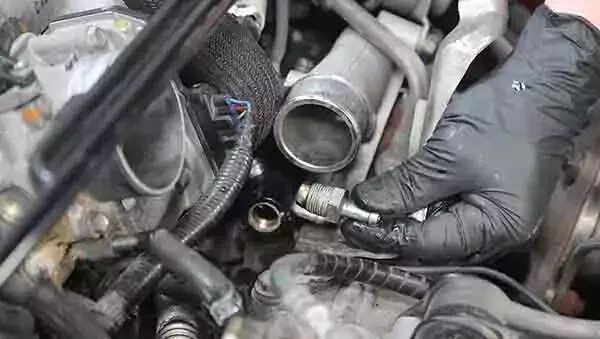
How to Test Your PCV Valve
6 min read
Buying the Best Portable Car Battery Jump Starter
6 min read
An Introduction to Cleaning Fuel Injectors
5 min read
A Deep-Dive Guide to Ignition Wires
7 min read
How to Replace Engine Mounts
4 min read
The Right Tools to Clean Your Fuel Injectors
6 min read
How Do Ignition Coils Work?
5 min read
Spark Plugs 101
7 min read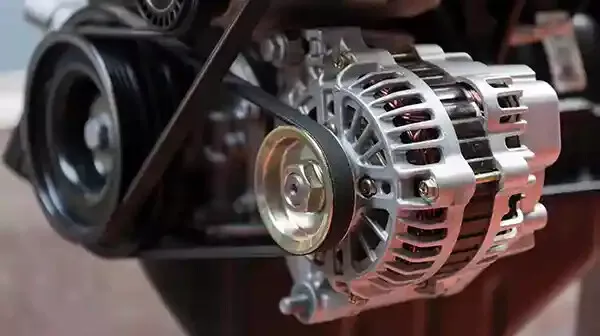
When to Replace Your Drive Belt
6 min read
Fuel Pumps and How They Work
8 min read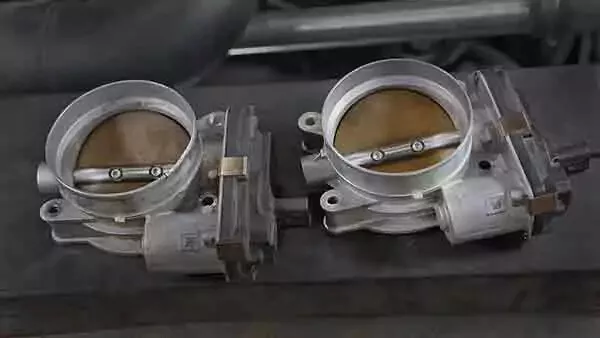
What to Know About Your Vehicle's Throttle Body
6 min read
Everything You Need to Know About Fuel Filters
6 min read
How to Buy the Right Ignition Coils
7 min read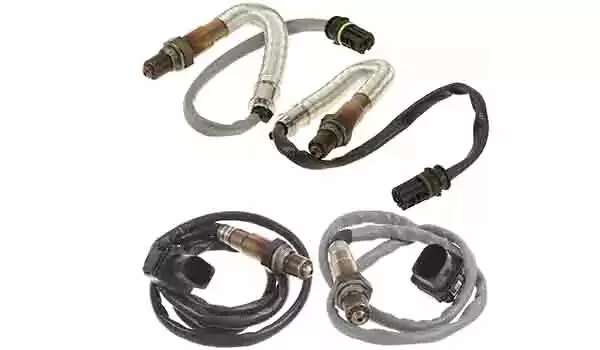
How to Buy the Right O2 Sensor
5 min read
How to Replace a Serpentine Belt Tensioner
4 min read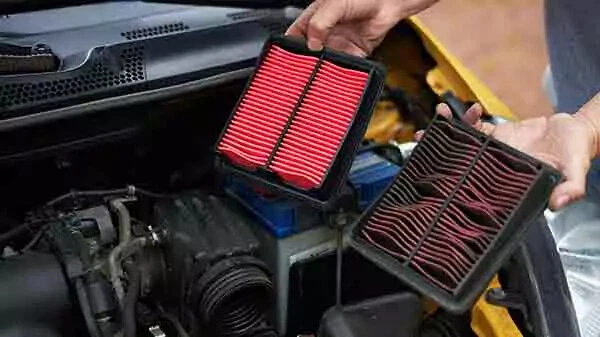
When to Replace Your Engine Air Filter
5 min read
How to Replace an Oxygen Sensor
5 min read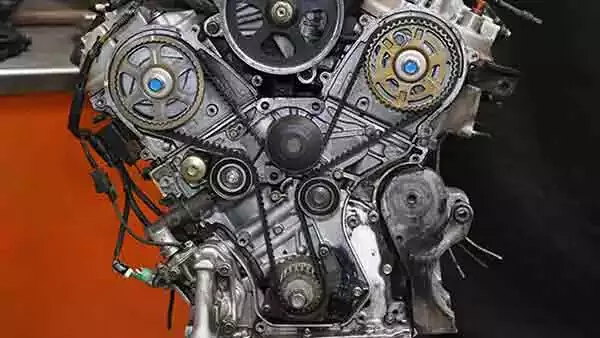
How to Buy the Right Timing Belt and Related Tools
5 min read
How to Buy the Right Car Distributor
6 min read
Timing Belts 101
5 min read
How to Replace an Engine Air Filter
5 min read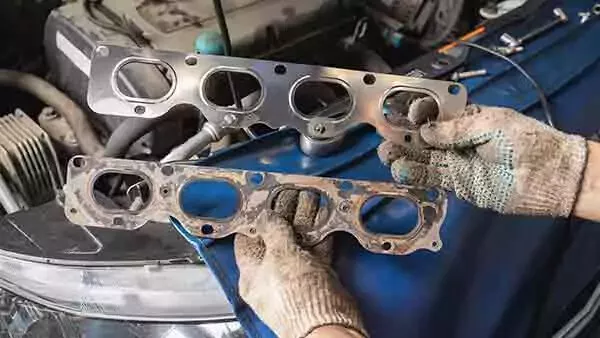
How to Buy the Right Exhaust Manifold Gasket
6 min read
How to Choose the Best Spark Plugs
5 min read
How to Replace a Car Starter
7 min read
What You Should Know About O2 Sensors
6 min read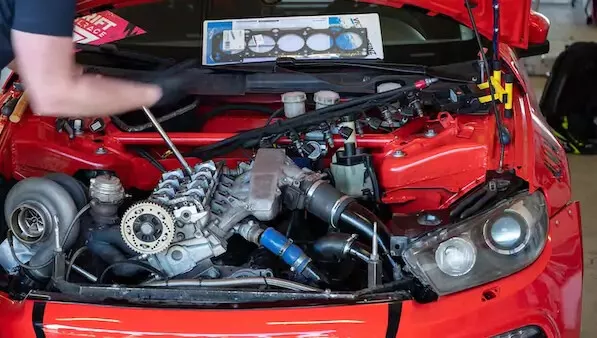
How to Buy the Right Valve Cover Gasket
4 min read
How to Replace a Distributor Cap and Rotor
5 min read
Understanding Your Car's Idler Pulley
4 min read
How to Replace a Fuel Filter
7 min read
How to Replace a PCV Valve
6 min read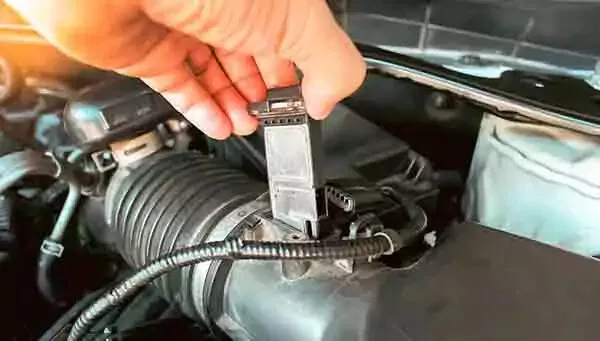
Do You Have a Faulty Mass Air Flow Sensor?
4 min read
Everything You Need to Know About Car Starters
7 min read
How to Replace an Exhaust Gasket
9 min read
Ignition Wire Buying Guide
6 min read
All About Your Distributor Cap and Rotor
7 min read
Spotting Intake Manifold Gasket Problems
7 min read
How to Change Oil in a Car
8 min read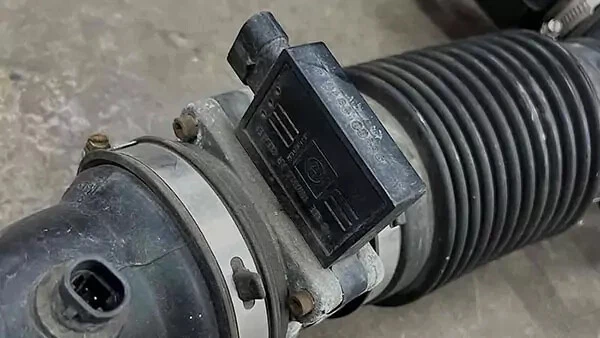
How to Buy the Best MAF Sensor
4 min read
How to Replace an EGR Valve
5 min read
How to Change an In-Tank Fuel Pump
9 min read
Explore more projects

How to Repair a Chipped Windshield
1 to 2 hours
Beginner
7 min read

How to Replace Brake Fluid
1 to 2 hours
Beginner
10 min read
How to Replace an Ignition Coil
Less than 30 minutes
Beginner
6 min read

How to Replace a Radiator Hose
Less than 30 minutes
Beginner
5 min read

How to Replace Brake Rotors
1 to 2 hours
Beginner
7 min read
How to Replace a Serpentine Belt Tensioner
Less than 30 minutes
Beginner
4 min read

How to Rotate Your Tires
30 to 60 minutes
Beginner
5 min read
How to Replace a Drive Belt
Less than 30 minutes
Beginner
5 min read

How to Refill Windshield Washer Fluid
Less than 30 minutes
Beginner
4 min read
How to Replace an Oxygen Sensor
30 to 60 minutes
Beginner
5 min read

How To Replace Differential Fluid
Less than 30 minutes
Beginner
8 min read

How to Replace Sway Bar End Links and Bushings
30 to 60 minutes
Beginner
6 min read

How to Replace Transmission Fluid and Filter
1 to 2 hours
Beginner
11 min read

How to Change Disc Brake Pads
30 to 60 minutes
Beginner
8 min read
How to Replace a Valve Cover Gasket
Less than 30 minutes
Beginner
7 min read

How to Replace a Cabin Air Filter
Less than 30 minutes
Beginner
5 min read

How to Change Windshield Wipers
Less than 30 minutes
Beginner
3 min read
How to Replace an Engine Air Filter
Less than 30 minutes
Beginner
5 min read

How to Replace Shock Absorbers
30 to 60 minutes
Beginner
8 min read
How to Clean Fuel Injectors
1 to 2 hours
Beginner
8 min read
How to Change a Car Battery
Less than 30 minutes
Beginner
6 min read
Automation How to Change a Car Battery
Less than 30 minutes
Beginner
6 min read
How to Replace a Mass Air Flow (MAF) Sensor
Less than 30 minutes
Beginner
7 min read

How to Replace a Clutch Master Cylinder
1 to 2 hours
Beginner
11 min read

How to Flush and Change Engine Coolant
30 to 60 minutes
Beginner
6 min read
How to Replace a Distributor Cap and Rotor
30 to 60 minutes
Beginner
5 min read

How to Check Tire Pressure and Change a Tire
Less than 30 minutes
Beginner
9 min read
How to Replace a Fuel Filter
30 to 60 minutes
Beginner
7 min read
How to Replace a PCV Valve
30 to 60 minutes
Beginner
6 min read

How to Replace a Brake Caliper
1 to 2 hours
Beginner
7 min read

How to Replace an Idler Pulley
30 to 60 minutes
Beginner
4 min read

How to Change a Headlight Bulb
Less than 30 minutes
Beginner
6 min read
How to Replace an Exhaust Gasket
1 to 2 hours
Beginner
9 min read
How to Change Oil in a Car
Less than 30 minutes
Beginner
8 min read

How to Jump Start a Car
Less than 30 minutes
Beginner
9 min read

How to Replace an Alternator
1 to 2 hours
Beginner
11 min read
How to Replace an EGR Valve
30 to 60 minutes
Beginner
5 min read