All steering systems use tie rod ends to connect the steering gear to each wheel’s spindle. Some vehicles have an inner and outer tie rod end, while others have only an outer end.
The outer tie rod connects to the steering knuckle—a component of the vehicle's front suspension system that connects the wheel assembly to the steering system. This allows the wheel to rotate while enabling steering control. The inner tie rod connects to the steering rack.
After your vehicle hits 100,000 miles, consider replacing the tie rods.
How Long Does It Take To Change Tie Rod Ends?
Tie rod replacement is considered an intermediate DIY mechanic job usually taking one to two hours.
Another concern is the tie rod end’s dust boots, which can crack or split long before the tie rod wears out. If the boot is split, the grease gets dirty, which introduces debris that accelerates the joint’s wear. If you catch a bad boot before the joint fails, replace the boot and fill it with fresh grease. Replacing the tie rod end boot is almost the same amount of labor as replacing the tie rod end itself, so consider replacing the tie rod and boot at the same time.
Front-end alignment is required whenever you remove or replace any steering or major suspension component. After completing this job, don’t drive the vehicle until you align the front end and steering. It’s safe to drive short distances to the alignment shop.
Tips and Tricks for DIY Tie Rod Replacement
- If one tie rod end is worn, the others are probably close behind. You’ll need an alignment afterward, so it makes sense to replace all tie rod ends at the same time.
- Inner and outer tie rods are connected with a threaded sleeve. One side is right-hand threaded, and the other is left-hand threaded. This allows the toe in/out—front wheels are typically pointed inward slightly—to be adjusted without removing the ends. When removing or assembling the ends, pay attention to the direction of the thread. If you can’t get it started, you might have the ends flip-flopped.
- These sleeves can rust and become difficult to remove, so inspect them when taking everything apart. Replace tie rod sleeves if they are rusted or damaged.
- Properly lubricate the new tie rods with the correct grease.

This project requires working safely under the vehicle. You will need a floor jack, and jack stands, ramps, or wheel cribs to support the vehicle.
Locate the factory jacking points just behind the front wheels or just in front of the rear wheels. The jacking point is a metal section with two V notches about two inches apart. Check your owner’s manual to confirm the lift location.
Never use jack stands on dirt, gravel, or asphalt. If you do not have access to a concrete work surface, use wheel cribs, solid-base ramps, or wide-base wood supports to support the vehicle. Never use cinder blocks or bricks as supports.

Removing the wheels is not essential to complete this job, but it helps. If you have rack-and-pinion steering, you may only have one tie rod end on each side—the outer one.
Spray the sleeve and all threads with penetrating oil to loosen corrosion and dirt.

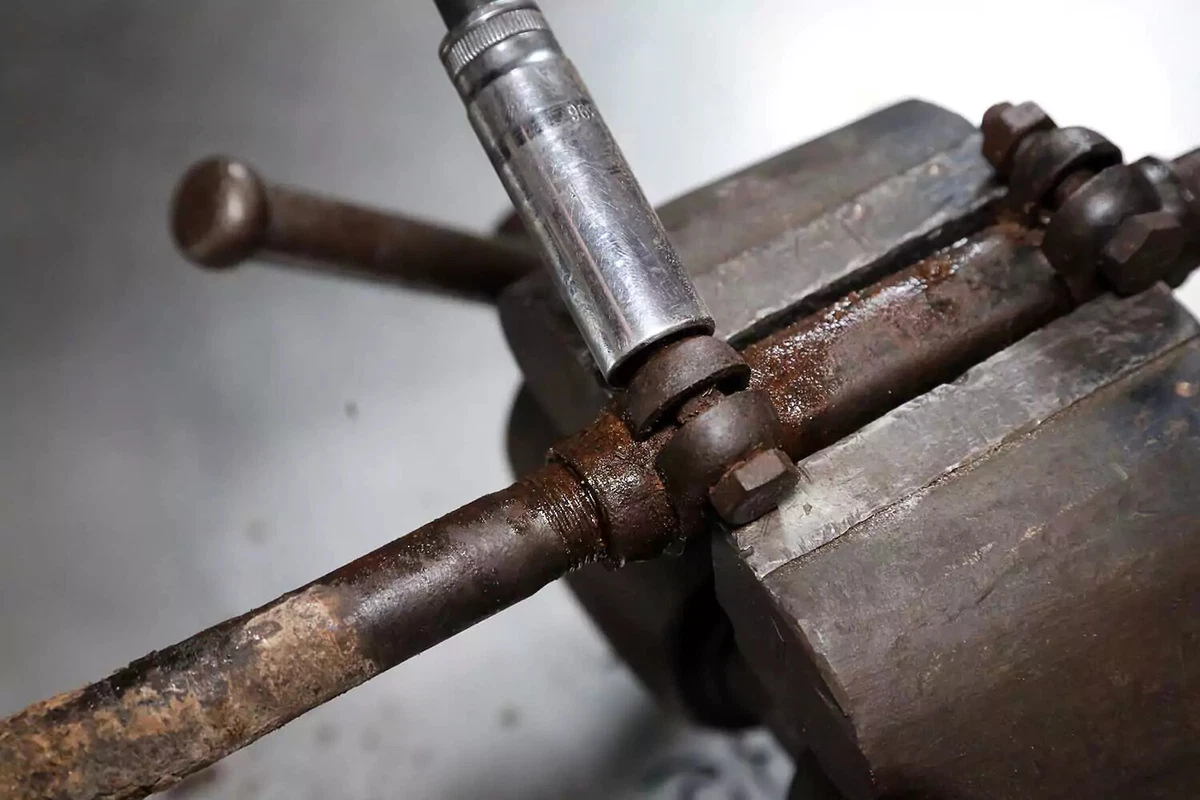
Remove the nuts on each end of the assembly. In most cases, you will have an inner and outer rod end connected with a threaded sleeve.
You may have simple lock nuts or castellated nuts locked with cotter pins. Regardless, remove them.
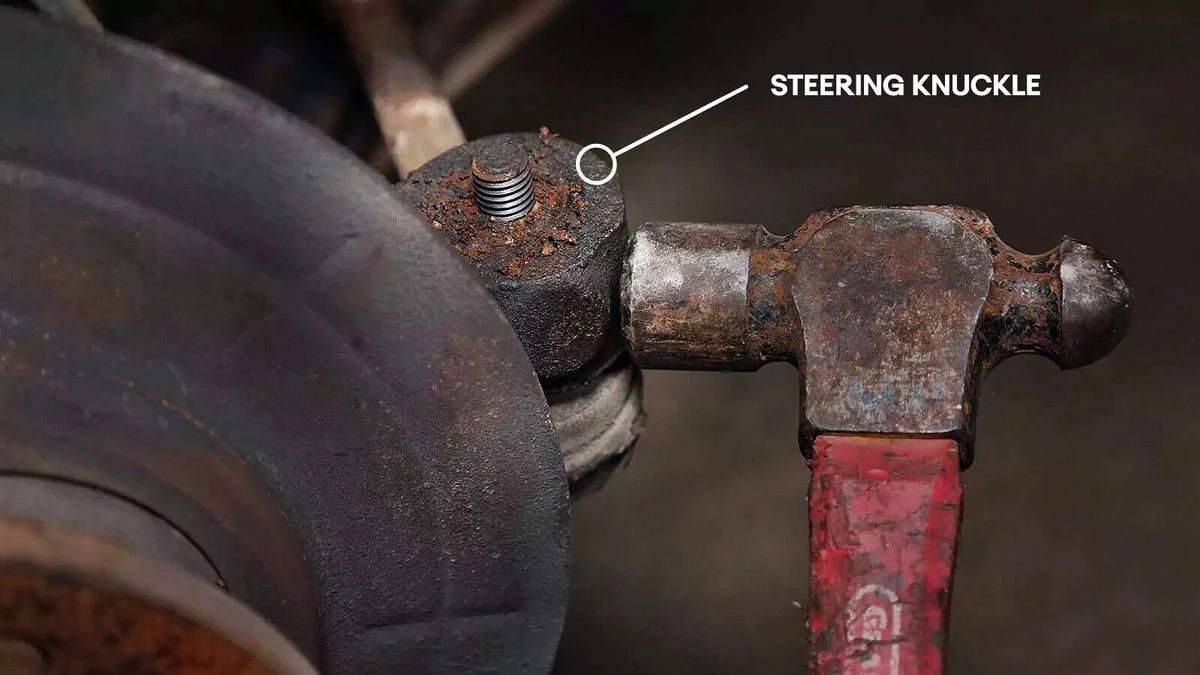
You can often remove the tie rod ends by hitting the steering arm with a hammer a few times. The shock usually separates the tapered spindle from the arm. It is worth a shot before using separators. On our demo vehicle, this worked on two ends—but not the other two.
If a half-dozen whacks doesn’t release the rod end, try hitting the steering arm with two hammers simultaneously—one on each side of the tie rod end.
You may be tempted to hit the tapered pin, but this can cause the threads to mushroom, making it impossible for the end to slide out of the mount.

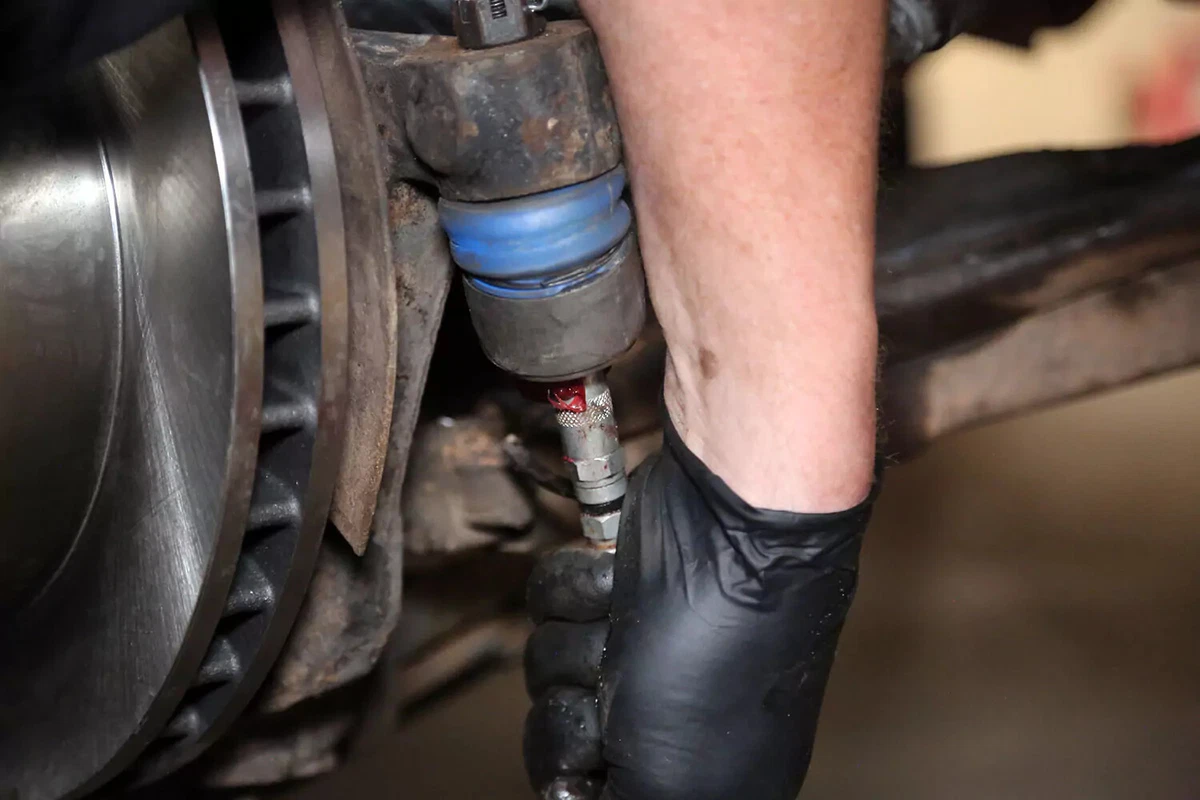
If the hammer doesn’t work, a tie rod separator should get the job done.
The separator can put a lot of pressure on the tie rod end. Be prepared for the “jack in the box” effect when using a separator: When the rod end’s tapered stud finally pops free, expect to hear a loud noise and for the separator to jump.

We used an offset puller tool to free the inner end because the standard separator wouldn’t fit. Tightening the puller’s bolt moves its jaws apart, forcing the rod end to come free.
Remove the entire assembly from the vehicle.

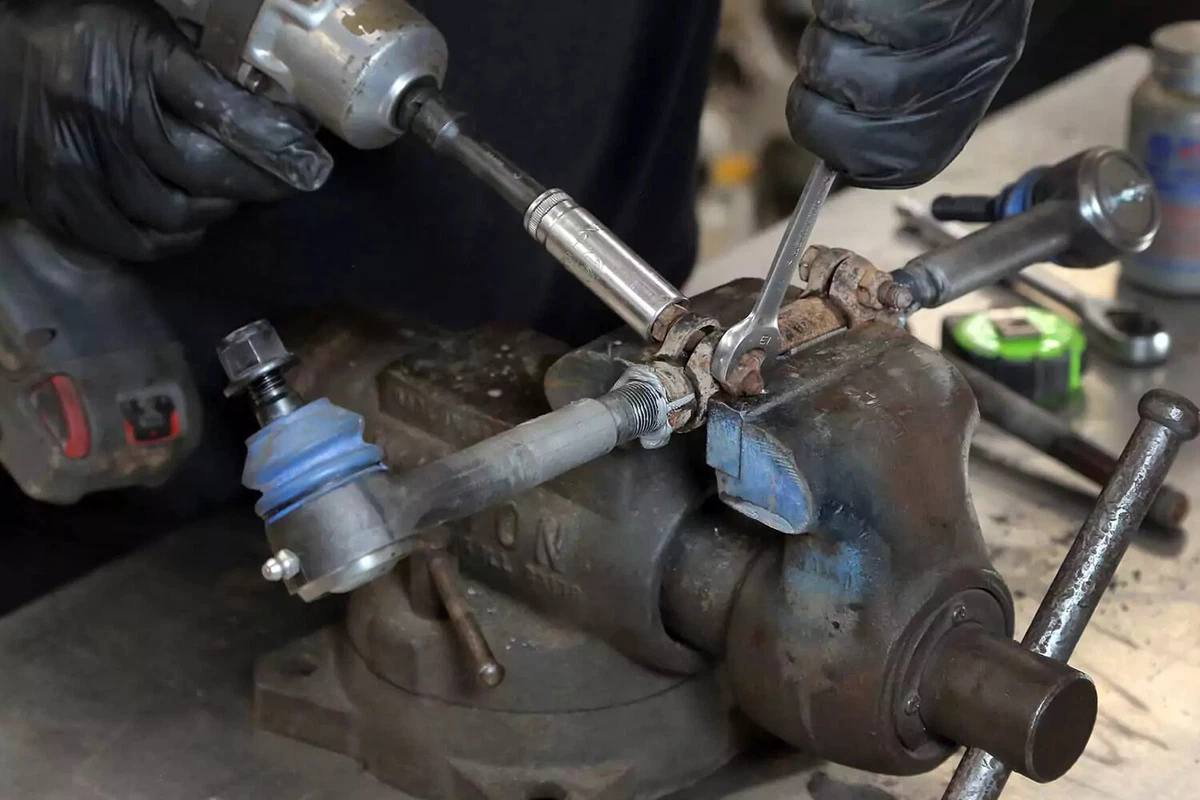
Place the old tie rod assembly on a bench or clamp it in a vice. We’ll make the new parts identical in dimension to the old ones.
Straighten the tapered pins and measure the center-to-center distance between each end. Start the measurement at the one-inch mark, note the full length, and then subtract one inch to ensure accuracy. The tail of the measuring tape can vary by as much as ⅛ inch, which is enough to cause drivability issues.
Note the direction of each end in relation to one another. Duplicate this with the new ends. The tire rod ends in our demo car were at 90-degree angles to one another.
For single-end tie rods: Before removing the tie rod from the vehicle, measure the distance between the two ends (driver and passenger side), and then count the threads as you unthread them from the shaft. This step helps ensure you spend minimal time adjusting the alignment later.
Loosen the clamping bolts on the tie rod adjuster sleeve. Some vehicles use a solid sleeve with jam nuts instead of the split-sleeve style shown here. Reminder: One side of the sleeve is left-hand threaded.

Unthread the ends from the sleeve, counting each full turn. The rod ends should be within one or two turns from each other. In other words, you should not have 15 turns on one and 20 on the other. The number of turns needs to be as close as possible to maximize thread engagement and adjustability.
The ends are probably coated with road grime and dirt. Use a box-end wrench on the tapered pin for more leverage. These sleeves are notorious for rusting and seizing. If you can’t get them to move, replace them.
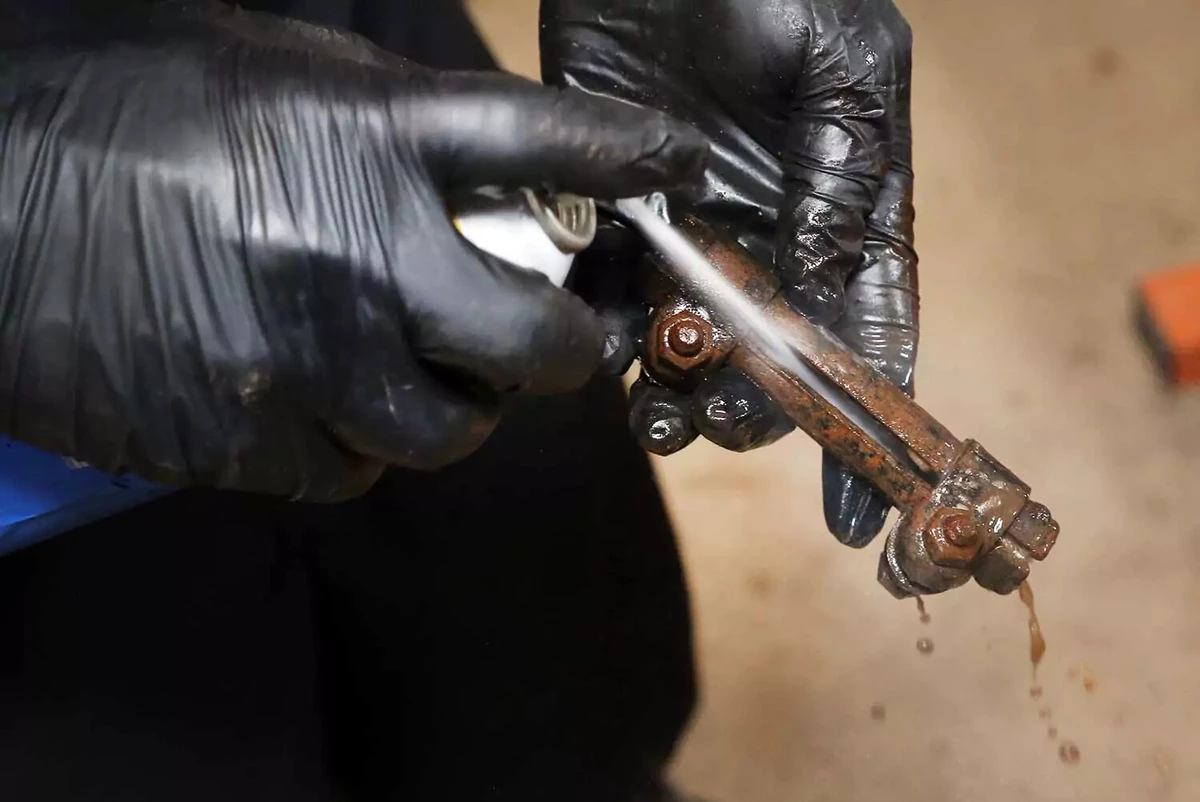
Use brake cleaner to remove all the crud from the sleeve. Inspect the sleeve for signs of rust or other damage that may warrant replacement. Our demo vehicle had light surface rust, but the sleeves were otherwise in good shape, so we reused them.
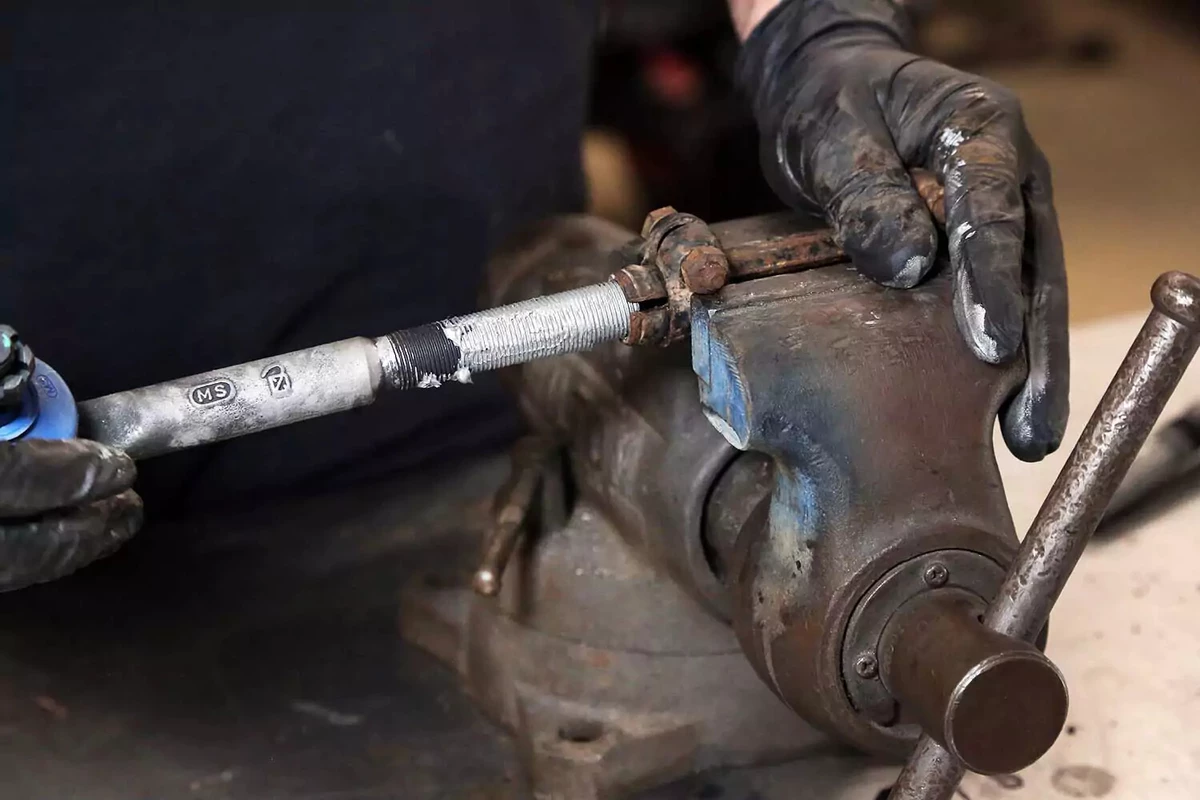
Apply a generous amount of anti-seize compound to the threads on the rod ends and screw them into the sleeve. You want to match the original thread count as closely as possible while maintaining the overall length measurement.

Measure the new tie rod assembly and adjust each end to match the original part's length. If you get this exactly right, your alignment will be spot on.
You’ll need to have the vehicle aligned afterward, but getting close to the measurement now will improve the vehicle's handling on the way to the shop.
After you are satisfied with the measurements, tighten the sleeve bolts or jam nuts to the factory specifications.

Install the new tie rod end assembly onto the vehicle. Make sure the inner and outer ends go to the correct location. The taper on the pins may be different. Hand-tighten the nuts onto the threaded pin.
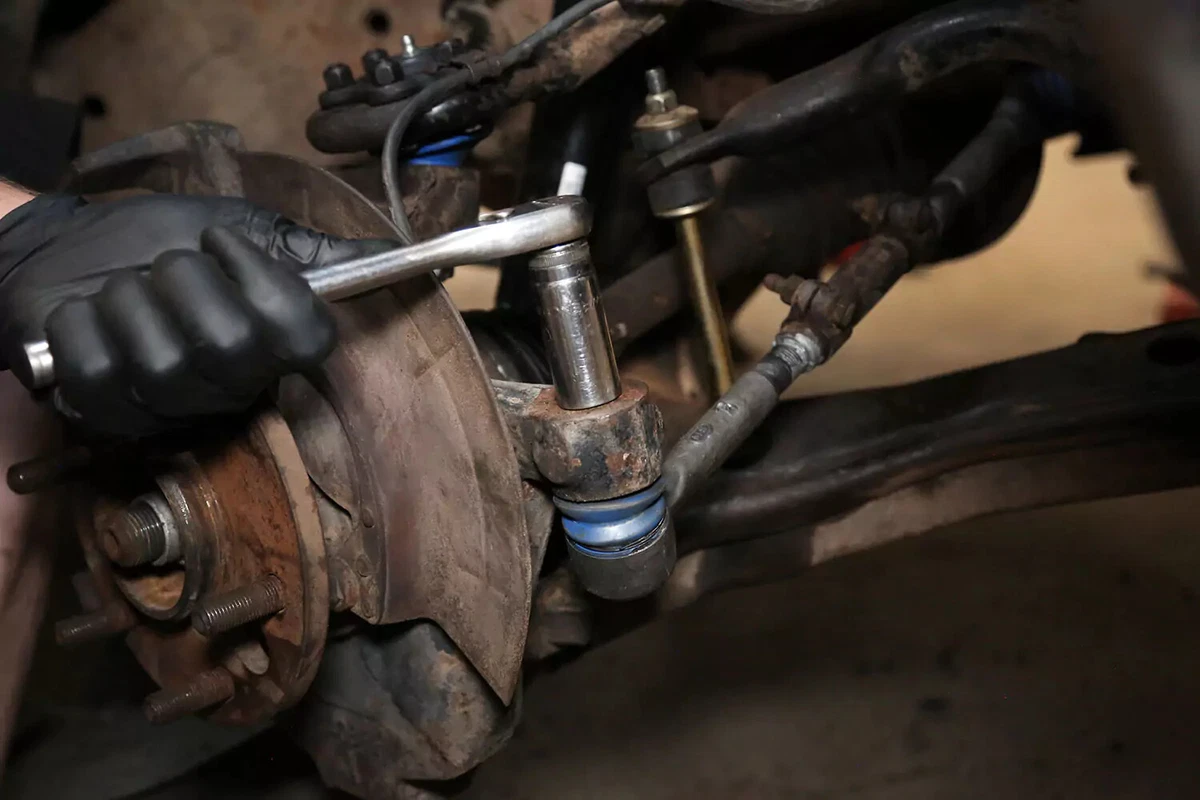
Use a socket to tighten the nuts on each tapered pin, drawing the pin into its mount fully.
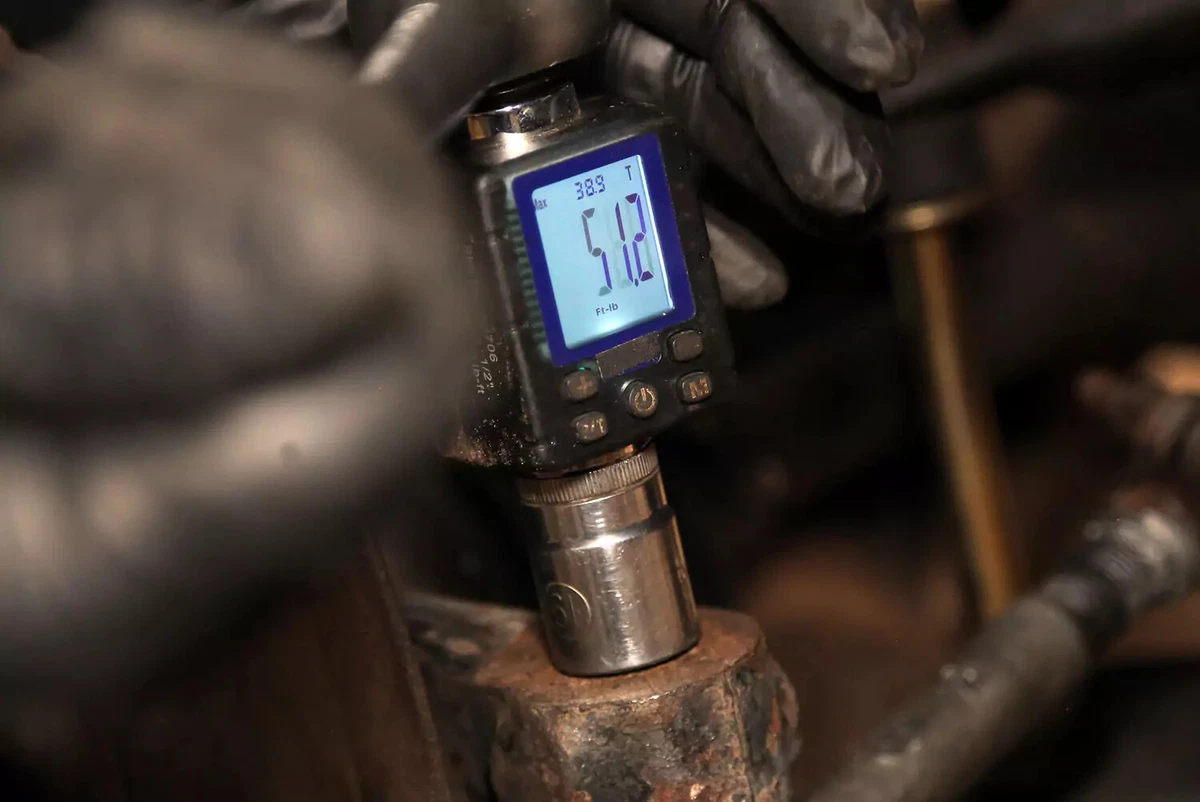
Use a torque wrench or gauge to torque each end to the specifications listed in your vehicle’s repair manual. Typical torque specs range from 35 to 80 pound-feet.
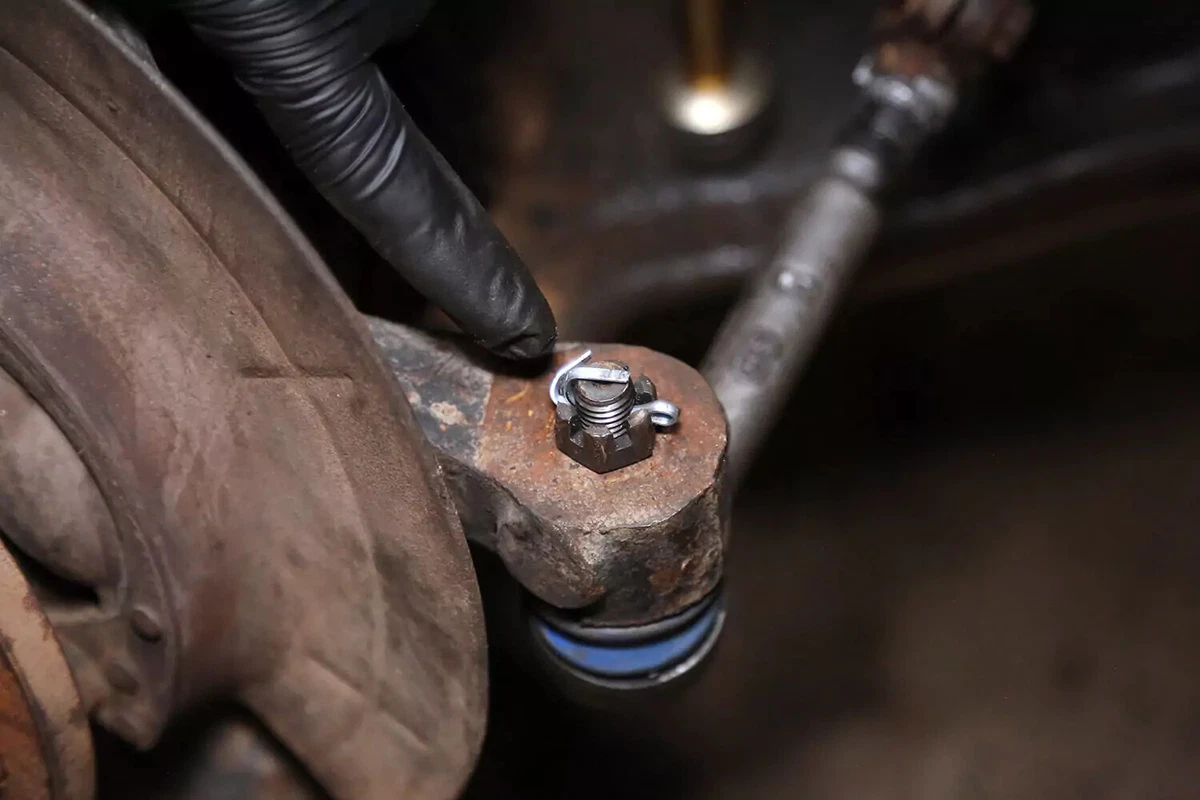
Install a new cotter pin through the castle nut. If the nut is not aligned with the hole in the pin, tighten the nut to the next slot.
Fold the tangs of the cotter pin over the nut and pin.
If your new tie rod ends have lock nuts, torque them now.
Finally, fill each end with grease until the boot begins to swell up, indicating that it is full.
Finish the project by reinstalling the wheels and torquing the lug nuts. Remove the jack and jack stand.
Take the vehicle to an alignment shop as soon as possible. Poor alignment quickly wears out tires.
About the author

Share your feedback
This article is meant to provide general guidance only. Automotive maintenance, repair, upgrade, and installation may depend on vehicle-specifics such as make and model. Always consult your owner's manual, repair guide for specific information for your particular vehicle and consider a licensed auto-care professional's help as well, particularly for advance repairs.
Recommended for you
Find answers and inspiration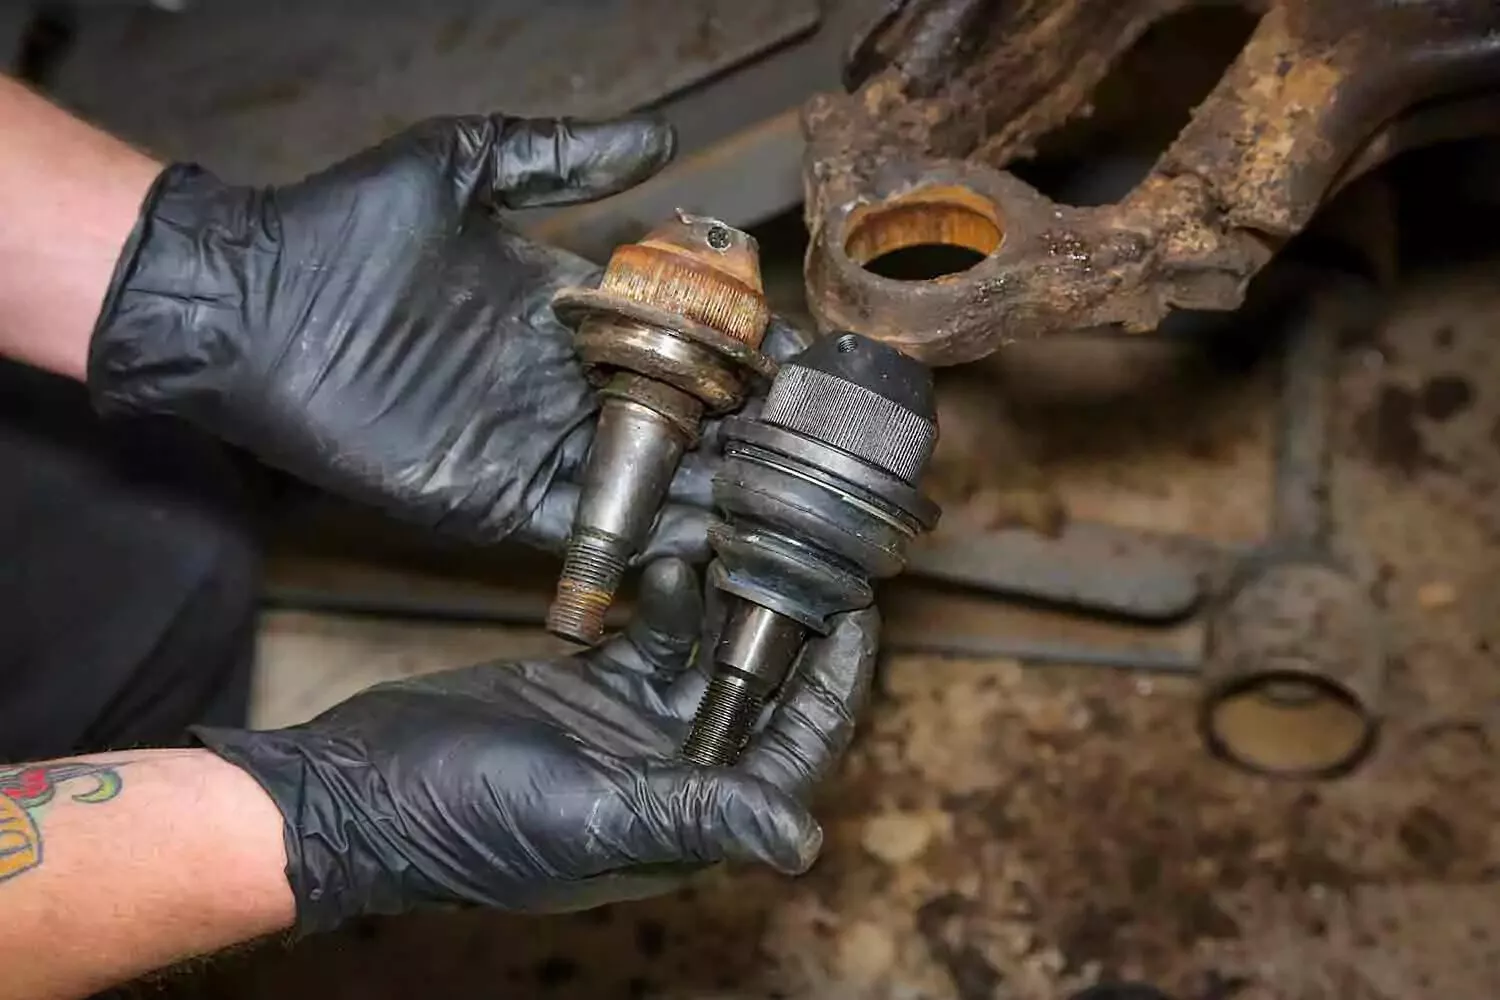
How to Diagnose a Failing Ball Joint
7 min read
How to Buy the Right Sway Bar Links and Bushings
6 min read
How to Buy the Right Steering Gearbox
5 min read
Understanding Steering Gearboxes
5 min read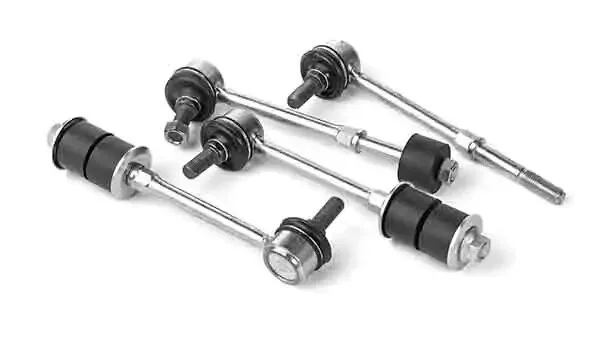
How to Buy the Right Tie Rod Ends
6 min read
An Intro to Flushing Your Power Steering Fluid
5 min read
How to Replace Sway Bar End Links and Bushings
6 min read
How to Replace a Power Steering Pump
7 min read
How to Choose the Best Shock Absorbers
8 min read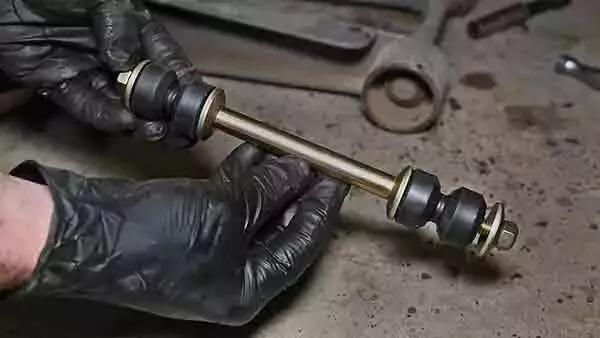
Understanding Sway Bar Links
6 min read
How to Replace a Steering Gearbox
8 min read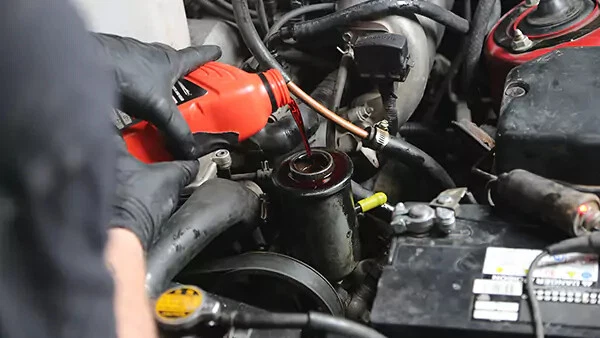
How to Replace Power Steering Fluid
8 min read
Why Idler Arms Are So Critical
6 min read
Power Steering Pump Problems and Solutions
5 min read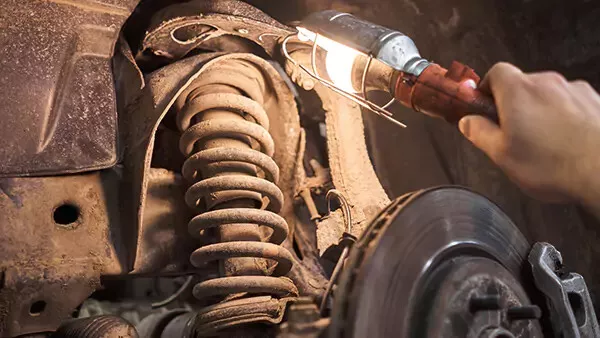
Shock Absorbers 101
8 min read
How to Replace Shock Absorbers
8 min read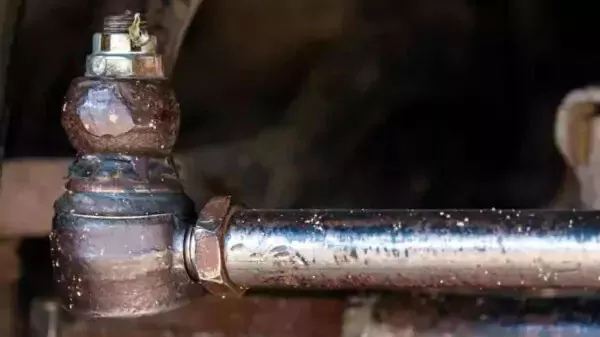
Diagnosing Bad Tie Rod Ends
6 min read
Explore more projects
How to Change a Thermostat
30 to 60 minutes
Intermediate
7 min read

How to Replace a Car Starter
1 to 2 hours
Intermediate
7 min read

How to Replace Spark Plugs
1 to 2 hours
Intermediate
7 min read
How to Replace a Transmission Mount
1 to 2 hours
Intermediate
7 min read

How to Replace Engine Mounts
1 to 2 hours
Intermediate
4 min read

How to Change a Water Pump
1 to 2 hours
Intermediate
8 min read

How to Change Manual Transmission Fluid
Less than 30 minutes
Intermediate
4 min read

How to Replace an Intake Manifold Gasket
2 to 5 hours
Intermediate
7 min read

How to Replace Wheel Bearings
1 to 2 hours
Intermediate
7 min read
How to Replace a Heater Core
More than 5 hours
Intermediate
12 min read
How to Replace a Power Steering Pump
1 to 2 hours
Intermediate
7 min read
How to Replace a Steering Gearbox
2 to 5 hours
Intermediate
8 min read
How to Replace Power Steering Fluid
1 to 2 hours
Intermediate
8 min read

How to Change Automatic Transmission Fluid
Less than 30 minutes
Intermediate
6 min read
How to Replace a U-Joint
1 to 2 hours
Intermediate
14 min read

How to Replace a Car Radiator
1 to 2 hours
Intermediate
8 min read

How to Change an In-Tank Fuel Pump
2 to 5 hours
Intermediate
9 min read