Do you own a rear-wheel-drive (RWD), four-wheel-drive (4WD), or all-wheel-drive (AWD) vehicle? If so, the rear differential and many front differentials are connected to the transmission/transfer case via a long tube called a driveshaft.
There is a universal joint at each end of the driveshaft. That joint is commonly called a U-joint. Some driveshafts are multi-piece and have four U-joints.
Over time, these joints wear out and must be replaced. If a worn-out or damaged U-joint is not promptly replaced, it could cause an accident or severely damage your vehicle.
It helps to understand the anatomy of a driveshaft. The shaft is made of steel or aluminum (or carbon fiber for some high-performance vehicles). Each end of the shaft has a weld-on yoke with two ears that line up. One half of the U-joint is attached to these yokes. The other side of the joint may attach to a slip, pinion, or flange yoke, depending on your make and model. Slip and pinion yokes are the most common. Regardless of the yoke type, the change process is the same.
The most common sign of a failing U-joint is a loud clunk when you put the vehicle in gear. Other signs include noise, vibrations, leaking transmission fluid, and powdery rust accumulating on the cross-shaped trunnion. Learn more about the types of U-joints and when they go bad - opens in new window or tab.. Also, see our U-joint buying guide - opens in new window or tab..
Tips and Tricks
- When one U-joint is bad, replace them all. If one is failing, another one is at risk. A worn joint puts more strain on the surviving joints.
- The key to this repair is cleaning. After the old joint is out, clean the yokes so the new one slips in easily.
- There are several types of U-joints in driveshafts. Each type is based on the cap-retainer method. The most common types are inside- and outside-clip. Compare the new U-joint to the old one before installing it.
- This demo uses a shop press that costs about $100 to $200. But you can also do this job with a ball-joint press and a socket.
- Some OEM-installed U-joints are retained with a thermoplastic injected into a hollow space inside the yoke. These are replaceable, but you can’t replace the plastic. Instead, use inside or outside clips for service parts.
- A few vehicles have non-serviceable U-joints, which require replacing the entire driveshaft.
- Test a U-joint by grabbing and twisting the driveshaft. If it twists more than a couple of degrees, it could be failing. Push the shaft (near each joint) back and forth on both axes. The joint should be firm and not slide at all. You can also test the U-joints by starting the engine, holding your foot on the brake, and putting the vehicle in gear (for automatics). If you hear a clunk or knock, the U-joints are going bad.
- If your U-joints have grease fittings, grease them annually.
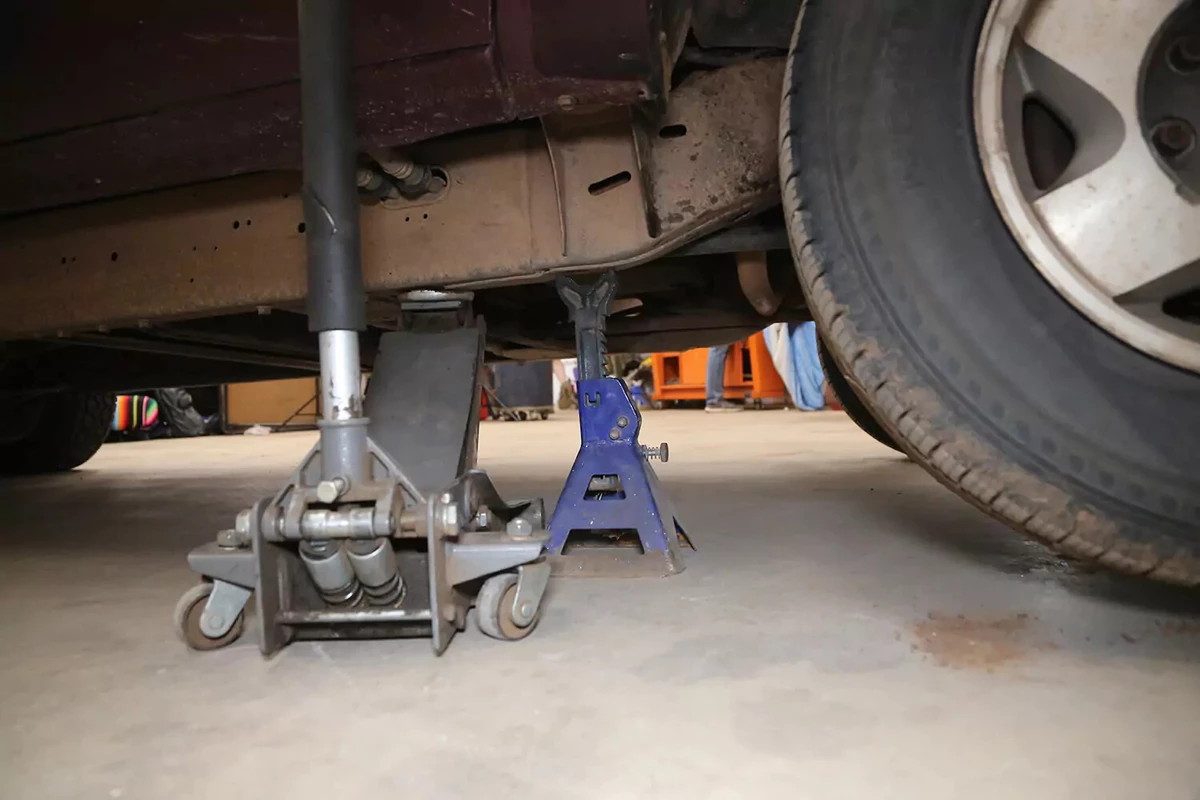
This project requires working safely under the vehicle. You will need a floor jack, and jack stands, ramps, or wheel cribs to support the vehicle.
Locate the factory jacking points just behind the front wheels or just in front of the rear wheels. The jacking point is a metal section with two V notches about two inches apart. Check your owner’s manual to confirm the lift location.
Never use jack stands on dirt, gravel, or asphalt. If you do not have access to a concrete work surface, use wheel cribs, solid-base ramps, or wide-base wood supports to support the vehicle. Never use cinder blocks or bricks as supports.
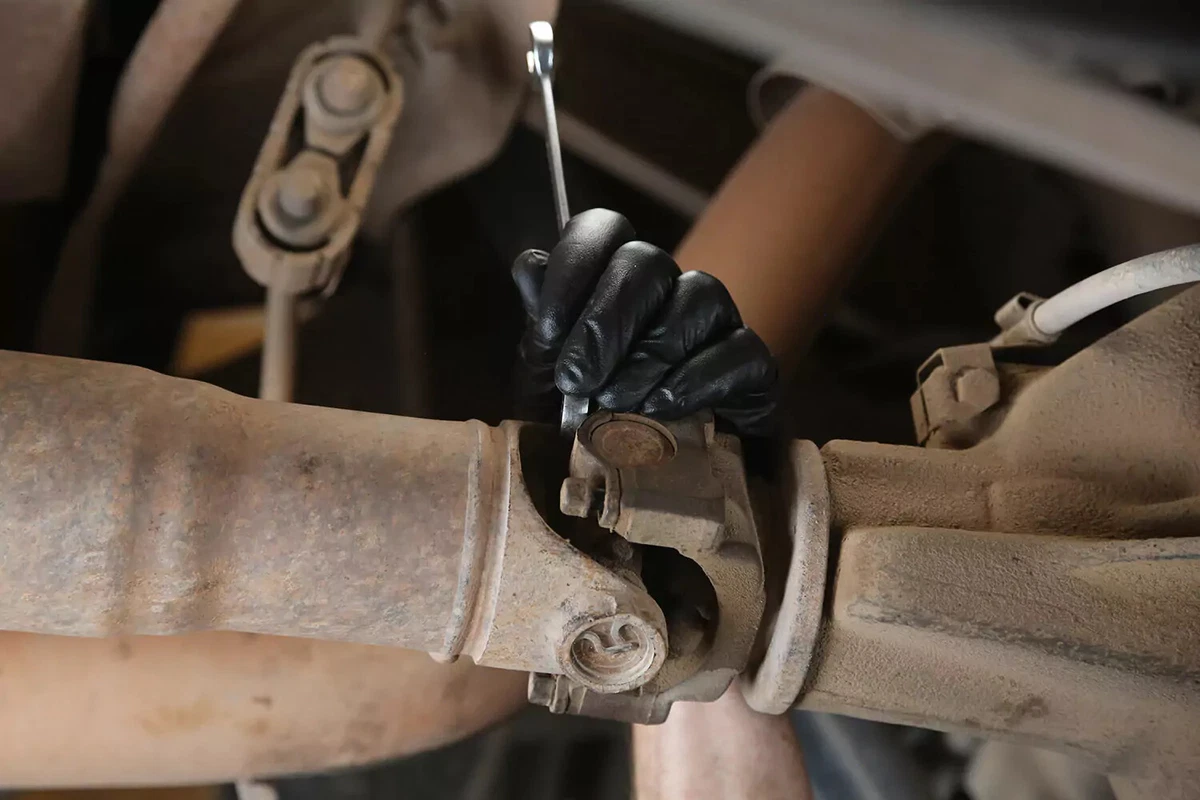
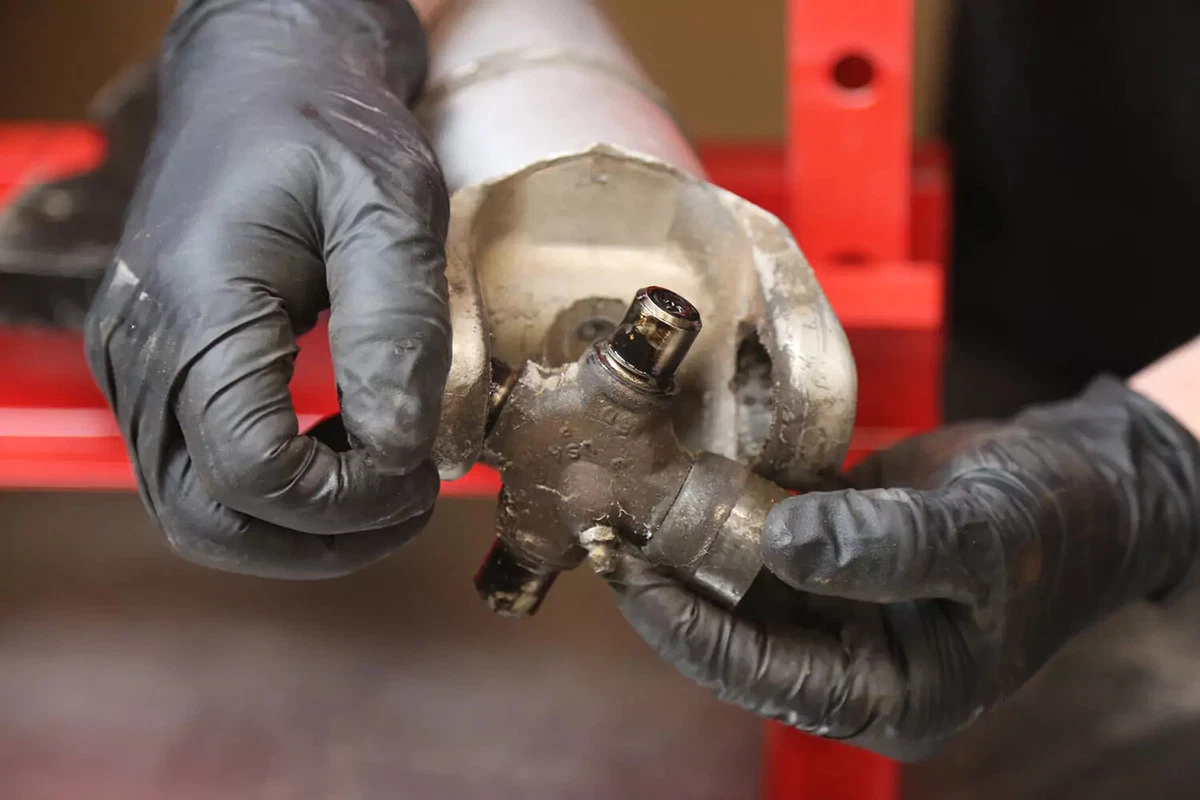
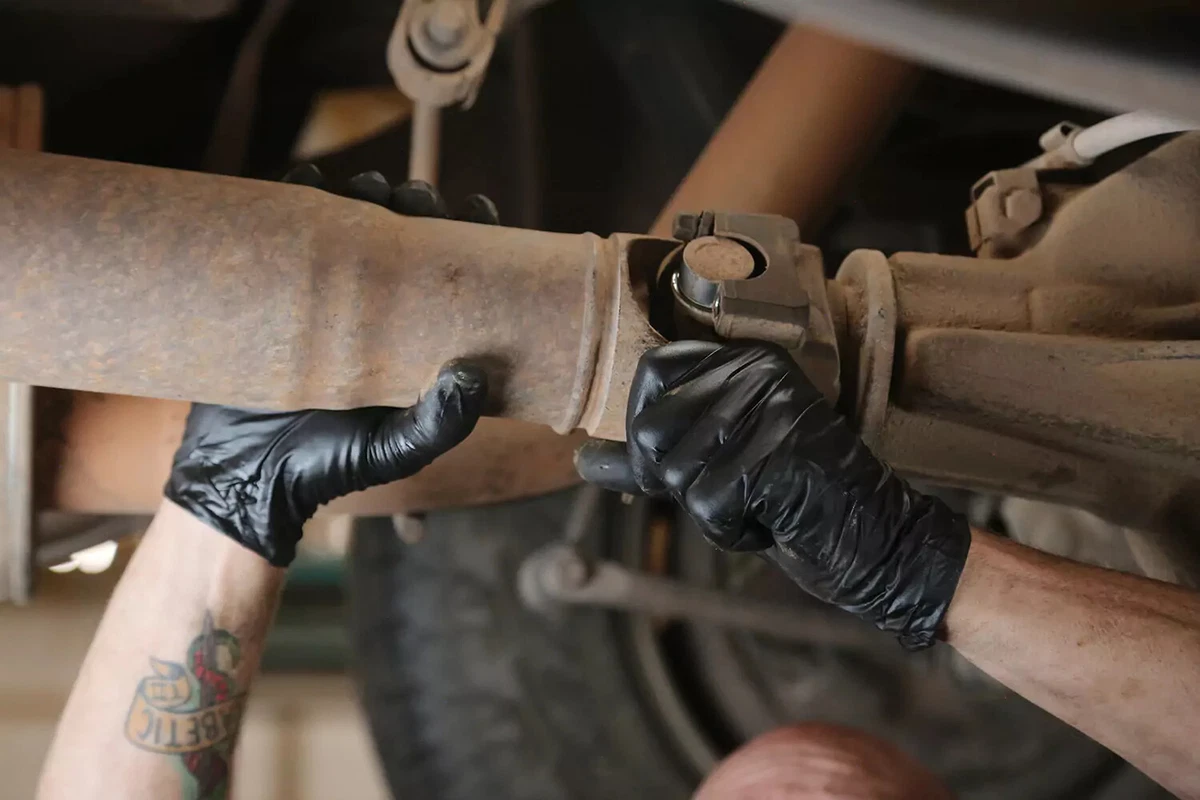
Locate the rear yoke at the differential. Remove the bolts holding the caps in place. These may be straps, caps, or U-bolts. Some vehicles have a flange that bolts to the yoke with or without a rubber isolator.
You might need to put the vehicle in neutral so that you can spin the driveshaft to gain access to each bolt. A higher shaft angle makes it more difficult to reach all the bolts.
Save these fasteners for reuse.
To free the caps from the yoke, push the driveshaft forward toward the transmission. You may need to use a pry bar to get the shaft to move.
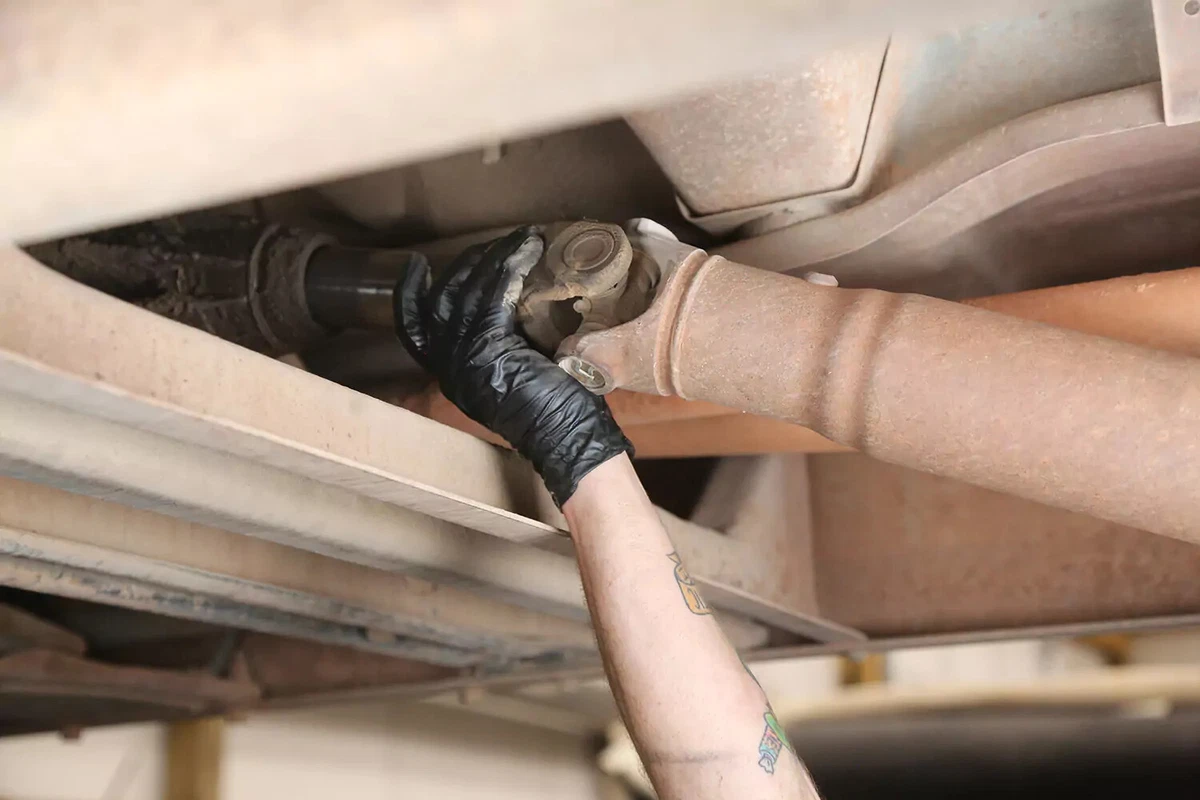
Slide the driveshaft slip yoke out of the transmission. Remove the shaft from under the vehicle and into your work area. There may be leaking transmission fluid. Be prepared with a drain pan.
If your vehicle has a multi-piece driveshaft, unbolt the carrier support bearing from the chassis. The support will be in the middle of the shaft, between the two sections. It’s typically bolted to a crossmember directly above or below the shaft.
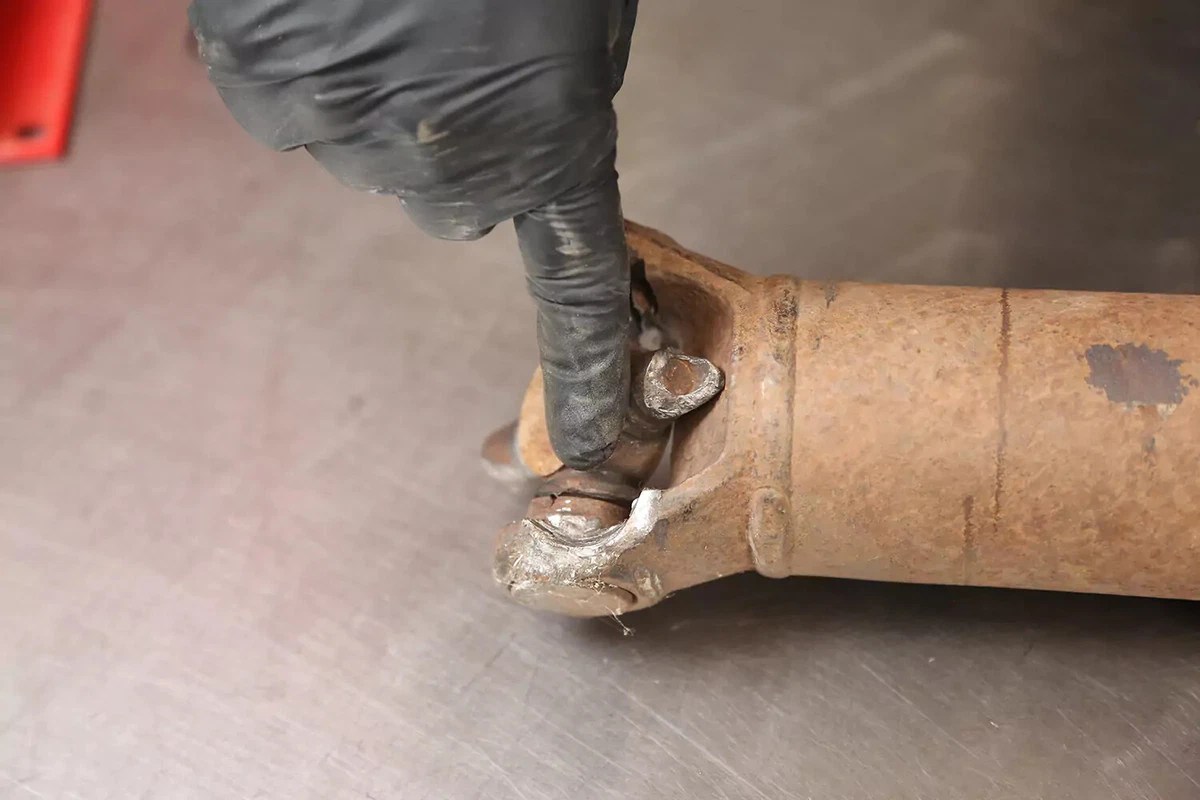
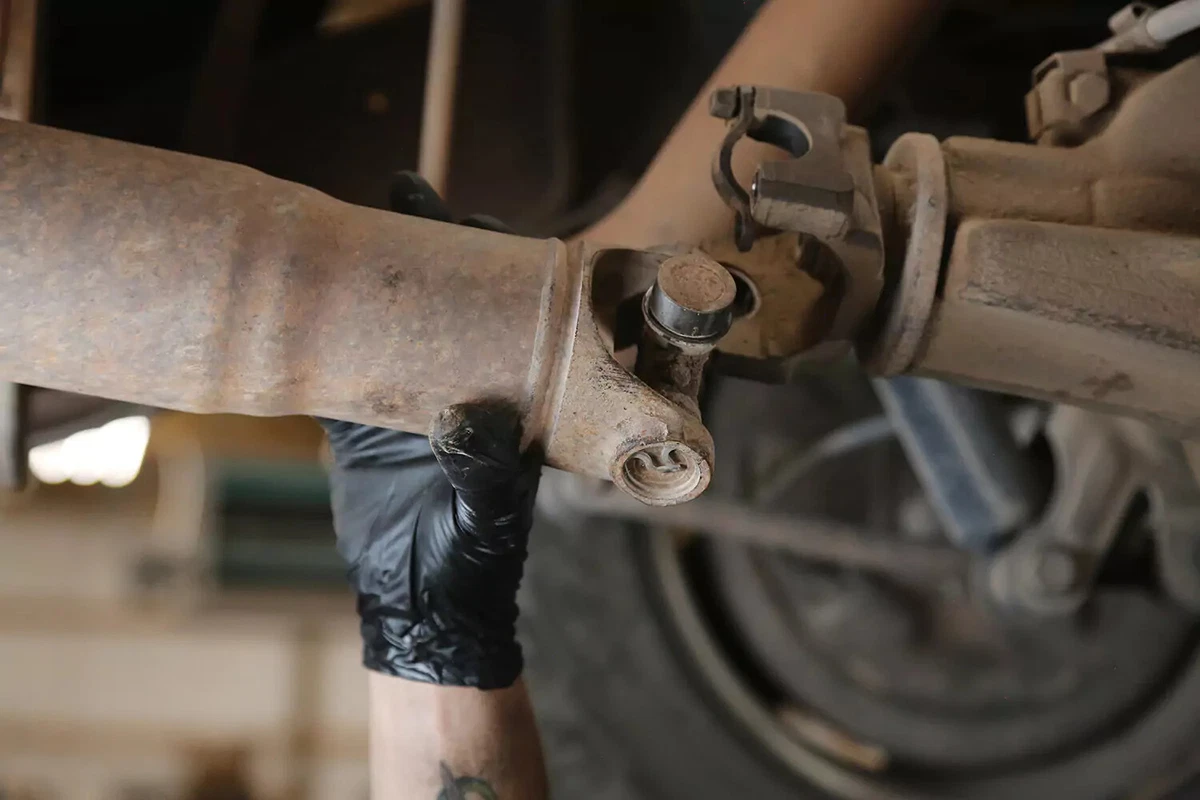
Inspect the yokes, flanges, and the shaft. This joint in our demo vehicle was failing in spectacular fashion—one ear of this welded yoke is worn halfway through.
If the shaft tube is dented, grooved, gouged, or bent, it must be replaced. Do not take a risk with a damaged driveshaft. A driveshaft that fails at highway speeds can cause an accident.
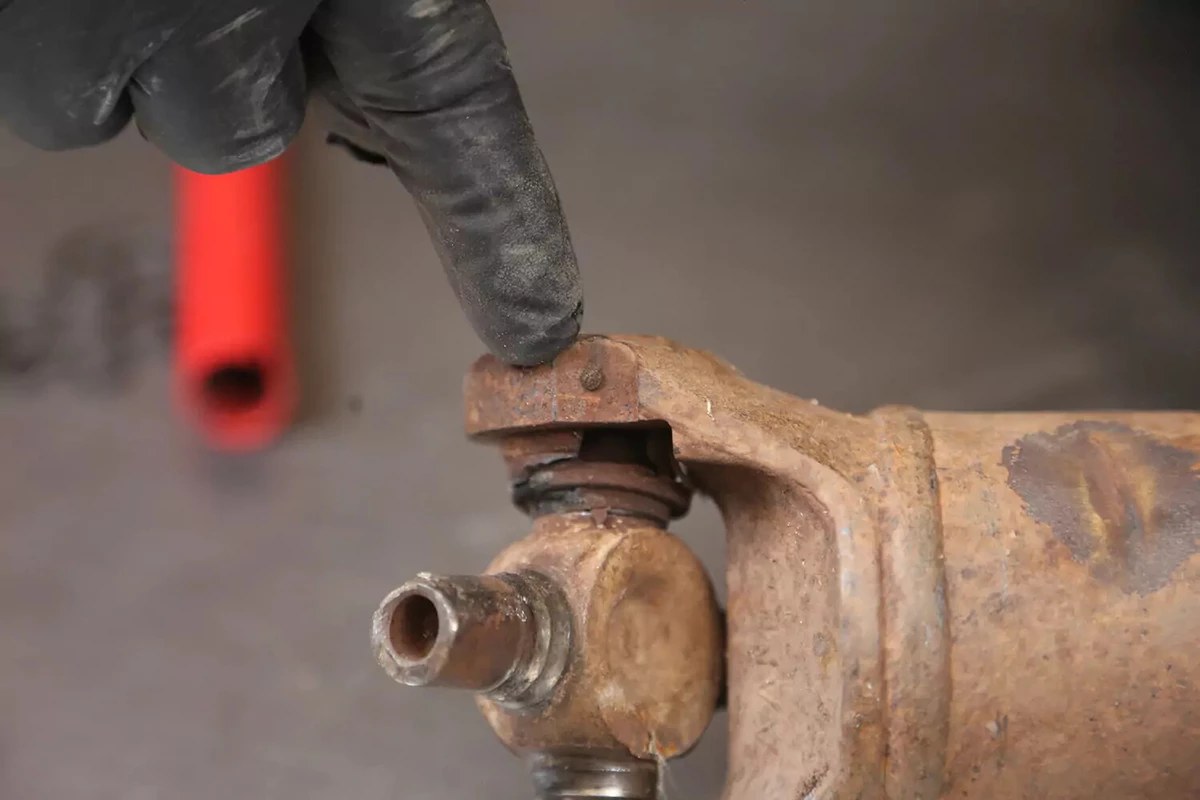
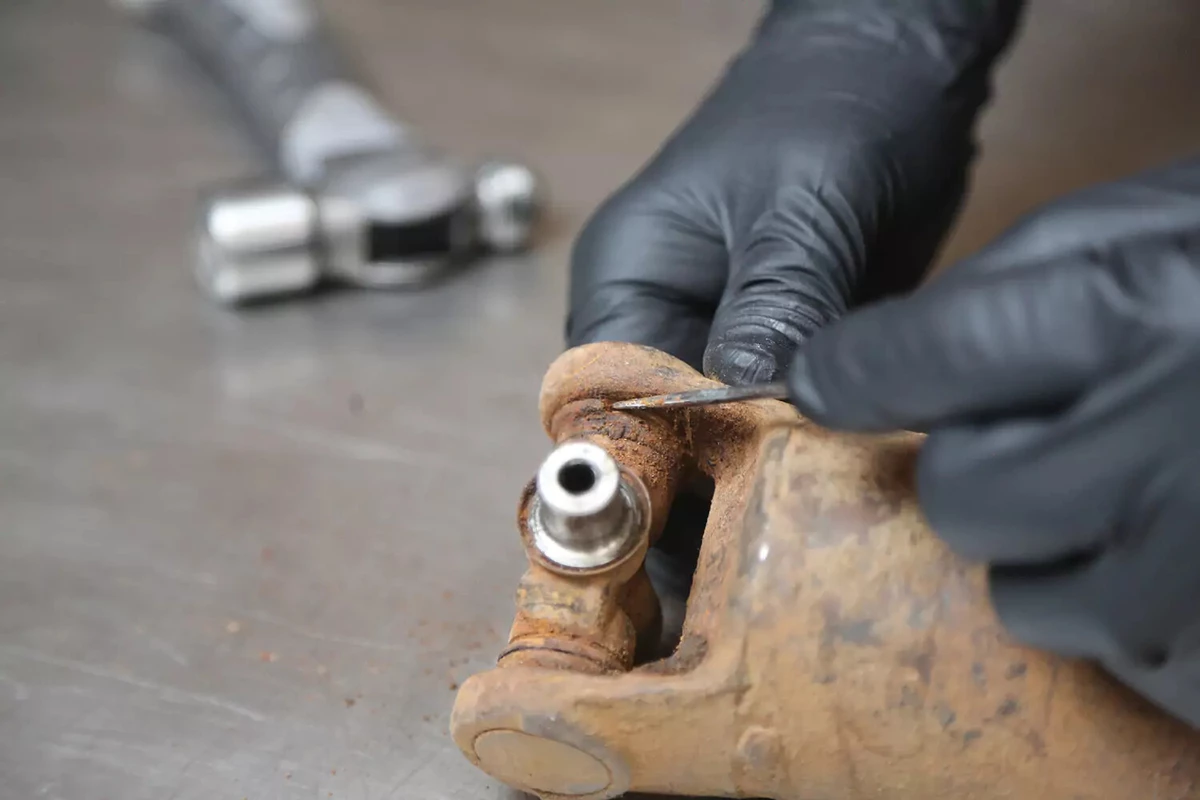
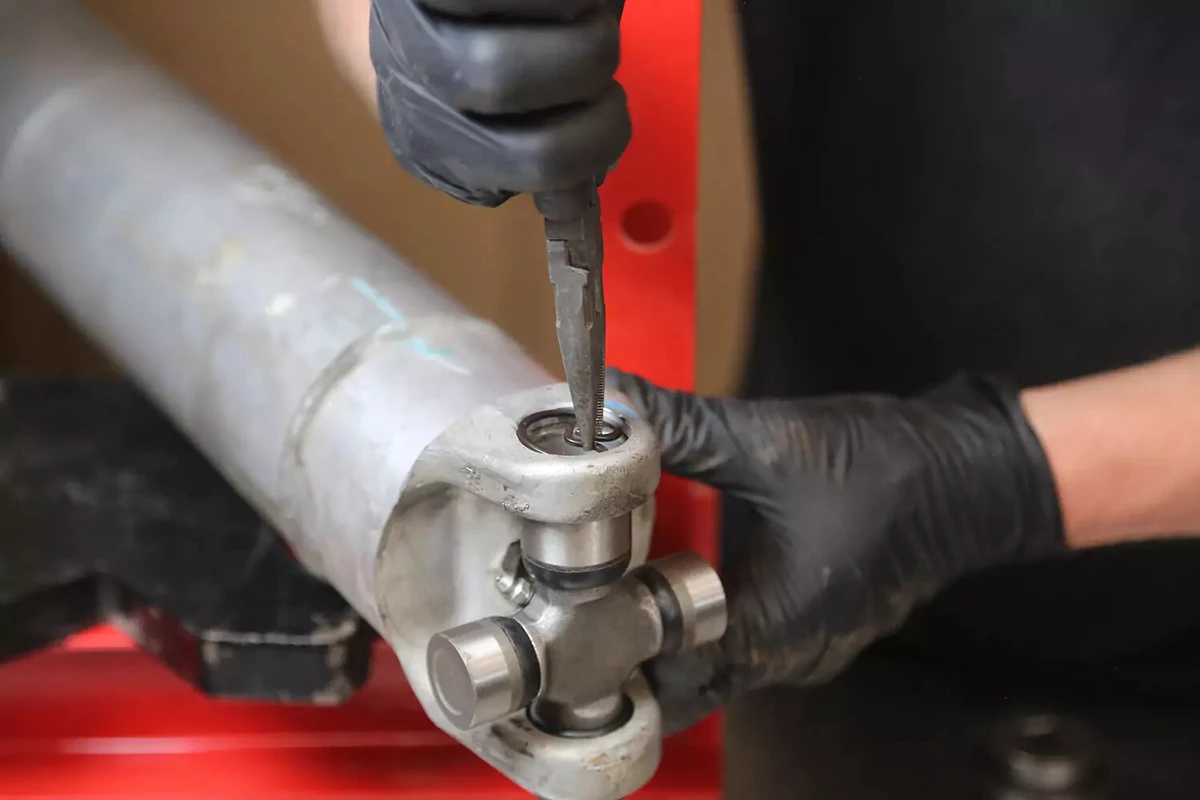
Determine the retainer type. Our demo vehicle has a late 1990s GM driveshaft with thermoplastic retainers. Notice a little round bump on the side of the yoke ear. This is the injection point.
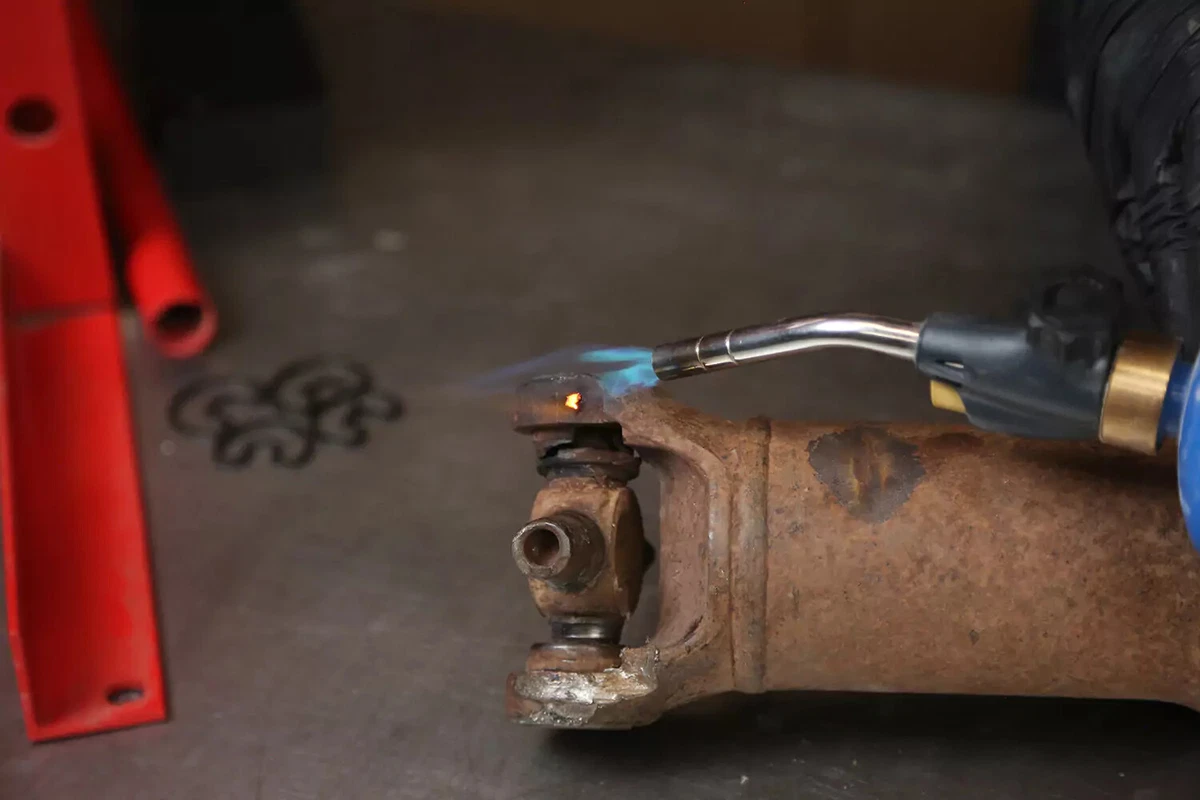
Remove the thermoplastic retainer by burning it out with a propane torch (or an electric induction heater).
Heat the ear until the hot plastic squeezes out of it. You might need to have the joint in the press to complete this step.
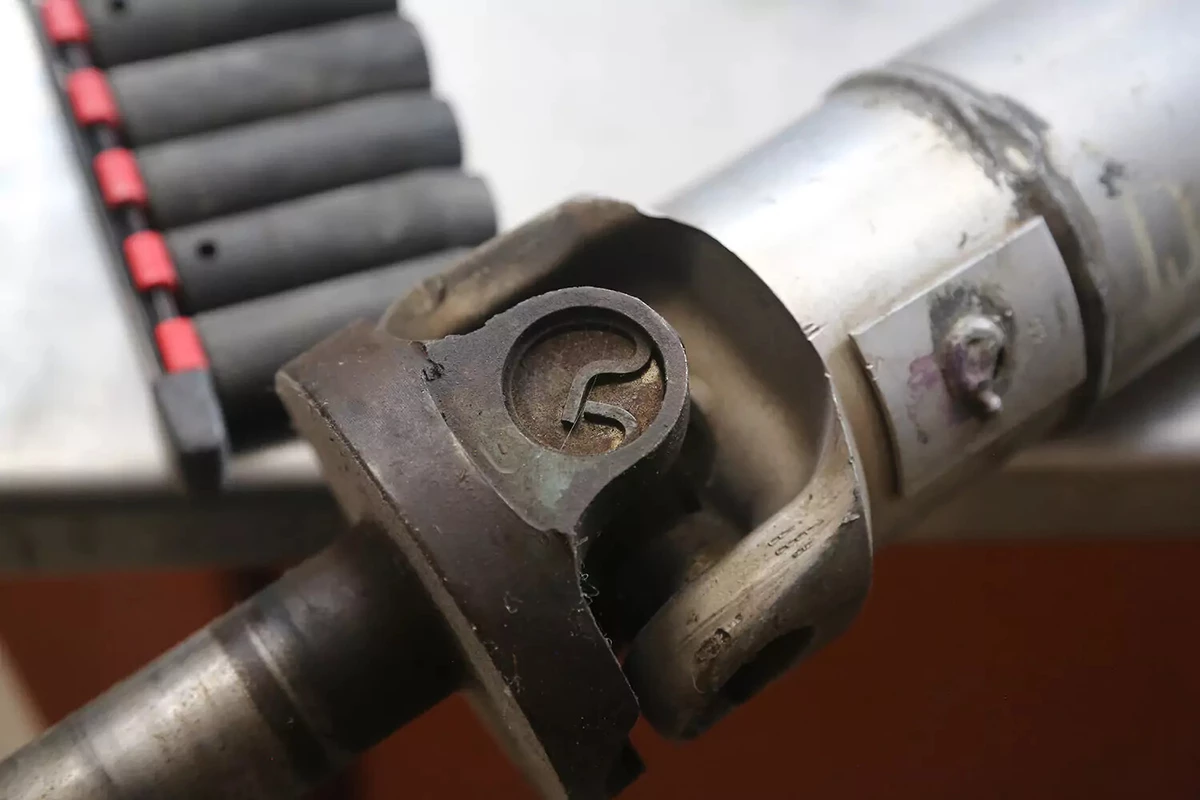
This is a staked U-joint—not from our demo vehicle. It’s not serviceable.
The caps are permanently held in place with metal grooves cut into the yoke. The entire drive shaft must be replaced—not just the U-joints.
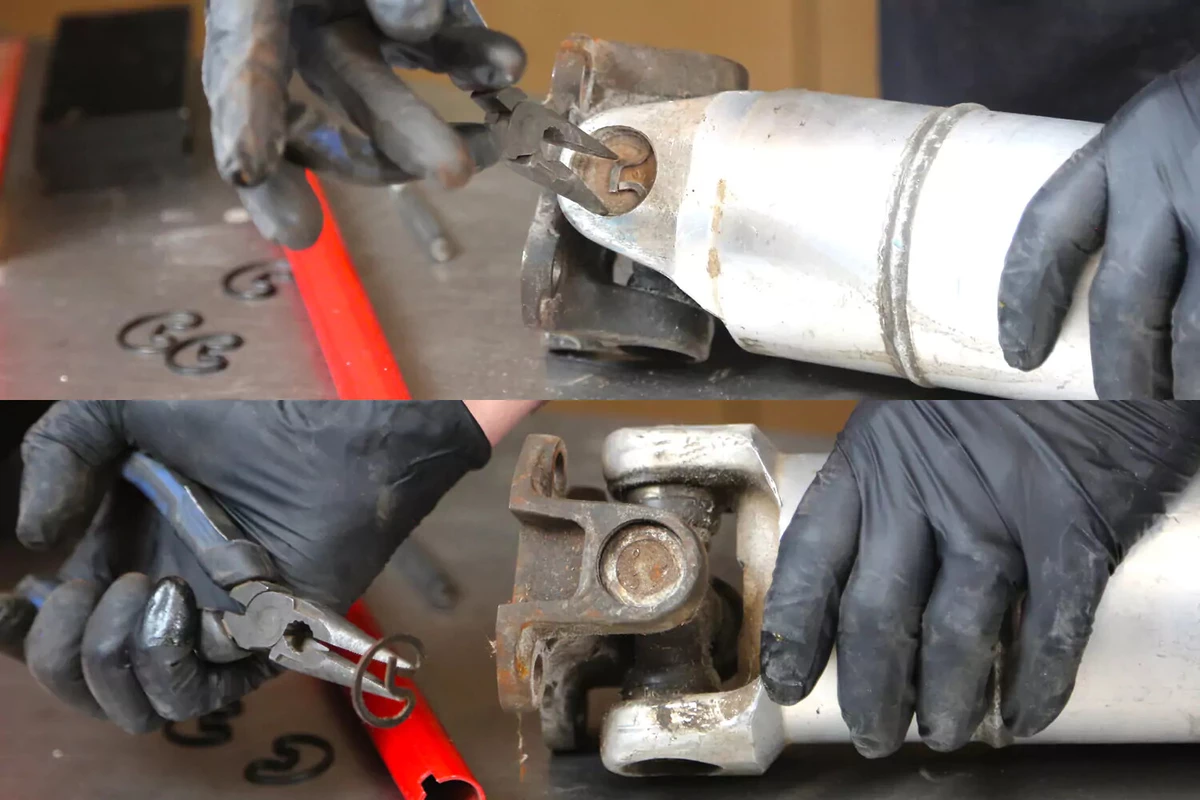
The joint in our demo vehicle uses inside-clip style caps. The caps have grooves on the inner side that keep them from falling out when spinning. They can be tough to remove because they can get rusty and bond to the cap.
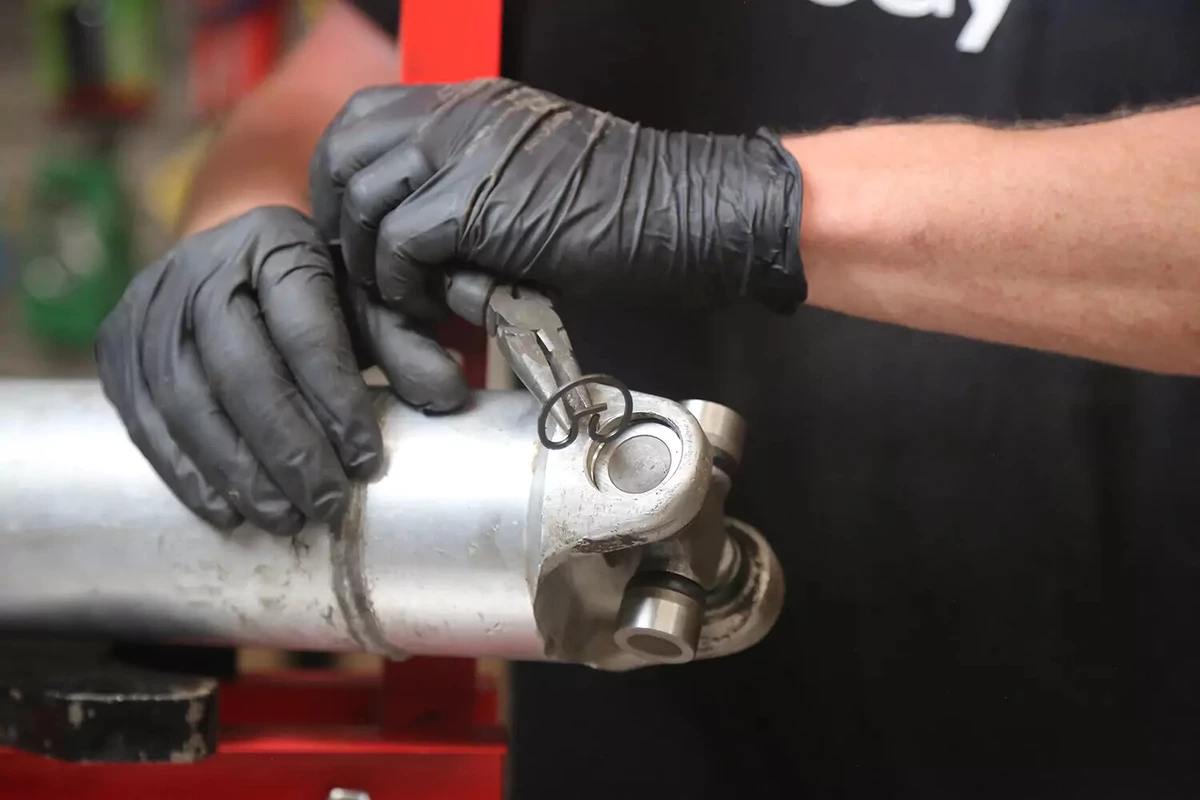
Use a punch and a hammer to tap one end of the clip. Tap until it breaks free.
Sometimes the clip shoots out easily, but it usually takes some tinkering. If the clip is stubborn or rotating, switch sides. Penetrating oil might help. Sometimes, snap-ring pliers work well.
These clips are one-time use only. They deform when removed and cannot be reused again safely.
If you lose or damage a new clip, buy a replacement. The clips play the critical role of holding the caps in place. Your new U-joints should come with new clips.
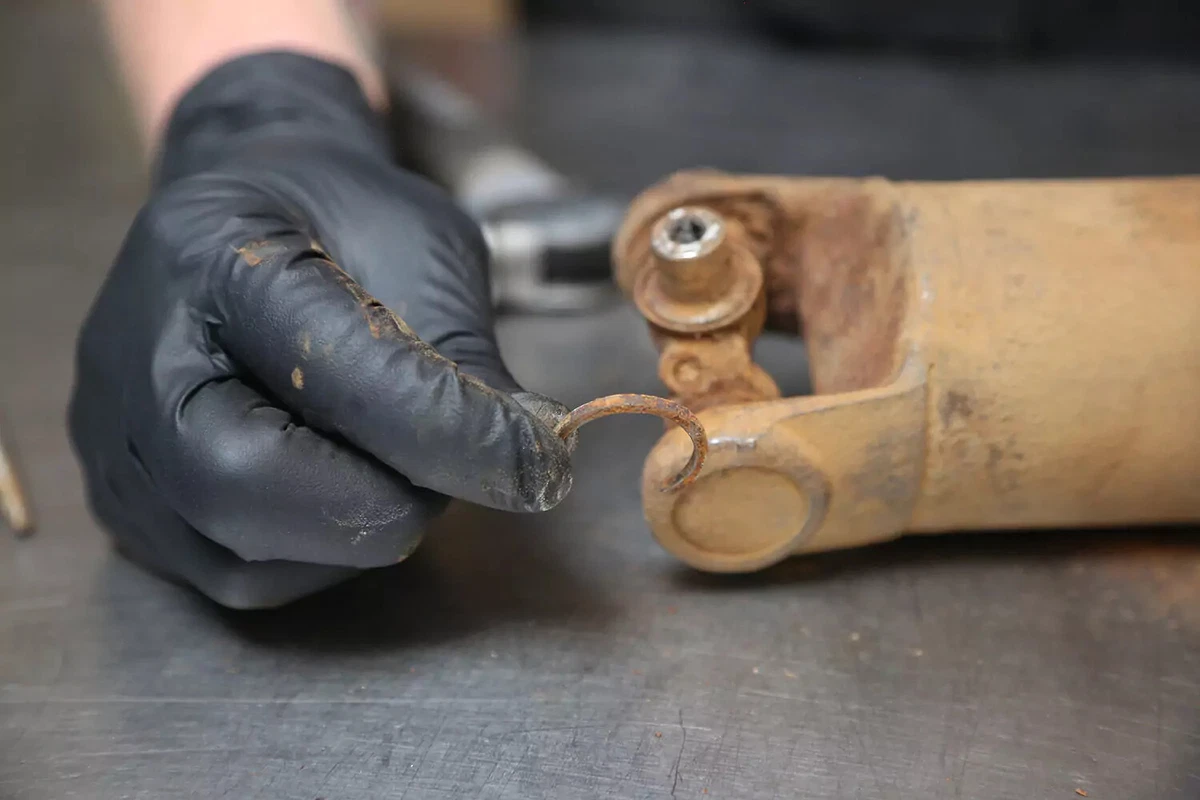
This is an outside clip from a groove cut in the yoke ear. This example is not from our demo vehicle.
These clips, which are easy to work with, are also one-time use only.
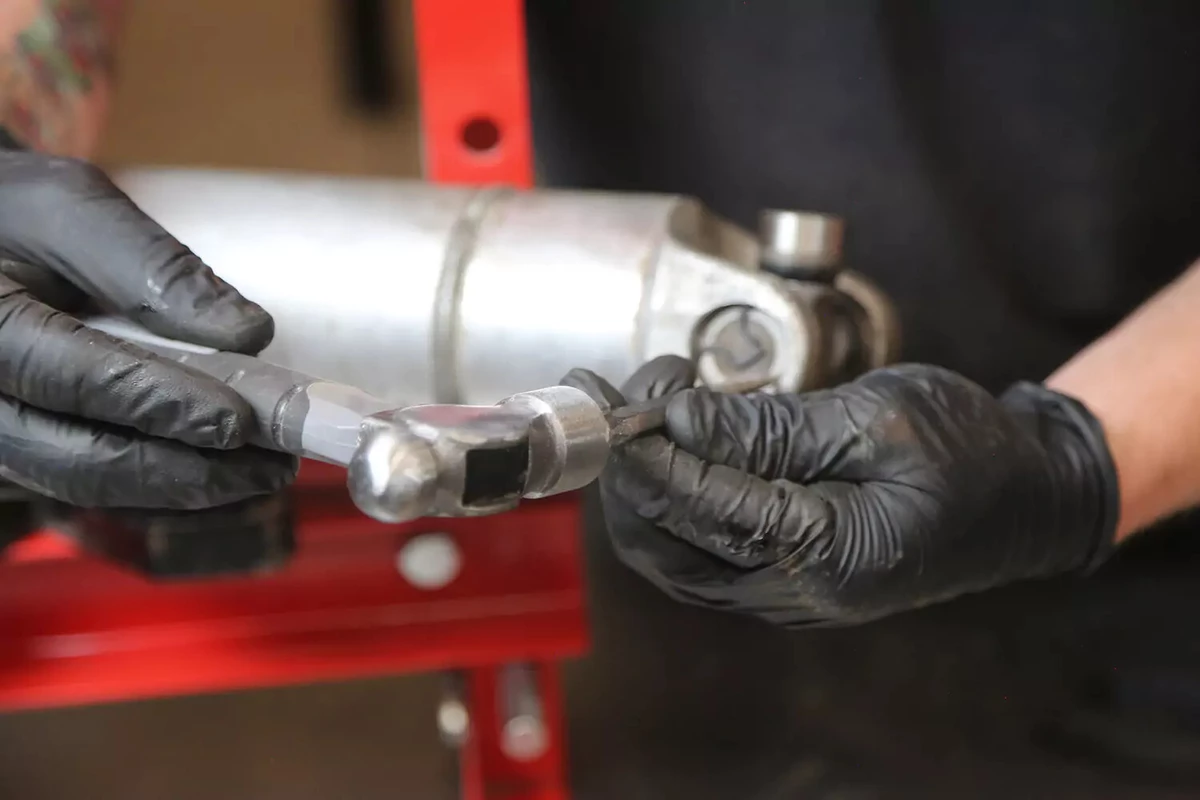
Use a pair of needle-nosed pliers to grip the two ends of the clip. Squeeze to compress.
After you have a good grip on the clip, twist the pliers to break the clip free of the groove and remove it from the yoke ear.
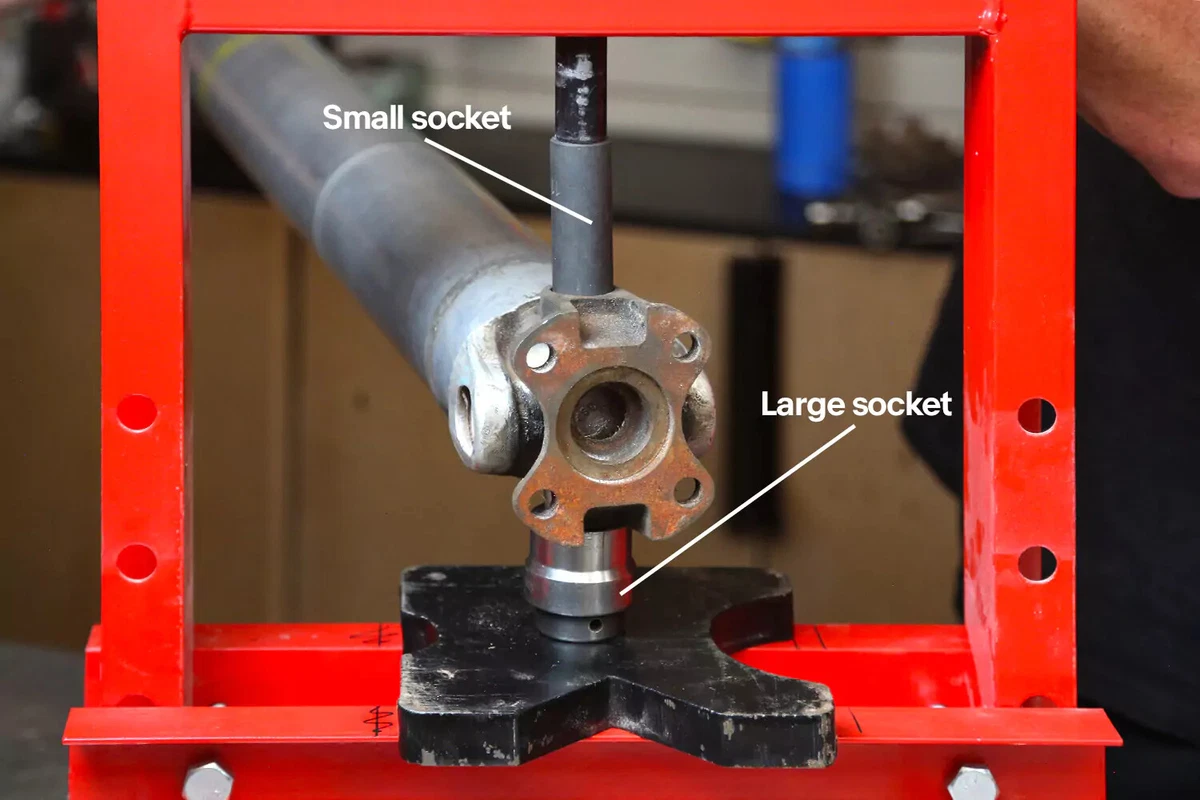
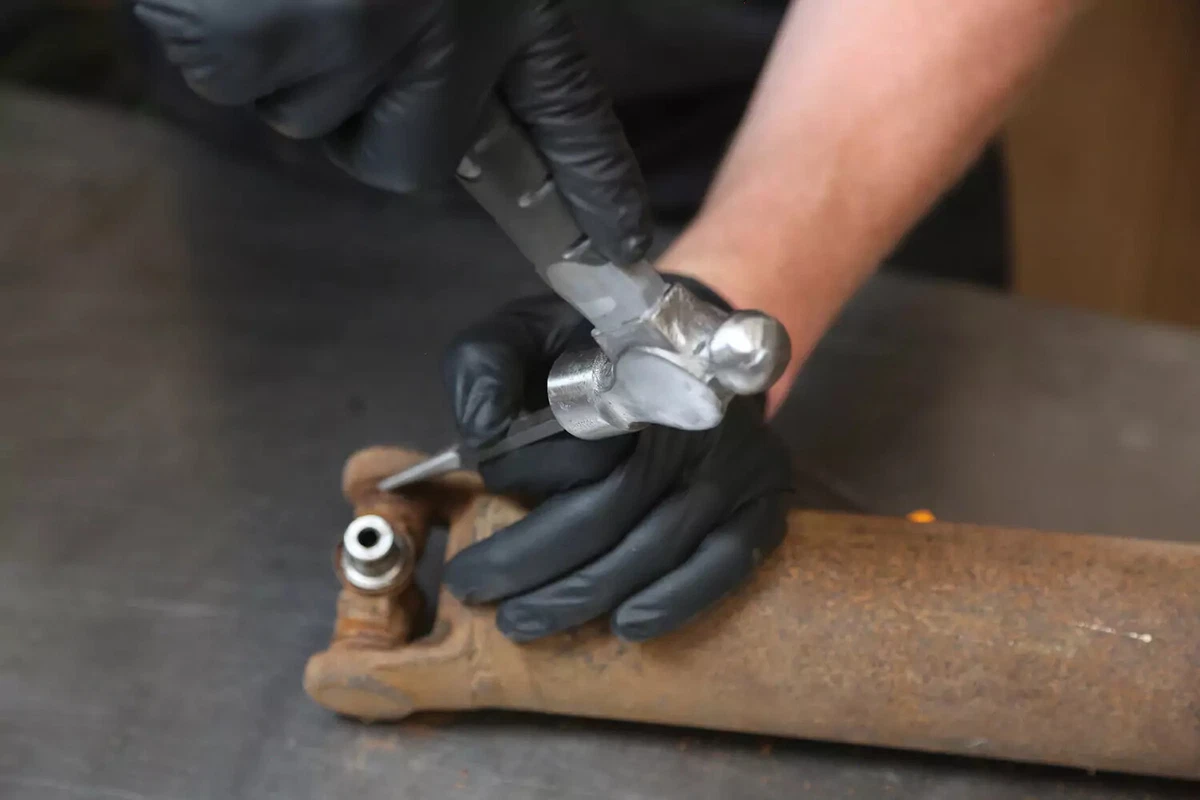
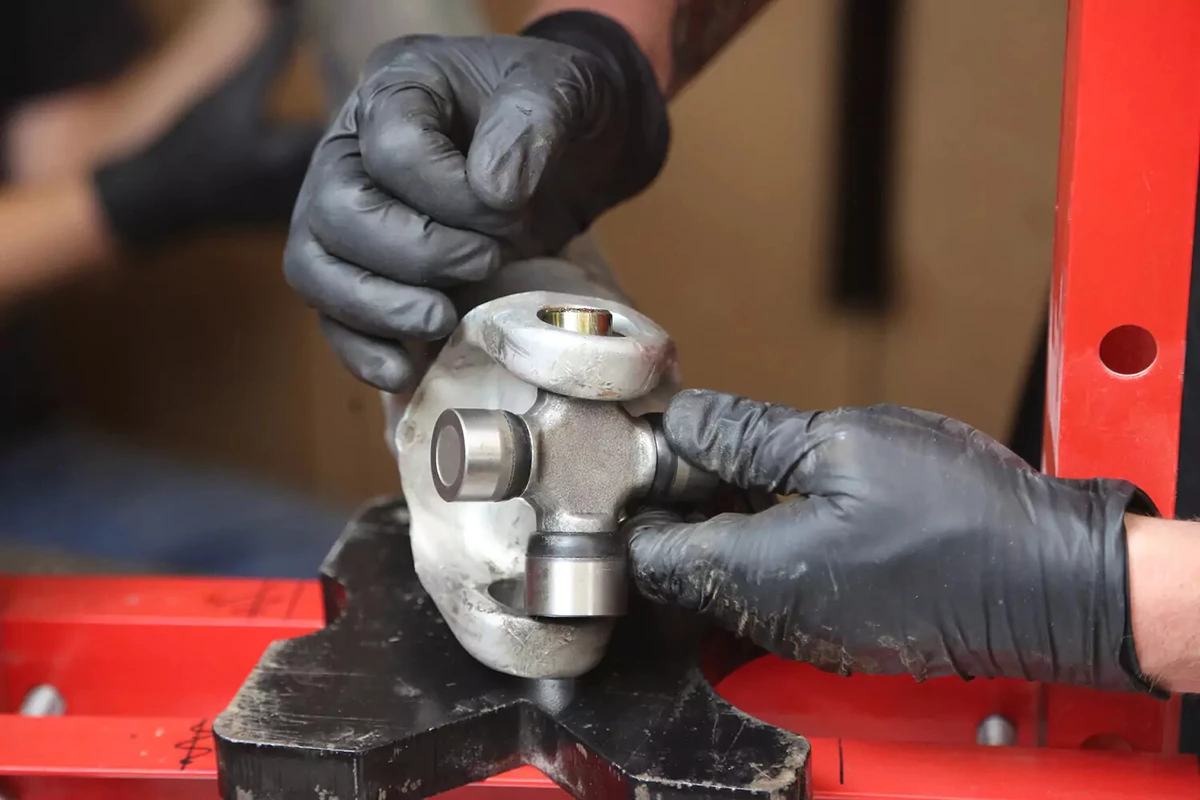
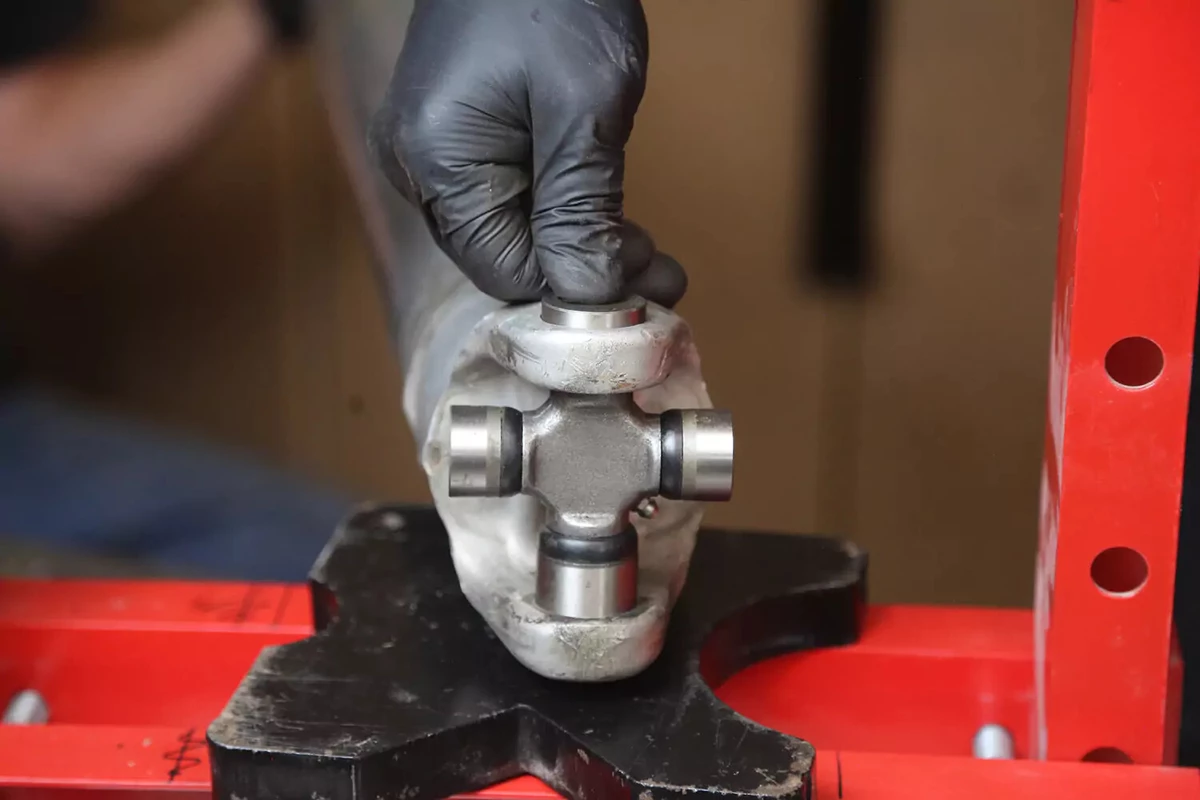
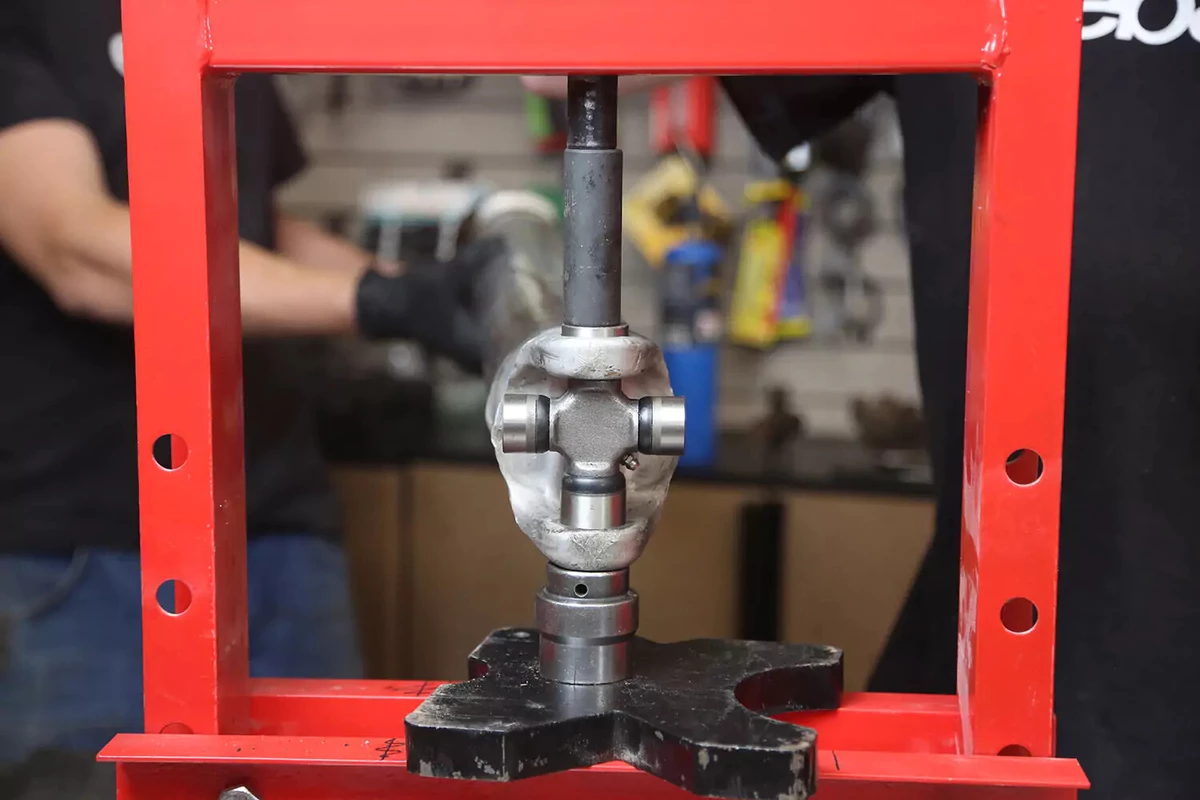
Place the U-joint assembly into the press with a large socket on the bottom to receive the cap. It must be large enough to fit the cap but small enough to support the ear of the yoke.
Place another socket on top of the opposing cap and bring the press down to make contact. The upper socket should be slightly smaller than the diameter of the cap. Then, press down until the lower cap comes out.
Don’t have a press handy? You can also use a hammer to tap on the upper socket to force the cap through. Support the shaft and lower socket on a sturdy workbench.
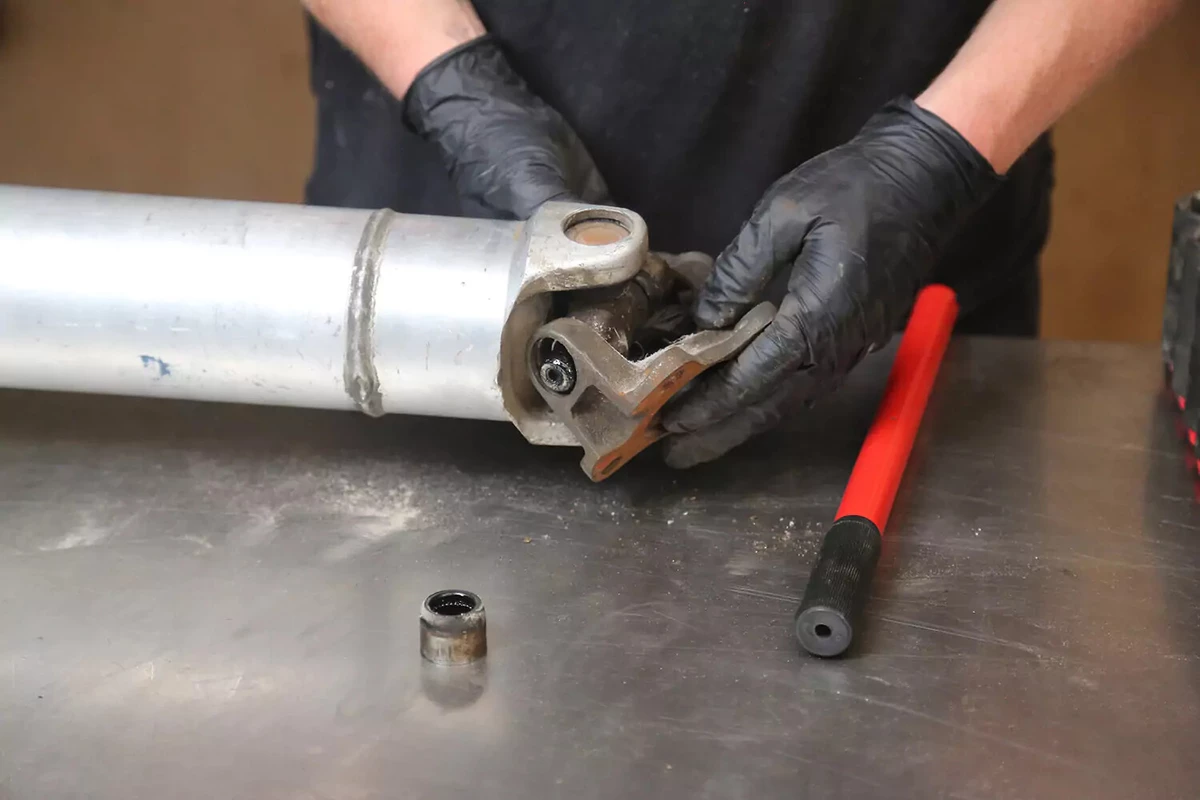
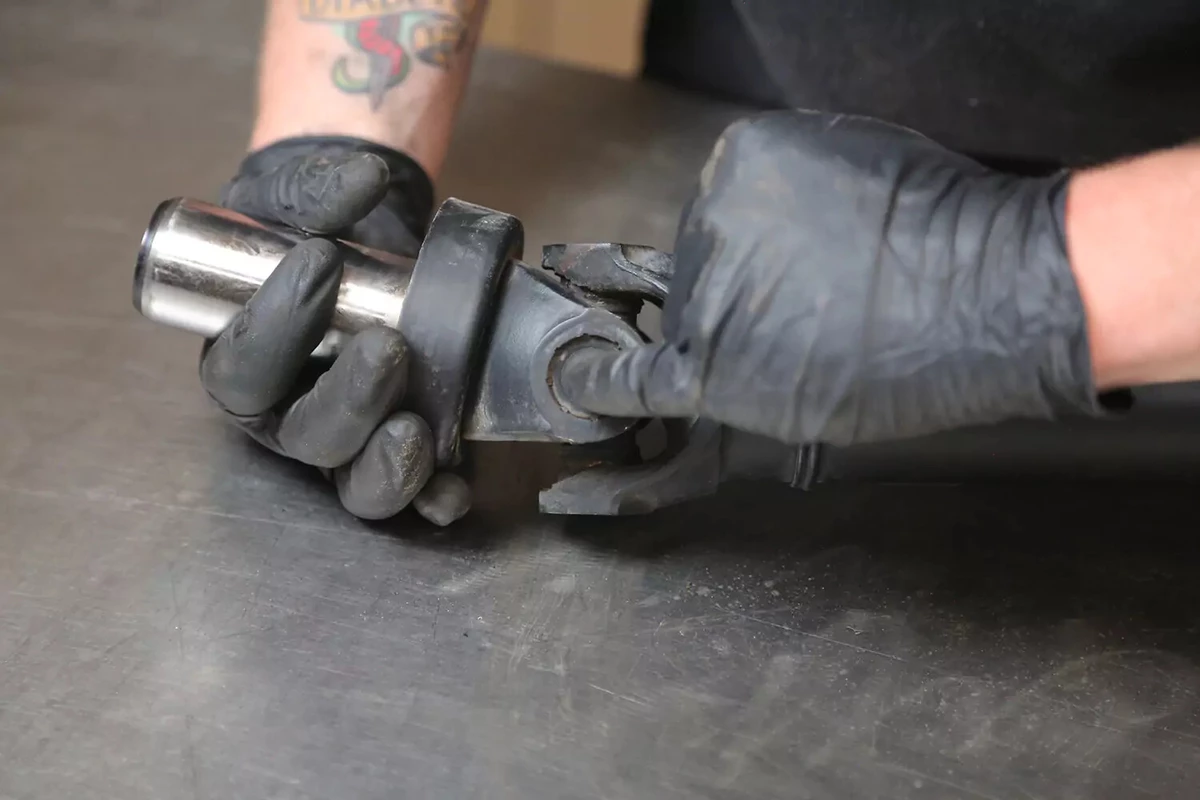
Remove the yoke from the side you just pressed out. The yokes are often very tight, so you might need to wiggle and work the yoke off the other cap.
Sometimes, you need to flip the joint and press the other cap out using the same method. That happens when the yoke is too small to remove the U-joint from the center.

With the other yoke removed, flip the shaft in the press to get the joint out of the welded yoke on the drive shaft. Use the same sockets as before.
Remove the cap from the welded yoke. This allows the joint cross to move around in the yoke.
Push the joint toward the side without a cap until the remaining cap slides out of the yoke.
This process is the same for all press-in yokes.
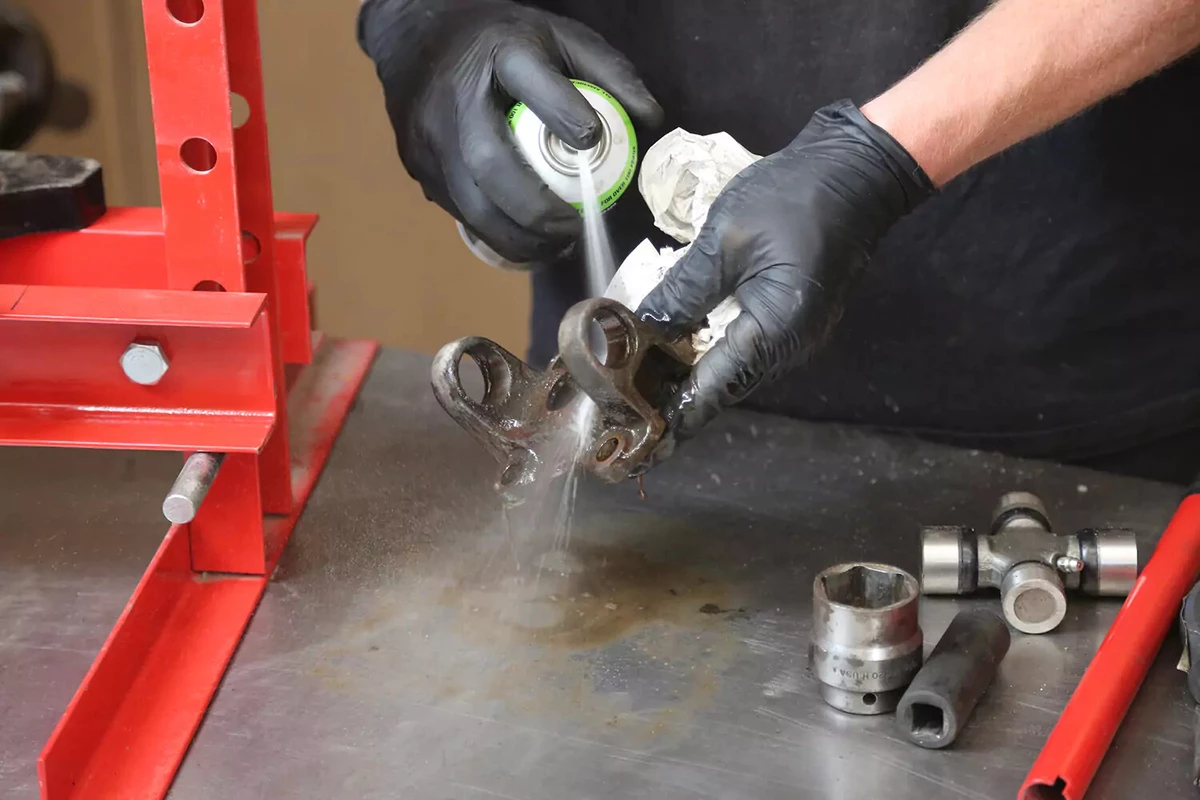
Use lots of brake cleaner and towels to clean all the grime and crud off the yokes. For heavily rusted yokes, a Scotchbrite pad or wire brush can be used to remove corrosion.
Clean the ears as much as possible so that the caps slide in smoothly. If the corrosion is severe, use a round file to remove it so the new caps slide in easily.
Remove one cap from the new joint. Slide the cross into the yoke.
Take care with this step. The needle bearings are held in place with grease. They will fall everywhere if you drop the cap. The bearings could also fall into the center of the cap.
If the bearings fall or come out, clean them and put them back in with more grease. Ensure they are pressed against the cap’s vertical wall. A single bearing in the bottom of the cap will make it impossible to install the joint and could destroy it.
If you have to press both caps in from the outside, install one cap, then the cross. Flip it over and push the other cap in by hand as far as you can while keeping the cross aligned with both caps. After the cross has engaged both caps, you can press the caps in.
Most of the time, you can push the other cap in by hand. This is a critical step because both caps must engage the cross deep enough to allow the needle bearings to press against the cross’s inner surface.
If a single bearing falls out of position, it will damage the joint.
Patience is required. There is a steep learning curve with the first few joints.
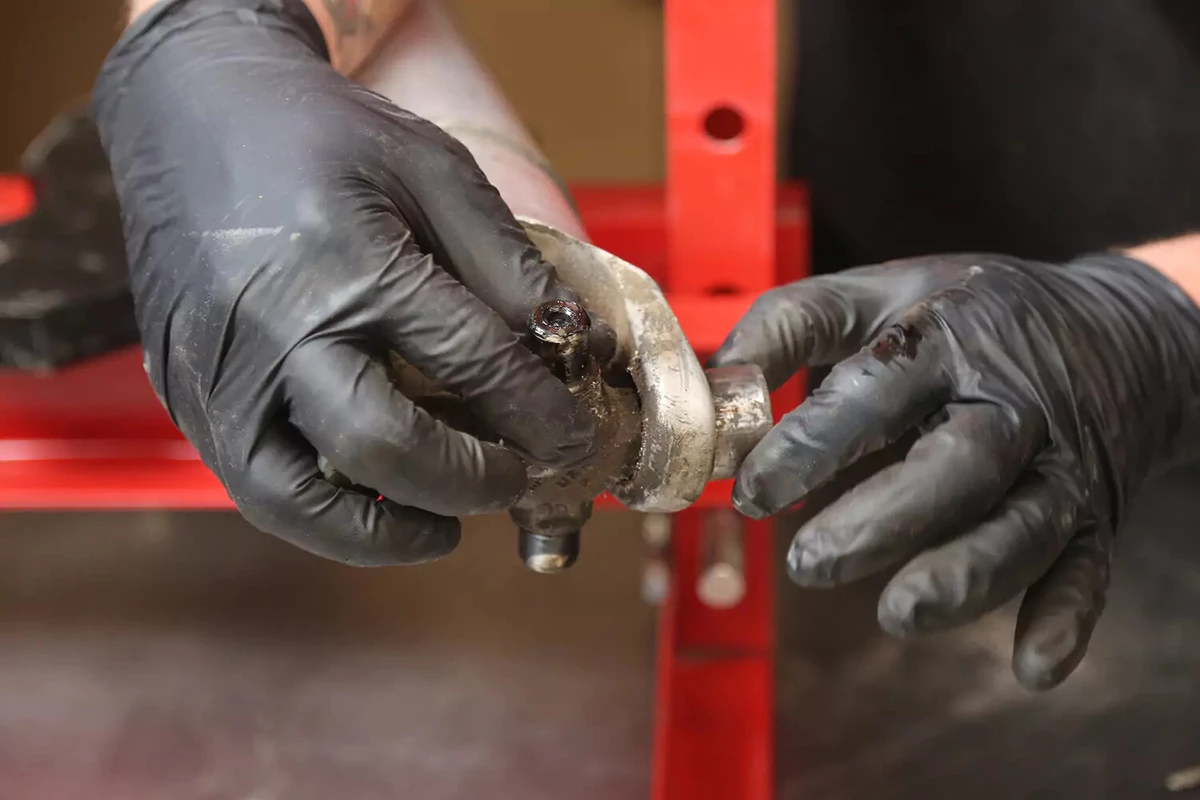
Install the first clip to the yoke. For this side, the cap is barely in the ear. The other cap will likely cover the groove.
For inside clip caps, install the first inner clip to the same cap (as shown here).
Set the yoke into the press. Place the ear with the clip in the bottom. Flip the socket over where it has a large, flat surface. This gives the yoke more support.
Slowly press the joint together until the cap seats against the clip on the bottom. If the cap won’t seat, one or more of the needle bearings could be out of place.
Remove the yoke from the press.
Again, if you don’t have a press, you can tap that socket with a hammer to seat the caps.
Install the other clip into the opposing yoke ear to clear the cap.
If there is space between the cap and the groove, you have the wrong joint, or it’s turned 90 degrees. (Many U-joints have a wide side and a narrow side).
Using a small punch and hammer, lightly tap both clips to set them into the grooves.
Don’t skip this step. If one small section of the clip is not fully seated into the groove, the cap will fly out. That could lead to a severe failure.
Repeat the process for each U-joint and yoke on the driveshaft.
Slide the slip yoke on the front of the driveshaft into the transmission. Rotate the shaft until it lines up with the pinion yoke. Reinstall the caps or bolts.
Pinion yokes use two methods of cap retention. Our demo vehicle uses straps retained by bolts, as shown.
Other pinion yokes use a u-bolt to retain the u-joint instead. Regardless, be sure the caps sit correctly in their cradle as the bolts or straps are tightened.

Tighten the bolts or nuts to secure the U-joint to the pinion yoke.
You can’t fit a torque wrench around the driveshaft, so tighten these bolts and nuts by hand. Most pinion yokes should be tightened to about 20 pound-feet, which is easy by hand. Don’t overtighten the caps, which can deform them, especially with U-bolts. A loose U-bolt or strap is also bad because the U-joint caps can fly out.
Check the bolts after you have driven the vehicle a couple of times. Heat cycles can loosen the bolts.
When using U-bolts, always replace the lock nuts or nyloc nuts. You can use regular grade 8 nuts and blue (medium) threadlocker because you can’t reuse locknuts. You can use the same threadlocker on strap/cap bolts.
Most U-joints are greaseable, which is evident by the grease fitting in the joint cross. If your joints are greaseable, they must be greased after the installation is complete. Non-greaseable joints are pre-greased and do not have a grease fitting.
If you have the option, replace the original non-greaseable joints with ones that have a grease fitting.
About the author

Share your feedback
This article is meant to provide general guidance only. Automotive maintenance, repair, upgrade, and installation may depend on vehicle-specifics such as make and model. Always consult your owner's manual, repair guide for specific information for your particular vehicle and consider a licensed auto-care professional's help as well, particularly for advance repairs.
Recommended for you
Find answers and inspiration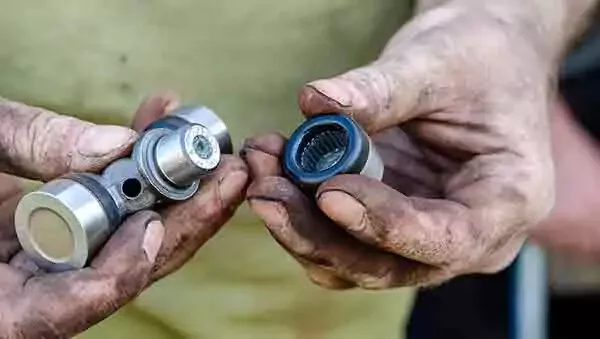
Types of U-Joints and When They Go Bad
6 min read
How to Buy the Right Differential Fluid
4 min read
An Intro to Replacing Clutch Fluid
5 min read
How to Change Manual Transmission Fluid
4 min read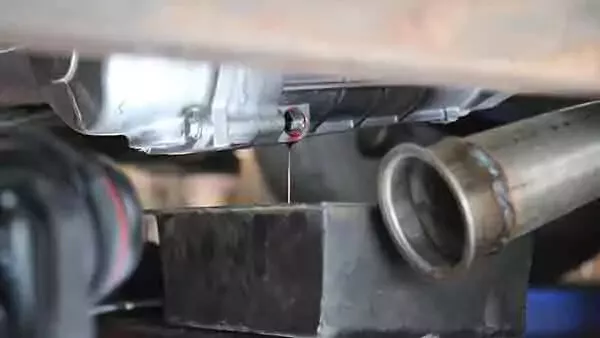
Picking the Right Manual Transmission Fluid
4 min read
How to Replace Wheel Bearings
7 min read
How To Replace Differential Fluid
8 min read
Choosing the Right Clutch Fluid
6 min read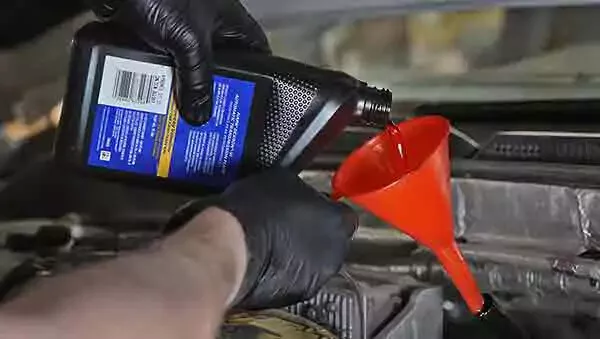
Buying the Right Transmission Fluid and Filter
4 min read
Buying the Right CV Axle
6 min read
How to Replace Transmission Fluid and Filter
11 min read
How to Change Automatic Transmission Fluid
6 min read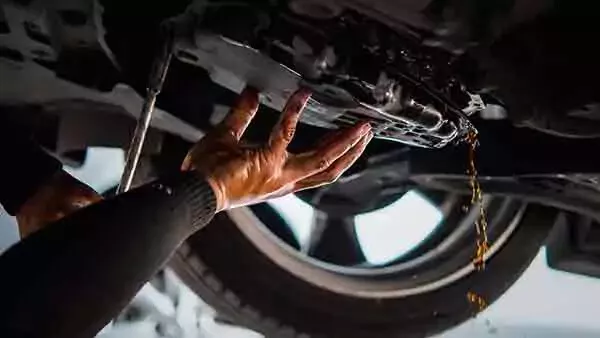
What to Know About Changing Transmission Fluid
6 min read
Choosing the Best Clutch Master Cylinder
4 min read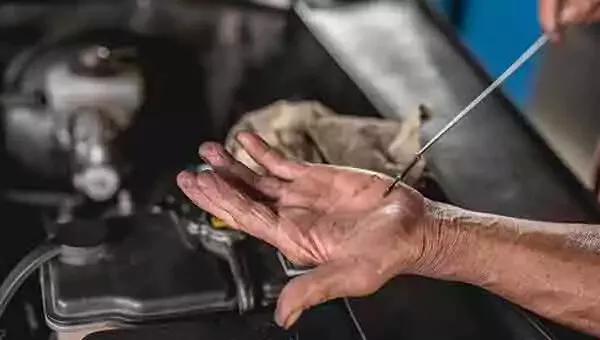
How to Buy the Right Transmission Fluid
5 min read
Buying the Right Transmission Mounts
4 min read
A Quick Guide to Your Clutch Master Cylinder
5 min read
How to Replace a Clutch Master Cylinder
11 min read
How to Replace a Transmission Mount
7 min read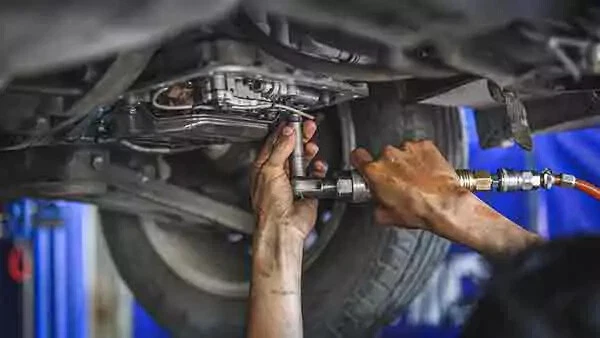
Replacing Your Transmission Fluid and Filter
5 min read
Selecting the Right Transfer Case Fluid
4 min read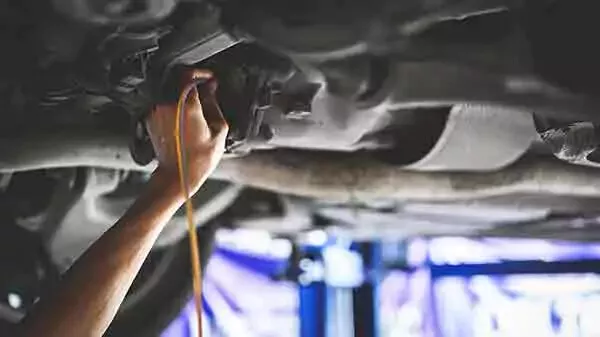
What Your Differential Fluid Is Telling You
5 min read
How to Replace a CV Axle
7 min read
Everything You Need to Know About Wheel Bearings
7 min read
How to Replace an Idler Pulley
4 min read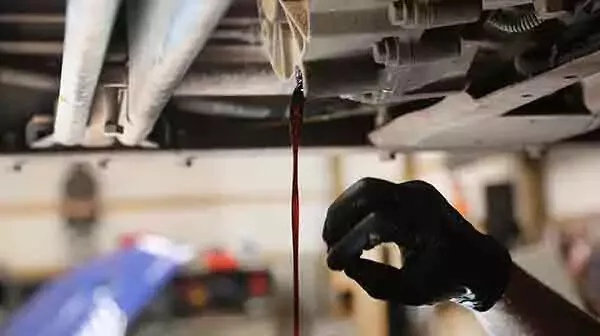
What You Need To Know About Transfer Case Fluid
4 min read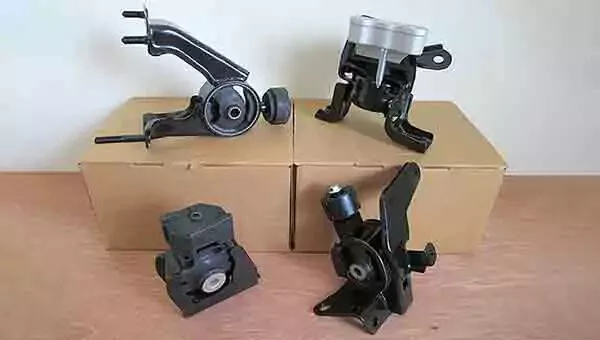
Understanding the Purpose of Transmission Mounts
5 min read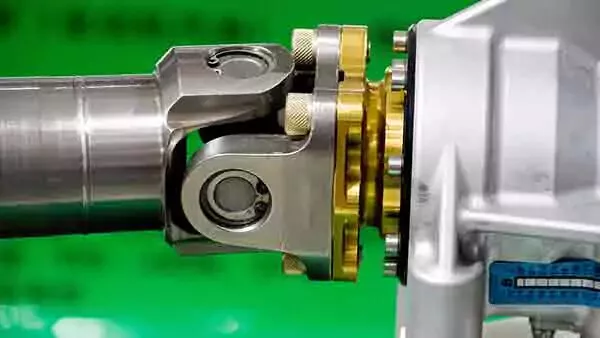
U-Joint Buying Guide
4 min read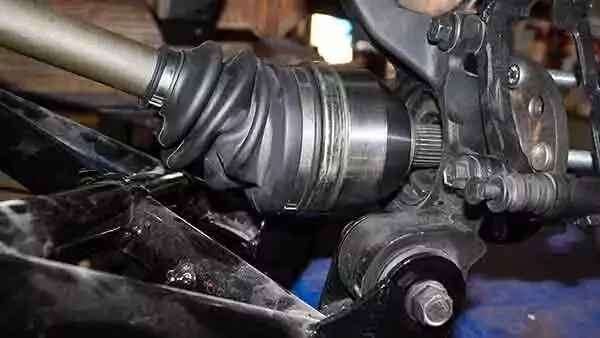
An Introduction to CV Axles and Joints
5 min read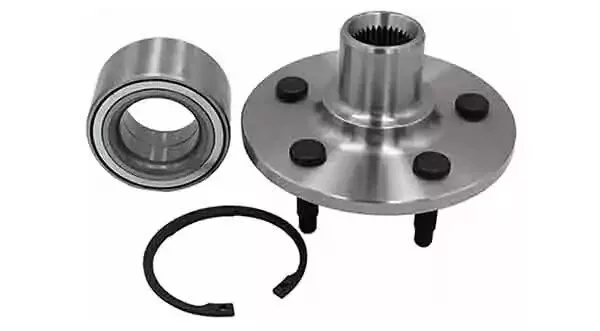
How to Buy the Right Replacement Wheel Bearings
6 min read
How to Replace Ball Joints
12 min read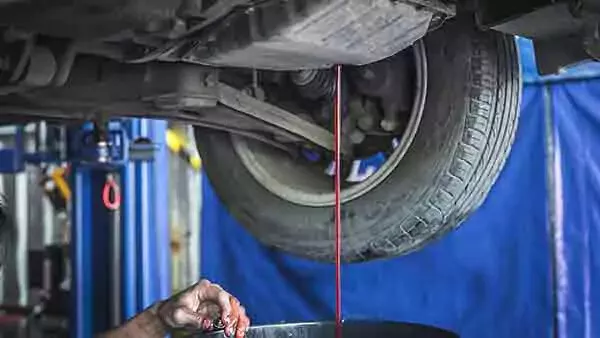
An Intro to Replacing Manual Transmission Fluid
4 min read
Explore more projects
How to Change a Thermostat
30 to 60 minutes
Intermediate
7 min read

How to Replace a Car Starter
1 to 2 hours
Intermediate
7 min read

How to Replace Spark Plugs
1 to 2 hours
Intermediate
7 min read
How to Replace a Transmission Mount
1 to 2 hours
Intermediate
7 min read

How to Replace Engine Mounts
1 to 2 hours
Intermediate
4 min read

How to Change a Water Pump
1 to 2 hours
Intermediate
8 min read
How to Change Manual Transmission Fluid
Less than 30 minutes
Intermediate
4 min read

How to Replace an Intake Manifold Gasket
2 to 5 hours
Intermediate
7 min read
How to Replace Wheel Bearings
1 to 2 hours
Intermediate
7 min read

How to Replace Tie Rod Ends
30 to 60 minutes
Intermediate
8 min read
How to Replace a Heater Core
More than 5 hours
Intermediate
12 min read

How to Replace a Power Steering Pump
1 to 2 hours
Intermediate
7 min read

How to Replace a Steering Gearbox
2 to 5 hours
Intermediate
8 min read
How to Replace Power Steering Fluid
1 to 2 hours
Intermediate
8 min read
How to Change Automatic Transmission Fluid
Less than 30 minutes
Intermediate
6 min read

How to Replace a Car Radiator
1 to 2 hours
Intermediate
8 min read

How to Change an In-Tank Fuel Pump
2 to 5 hours
Intermediate
9 min read