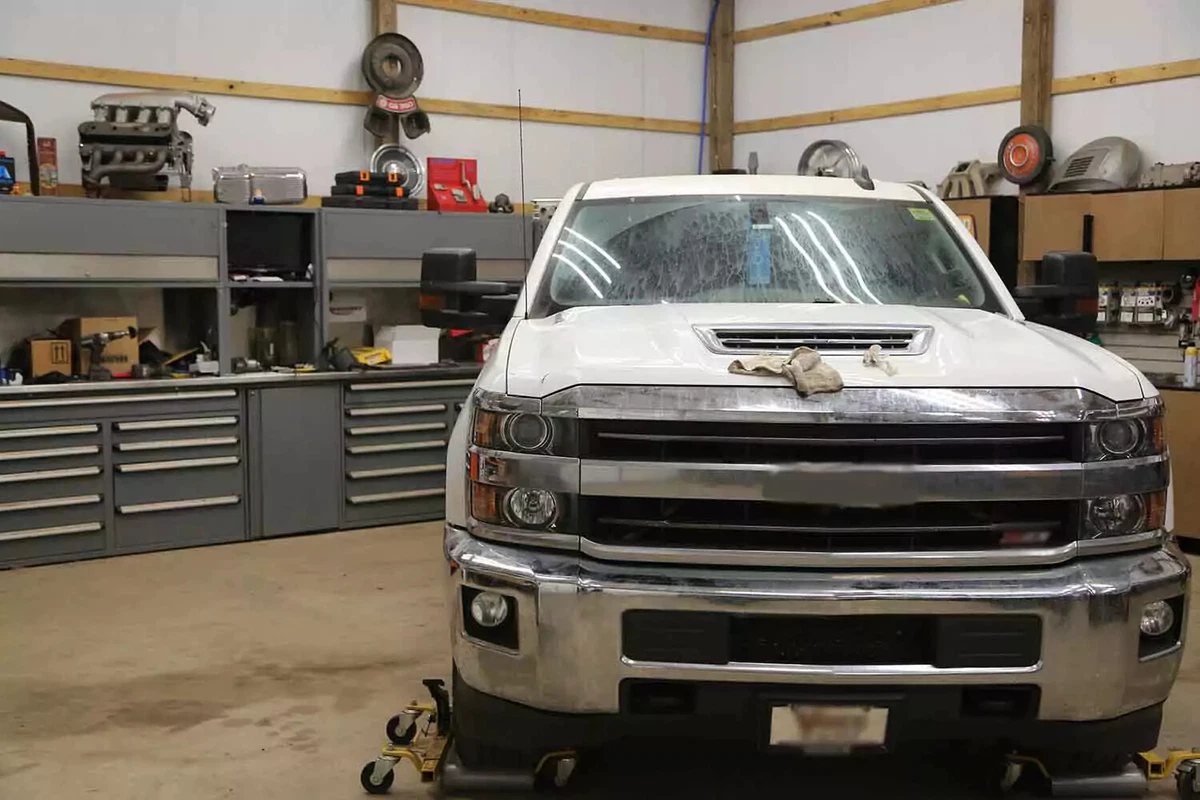
Your tires can last 30,000 or more miles before they need to be replaced. Periodic tire rotation gets the most life out of them.
Every vehicle brand and tiremaker suggests a preferred interval for tire rotation. However, the general rule is to rotate your tires every 5,000 miles or six months, whichever comes sooner. For some auto brands and specific vehicles—such as those driven aggressively or with problematic suspensions—you should rotate the tires every 3,000 miles to reduce the severe inner tread wear.
Learn more about why you should rotate your tires - opens in new window or tab. on a regular schedule. And what you should buy before taking on the job - opens in new window or tab..
How long does it take to rotate tires?
DIY tire rotation is a beginner mechanic job that usually takes 30 to 60 minutes. The rotation process is the same for all vehicles. However, the pattern depends on the drive wheels—front-wheel drive, rear-wheel drive, all-wheel drive, etc.—and tire type.
Tips and tricks for DIY tire rotation
- Removing all of the wheels at the same time is the fastest way to get the job done.
- Some tires, particularly high-performance tires, are directional. You can’t switch directional tires from side to side. Installing them backward reduces traction and water shedding. You can only rotate them from front to rear. This pattern works for all vehicle drive types.
- If your vehicle has a full-size spare, include it in the rotation pattern. This typically involves moving the spare to the passenger side rear, moving the driver front to the spare position, and then moving the others in whichever pattern best fits your vehicle.
- Safety is key. Never get under a raised vehicle that is not adequately supported and safe.
- When you are done rotating the tires, note the mileage so you’ll know when you need to do it again.
Park the vehicle in a safe location where you can remove the wheels. Concrete is the best surface. Dirt, gravel, or asphalt can allow the jack and jack stands to sink into the ground, creating a dangerous situation.
If you must rotate tires on those surfaces, use large steel or wood support blocks that spread the load. You can use old wheels, but do not use cement blocks. They will not safely support a vehicle.
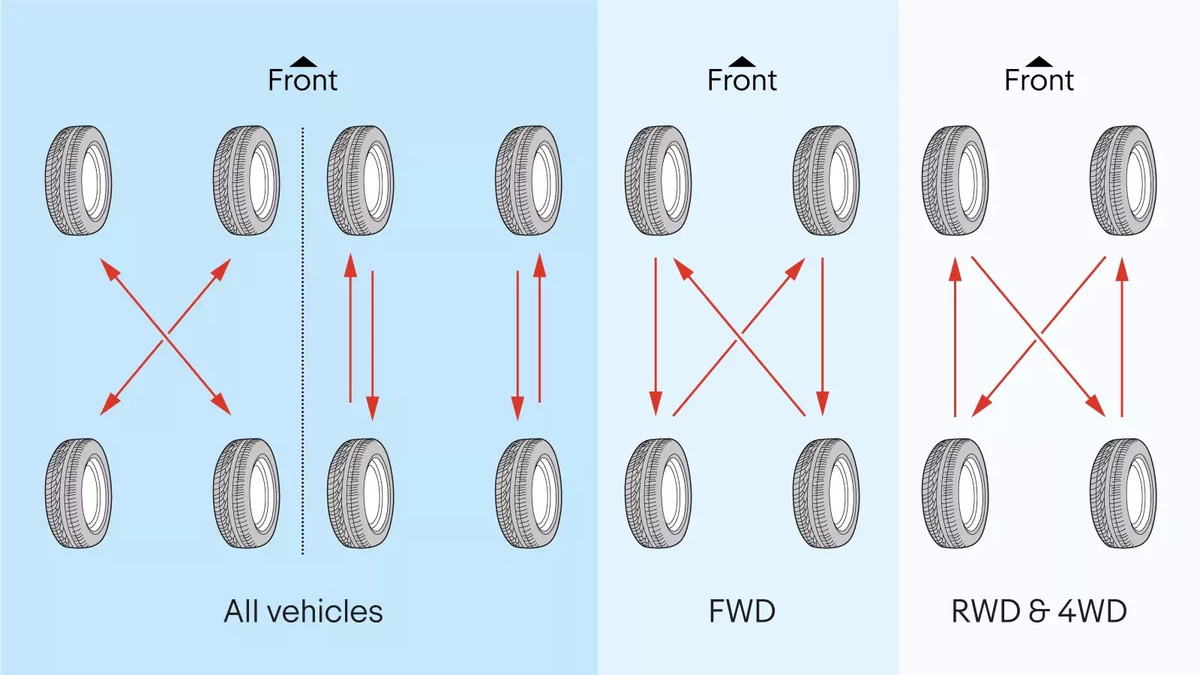
Your drive wheels and tire type determine the rotation pattern. You don’t have to adhere to these suggestions, but they are commonly used for most vehicles.
If your tires are directional, you cannot switch the tires side to side—only front to back. Look for the arrow on the sidewall that indicates the direction the tire rotates.
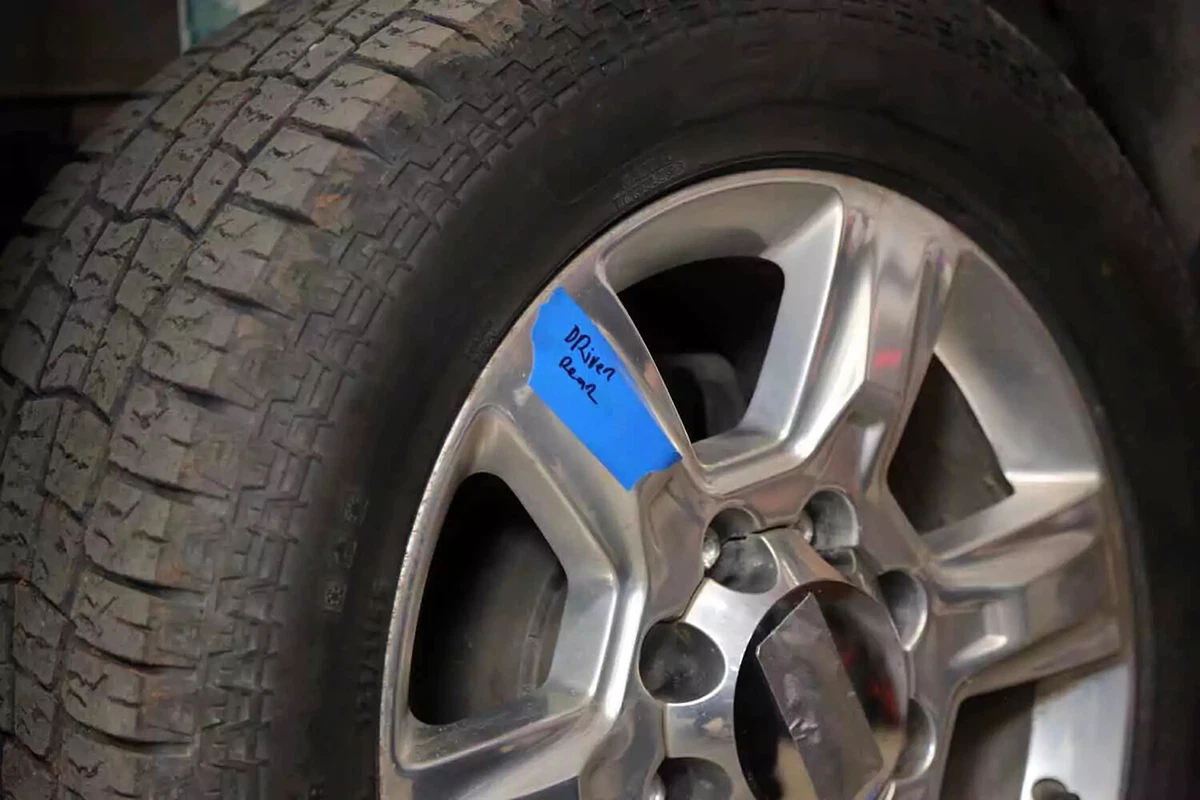
Before removing a wheel from the vehicle, use tape and a marker to note its original position. We wrote “drive rear” to designate the driver rear position. This helps you remember where each tire was and where it will be moved. If you are including the spare tire, label it as well.
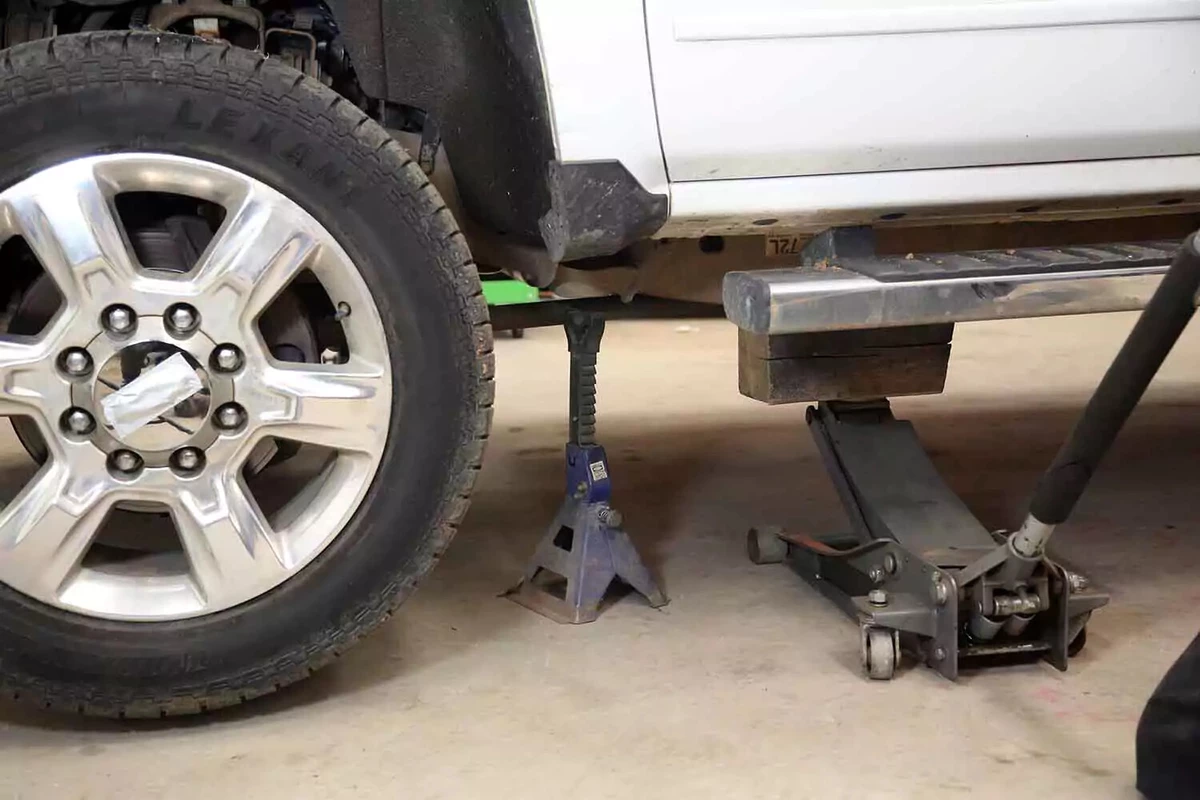
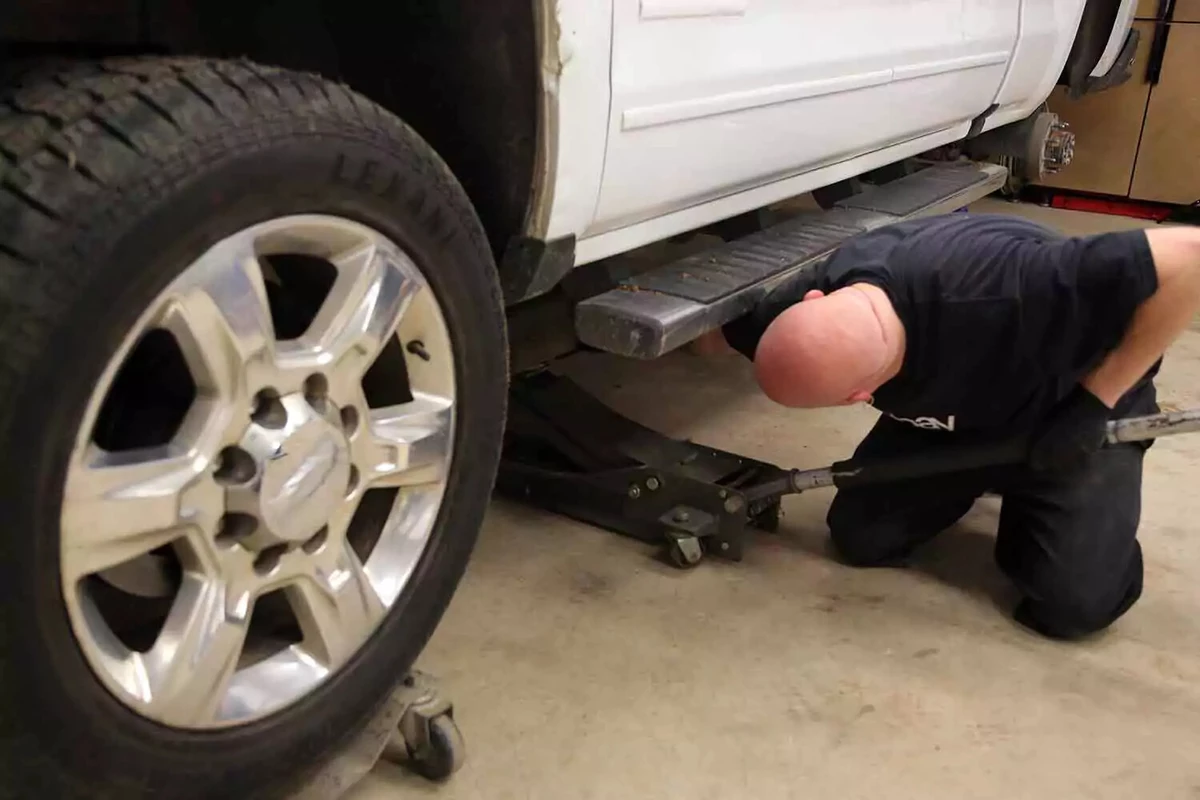
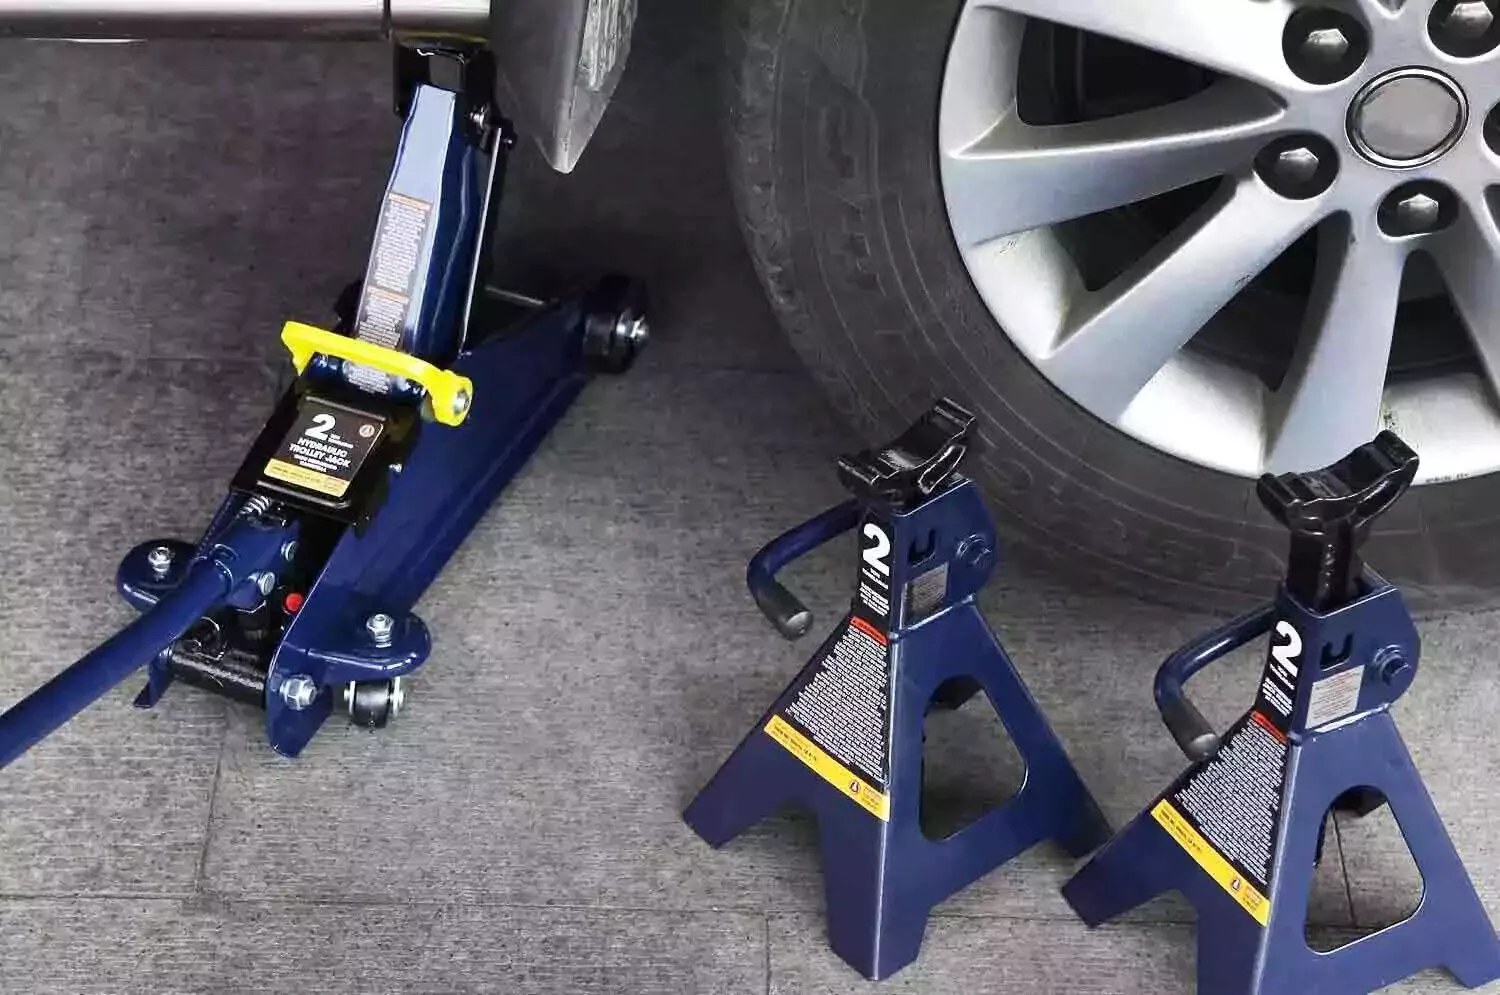
This project requires working safely under the vehicle. You will need a floor jack, and jack stands, ramps, or wheel cribs to support the vehicle.
Locate the factory jacking points just behind the front wheels or just in front of the rear wheels. The jacking point is a metal section with two V notches about two inches apart. Check your owner’s manual to confirm the lift location.
Never use jack stands on dirt, gravel, or asphalt. If you do not have access to a concrete work surface, use wheel cribs, solid-base ramps, or wide-base wood supports to support the vehicle. Never use cinder blocks or bricks as supports.
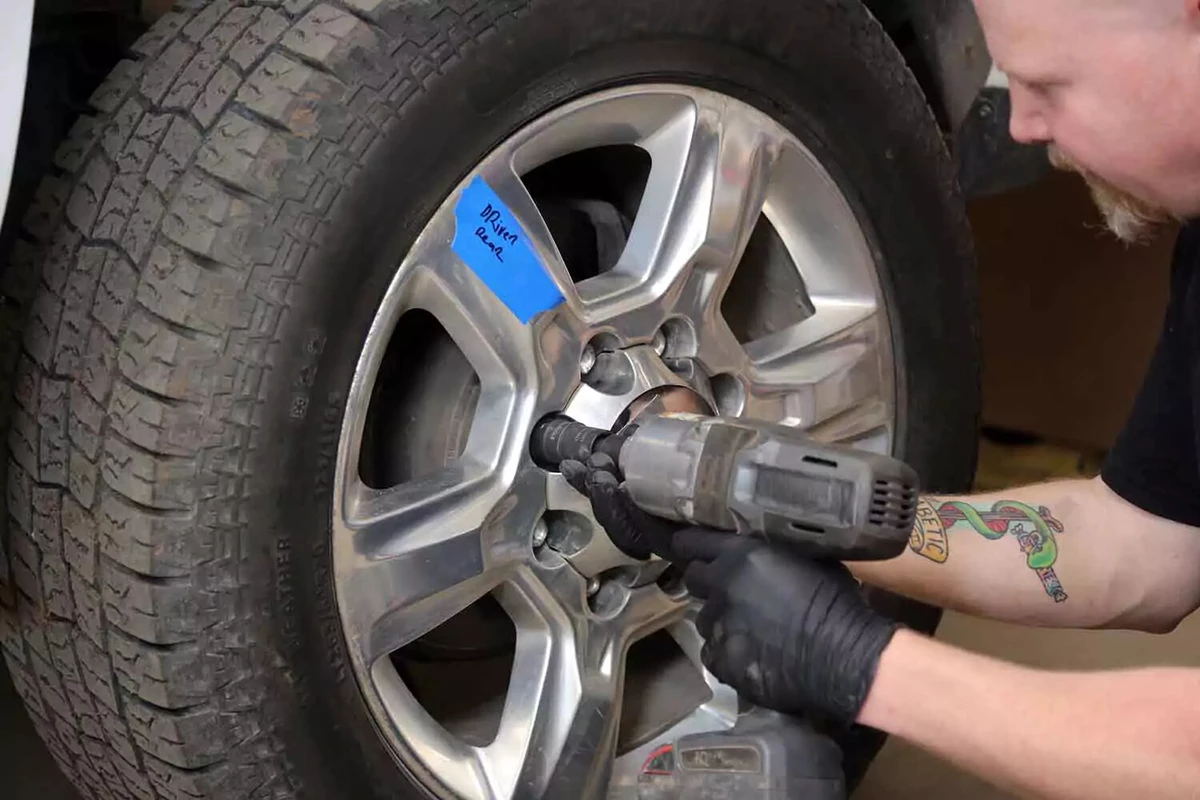
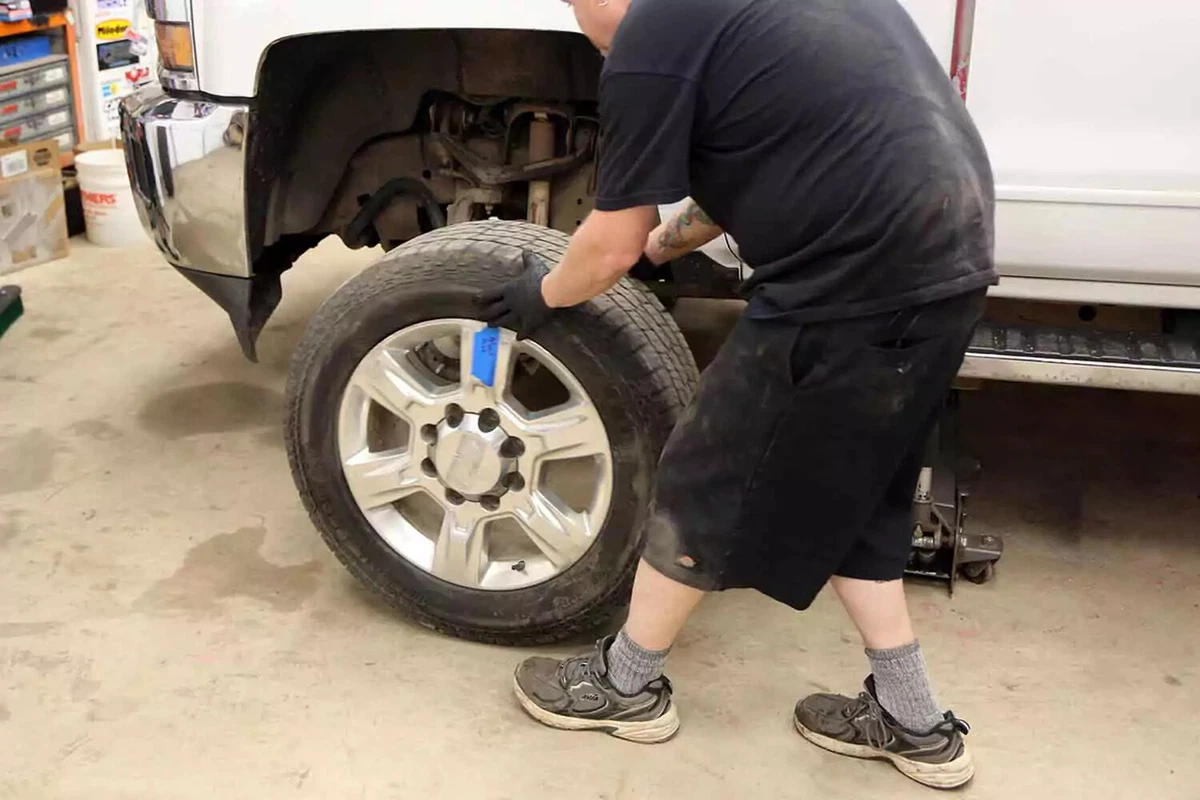
Use a tire iron or impact wrench to remove the lug nuts from the wheel. Set them aside. Then, pull the wheel off the hub. Lay the wheel down on the back side. Don’t lean the tire against the car’s body or leave it upright where it can roll away.
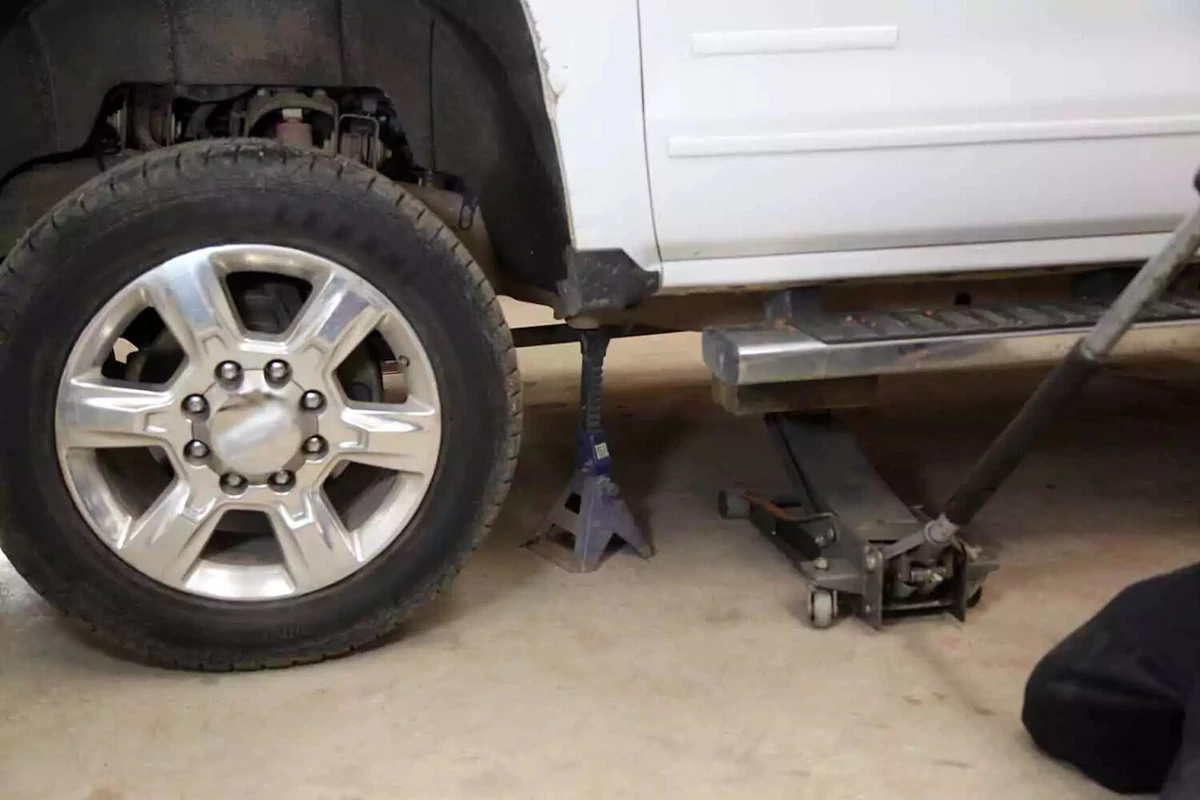
Many vehicles have limited space for jack stands. If you have sufficient room, place a jack stand under the vehicle before removing the tire.
Once the jack stand is in place, lower the floor jack (with the vehicle’s weight on the stand) and move to the next wheel. A jack stand, when properly placed, will support the vehicle in lieu of each wheel.
This step is required for each corner when rotating your tires so that you can swap all four tires at the same time.
Continue raising each corner of the vehicle and removing the wheels until all four are off. For safety, use a jack stand under each corner.
Move each wheel to its final position and install it on the hub. Clean the hub surface, centering ring, and the back of the wheels. Use a wire brush to remove dirt and corrosion so the wheel sits flat on the hub.
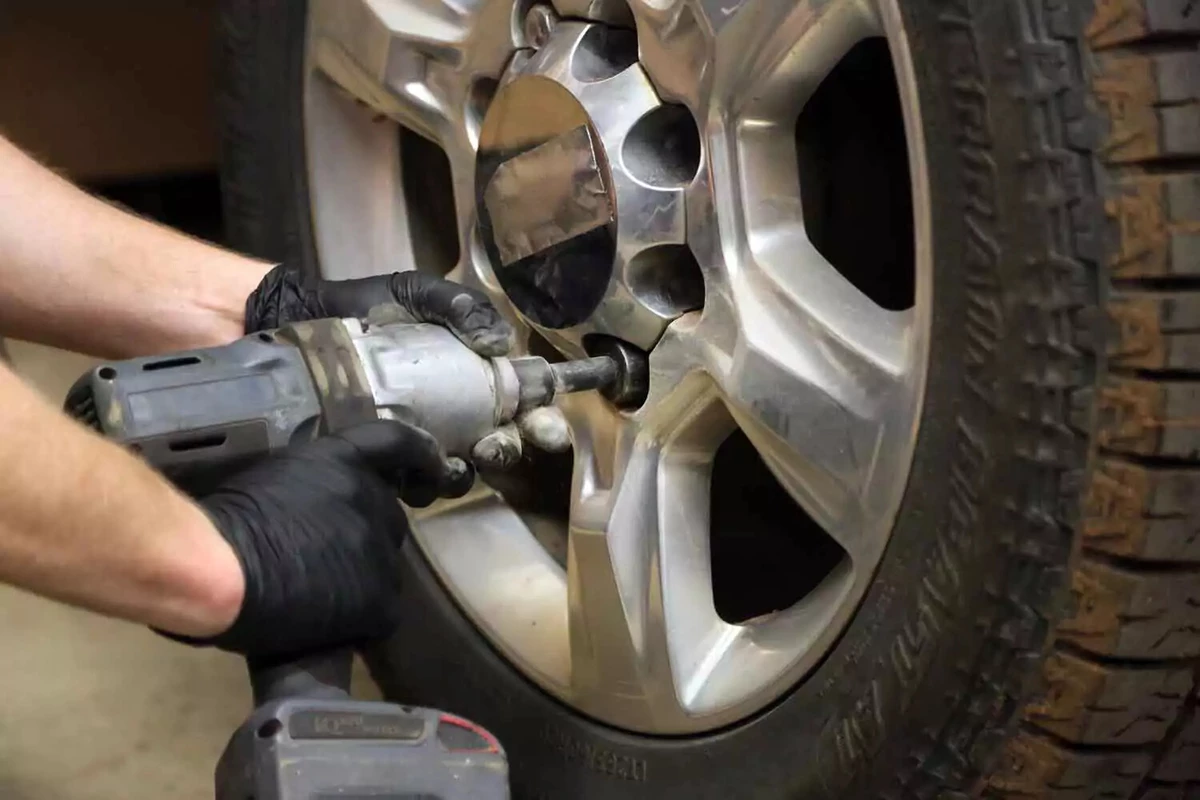
Thread each lug nut by hand until the wheel is tight against the hub. Then, use the tire iron or impact gun to tighten each lug in a criss-cross pattern until the lug nuts are snug. You will properly torque them shortly, but not quite yet. Repeat this for each wheel.
Use the jack to raise the vehicle off the jack stand. Remove the stand. Then, slowly lower the jack until the tire supports the full weight of the vehicle. Remove the jack and repeat with the other wheels.
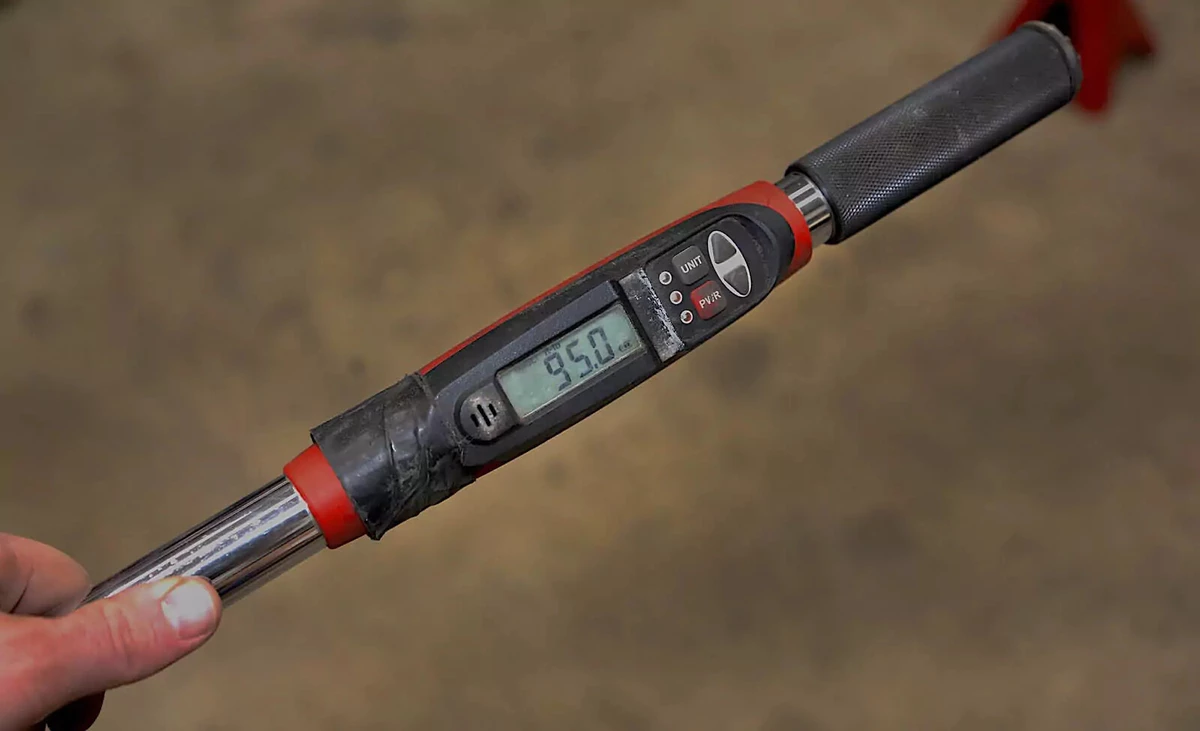
Check your owner’s manual for the correct lug nut torque specifications. Set your torque wrench to match those specs. For this vehicle, the factory spec is 140 pound-feet.
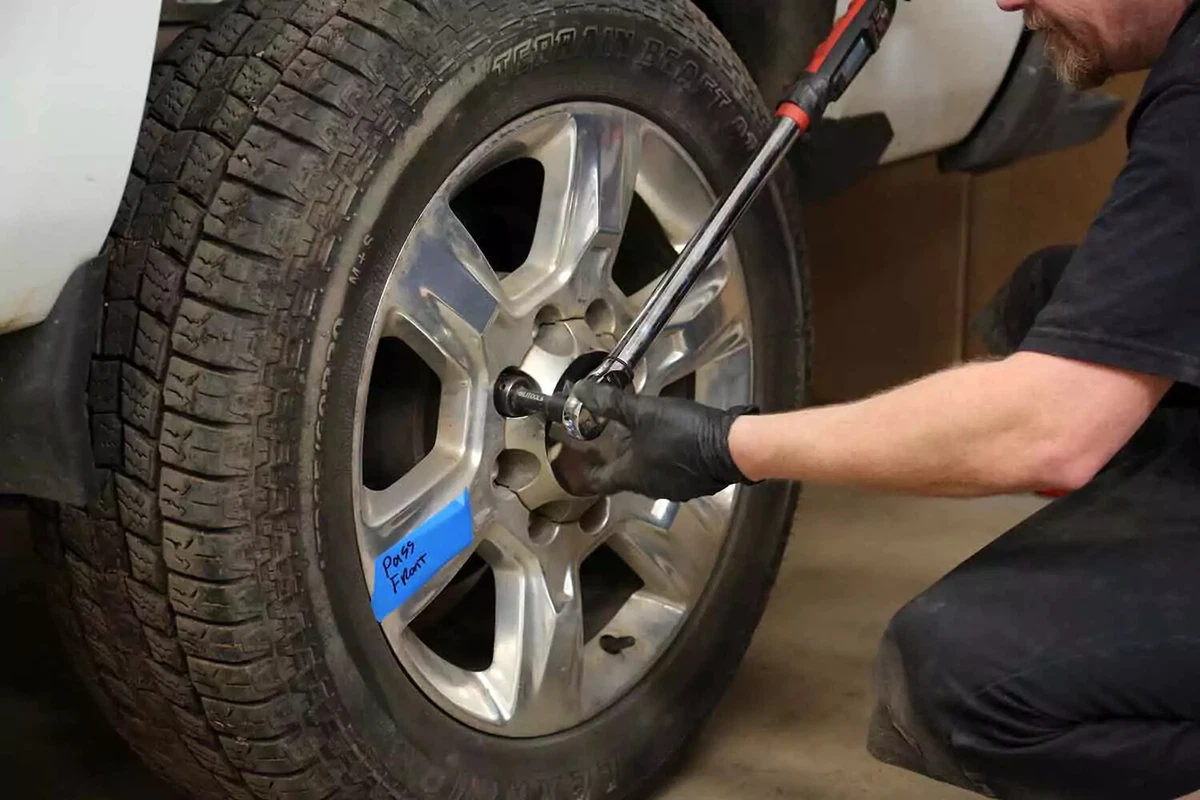
Torque each lug nut to the required spec in a crisscross or star pattern. If you don't have a torque wrench, you can do this with a tire iron (or breaker bar and socket).
With a tire iron, you will exert substantial effort to tighten the lug nut. If you position the tire iron or breaker bar so that you are pulling up (instead of down), you can use your legs for maximum force.
About the author

Share your feedback
This article is meant to provide general guidance only. Automotive maintenance, repair, upgrade, and installation may depend on vehicle-specifics such as make and model. Always consult your owner's manual, repair guide for specific information for your particular vehicle and consider a licensed auto-care professional's help as well, particularly for advance repairs.
Recommended for you
Find answers and inspiration
Explore more projects

How to Repair a Chipped Windshield
1 to 2 hours
Beginner
7 min read

How to Replace Brake Fluid
1 to 2 hours
Beginner
10 min read

How to Replace an Ignition Coil
Less than 30 minutes
Beginner
6 min read

How to Replace a Radiator Hose
Less than 30 minutes
Beginner
5 min read

How to Replace Brake Rotors
1 to 2 hours
Beginner
7 min read

How to Replace a Serpentine Belt Tensioner
Less than 30 minutes
Beginner
4 min read

How to Replace a Drive Belt
Less than 30 minutes
Beginner
5 min read

How to Refill Windshield Washer Fluid
Less than 30 minutes
Beginner
4 min read

How to Replace an Oxygen Sensor
30 to 60 minutes
Beginner
5 min read

How To Replace Differential Fluid
Less than 30 minutes
Beginner
8 min read

How to Replace Sway Bar End Links and Bushings
30 to 60 minutes
Beginner
6 min read

How to Replace Transmission Fluid and Filter
1 to 2 hours
Beginner
11 min read

How to Change Disc Brake Pads
30 to 60 minutes
Beginner
8 min read

How to Replace a Valve Cover Gasket
Less than 30 minutes
Beginner
7 min read

How to Replace a Cabin Air Filter
Less than 30 minutes
Beginner
5 min read

How to Change Windshield Wipers
Less than 30 minutes
Beginner
3 min read

How to Replace an Engine Air Filter
Less than 30 minutes
Beginner
5 min read

How to Replace Shock Absorbers
30 to 60 minutes
Beginner
8 min read

How to Clean Fuel Injectors
1 to 2 hours
Beginner
8 min read

How to Change a Car Battery
Less than 30 minutes
Beginner
6 min read
Automation How to Change a Car Battery
Less than 30 minutes
Beginner
6 min read

How to Replace a Mass Air Flow (MAF) Sensor
Less than 30 minutes
Beginner
7 min read

How to Replace a Clutch Master Cylinder
1 to 2 hours
Beginner
11 min read

How to Flush and Change Engine Coolant
30 to 60 minutes
Beginner
6 min read

How to Replace a Distributor Cap and Rotor
30 to 60 minutes
Beginner
5 min read

How to Check Tire Pressure and Change a Tire
Less than 30 minutes
Beginner
9 min read

How to Replace a Fuel Filter
30 to 60 minutes
Beginner
7 min read

How to Replace a PCV Valve
30 to 60 minutes
Beginner
6 min read

How to Replace a Brake Caliper
1 to 2 hours
Beginner
7 min read

How to Replace an Idler Pulley
30 to 60 minutes
Beginner
4 min read

How to Change a Headlight Bulb
Less than 30 minutes
Beginner
6 min read

How to Replace an Exhaust Gasket
1 to 2 hours
Beginner
9 min read

How to Replace a Throttle Body
30 to 60 minutes
Beginner
6 min read

How to Change Oil in a Car
Less than 30 minutes
Beginner
8 min read

How to Jump Start a Car
Less than 30 minutes
Beginner
9 min read

How to Replace an Alternator
1 to 2 hours
Beginner
11 min read

How to Replace an EGR Valve
30 to 60 minutes
Beginner
5 min read