Many four-wheel-drive and all-wheel-drive vehicles have a transfer case behind the transmission. This gear-driven box transfers power from the transmission to the rear and front axle. The transfer case is attached to the transmission but has a separate service schedule.
The typical change interval for a transfer case fluid is 30,000 to 60,000 miles. However, if you frequently drive through water, mud, or dirt roads, change the fluid more often.
Most modern transfer cases built since the early 1990s use automatic transmission fluid (ATF). Older transfer cases and heavy-duty units (larger than three-quarter tons) probably use gear oil. Some vehicles might require special transfer case fluid with additives to keep clutches in top shape. Check your owner’s manual to confirm the right fluid for your vehicle.
Transfer cases typically hold 1.5 to three quarts of fluid. Adding new fluid in the case can be challenging when space is limited. If you can’t fit a bottle where it needs to go, we recommend using a hand-operated transfer pump, which often costs less than $20.
Tips and Tricks
- Some AWD vehicles use a transaxle that operates similarly but shares the fluid with the transmission. This varies by model. Larger AWD SUVs and trucks use separate transfer cases.
- Depending on your vehicle’s ride height, you might need to lift your vehicle. Some larger trucks and SUVs have enough room to get under the vehicle. Raising the vehicle can give you the extra room you need.
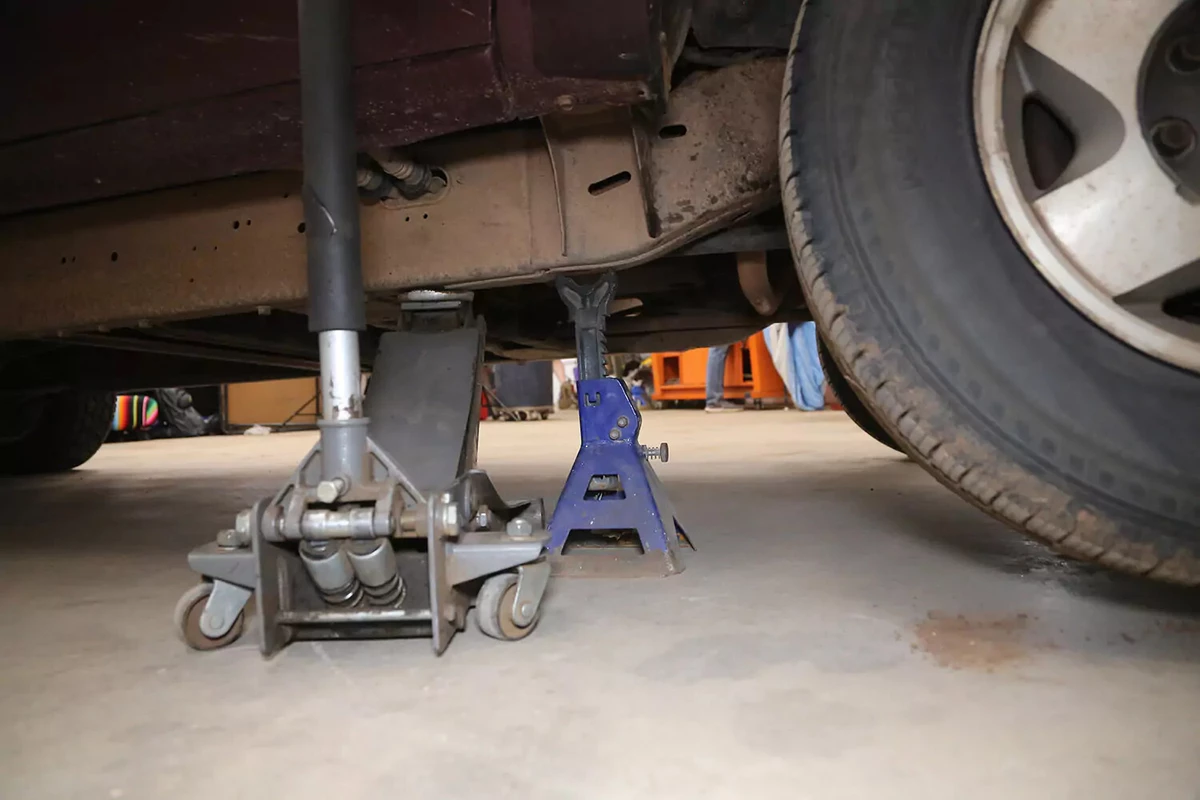
This project requires working safely under the vehicle. You will need a floor jack, and jack stands, ramps, or wheel cribs to support the vehicle.
Locate the factory jacking points just behind the front wheels or just in front of the rear wheels. The jacking point is a metal section with two V notches about two inches apart. Check your owner’s manual to confirm the lift location.
Never use jack stands on dirt, gravel, or asphalt. If you do not have access to a concrete work surface, use wheel cribs, solid-base ramps, or wide-base wood supports to support the vehicle. Never use cinder blocks or bricks as supports.

Look under the vehicle. In most vehicles, the transfer case is behind the transmission, about halfway between the front and rear wheels. It has one drive shaft going to the rear axle and another one to the front axle.

The drain plug is either on the case’s bottom vertical edge (as shown here) or all the way on the bottom.
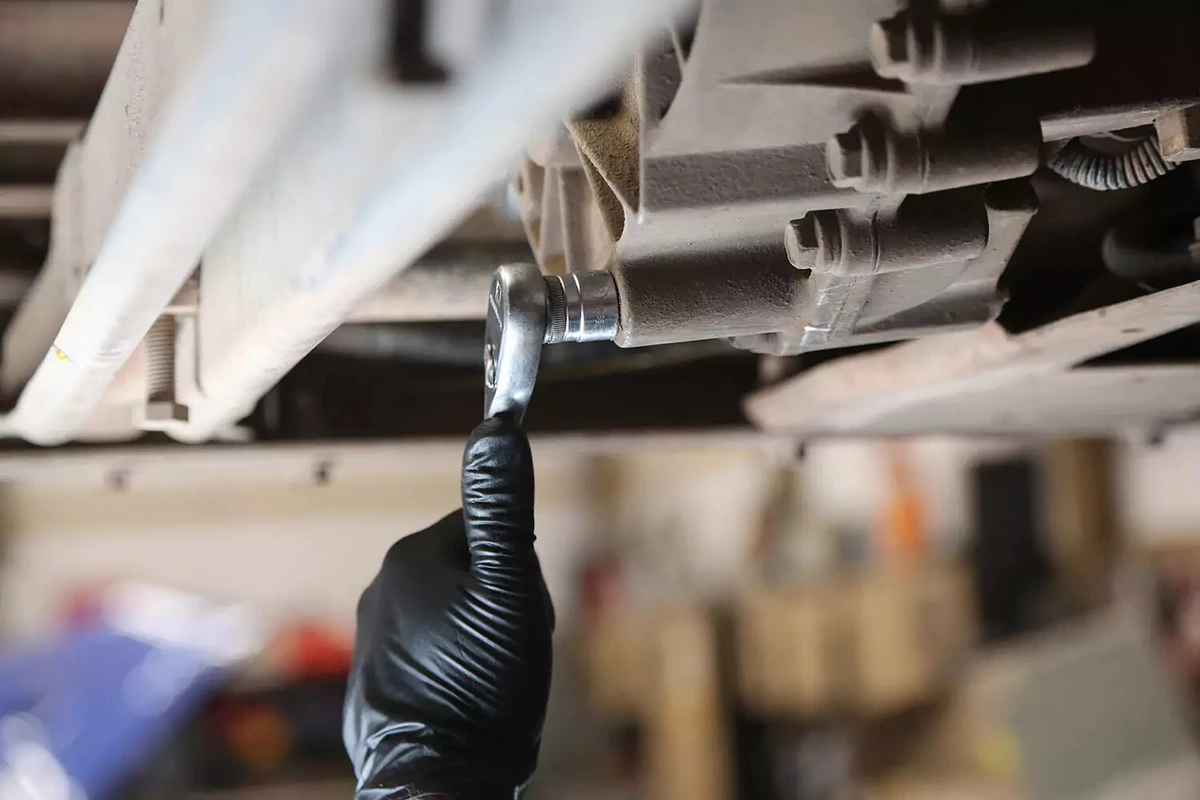
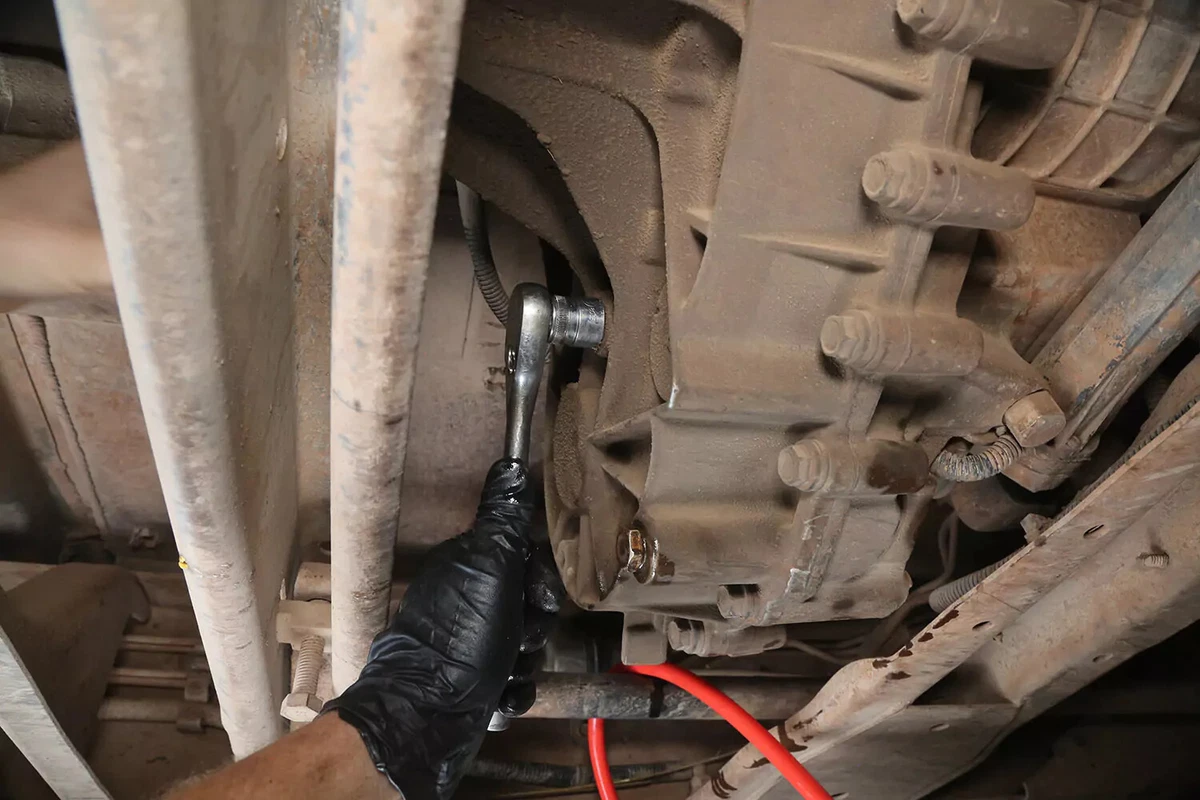
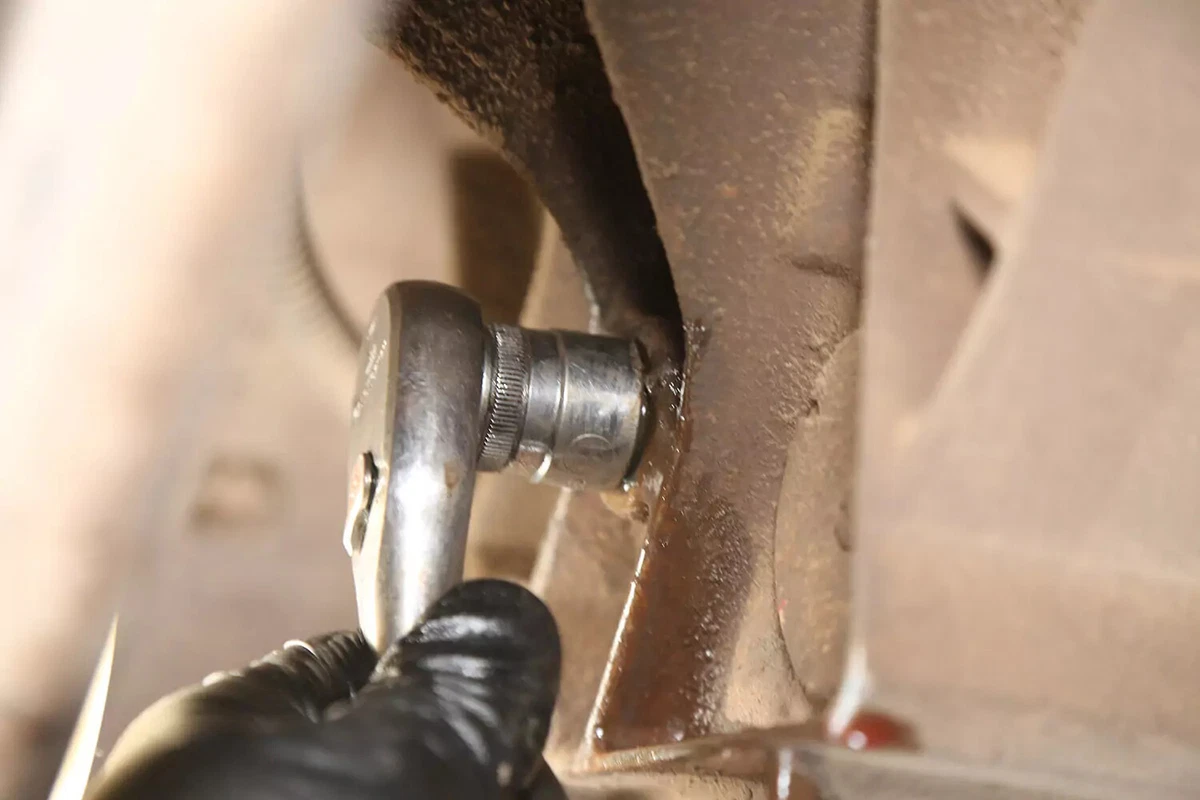
Use a socket and ratchet to loosen the plug. Some vehicles use a square drive, Allen, or Torx plug. Our demo vehicle has a hex plug.
Don’t remove the plug yet.
After the plug is loose, place the drain pan under the work area to catch the fluid’s flow.

Remove the plug. Allow the fluid to drain until it’s a slow drip.
If your plug has a magnetic tip, clean it now.
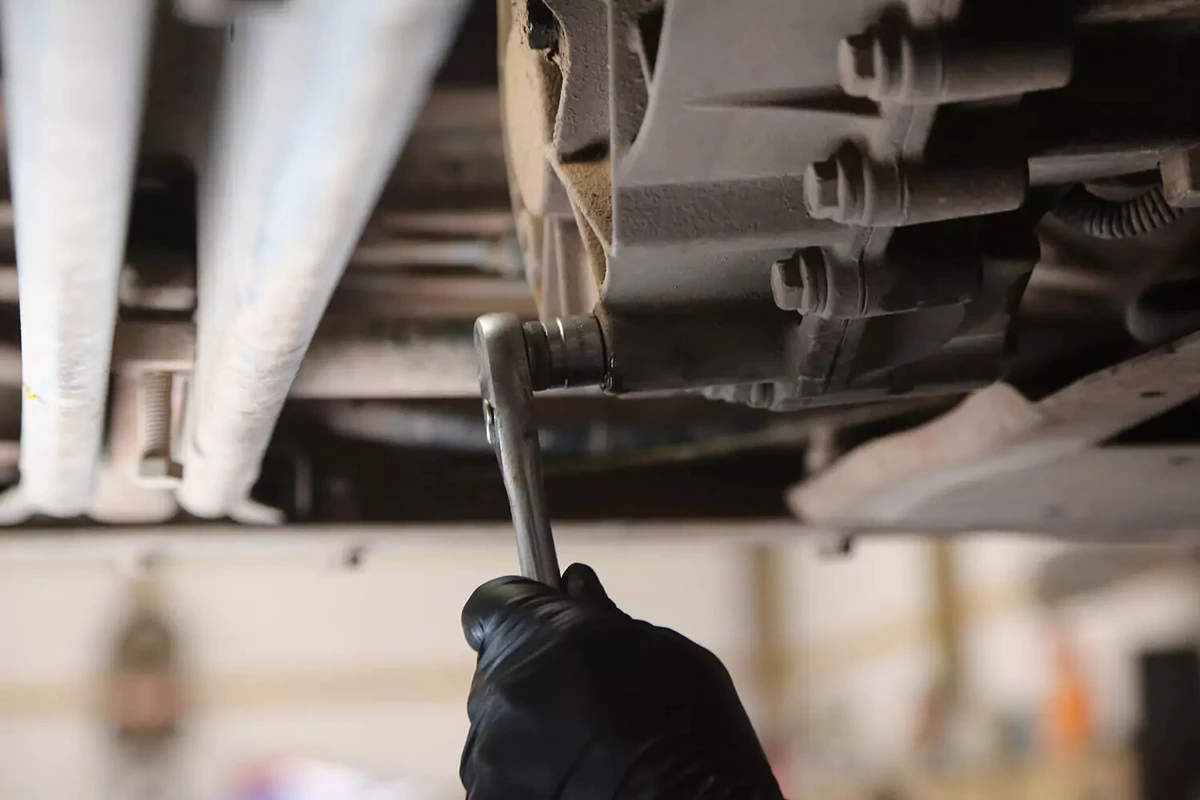
Reinstall the plug. Use the torque specification found in your owner’s manual.
Most drain plugs use about 15 pound-feet of torque.
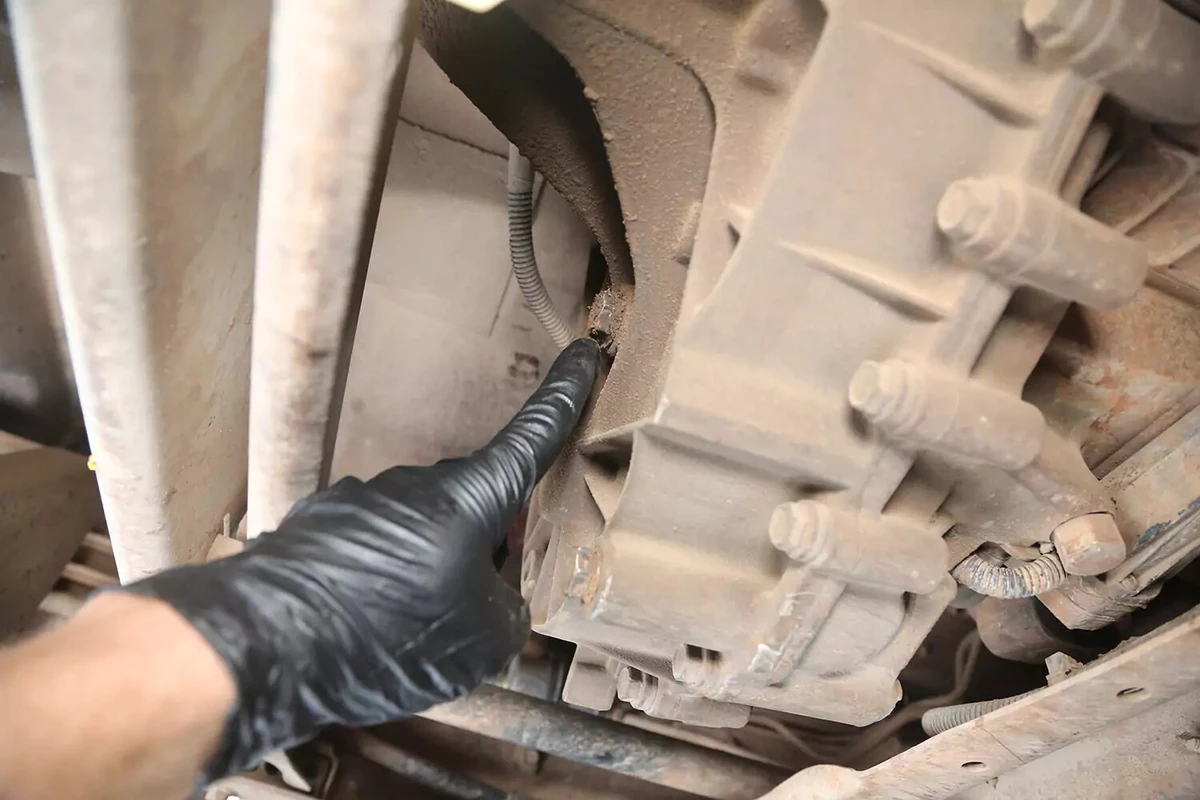
The fill plug is typically above the drain plug, close to the case’s centerline.
Spray an aerosol brake cleaner in the area to prevent dirt from getting in the transfer case while you’re filling it.
Use a socket to remove the fill plug. If it has a crush washer, replace it now.
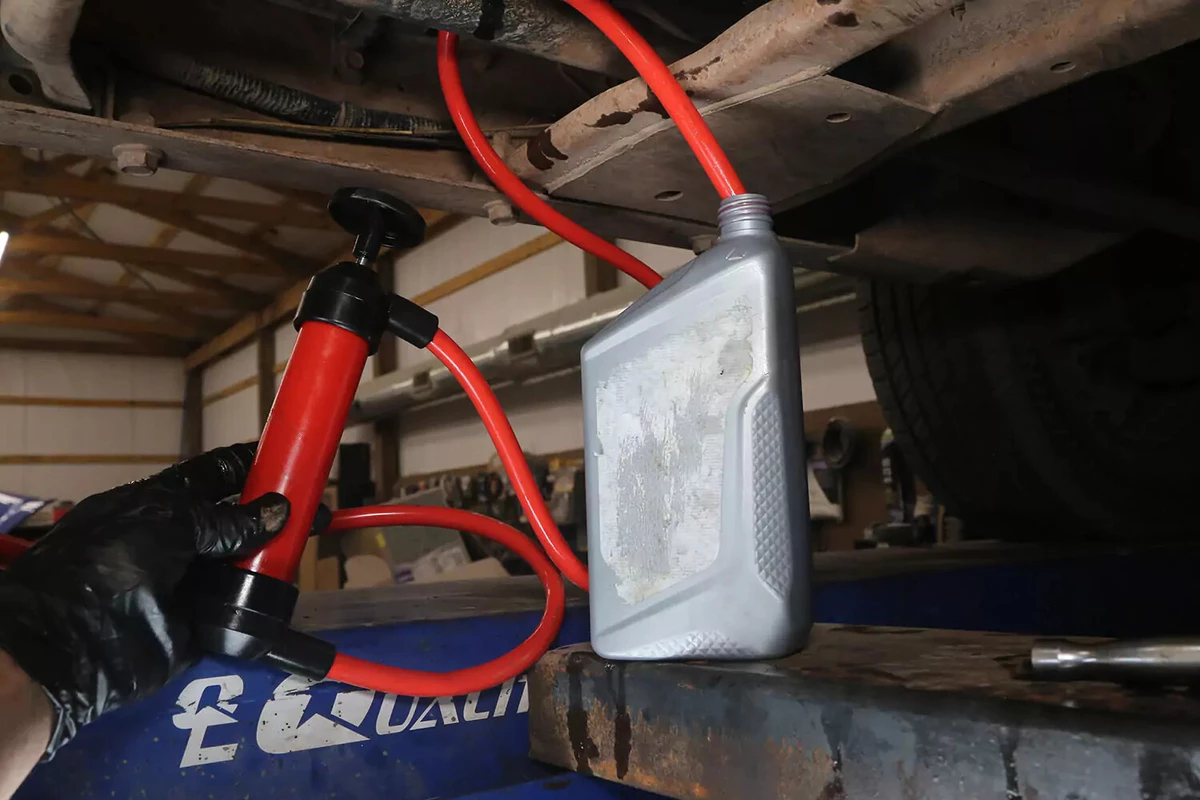
Place the input side of the transfer pump into the bottom of the fluid bottle. Route the output hose to the filler port.
Push the filler hose into the case, pushing it beyond the threads.
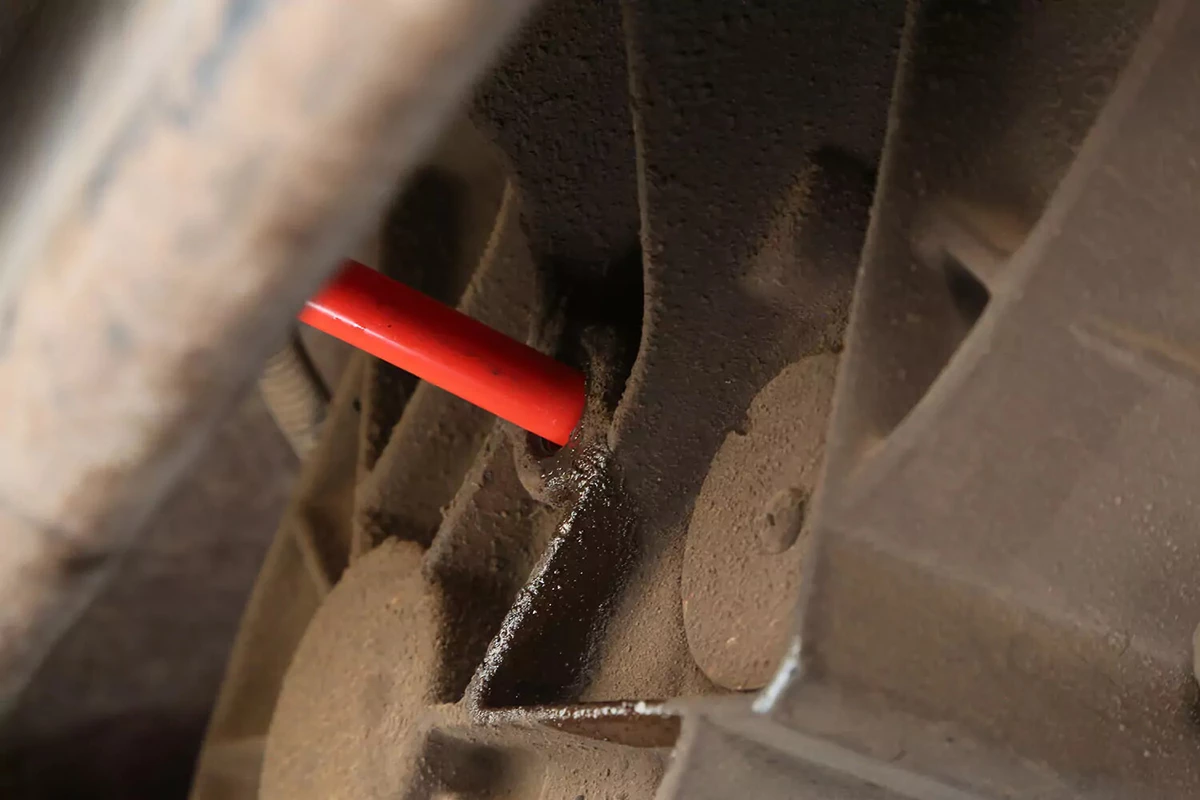
If the hose outlet is resting on the threads instead of being inserted fully into the transfer case, you may incorrectly believe the fluid is full. The fluid level is full when it’s level with the threads.
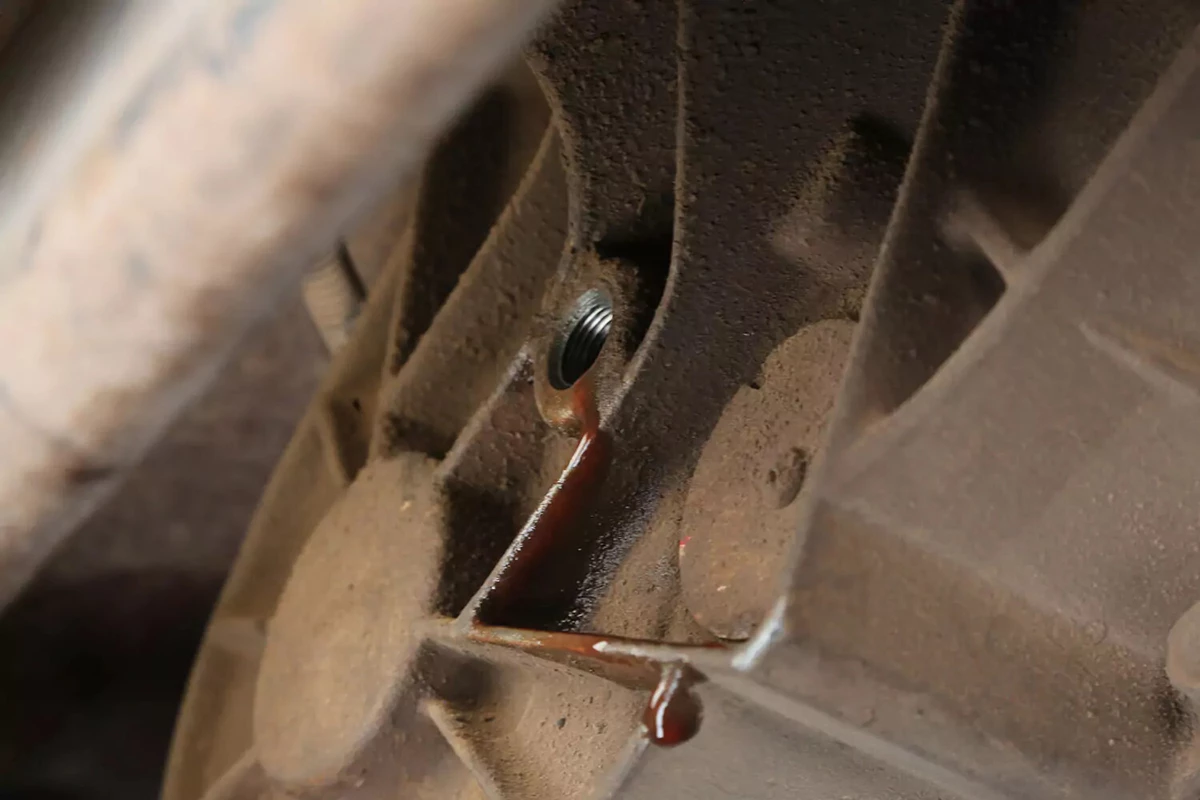
Pump fluid into the transfer case until it begins to run back out of the fill port (as shown). The fluid should be level with the bottom of the port.
Most transfer cases hold 1.5 to three quarts of fluid. Your repair manual or owner’s manual indicates the quantity.
Reinstall the filler plug. Some plugs use a sealing washer, which should be replaced. Others use tapered pipe threads and no washer.
Use a torque wrench to tighten the plug. It can be difficult to get a torque wrench into this tight space.
Use torque specs found in your owner’s manual, usually about 15 pound-feet of torque.
Use brake cleaner on any spillage from the transfer case. This will let you spot any leaks on your driveway over the next few days.
Lower the car back onto its wheels.
About the author

Share your feedback
This article is meant to provide general guidance only. Automotive maintenance, repair, upgrade, and installation may depend on vehicle-specifics such as make and model. Always consult your owner's manual, repair guide for specific information for your particular vehicle and consider a licensed auto-care professional's help as well, particularly for advance repairs.